Crochet Pumpkin Pie Keychain – Free Thanksgiving Pattern
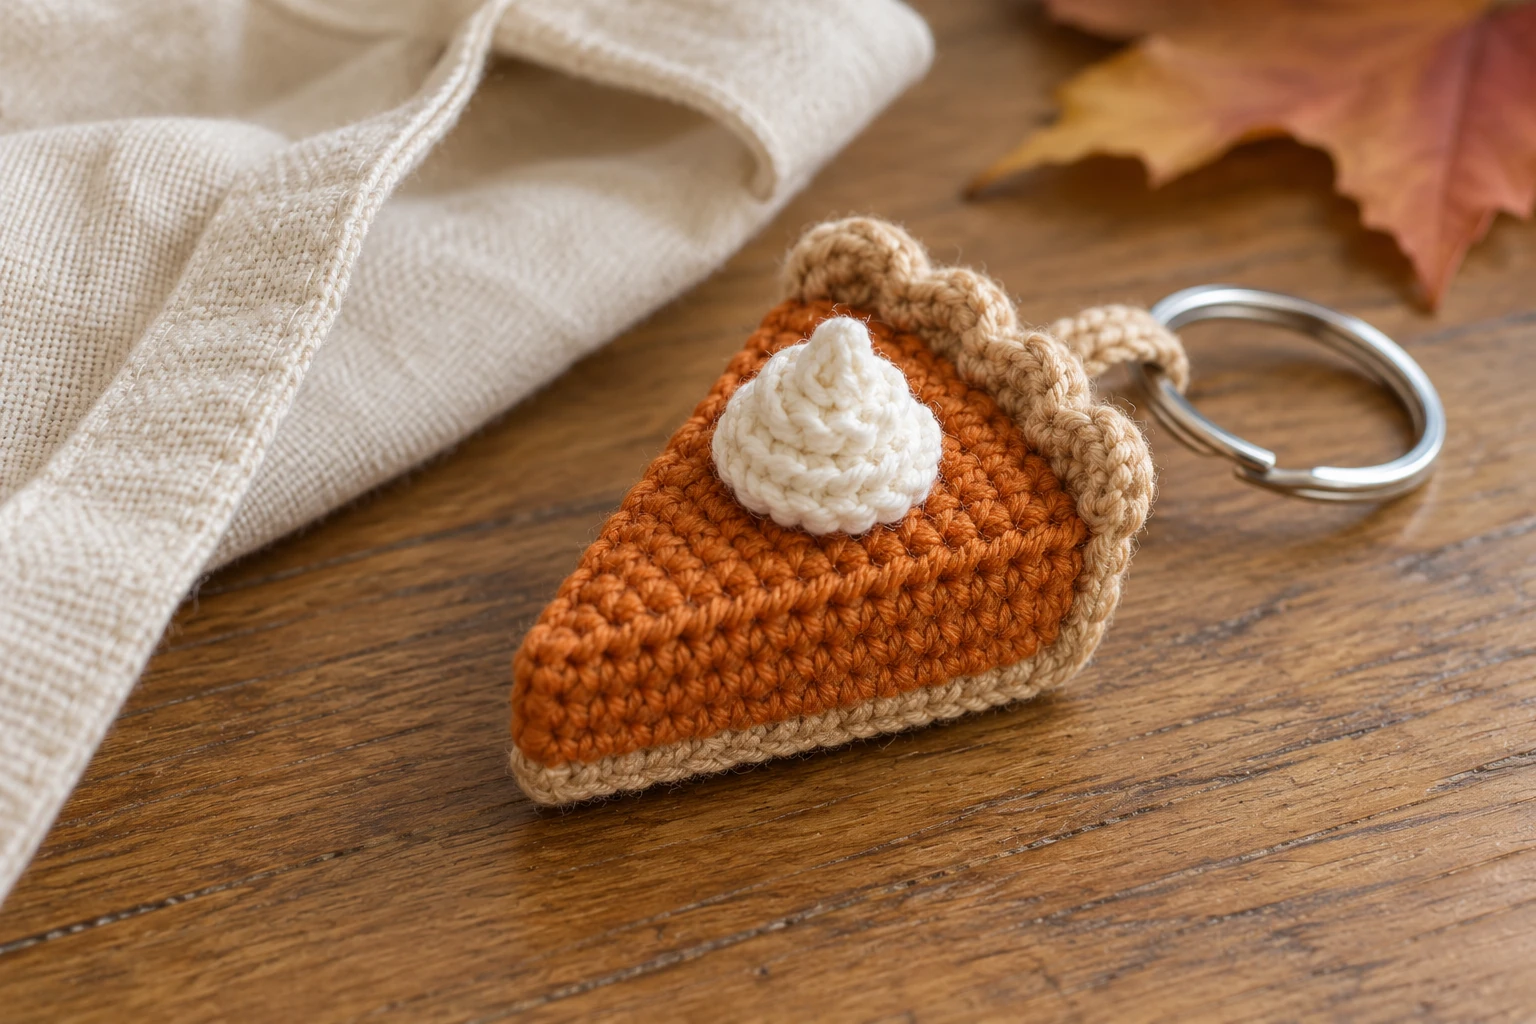
Make a little slice of autumn with this crochet pumpkin pie keychain. The design combines an orange triangular filling, a biscuit-colored base, a scalloped back crust, and a small ivory cream topping. Add a silver keyring to turn the finished slice into a seasonal bag charm or handmade Thanksgiving gift.
The pie is assembled from two matching triangles and a short crocheted side wall. This makes the construction easier to follow than shaping the entire wedge in continuous rounds.
Pattern note: This is an original, untested written pattern. The stitch counts have been checked mathematically, but the construction still needs a physical sample before being described as tested. The generated photographs illustrate the intended appearance; your finished shape and stitch texture may vary.
Pattern Overview
| Detail | Description |
|---|---|
| Skill level | Confident beginner |
| Terminology | US crochet terms |
| Construction | Flat triangles, a side wall, and sewn details |
| Main stitches | Single crochet, half double crochet, double crochet |
| Colors | Pumpkin orange, biscuit tan, ivory |
| Size | Depends on yarn, hook, and tension |
| Main use | Keychain, bag charm, or seasonal decoration |
You should be comfortable counting stitches, increasing at the ends of a row, working around row edges, and sewing small pieces together. For another small accessory, try our crochet mushroom keychain pattern.
Materials and Tools
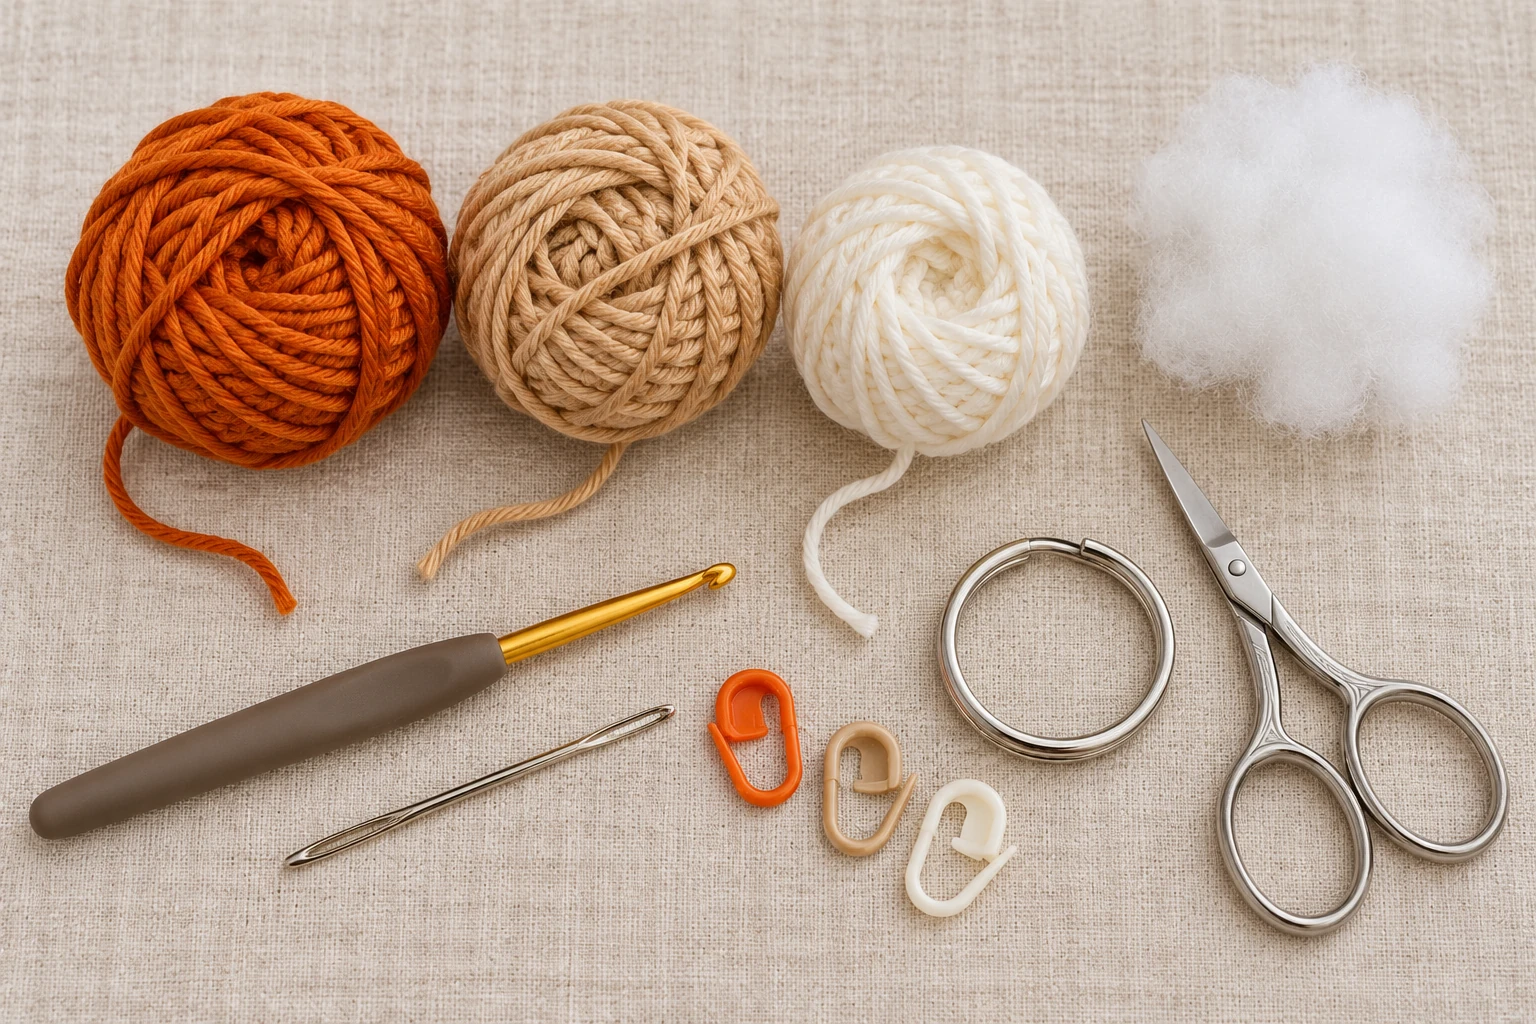
- Smooth sport-weight cotton yarn in pumpkin orange.
- Matching cotton yarn in biscuit tan.
- A small amount of ivory cotton yarn.
- A 2.5 mm crochet hook as a starting point.
- A small amount of polyester stuffing.
- A blunt yarn needle and scissors.
- Several removable stitch markers.
- A silver split keyring.
Use the same yarn weight for all three colors. Mixing a thick tan yarn with a thin orange yarn can make the base larger than the filling. Choose a hook that produces a firm fabric without making stitches difficult to work. If stuffing shows through the gaps, try a smaller hook or slightly firmer tension. You do not need safety eyes, beads, glue, or wire for this design.
Abbreviations and Pattern Notes
This pattern uses US crochet terminology.
| Abbreviation | Meaning |
|---|---|
| ch | Chain |
| sc | Single crochet |
| hdc | Half double crochet |
| dc | Double crochet |
| sl st | Slip stitch |
| inc | Work 2 single crochet stitches into one stitch |
| st / sts | Stitch / stitches |
Numbers in parentheses show the stitch count at the end of a row or round. Chain 1 and turn after each triangle row, except after Row 9. The turning chain does not count as a stitch. Work through both loops unless instructed otherwise. Place increases in the first and last stitches of the row.
For the side wall, work in continuous rounds without joining. Move your marker to the first stitch of each new round. Keep the triangles flat while checking their shape. Do not pull the corners outward to make them look larger.
Step 1: Crochet the Orange Top Triangle
Use pumpkin-orange yarn. Foundation: Ch 2.
| Row | Instructions | Count |
|---|---|---|
| 1 | Sc in the second chain from the hook | 1 |
| 2 | Work 3 sc into the only stitch | 3 |
| 3 | Inc, sc in the next stitch, inc | 5 |
| 4 | Inc, sc in the next 3 stitches, inc | 7 |
| 5 | Inc, sc in the next 5 stitches, inc | 9 |
| 6 | Inc, sc in the next 7 stitches, inc | 11 |
| 7 | Inc, sc in the next 9 stitches, inc | 13 |
| 8 | Inc, sc in the next 11 stitches, inc | 15 |
| 9 | Inc, sc in the next 13 stitches, inc | 17 |
Fasten off. The starting row forms the pointed end of the pie. Row 9 forms the broad back edge where the scalloped crust will sit. Check every row before moving on. From Row 3 onward, each row adds exactly two stitches.
Add the Triangle Border
The border provides a counted edge for assembly. Lay the triangle flat with the broad edge at the top and the point at the bottom. Join orange yarn at the pointed end. Ch 1, then:
- Work 1 sc at the point.
- Work 8 sc up the first sloping edge, placing one stitch into each row end from Rows 2–9.
- Work 17 sc across the broad edge, one into each stitch of Row 9.
- Work 8 sc down the second sloping edge, one into each row end from Rows 9–2.
- Join with a sl st to the first sc.
Border count: 34 stitches. The stitches at the two broad corners go into different parts of the fabric: one into the row end and one into the top of the Row 9 stitch. Fasten off with a long sewing tail. Mark the point and both ends of the 17-stitch back edge.
Step 2: Make the Tan Base
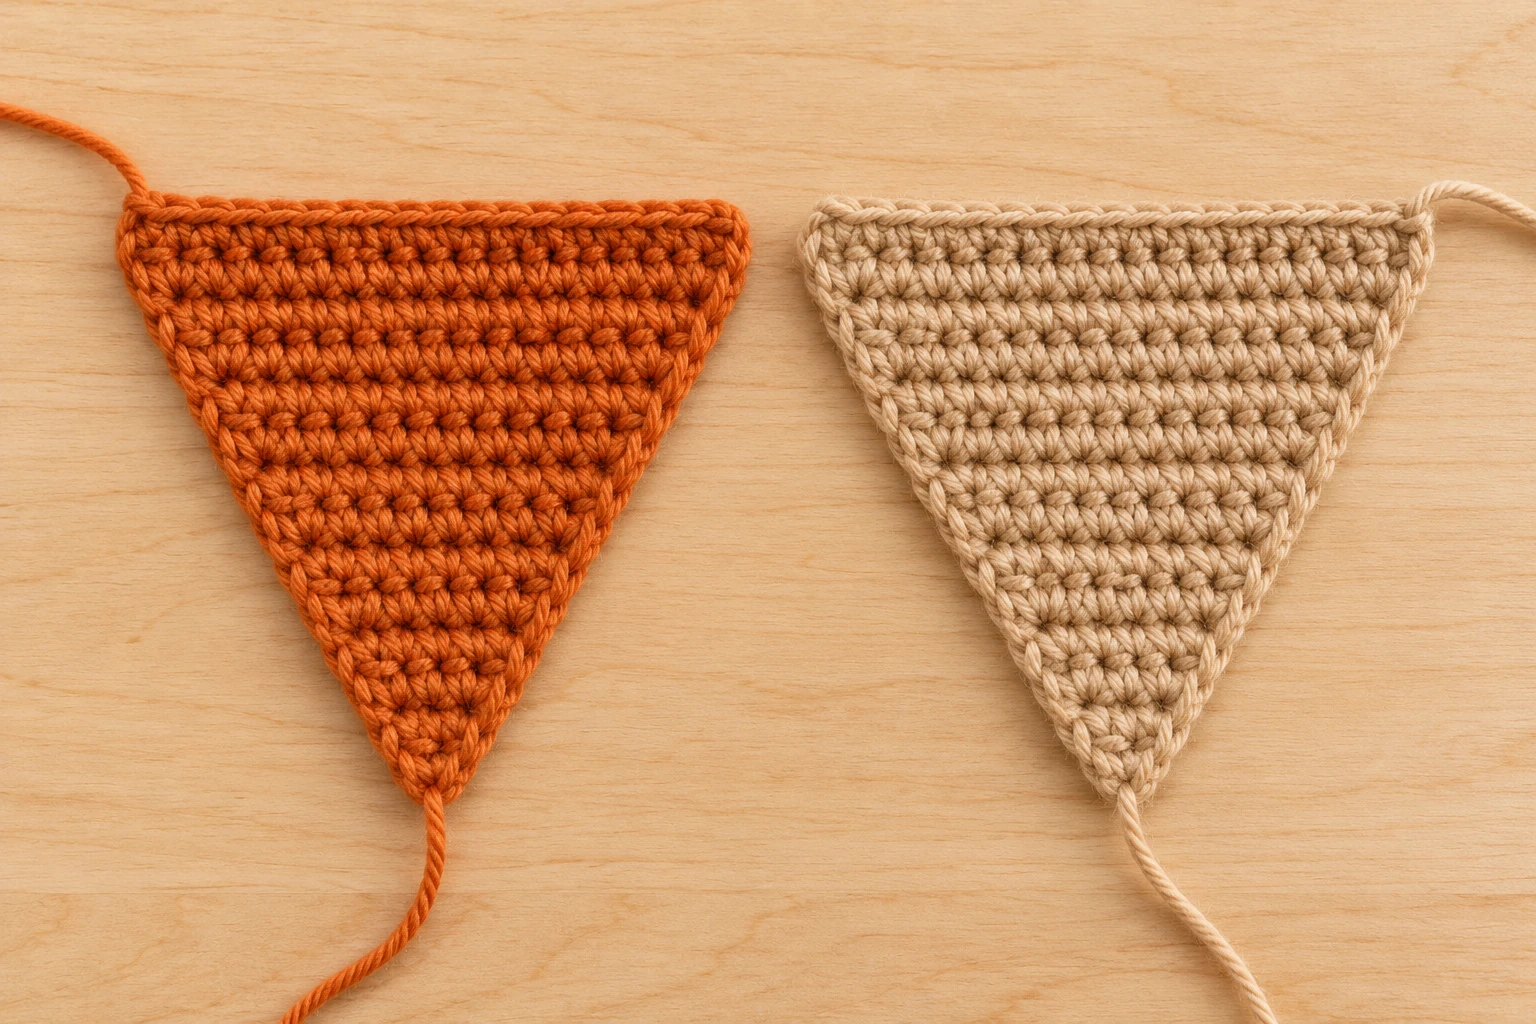
Use biscuit-tan yarn. Repeat Rows 1–9 of the orange triangle, including the 34-stitch border. The two triangles should have matching stitch counts and similar dimensions. Place one over the other to compare them before continuing.
If the tan triangle is noticeably larger, check whether you crocheted it more loosely. Correct the tension rather than stretching the orange triangle to fit. Fasten off and weave in the starting tail. Leave the outer border clear so you can work the side wall into it.
The tan base represents the bottom crust. It should remain a thin layer beneath the orange filling rather than extending into a wide decorative rim.
Step 3: Build the Orange Filling Wall
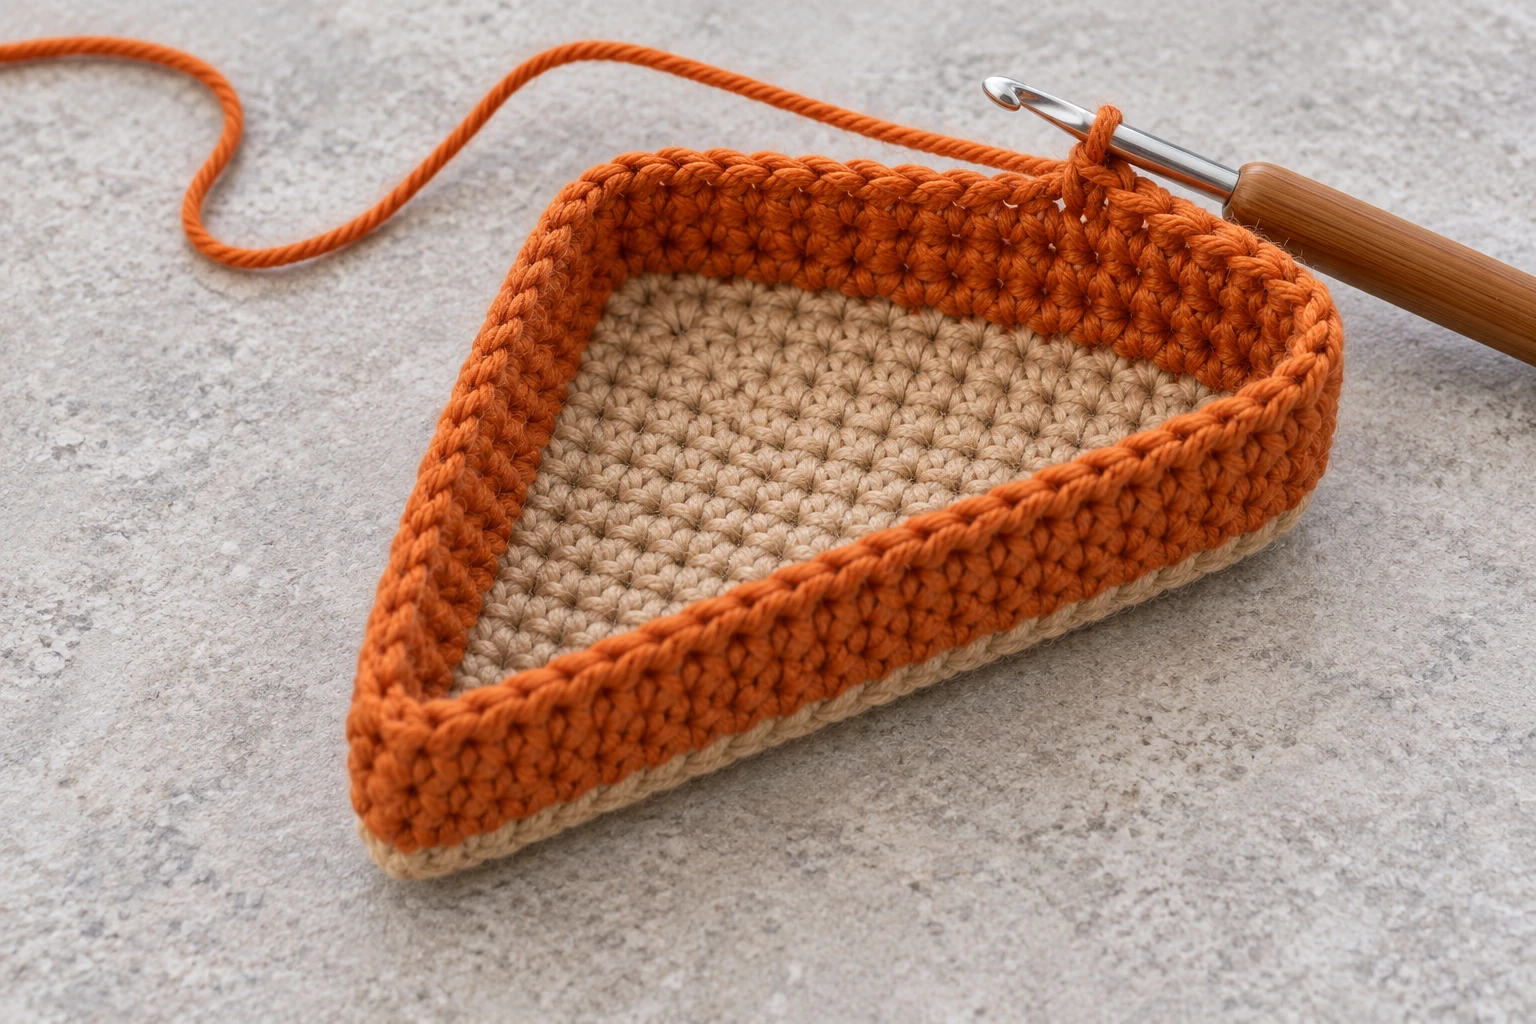
Join pumpkin-orange yarn to the tan border at the center of the broad back edge.
Round 1: Ch 1, then sc in each of the 34 border stitches. Do not join. (34)
Mark the first stitch. Rounds 2–5: Sc in every stitch around. (34 each round)
Fasten off with a long tail for attaching the top. These rounds form a short wall around the base. Gently fold the orange fabric upward as you work. Because there are no corner increases, the outline may become softly rounded. During assembly, align the marked corners and point to restore the wedge shape.
Check that the wall remains the same height all the way around. An accidental increase creates a bulge; a missed stitch can pull one section inward.
Step 4: Sew and Stuff the Pie Slice
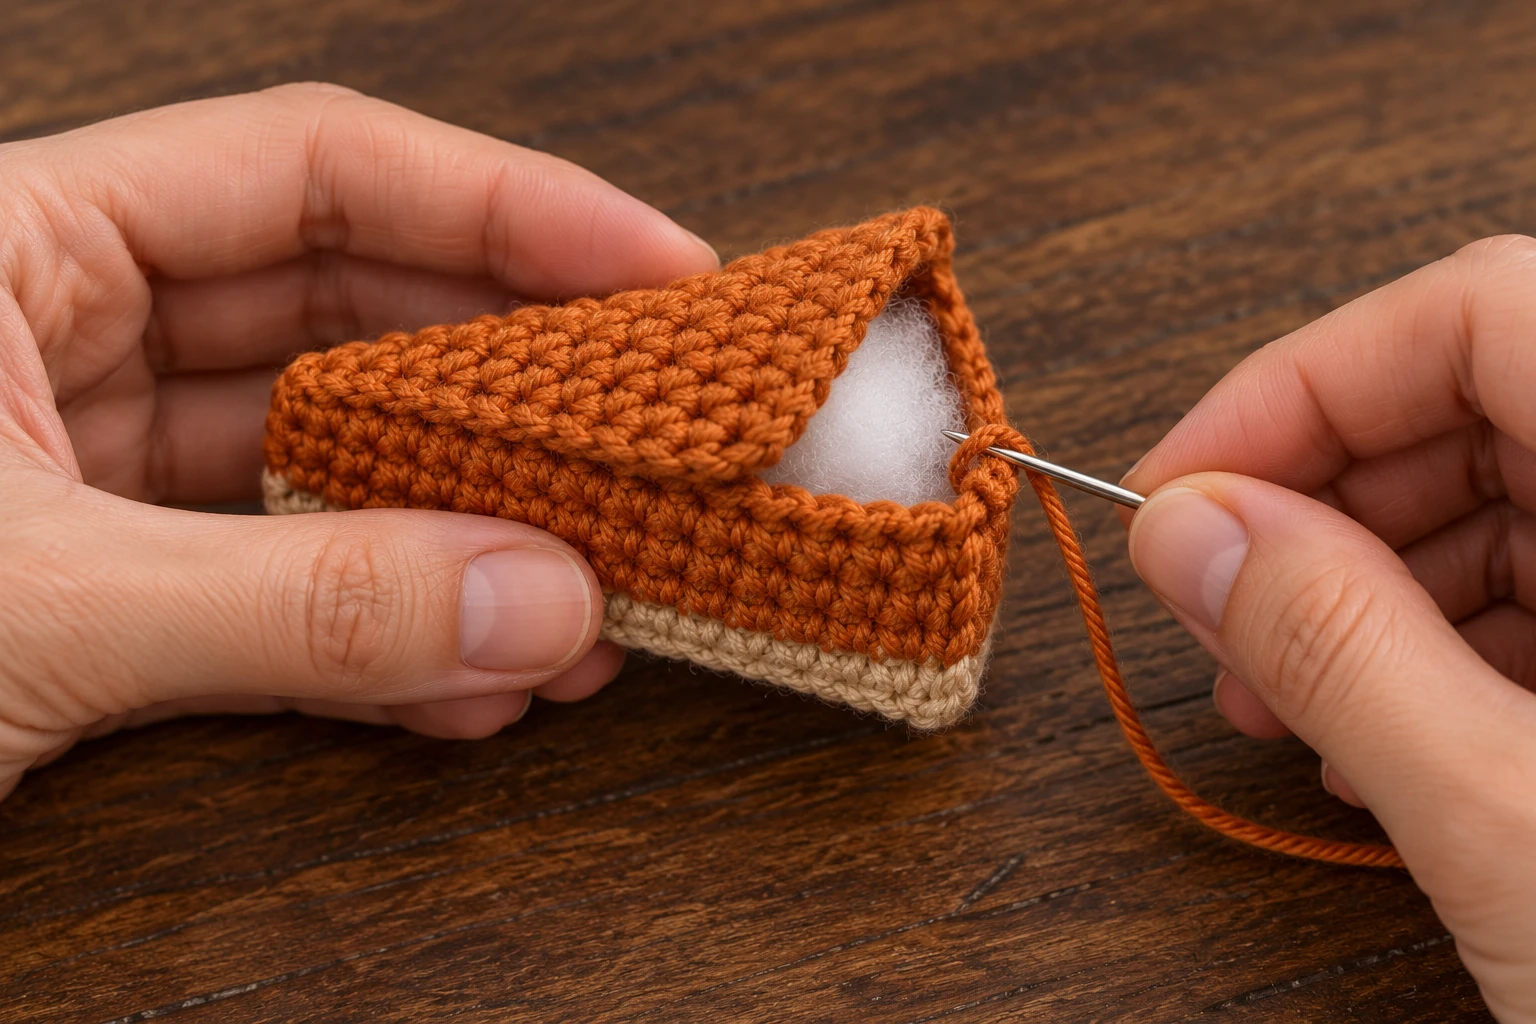
Position the orange top over the side wall, with the outward-facing side visible. Match the pointed ends, both broad corners, and the center of the back edge. Use stitch markers to hold these locations together.
Thread the orange sewing tail through your yarn needle. Sew one top-border stitch to one stitch of the final wall round, working around the slice. Keep the seam snug without pulling it into a tight ridge.
Leave an opening of approximately eight stitches along the back edge. Add small amounts of stuffing through this opening. Push a little stuffing toward the point first, then distribute the rest across the body. The top should remain fairly flat, with enough filling to support it.
Avoid packing the slice into a rounded cushion. Too much stuffing hides the triangular outline and pushes the sides outward. Close the remaining stitches. Weave the tail through several stitches inside the seam before trimming it.
Our guide to sewing amigurumi pieces together neatly can help with tidy joins and hidden yarn ends.
Step 5: Crochet the Scalloped Back Crust
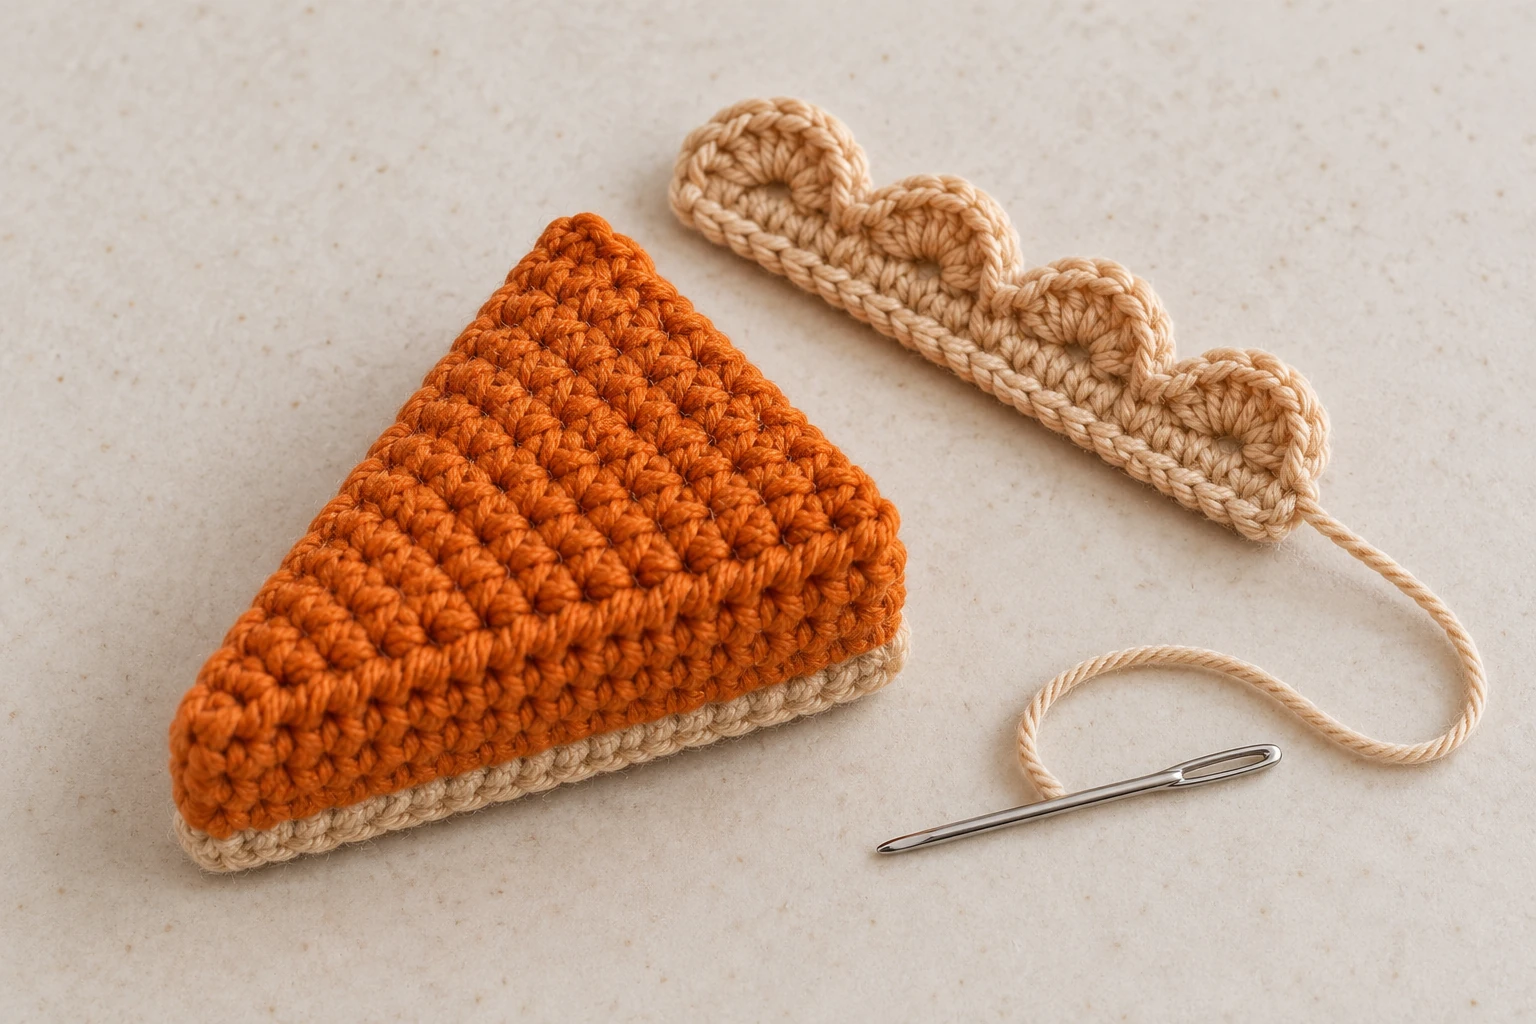
Use biscuit-tan yarn. Foundation: Ch 18.
Row 1: Sc in the second chain from the hook and each remaining chain. (17)
Ch 1 and turn. Row 2: Sc in the first stitch. Repeat the following sequence four times: skip 1 stitch, work 5 dc into the next stitch, skip 1 stitch, sc in the next stitch.
You should have four shells, with a single crochet at each end and between neighboring shells. Fasten off with a long sewing tail. Place the straight foundation edge along the broad back edge of the pie. The shells should rise above the orange top.
Sew the straight edge securely across the back. Catch both the crust strip and the pie fabric with each sewing stitch. Keep the scalloped edge free. Sewing down the tops of the shells would flatten the crust.
Do not extend this strip around the two sloping sides. Leaving those sides orange keeps the slice recognizable as pumpkin pie.
Step 6: Make the Ivory Cream Topping
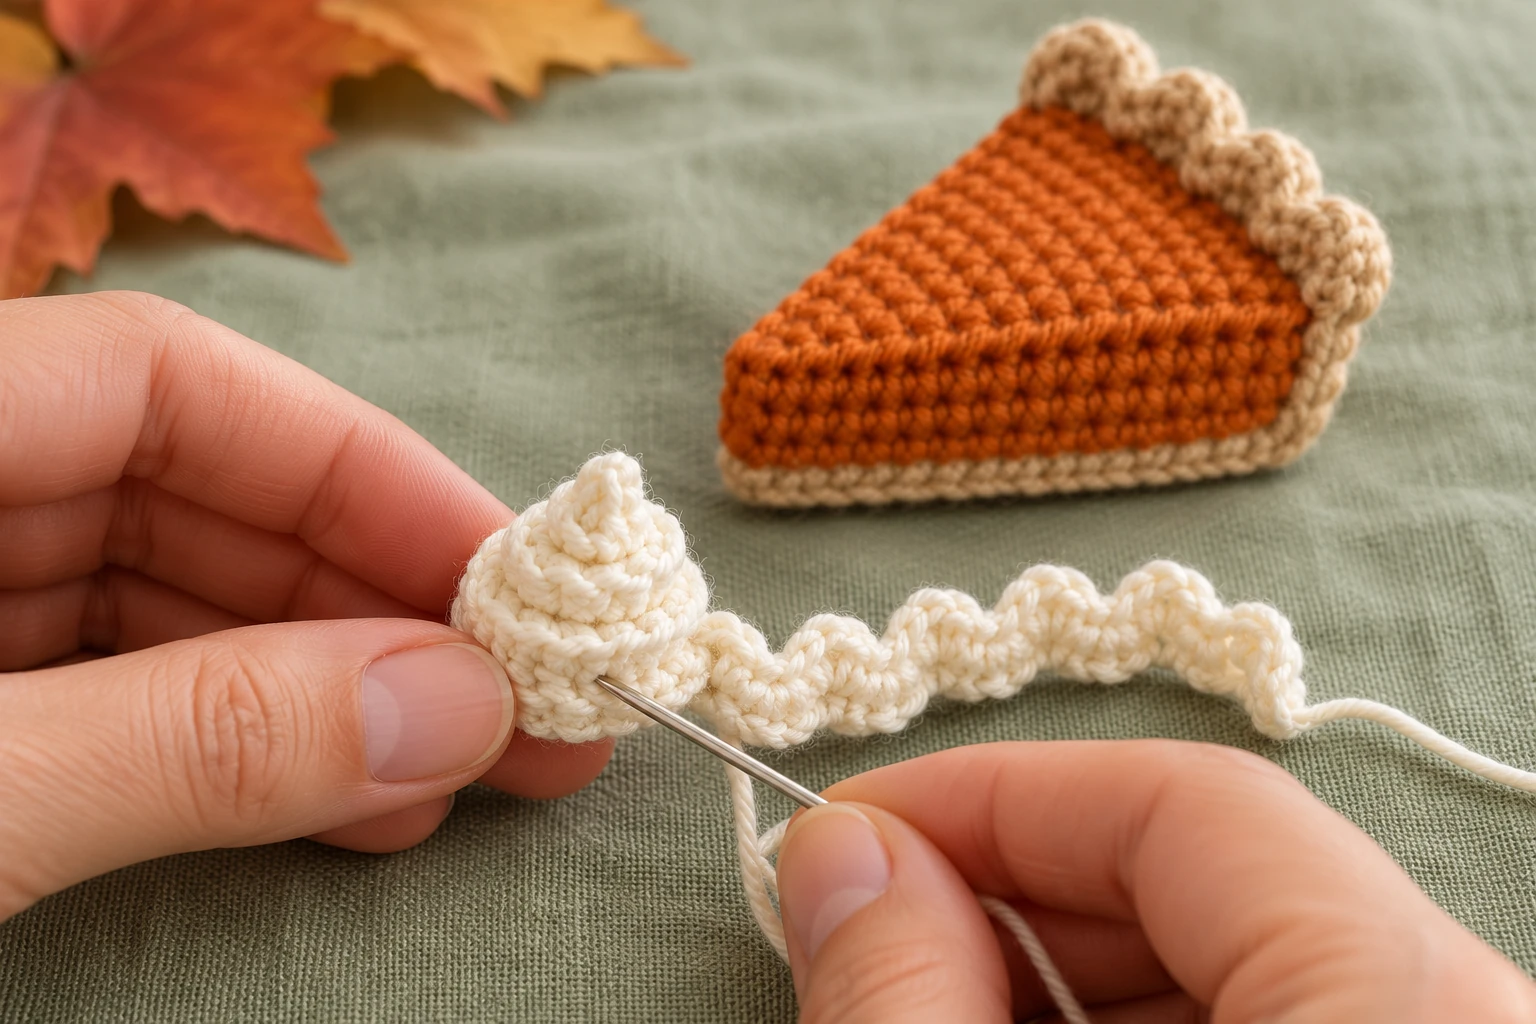
Use ivory yarn. Foundation: Ch 16. Work 3 hdc into the second chain from the hook and each remaining chain. (45 hdc)
Fasten off with a long sewing tail. The increases create a curling strip. Starting at one end, roll the strip into a small rosette. Keep the first turn slightly raised to form the center, then wrap the remaining strip around its base.
Use the sewing tail to stitch through the underside of the layers. Secure the rolled shape before attaching it to the pie. Place the topping near the center of the orange triangle, leaving space around the pointed end and back crust.
Sew through the base of the rosette and the orange top in several places. Check that the outer end cannot unwrap. The topping does not need stuffing. Its shape comes from the curled strip and the stitches holding it together.
Step 7: Add the Keyring Loop
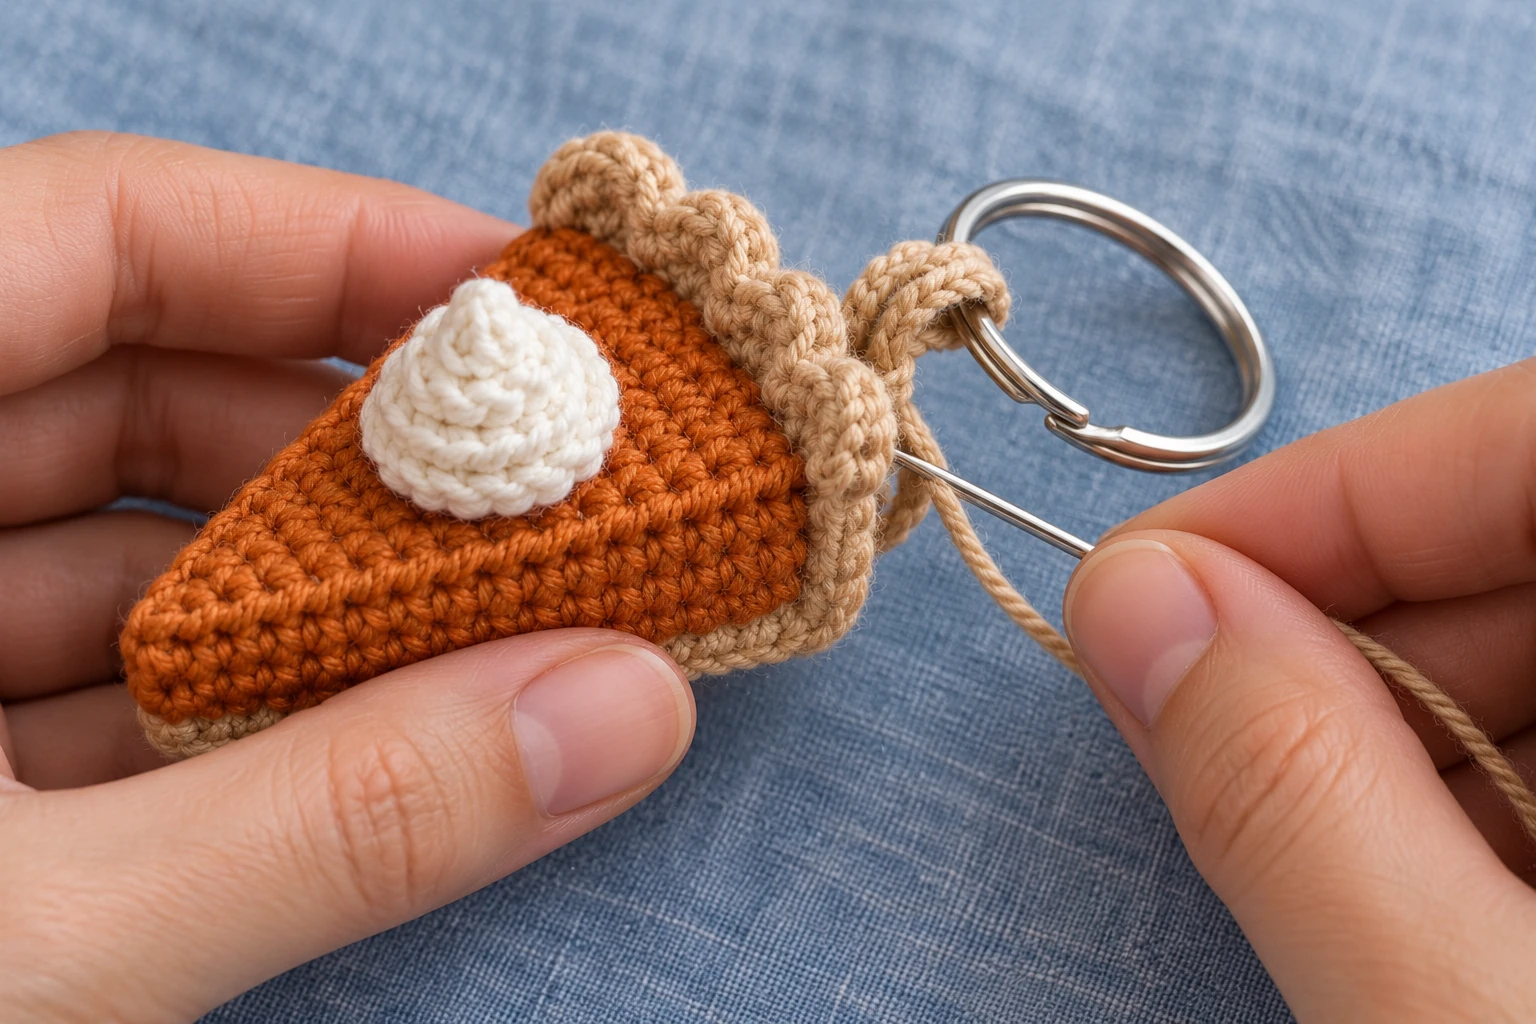
Use biscuit-tan yarn. Foundation: Ch 13. Sl st in the second chain from the hook and each remaining chain. (12 sl sts)
Fasten off, leaving tails for sewing. Pass the strip through the silver split ring. Bring the two ends together to form a loop. Position the ends at the center back of the pie, behind the scalloped crust. Sew them into the body fabric with several passes.
Catch more than one body stitch so the attachment is distributed across a small area. The loop should be anchored to the pie itself, not only to a decorative shell. Weave in the tails securely. Pull the ring gently while holding the pie. If the attachment shifts, reinforce it before using the charm.
For a different removable accessory, see our crochet bow bag charm pattern.
Finishing and Shape Checks
Before calling the project complete, check that the front point is visible, the top and base align, stuffing does not show through the stitches, the back crust stands above the filling, the cream topping is firmly attached, and the keyring loop holds securely.
Use your fingers to gently shape the corners. Avoid pulling hard on individual stitches. Follow your yarn’s care instructions. Remove the metal ring before cleaning if possible, and let the charm dry fully before reassembling it.
Common Problems
My triangle has uneven sides
Count the rows and confirm that the increases sit at both ends. Forgetting one increase produces an uneven outline.
The orange wall flares outward
Check for accidental increases, especially near the point. Every wall round should contain 34 stitches.
The top looks too rounded
Remove some stuffing before closing the final seam. Spread the remaining filling evenly instead of leaving a lump in the center.
The crust will not stand upright
Check its placement. The foundation edge should be sewn to the broad back edge, with the shell tops left free.
The cream topping keeps unfolding
Secure the rolled strip through several layers on its underside before sewing it to the pie.
Frequently Asked Questions
Can I make this with acrylic yarn?
Yes. Use matching weights for all colors and choose a hook that creates a firm fabric. The texture and size may differ from the cotton version.
How large will the finished keychain be?
There is no verified finished measurement for this untested pattern. Measure your triangles before assembly. Yarn thickness and tension determine the final dimensions.
Can I make the charm without stuffing?
A small amount helps support the wedge. Without it, the orange wall may collapse. Use light stuffing rather than filling it firmly.
Can I turn it into a Thanksgiving ornament?
Yes. Replace the split ring with a hanging loop. Secure the loop to the body using the same reinforced attachment method.
Do I need a magic ring?
No. Every separate piece begins with a foundation chain.
Is this a no-sew pattern?
No. The top, crust, cream topping, and attachment loop require sewing. The counted borders help you align the main pieces.
Can I make a different pie flavor?
Yes. Change the orange to dark brown for a chocolate-inspired slice or pale yellow for a custard-inspired version. Keep the tan crust and ivory topping.
More Small Seasonal Crochet Projects
Pair your crochet pumpkin pie keychain with our mini crochet turkey pattern for another Thanksgiving project. For a broader autumn display, add a no-sew crochet pumpkin.
The finished pie charm brings together a simple triangular construction and small decorative details. Keep the filling lightly stuffed, reinforce the keyring loop, and let the orange, tan, and ivory colors define the little slice.