Free Crochet Bow Bag Charm Pattern for Beginners
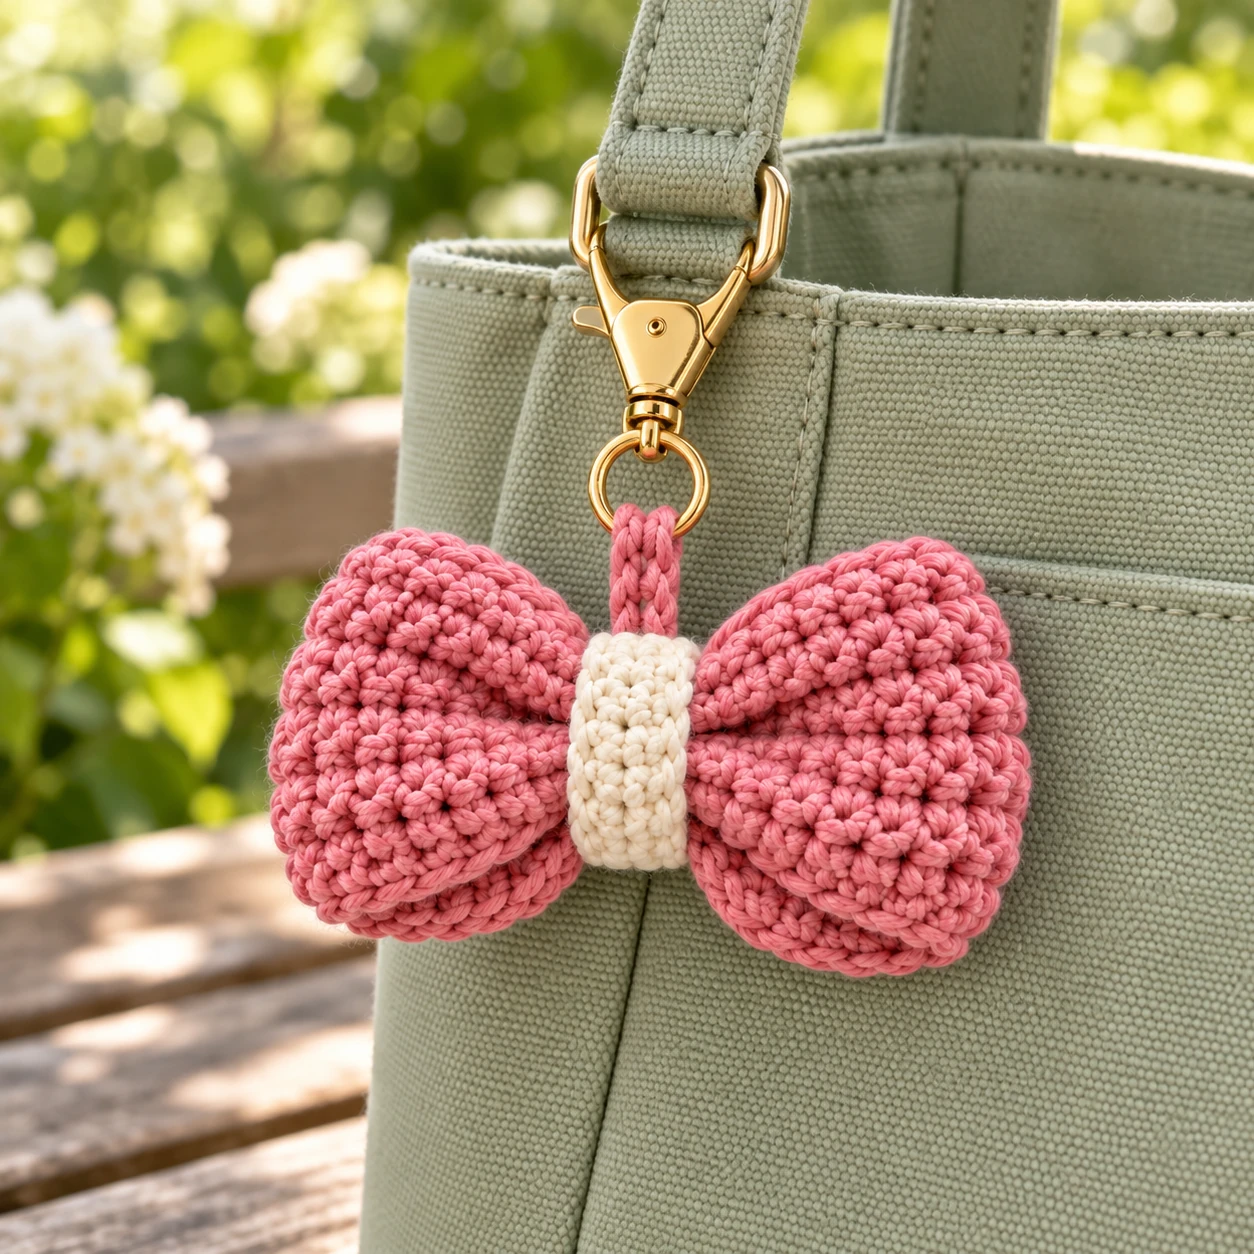
Make a crochet bow bag charm with a simple single crochet rectangle, fitted center band, and sewn hanging loop.
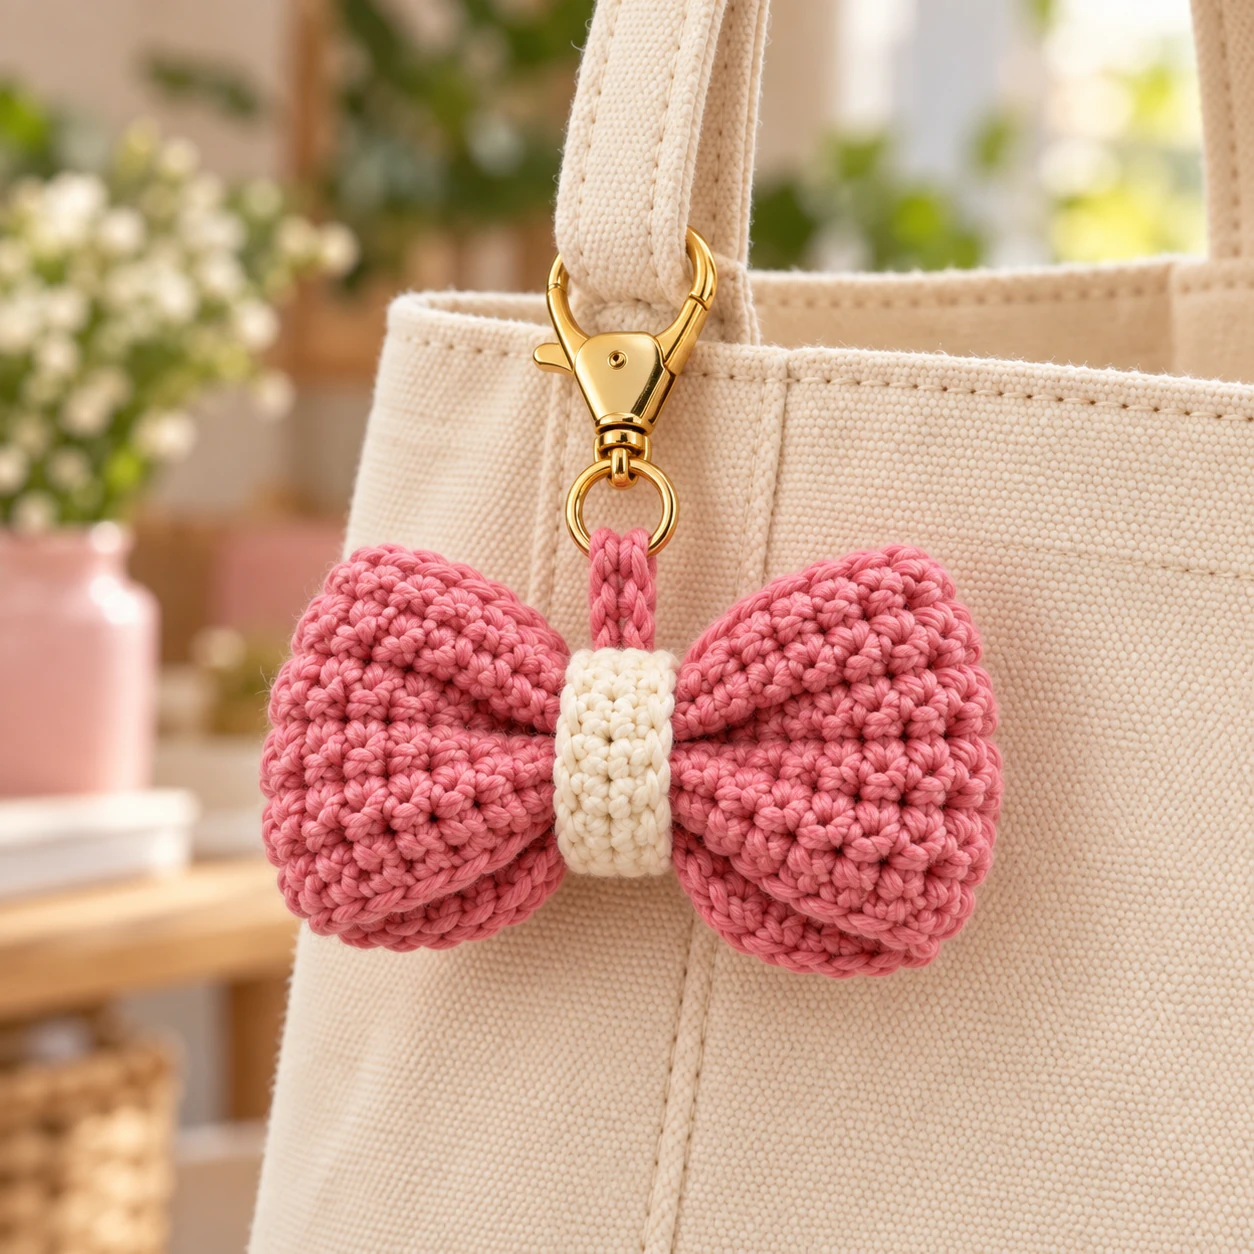
This crochet bow bag charm pattern turns a flat rectangle into a small accessory for a tote, purse, or backpack. Work the panel in single crochet, join its short ends, pinch the center, and cover the gathering stitches with a narrow band.
The main version uses dusty pink yarn with a cream center. You can also use one color throughout or choose red and cream for a holiday gift. The instructions use US crochet terms and include checkpoints for fitting the band and positioning the clasp.
Pattern at a Glance
| Detail | Instructions |
|---|---|
| Skill level | Beginner, with simple hand sewing |
| Main stitch | Single crochet |
| Construction | Flat panel joined into a ring, flattened, and gathered |
| Suggested yarn | DK cotton or a cotton blend |
| Suggested hook | 3 mm; adjust to suit your yarn |
| Bow panel | 30 stitches across, 10 rows tall |
| Center band | 3 stitches across; work to fit |
| Stuffing | None |
| Attachment | Crochet loop with a clasp or split key ring |
You should be comfortable making a chain, finding the last stitch of a row, and sewing through crochet fabric with a yarn needle. A stitch marker in the first or last stitch can help you keep the edges straight.
Materials
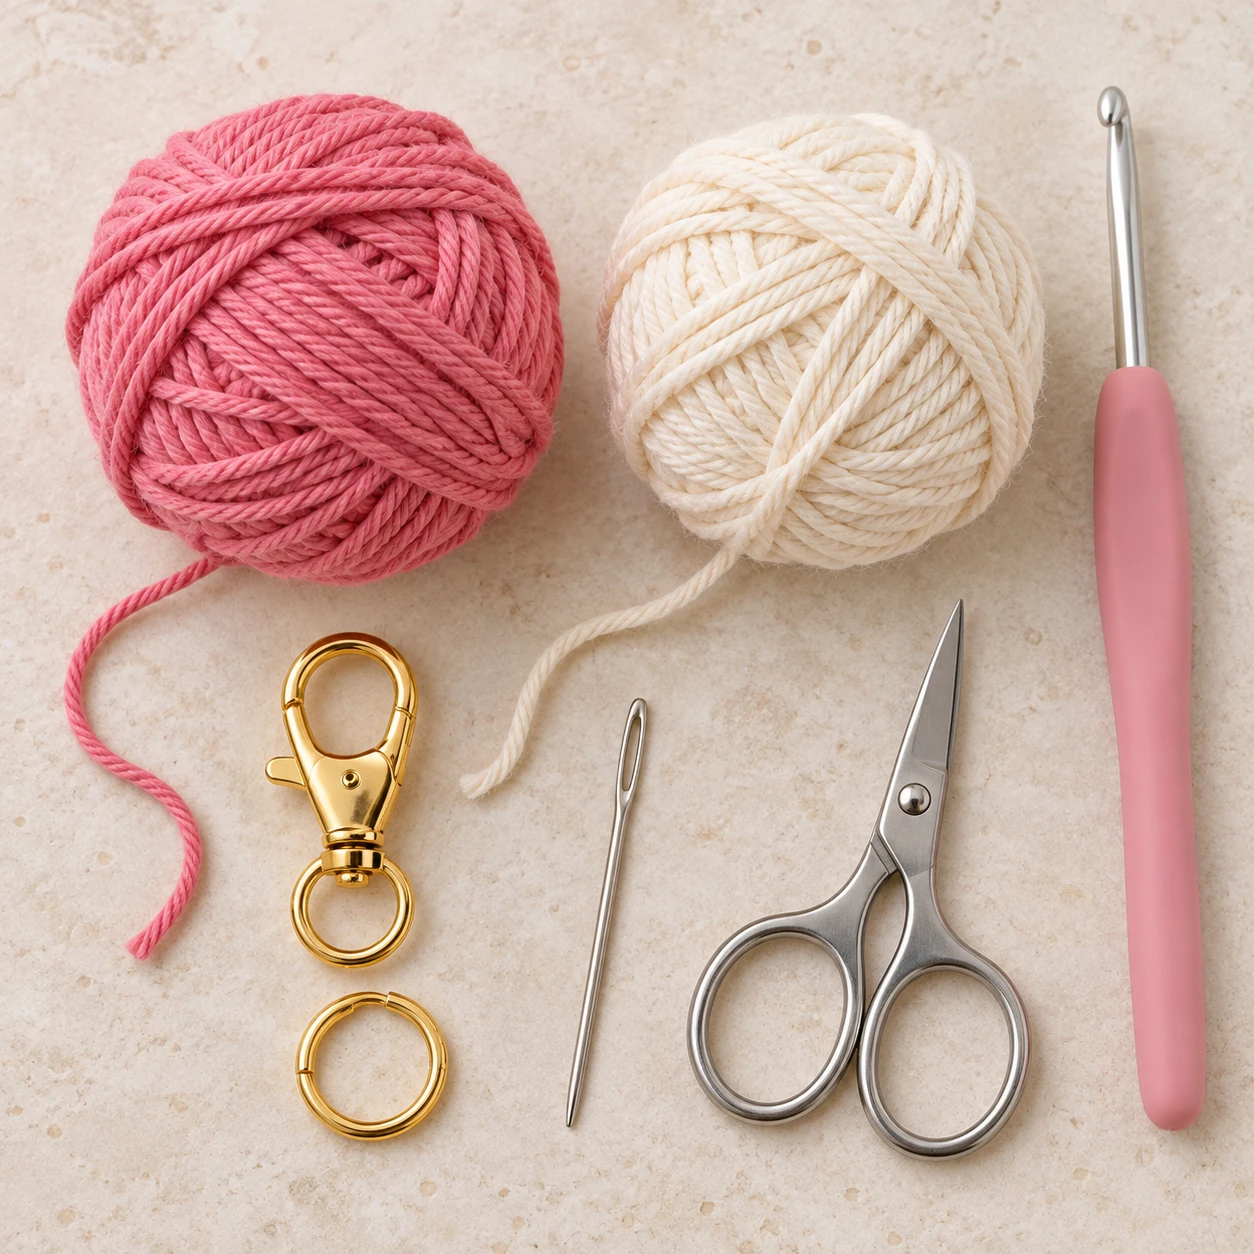
- DK cotton or cotton-blend yarn in your main color; have a small ball available.
- A small amount of matching or contrasting yarn for the center band.
- A 3 mm crochet hook, or a size that makes a firm but workable fabric.
- Yarn needle and scissors.
- Stitch markers, optional.
- Small lobster clasp or swivel clasp, plus a suitable connecting ring; alternatively, use a split key ring.
- Small jewelry pliers if your connecting ring requires them.
Choose smooth yarn so you can see the stitches and the sewing points clearly. Check that the hardware has smooth edges where it touches the yarn. You do not need stuffing, glue, or beads for this version.
Abbreviations and Pattern Notes
| Abbreviation | Meaning |
|---|---|
| ch | Chain |
| sc | Single crochet |
| sl st | Slip stitch |
| st / sts | Stitch / stitches |
The turning ch 1 does not count as a stitch. Work into both loops of each stitch unless told otherwise. Every row of the main panel has 30 sc.
Use the same yarn and hook throughout the bow panel. Changing yarn weight halfway through can make one side thicker than the other. Leave sewing tails long enough to complete the seams and weave in the remaining yarn.
How the Finished Size Works
The starting chain determines the panel length. Joining the two short ends makes a ring; flattening that ring gives a bow approximately half the original panel length before gathering. The panel height determines the height of the bow loops.
For example, a panel measuring 16 cm along its foundation edge will flatten to approximately 8 cm across before you pinch the center. This is a construction example, not a measured result for the specified yarn and hook. Gathering changes the final shape, so measure your own bow after assembly.
If you need a particular width, aim for a panel about twice that width. Add or remove starting chains before continuing; the stitch count will always be one less than the foundation-chain count. Make a small sample first when an exact size matters.
Step 1: Crochet the Bow Rectangle
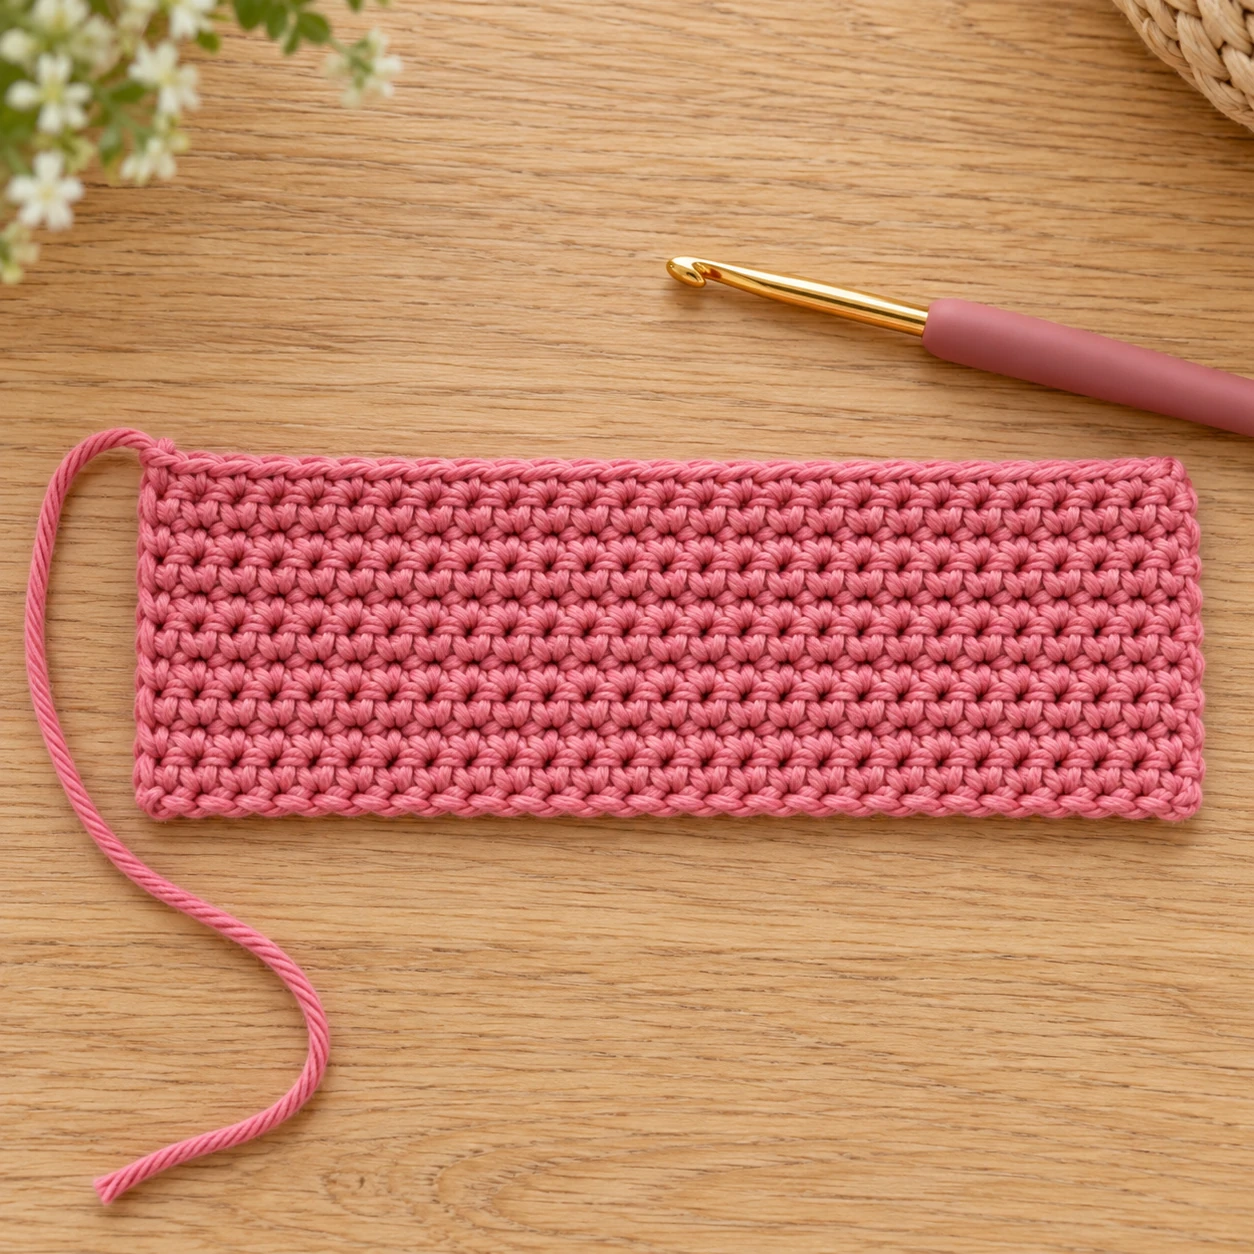
With your main color, ch 31.
Row 1: Starting in the second chain from the hook, sc in each chain across. 30 sc.
Rows 2–10: Ch 1, turn, and sc in each stitch across. 30 sc in every row.
After Row 10, fasten off and leave a sewing tail about 30 cm long. Do not add another turning chain.
Lay the panel flat. Count the stitches in the last row and check both edges. If the panel narrows toward the top, you may have missed an edge stitch. Correct that before sewing, because a slanted panel can create unequal bow loops.
Measure the panel along its long edge. If it is too short for your intended charm, restart with a longer foundation chain. Adding rows increases the height, rather than the width, of the finished bow.
Step 2: Join the Short Ends
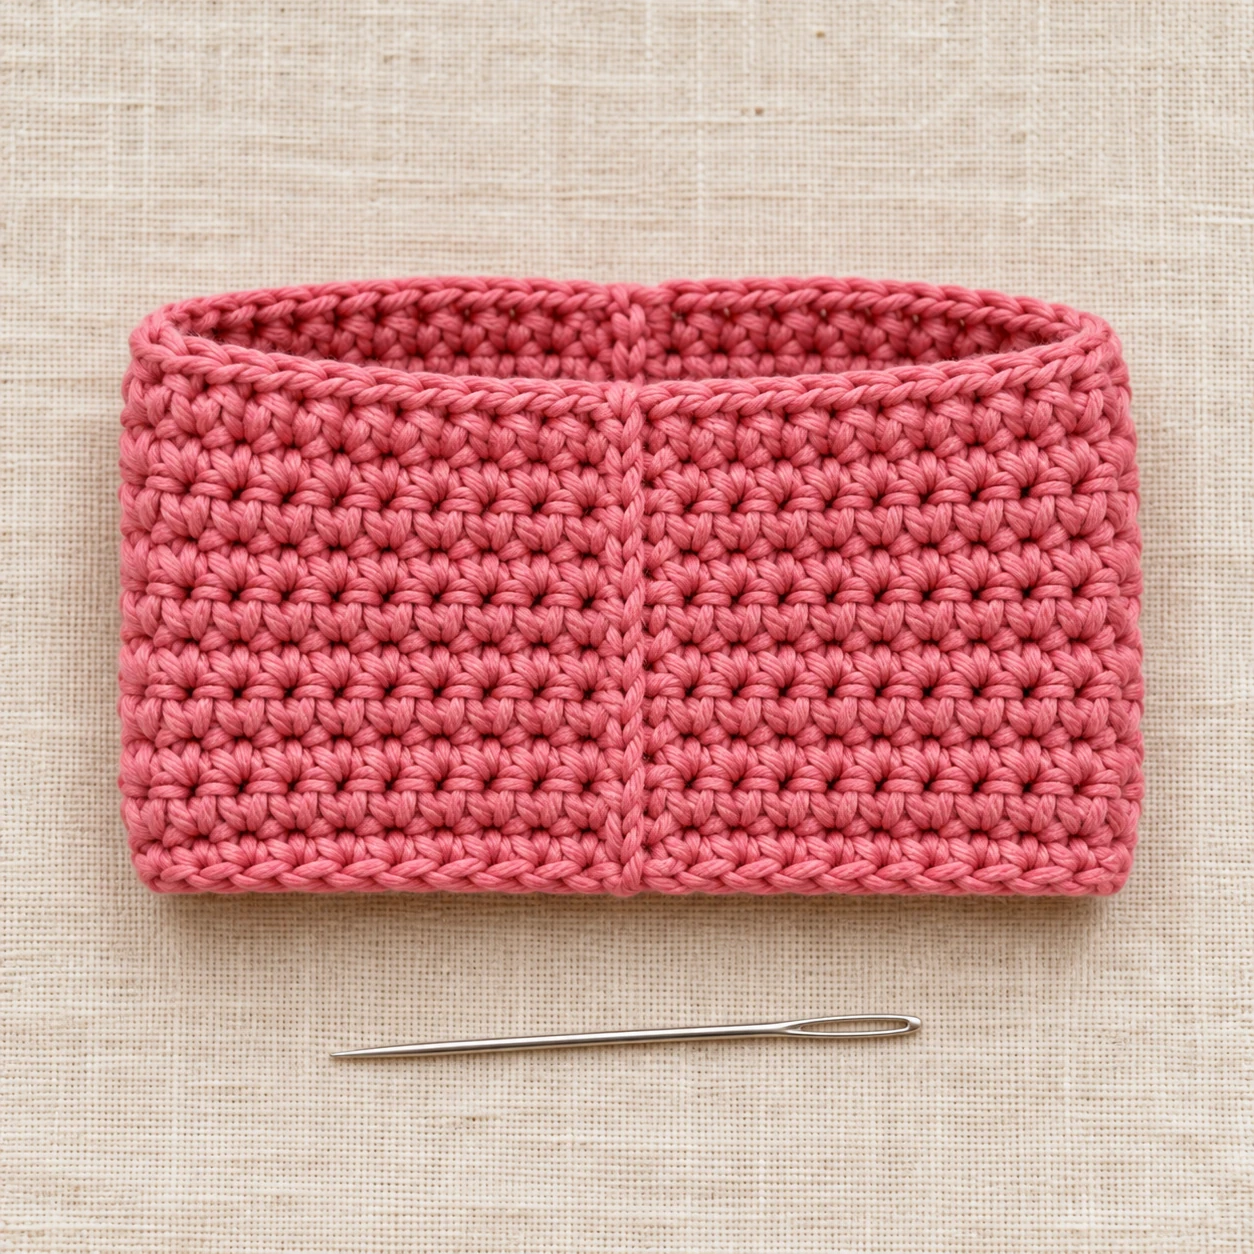
Place the panel flat with its long edges running left to right. Bring the two short edges together to make a ring. Keep the panel untwisted.
Use the sewing tail to whipstitch the short edges together, matching the row ends from bottom to top. Join the edges without overlapping them; an overlap adds unnecessary bulk at the center.
Flatten the ring so the seam sits in the middle of the back. The folded ends on the left and right become the outer edges of the bow loops. Check that the seam is centered and that both sides contain the same amount of fabric.
Secure the seam tail and weave it through several stitches. Leave the opposite starting tail available if you want to weave it in after gathering.
Step 3: Gather the Middle
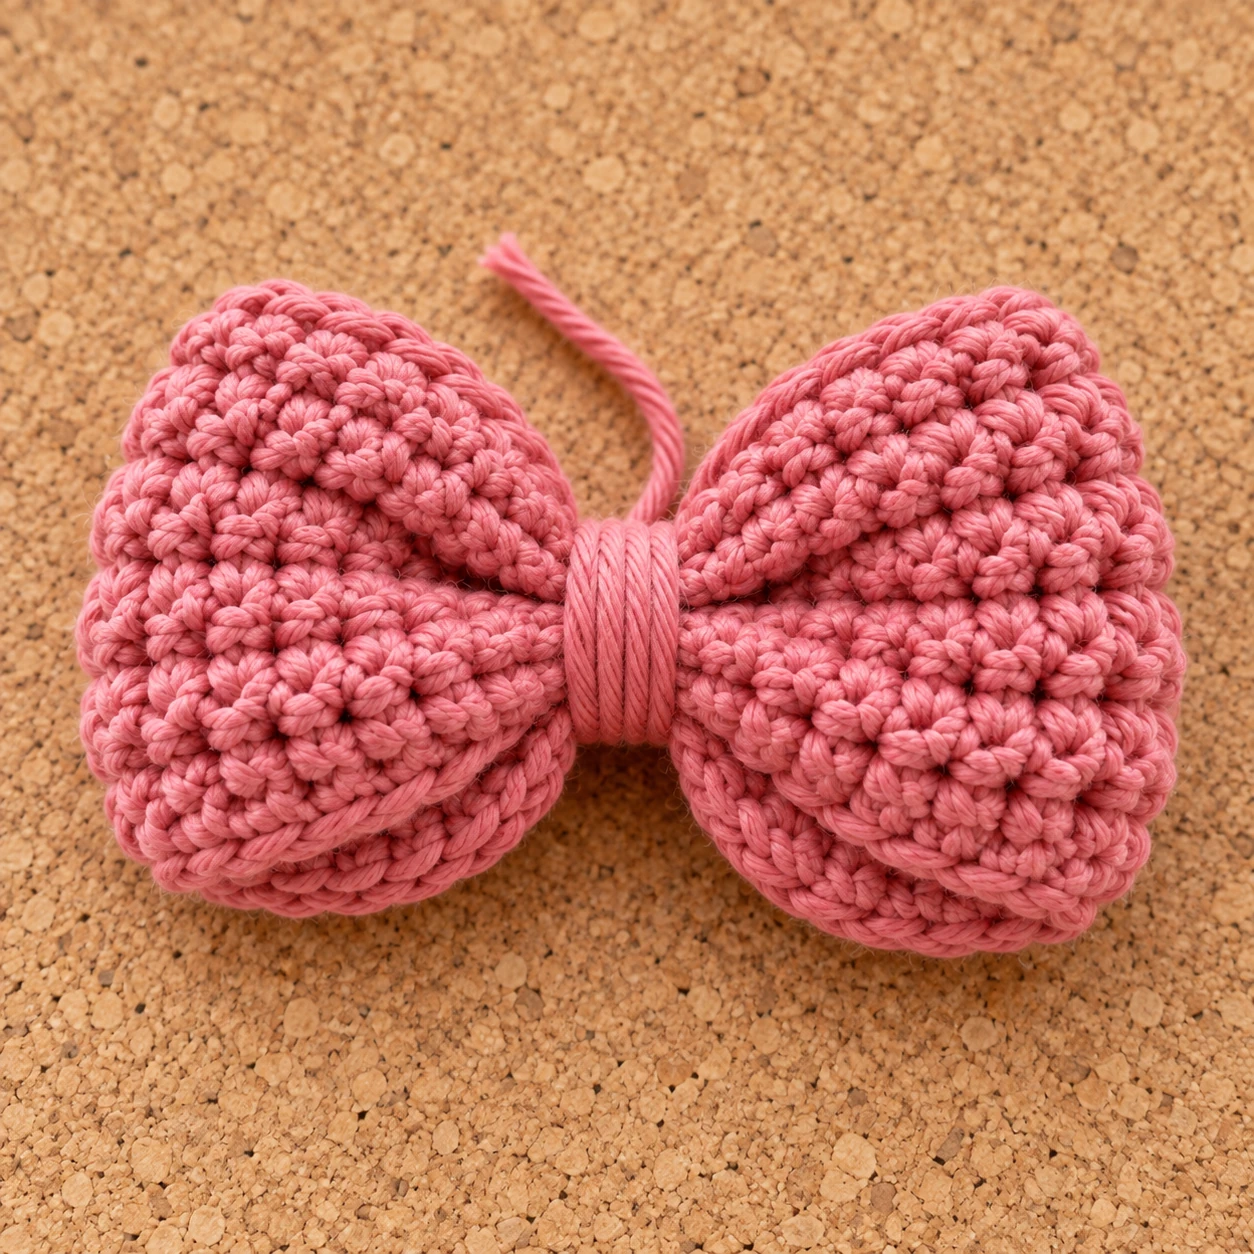
Keep the back seam centered. At the midpoint, pinch the fabric from its upper edge to its lower edge into small accordion folds. Both layers of the flattened ring should be gathered together.
Adjust the folds until the two loops look balanced. Hold the center firmly and wrap a separate length of matching yarn around it several times. Tie the yarn securely at the back, then use the yarn needle to pass the ends through the gathered fabric and weave them in.
The wrap should hold the folds in place without cutting into the stitches. If one loop is larger, loosen the wrap and reposition the center before proceeding. The cream band will cover the wrapping yarn, but it will not correct an off-center shape.
Step 4: Make the Center Band
With your center-band color, ch 4.
Row 1: Sc in the second chain from the hook and in the next two chains. 3 sc.
Row 2 onward: Ch 1, turn, and sc across. 3 sc in every row.
After several rows, test the strip around the gathered center. The three-stitch width runs horizontally across the front of the bow; the growing row length wraps around the center from front to back. Continue until the two ends meet at the back without stretching tightly or leaving a gap.
There is no fixed row count here because the needed length depends on your yarn, tension, and gathered-center thickness. Leave the strip open for now. Fasten off with a long sewing tail once it fits.
Step 5: Make and Attach the Hanging Loop
With the main color, ch 14. Fasten off, leaving a long tail at each end. Fold the chain in half to form a loop, bringing its two ends together.
Position both ends at the upper center back of the bow. Leave the curved part above the bow so there is room for your hardware. Before sewing, check that the loop is long enough for the connecting ring and does not lean to one side.
Sew each end through several stitches of the gathered center. Make more than one pass, keeping the stitches hidden at the back. Weave the remaining tails into the fabric in different directions. Attaching both ends with sewing distributes the pull better than tying a knot through one loose edge stitch.
Keep the loop separate from the outer bow loops so the clasp can move without rubbing against their edges.
Step 6: Close the Band and Add the Hardware
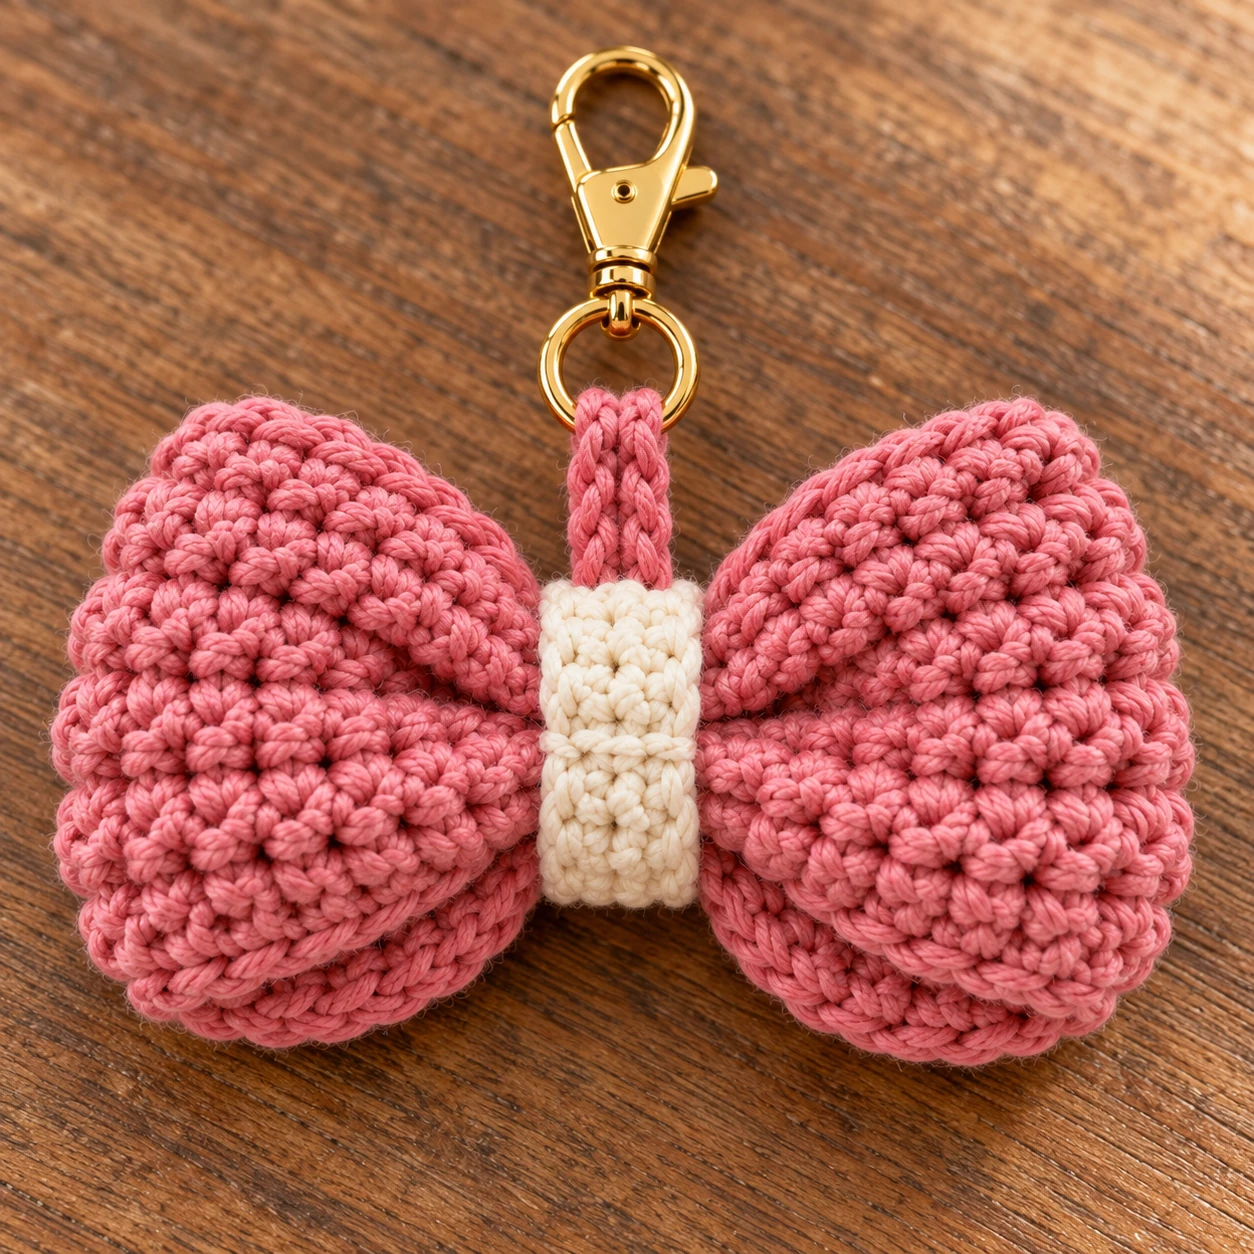
Wrap the fitted cream strip around the center, covering the gathering yarn and the sewn ends of the hanging loop. Let the loop emerge above the band. Sew the strip’s ends together at the back, then add a few hidden stitches through the band and gathered center to prevent the band from sliding.
Attach your clasp to the crochet loop with suitable hardware. If using an open jump ring, twist its ends sideways with pliers, thread it through the loop and clasp, and twist it closed. Check that the ends meet without a gap or sharp offset. A split ring is another option; feed the crochet loop onto it carefully rather than forcing it against the metal edge.
Gently pull on the loop while holding the bow center. Check for slipping yarn, a loose seam, or an opening in the ring. This is a useful finishing check, rather than a guarantee that the attachment will withstand strong pulls.
Step 7: Finish and Style the Charm
Weave in any remaining ends. Change direction when weaving through nearby stitches and trim after the tails are secure. Open the two bow loops with your fingers, straighten the center band, and check the front and back.
Clip the charm to a handle fitting, zipper pull, or key ring that can accommodate the clasp. For a matching handmade accessory, pair it with the granny square tote bag pattern. If you prefer a shaped charm for another bag, try the crochet mushroom keychain pattern.
Optional Ribbon Tails
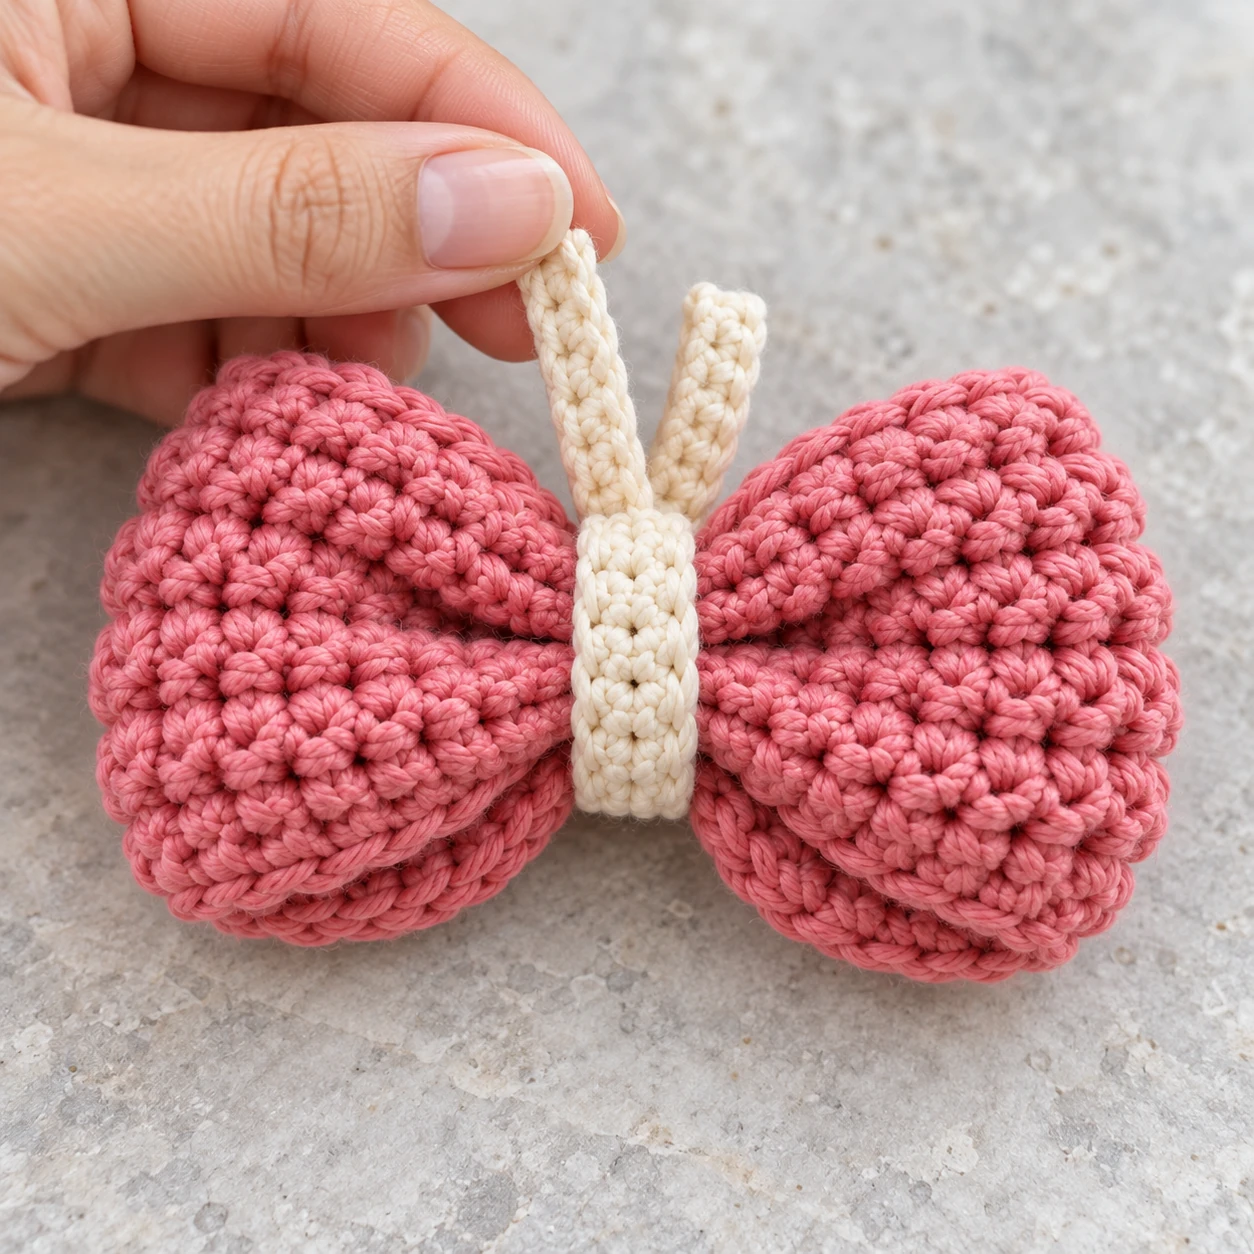
For a bow with hanging tails, make two small rectangles in the main color.
Foundation: Ch 13.
Row 1: Sc in the second chain from the hook and across. 12 sc.
Rows 2–4: Ch 1, turn, and sc across. 12 sc.
Fasten off, leaving a sewing tail. These pieces have straight ends. Sew one short edge of each tail behind the gathered center, angling their lengths downward in opposite directions. Attach them before closing the cream band so the band covers the sewing points.
Check that the tails do not interfere with the hanging loop. You can shorten them by reducing the starting chain, or leave them off for a simpler charm.
Size and Color Variations
| Version | Foundation chain | Stitches per row | Suggested panel rows |
|---|---|---|---|
| Smaller bow | 21 | 20 | 7–8 |
| Main bow | 31 | 30 | 10 |
| Larger bow | 41 | 40 | 12–14 |
These are starting points for changing proportions, not verified finished measurements. Use the same joining method and make the center band to fit each bow. Inspect the hanging-loop attachment carefully when using a heavier yarn or larger bow.
For Christmas, try red with a cream center. For Halloween, use black with orange or purple. Sage and cream, navy and white, or a single dusty pink shade work well for an everyday accessory. Color changes do not require changes to the stitch counts.
Troubleshooting
The bow loops are uneven. Check that the back seam is centered and that the gathering wrap sits halfway between the folded outer ends. Reposition the fabric before tightening the wrap again.
The panel edges slope. Count the stitches at the end of each row. Work the first sc into the first stitch, not the turning chain, and do not skip the final stitch.
The bow is too soft. Try a firmer yarn or a slightly smaller hook for the next panel. Adding rows changes the height; it does not reliably stiffen loose stitches. Keep the fabric comfortable enough to fold and sew.
The cream band slips. Check its fit and add hidden anchoring stitches through the gathered center. If it is too long, remove rows and refit it before sewing.
The clasp leans sideways. Check the hanging loop’s sewing points. Both ends should sit together at the upper center back, rather than on one bow loop.
The panel curls strongly. Check whether the starting chain is much tighter than the later rows. Remake a tight foundation with looser chains, then return to your regular tension for the single crochet rows.
Frequently Asked Questions
Does this crochet bow bag charm need stuffing?
No. The panel forms two layers when you join and flatten it. Gathering those layers gives the bow its shape.
Can I use worsted-weight yarn?
Yes, but the panel will usually be larger with the same stitch count. Use a hook that produces a firm fabric and check the panel measurements before joining it.
Can I use the bow without a metal clasp?
Yes. Sew the bow directly to an accessory, or make a loop that fits your intended attachment point. Check the fit before fastening off; the 14-chain loop is designed as a starting point for hardware attachment.
How do I make it into a keychain?
Use a split key ring instead of a clasp. Keep the same sewn hanging loop and check that the metal edge does not catch or abrade the yarn.
How should I clean the charm?
Follow the yarn label’s care instructions. Remove detachable hardware when appropriate and reshape the bow as it dries. Inspect the loop and seams after cleaning, and replace a worn loop before using the charm again.