Crochet Mini Christmas Mitten Keychain – Free Festive Gift Pattern
Make a crochet mini Christmas mitten keychain with a red hand, ivory ribbed cuff, small thumb, and hanging loop. Includes step-by-step instructions and finishing tips.
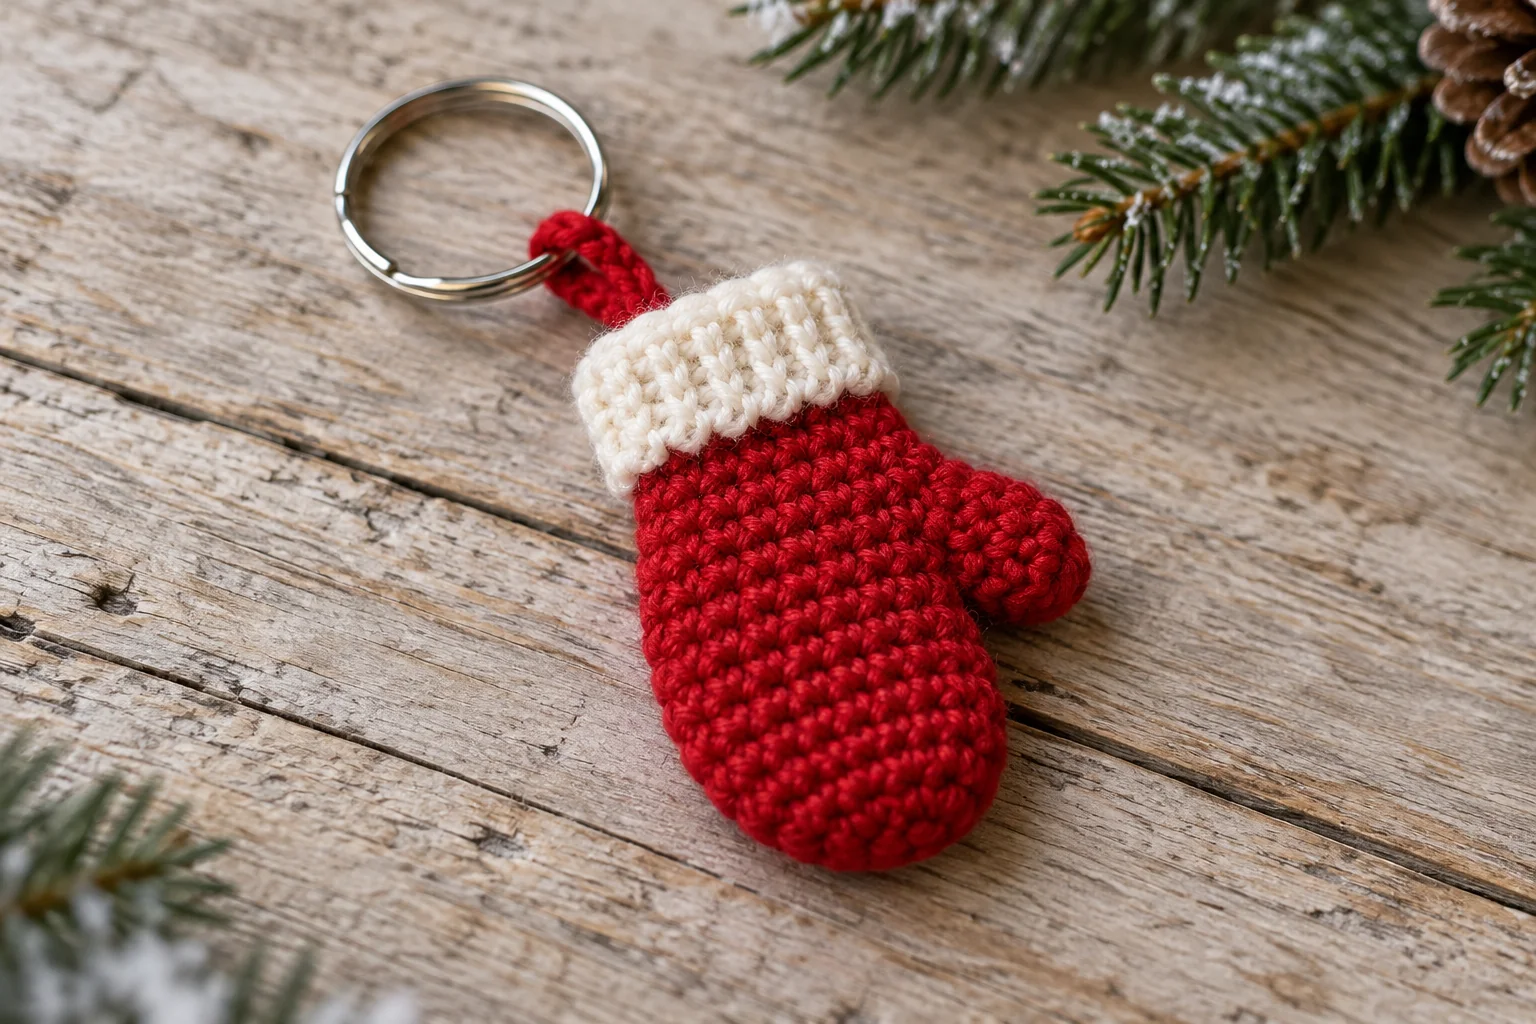
A tiny red mitten with an ivory cuff makes a cheerful Christmas accessory for keys, bags, and gift wrapping. This crochet mini Christmas mitten keychain uses simple stitches, a small thumb opening, and a separately worked ribbed cuff.
The mitten is crocheted from the rounded fingertip toward the wrist. You will leave an opening for the thumb, finish the hand, then crochet the thumb directly into that opening. A short yarn loop connects the finished mitten to a split keyring.
The instructions below use US crochet terms.
Pattern note: This is an original written pattern that has not been physically tested. The generated images illustrate the intended design. Follow the written stitch counts, and expect small differences in size and shape depending on your yarn, tension, and finishing.
Project Overview
- Skill level: Confident beginner.
- Construction: Continuous rounds for the mitten and thumb; short rows for the cuff.
- Main stitches: Single crochet, increases, decreases, and back-loop single crochet.
- Estimated size: Approximately 6–8 cm long, excluding the hanging loop, with DK yarn and a small hook.
- Colors: Christmas red and ivory.
The finished size is an estimate rather than a measured sample. You do not need to match a precise gauge for this decorative project, but the fabric should be dense enough to keep the filling inside. This is a miniature decoration, not a wearable mitten.
Materials and Tools
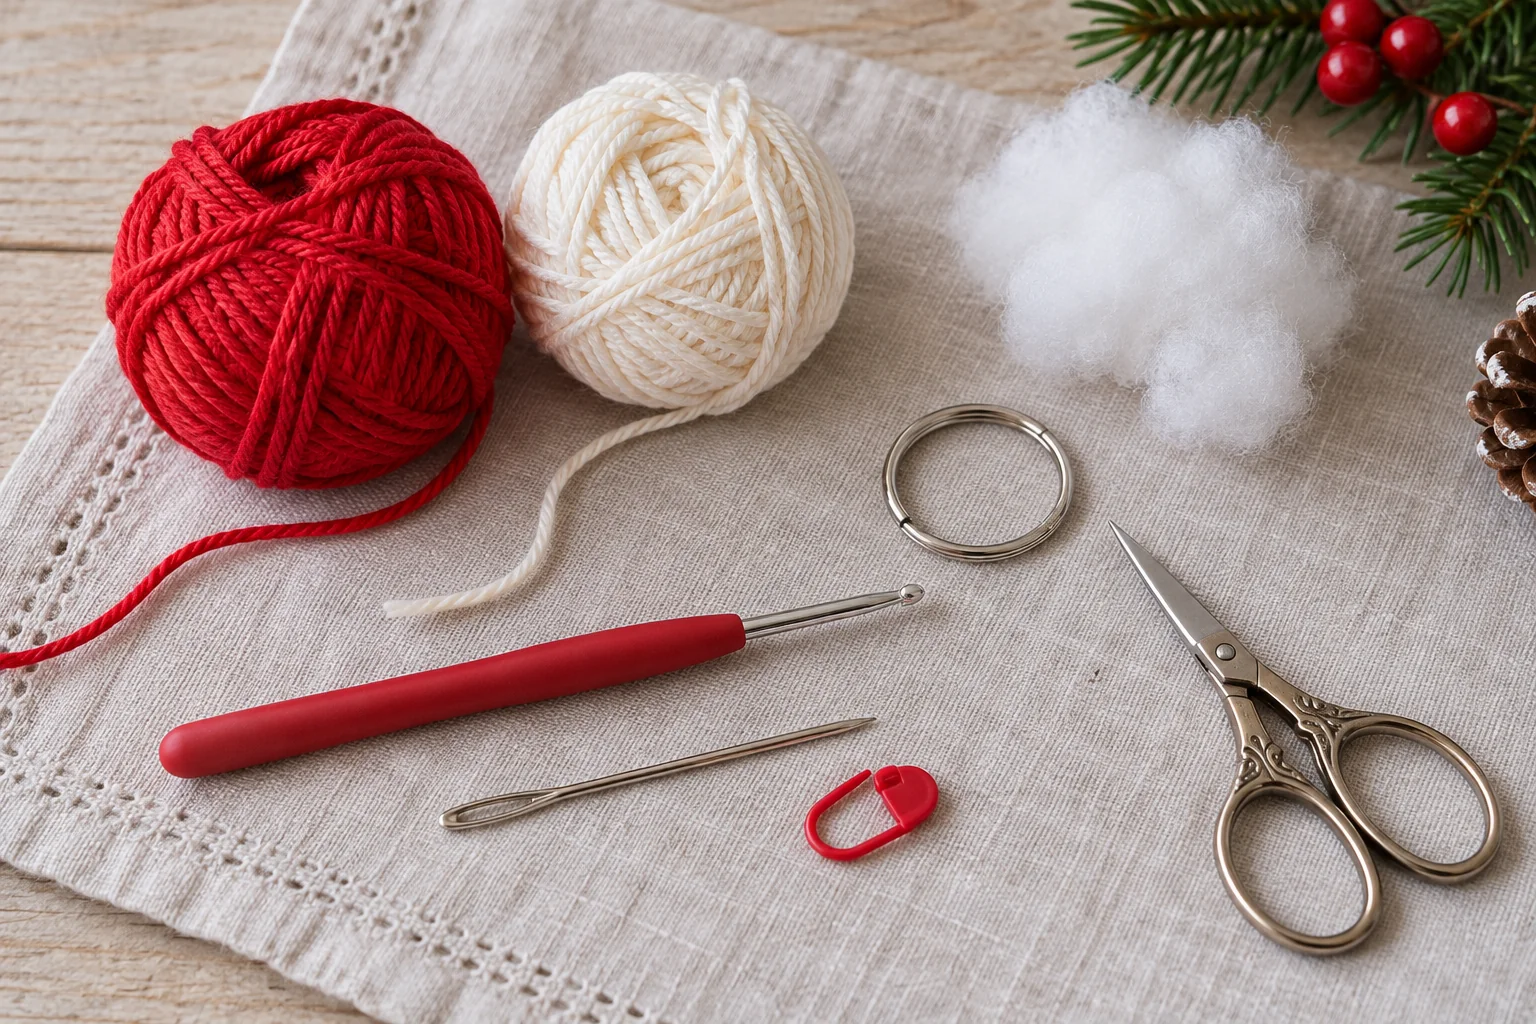
Gather the following supplies before starting:
- DK cotton yarn in red; allow approximately 15 g.
- A small amount of ivory DK cotton yarn.
- A 2.5–3 mm crochet hook.
- A small amount of polyester fiberfill.
- One metal split keyring.
- A blunt yarn needle.
- A stitch marker.
- Scissors.
Choose red and ivory yarns of a similar thickness. A noticeably thicker ivory yarn can make the cuff bulky, while a much thinner yarn may create a loose cuff that does not sit neatly against the wrist.
Cotton gives the stitches a clear texture and helps the miniature mitten keep its shape. If you use another fiber, check that the fabric remains firm without becoming difficult to crochet.
Use a hook that produces close stitches. If you can easily see through your practice fabric, try a smaller hook before making the mitten.
Abbreviations
| Abbreviation | Meaning |
|---|---|
| MR | Magic ring |
| ch | Chain |
| sc | Single crochet |
| inc | Work 2 sc into the same stitch |
| dec | Single crochet 2 stitches together |
| sl st | Slip stitch |
| BLO | Back loop only |
| R | Round |
An invisible decrease may be used for the closed mitten sections. A standard single crochet decrease also works. Numbers in parentheses show the stitch count at the end of a round or row.
For example, (1 sc, inc) × 6 means repeat one single crochet followed by one increase six times.
Before You Begin
Work the red mitten in continuous rounds. Do not join at the end of each round unless instructed.
Place a stitch marker in the first stitch and move it upward as you work. Counting each round is especially useful around the thumb opening, where chains replace skipped stitches.
The main mitten finishes with an open wrist. Leave that opening accessible until the thumb is complete and the stuffing has been adjusted. Keep the filling light. The goal is a softly rounded mitten, rather than a tightly packed ball with a thumb.
Step 1: Crochet the Rounded Fingertip
Use red yarn.
- R1: Work 6 sc into a MR. (6)
- R2: Inc in each stitch around. (12)
- R3: (1 sc, inc) × 6. (18)
Pull the magic ring closed and secure the starting tail inside the piece. These first three rounds form the rounded end where the fingers would sit in a full-size mitten. There are no individual finger sections.
Check that you have 18 stitches before continuing. An extra increase here changes the width of the entire hand and makes the later wrist decreases harder to match.
Step 2: Build the Main Hand
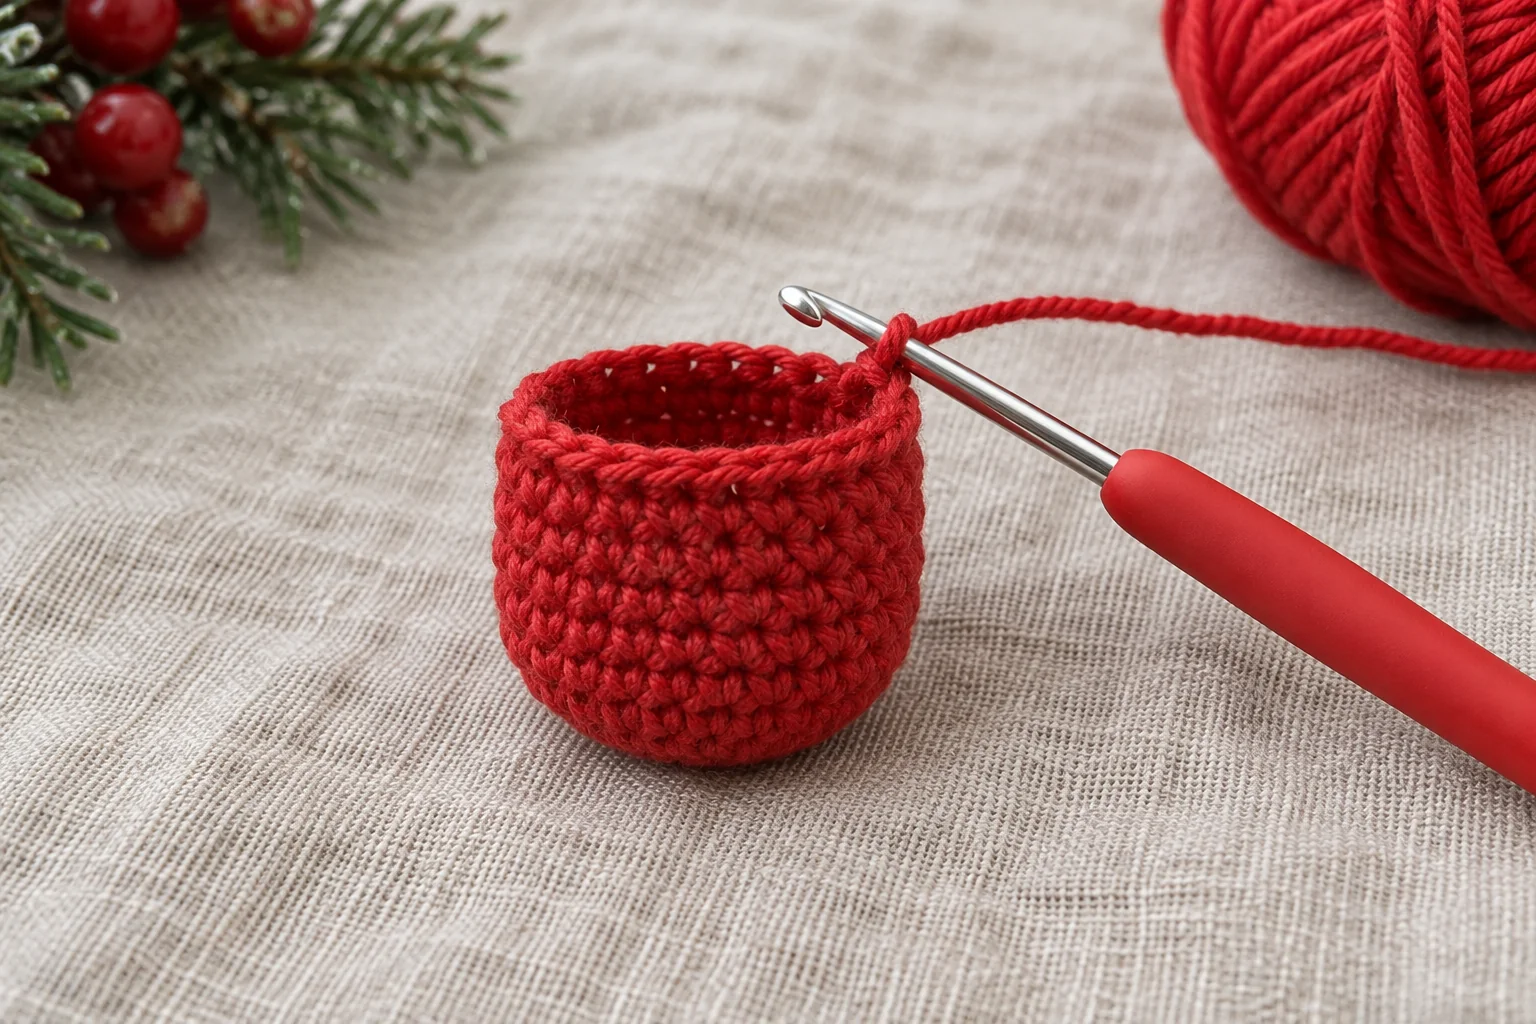
Continue in red.
- R4–R8: Sc in each stitch around. (18 each round)
The piece will begin to resemble a small rounded cup. Gently smooth it with your fingers as you work. Avoid pulling the sides flat, since the mitten needs a little depth for its finished shape.
At the end of R8, check the count again. You should still have 18 stitches. Do not add stuffing yet. Keeping the piece empty makes it easier to work into the thumb opening later.
Step 3: Create the Thumb Opening
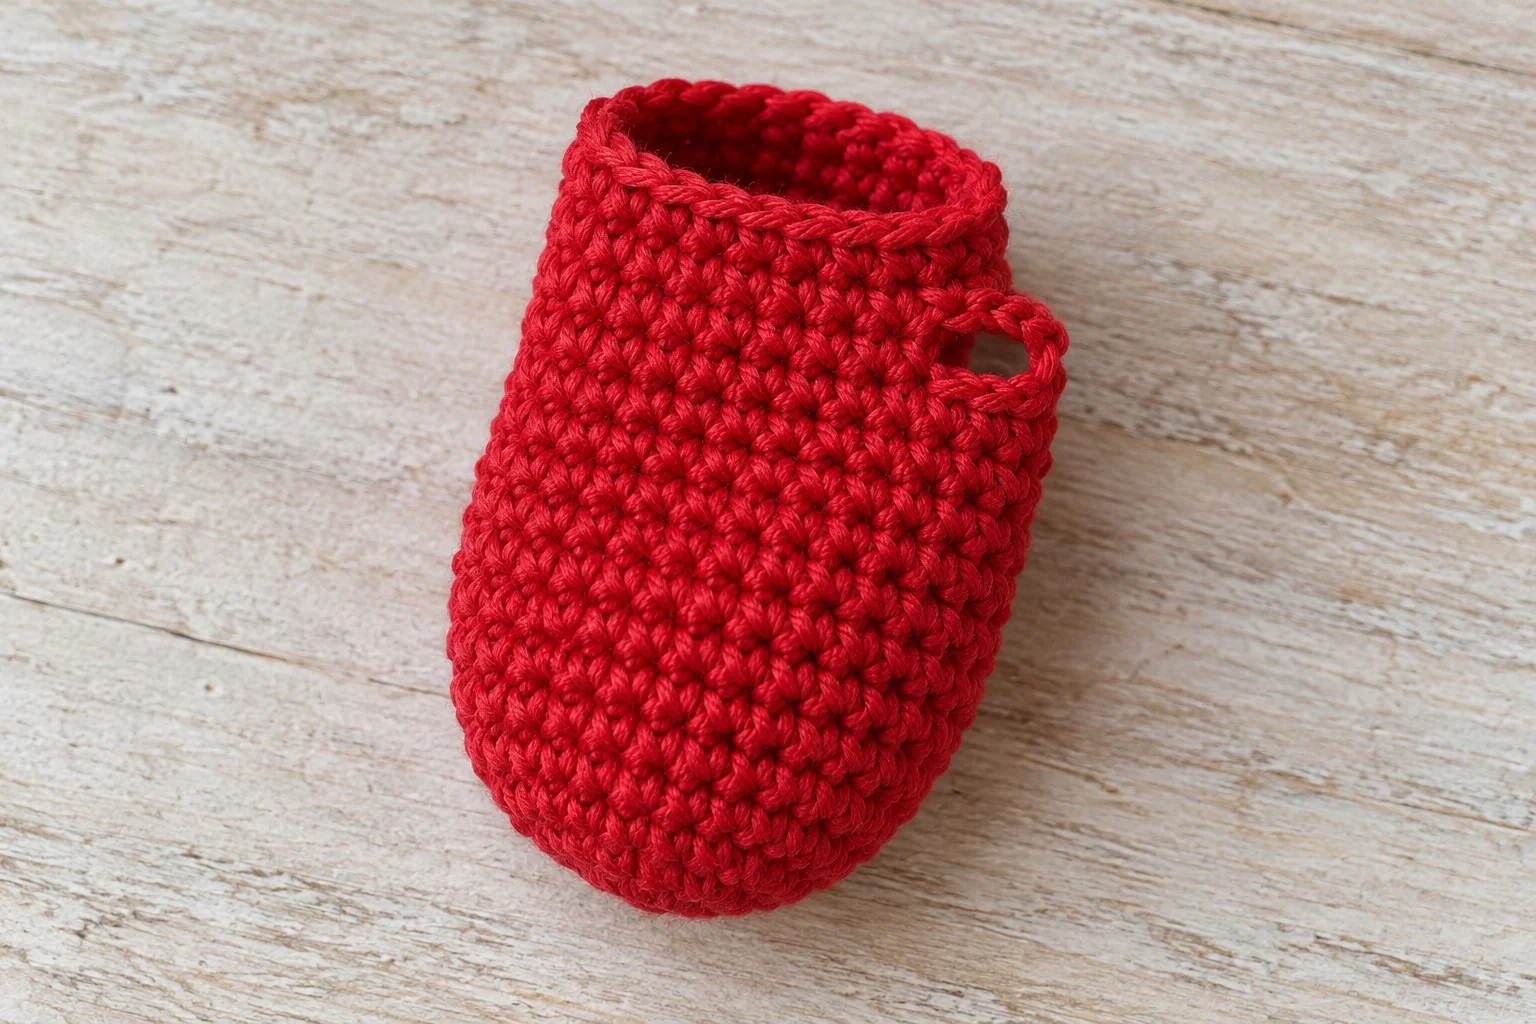
The next round leaves a small opening on one side of the mitten.
- R9: 6 sc, ch 3, skip the next 3 stitches, then 9 sc. (18, counting the 3 chains)
You have worked 15 single crochet stitches and created a three-chain bridge. The three skipped stitches sit below that bridge. Together, the bridge and skipped stitches form the opening where the thumb will be crocheted.
Keep the chains close to the size of your normal stitches. Very loose chains create an oversized opening, while very tight chains make the next round difficult to work.
- R10: Sc around, working 1 sc into each of the 3 chains. (18)
Work into one consistent loop of each chain. Do not crochet all three stitches into the space beneath the chain bridge. Before proceeding, check that the opening remains visible on the side and that R10 contains 18 stitches.
Step 4: Shape the Wrist
Continue in red.
- R11: (1 sc, dec) × 6. (12)
- R12: Sc in each stitch around. (12)
Finish with a sl st into the next stitch. Fasten off and weave the tail into the inside of the mitten. Leave the 12-stitch wrist opening unclosed.
The decrease round narrows the hand toward the cuff. It should create a gentle transition rather than a sharply pinched neck. If the wrist looks uneven, check that all six decreases were worked across two stitches. Do not compensate by adding stitches at random; correcting the round now gives a cleaner cuff attachment later.
Step 5: Crochet the Small Thumb
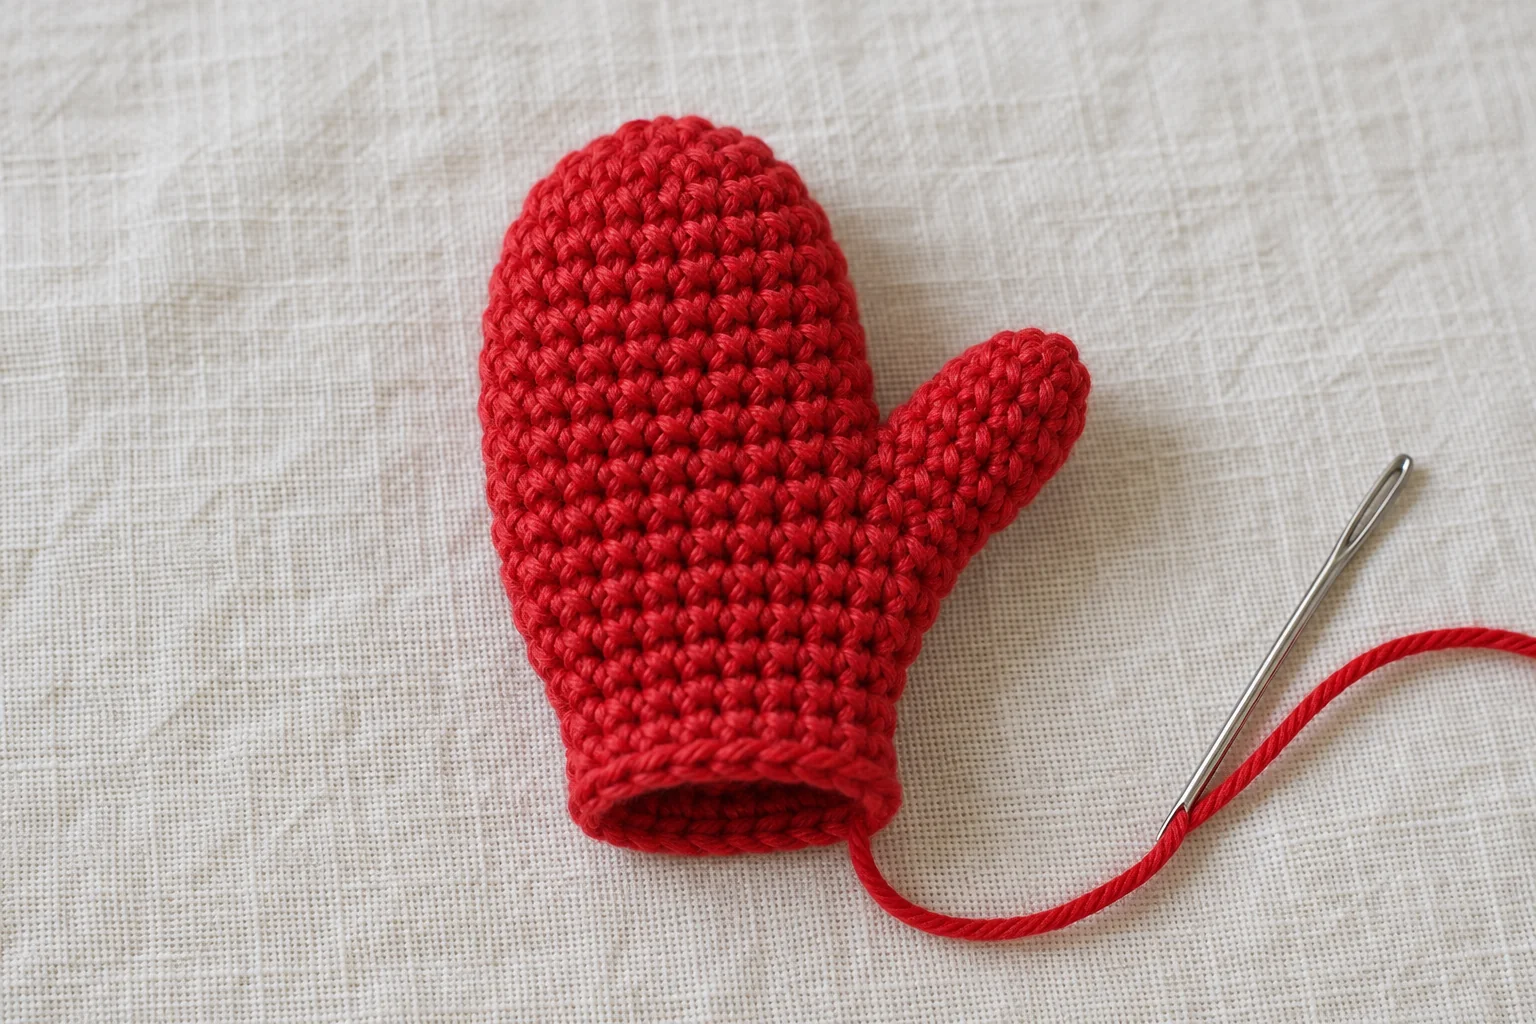
Hold the mitten with the thumb opening facing you. Join red yarn at one corner of the opening. Crochet around the entire edge as follows:
- Thumb R1: Work 3 sc along the exposed loops of the chain bridge, 1 sc at the first corner, 3 sc into the skipped stitches, and 1 sc at the second corner. (8)
- Thumb R2: Sc in each stitch around. (8)
- Thumb R3: Dec × 4. (4)
The corner stitches help fill the gaps where the chain bridge meets the hand. Place those stitches through firm loops at the corners. Avoid working into a large empty space, which can leave a visible hole beneath the thumb.
Before completing R3, add a tiny amount of filling if you want a rounded thumb. You can also leave it unstuffed for a softer shape.
Fasten off with a short sewing tail. Thread the tail through the front loops of the remaining four stitches, pull the opening closed, and secure the end inside. Use the joining tail to close any small gap at the thumb base. The finished thumb should project slightly from the side. It does not need to stand rigidly upright.
Step 6: Make the Ivory Ribbed Cuff
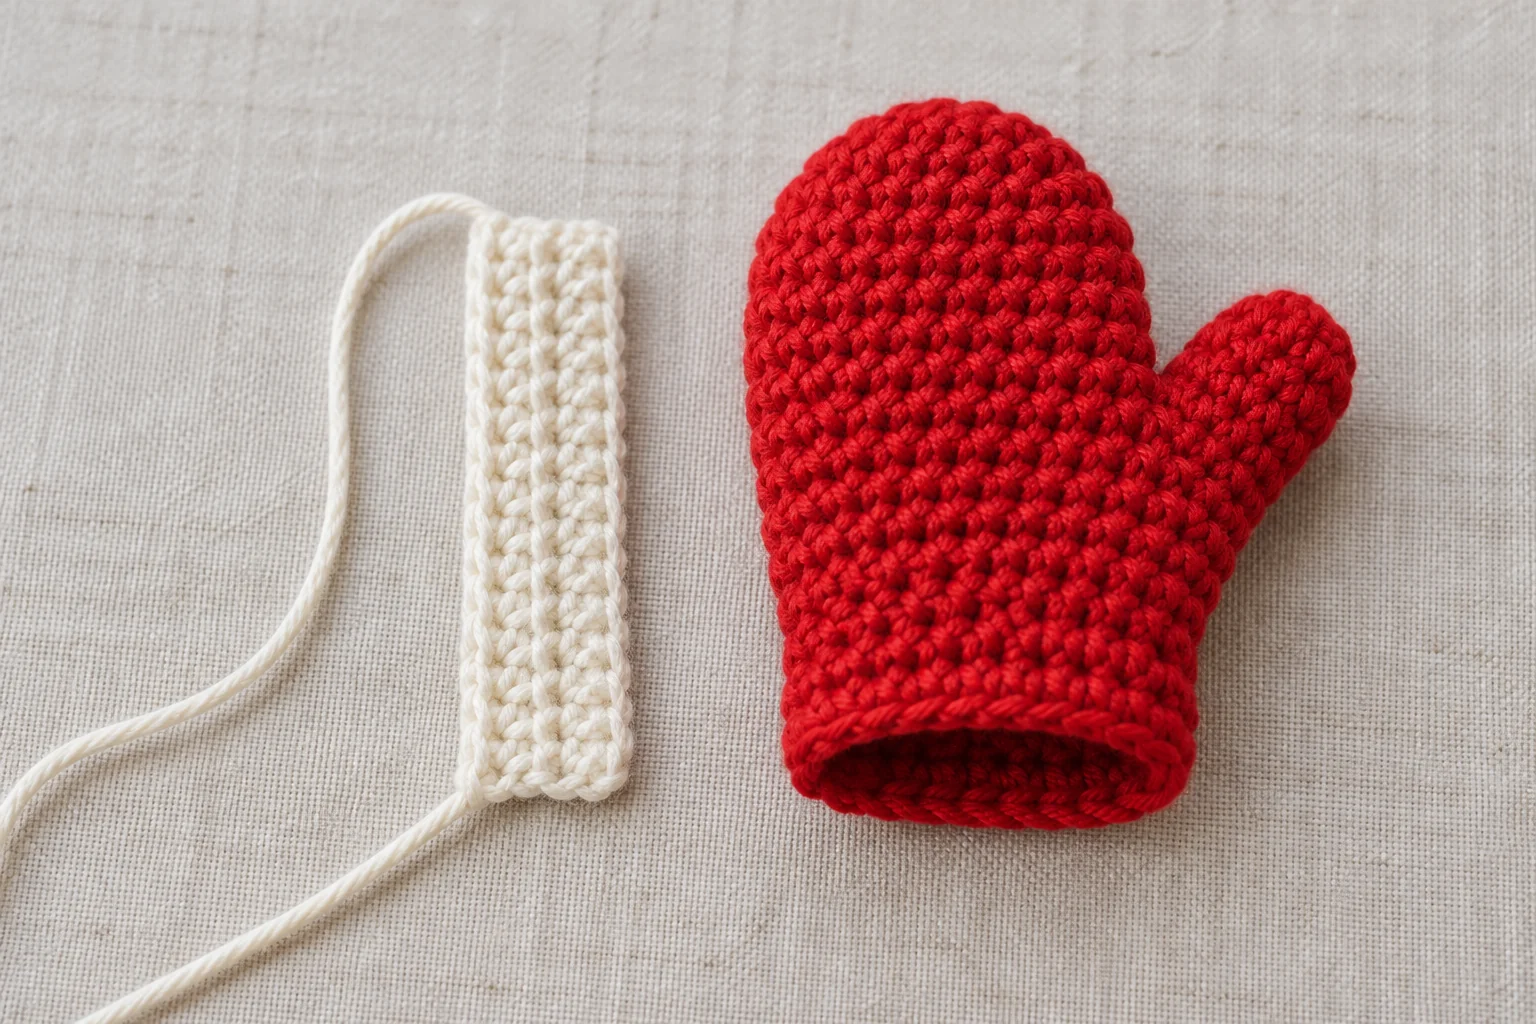
The cuff is worked as a small rectangular strip and joined into a ring. Use ivory yarn.
- Foundation: Ch 4.
- Row 1: Starting in the second chain from the hook, sc across. (3)
- Rows 2–12: Ch 1, turn, then sc BLO across. (3 each row)
The turning chain does not count as a stitch. Working into the back loops creates shallow ribs across the strip. Keep the turning chains relaxed so the edges remain straight.
Before joining, wrap the strip around the red wrist. Its 12 row ends are intended to match the 12 wrist stitches. The strip should fit without stretching the red opening noticeably. If your yarn or tension produces a poor fit, adjust the cuff length by a row or two and distribute the attachment stitches evenly.
Bring the short ends together. Sew the three foundation stitches to the three stitches of the final row to form a small ring. Leave a long ivory tail for attaching the cuff.
Attach the Cuff
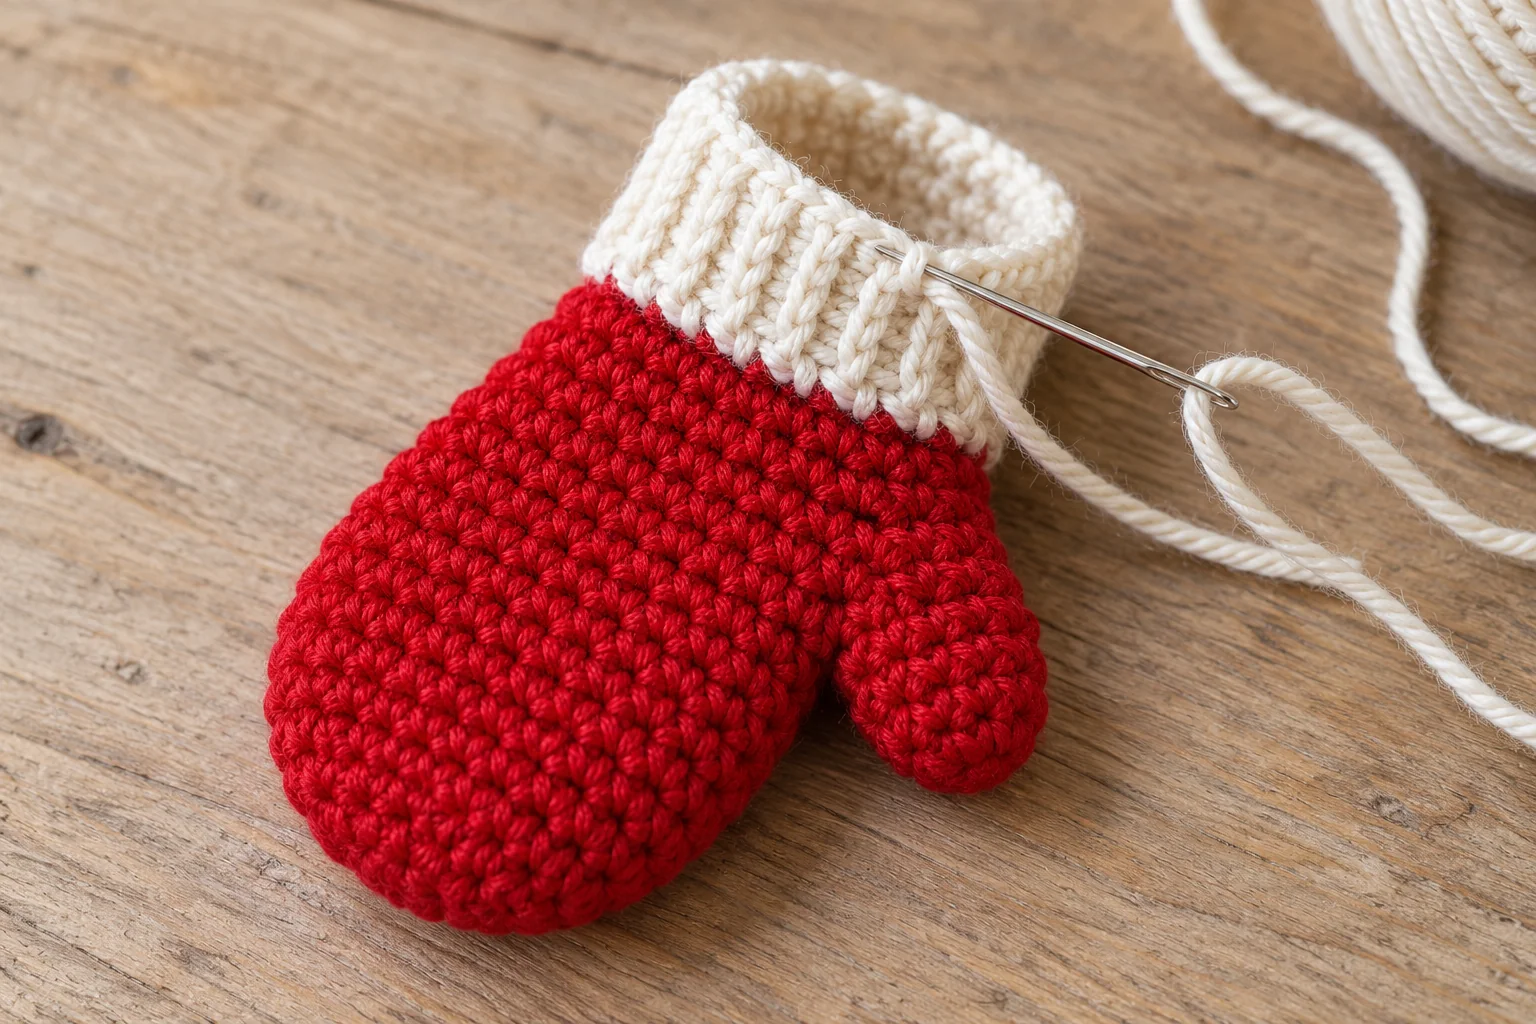
Add a small amount of stuffing to the red hand through the wrist opening. Keep the filling below the wrist edge. Place the ivory cuff around the opening, with its joining seam toward the back.
Sew one long edge of the cuff to the red wrist. For the standard 12-row cuff, match one row end to each of the 12 wrist stitches. Keep the other edge of the cuff open. The cuff covers and extends the wrist opening; it does not need to be gathered shut.
Secure the yarn and weave in the remaining tail.
Step 7: Add the Hanging Loop and Keyring
Use red yarn.
- Ch 12.
- Fasten off, leaving a sewing tail at each end.
Fold the chain into a loop and attach both ends to the back of the mitten near the red-and-ivory join.
Sew through several firm stitches rather than anchoring the loop to one strand of yarn. Make multiple passes with each tail, then weave the ends securely inside. Thread the metal split keyring through the chain loop.
Check that the ring moves freely and that the attachment does not pull the cuff out of shape. If you prefer a shorter loop, reduce the chain length before attaching it. For a Christmas tree decoration, leave off the metal ring and use the crochet loop as the hanger.
Finishing and Troubleshooting
The thumb opening has small gaps
Use the red joining tail to sew across the gaps at the two corners. Follow the surrounding stitches and avoid pulling so tightly that the thumb base becomes pinched.
The mitten looks too round
Remove a little filling through the open cuff and smooth the hand into a gently flattened mitten shape. The thumb should remain visible from the front.
The cuff flares outward
Check that the cuff is not too long for the wrist. A small amount of flexibility is useful, but excess length creates a ruffled edge.
The cuff looks twisted
Position its joining seam at the back, then check that each row end follows the wrist evenly. Pin or loosely baste the cuff in place before completing the seam.
The hanging loop feels loose
Add more securing stitches through the red fabric near the wrist. The loop should connect to the mitten itself, with the cuff helping conceal the attachment.
Color and Gift Ideas
Red and ivory create the classic Christmas version, but the same construction also works in forest green, burgundy, or navy. For a coordinated set, keep the cuffs ivory and change the main mitten color. Make each mitten separately using the same stitch counts.
You can attach the finished piece to a gift tag or tie it around a wrapped present. Keep any additional decoration lightweight so the tiny mitten hangs comfortably.
Frequently Asked Questions
Is this mini crochet mitten suitable for beginners?
It suits confident beginners who can crochet in rounds, increase, decrease, and sew a simple seam. The thumb opening is the section that requires the most careful counting.
Can I use thicker yarn?
Yes. Thicker yarn produces a larger mitten and may require a larger keyring. Choose a hook that creates dense fabric, and check the cuff fit before sewing it on.
Do I need to stuff the mitten?
No. Light stuffing helps create the rounded appearance, but an unstuffed mitten makes a flatter charm. Avoid filling it so firmly that it loses its mitten shape.
Is the thumb made separately?
No. It is crocheted directly around the opening created in R9. Only the ivory cuff is made separately and sewn onto the wrist.
Can I make a matching pair?
Yes. Make a second mitten using the same instructions. Rotate and position the pieces as needed for display; this miniature pattern does not include separate left- and right-hand shaping.
Can I use it as a Christmas ornament?
Yes. Omit the metal keyring and use the red chain loop to hang it. Adjust the loop length to suit the branch or display hook.
Will the finished mitten look exactly like the image?
The image illustrates the intended design. Your result may vary because of yarn thickness, tension, stuffing, and finishing. The written pattern has not been physically tested.
Your Mini Christmas Mitten Is Finished
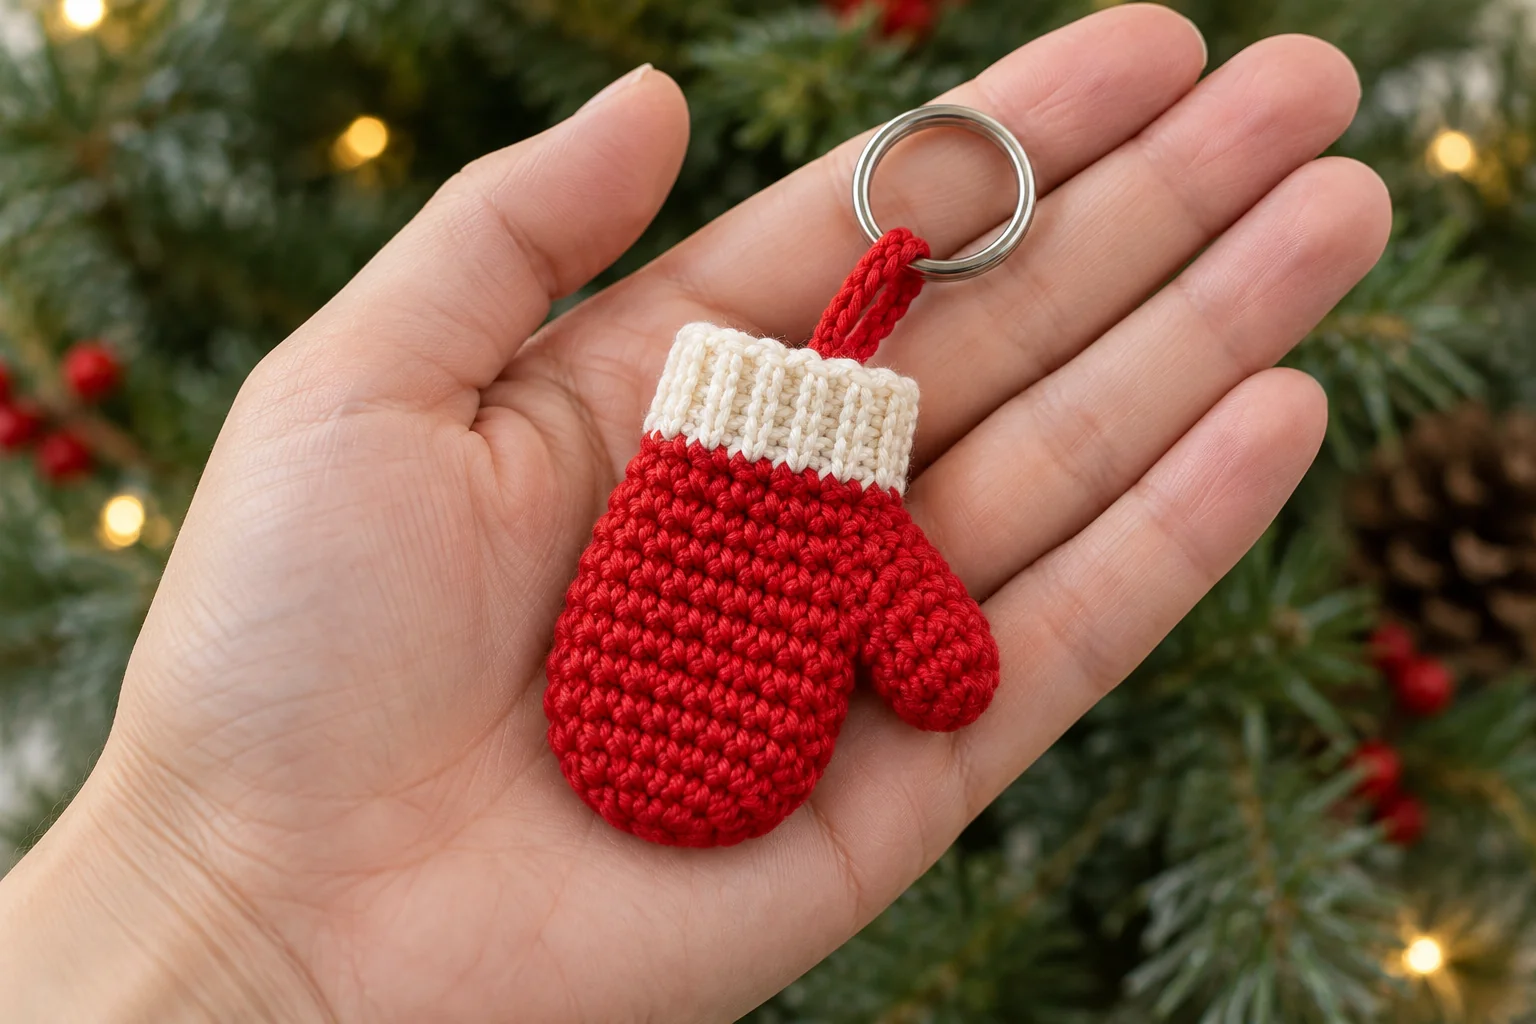
Check the thumb closure, cuff seam, and hanging loop before using the charm. Smooth the red hand, straighten the ivory cuff, and make sure no yarn ends remain visible.
Your crochet mini Christmas mitten keychain is ready to add a small festive detail to a bag, a set of keys, or a wrapped gift.
For another winter character, explore our free crochet gingerbread man pattern. For a small accessory to make during the autumn season, try the crochet witch hat keychain pattern.