Crochet Christmas Bow Garland – Free Step-by-Step Pattern
Make a crochet Christmas bow garland with six burgundy and ivory bows. Follow the free pattern for the loops, tails, center wraps, and hanging cord.
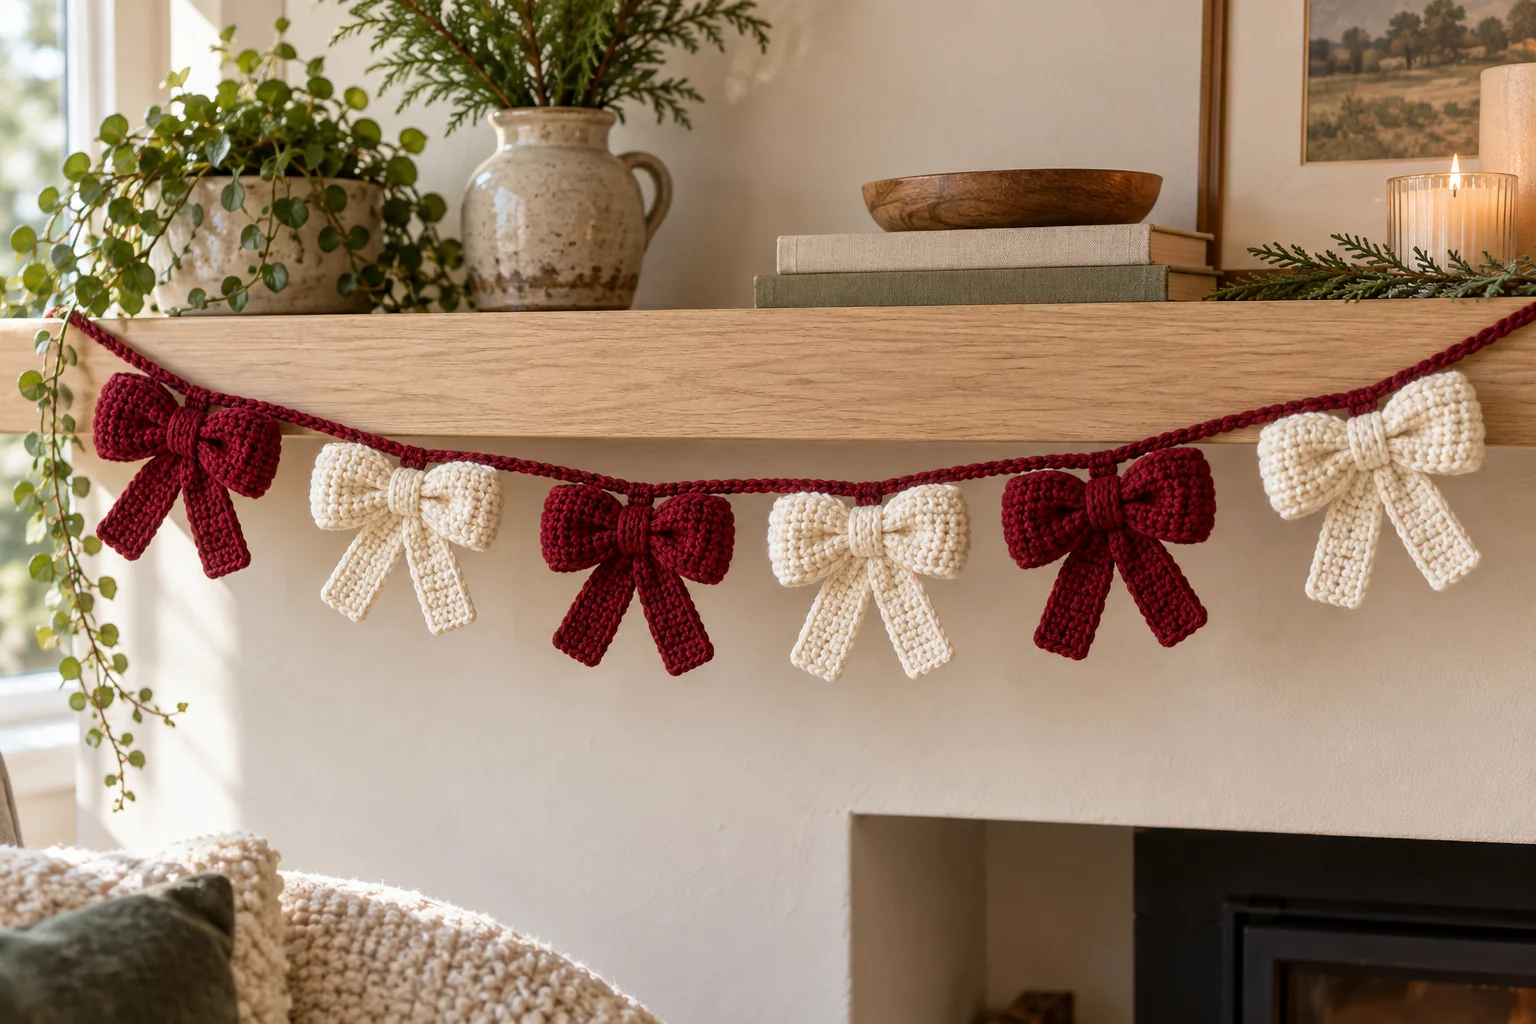
Make a crochet Christmas bow garland with six soft bows in burgundy and ivory, joined to a simple matching crochet chain. Each bow combines a folded rectangular band, a separate tail strip, and a narrow center wrap. The pieces use half double crochet and single crochet, so the construction is easy to follow without shaping or complicated stitch patterns.
This free pattern explains how to crochet the pieces, arrange the tails, secure the centers, and attach all six bows to the cord. Hang the finished garland across a shelf or use it as a reusable decoration for a seasonal display. The colors alternate along the cord, creating a warm, traditional Christmas look.
Pattern note: This original written design has not been physically tested. Dimensions and yarn quantities are preparation estimates. Illustrative images show the intended appearance rather than a verified finished sample. Check your pieces against the written counts and adjust the center-wrap length to fit your actual fabric.
Crochet Christmas Bow Garland: Project Overview
The project suits a confident beginner who can count stitches, work into a foundation chain, and sew a short seam. All instructions use US crochet terminology. You will work every piece flat in turned rows, then assemble the bows before attaching them to the garland cord. Nothing is stuffed, and the cord carries the bows as decorative accents rather than supporting any useful weight.
Make six bows: three burgundy and three ivory. For each bow, crochet one main band, one tail strip, and one center wrap in the same color. Use burgundy for the hanging cord. You can change the palette, but keep all yarns the same weight so the bows have similar proportions.
The main band starts with 36 half double crochet stitches and folds to roughly half its original width. Its finished size depends on your gauge. As a planning example, a fabric with 20 half double crochet stitches per 10 cm gives an approximately 18 cm flat band and a 9 cm folded bow, before gathering. This is a calculation, not a measured sample.
Materials and Tools
Use smooth DK cotton or a cotton blend in burgundy and ivory. Allow approximately 75 g of each color as a starting purchase estimate; actual consumption varies with yarn meterage and tension. Keep some burgundy yarn for the cord and assembly. Smooth yarn makes the stitch tops easier to identify than velvet, especially for a first attempt.
You also need a 3.5 mm crochet hook or a size that creates flexible, reasonably firm fabric, a blunt yarn needle, scissors, removable stitch markers, and a measuring tape. A few clips help hold the folds during assembly. Choose a blunt needle that passes through the stitches without splitting the yarn.
The cotton version described here is the reference design for the tutorial. Velvet yarn creates a different texture and may change both the size and the way the ends behave. If you try velvet later, make a sample bow before preparing a complete set.
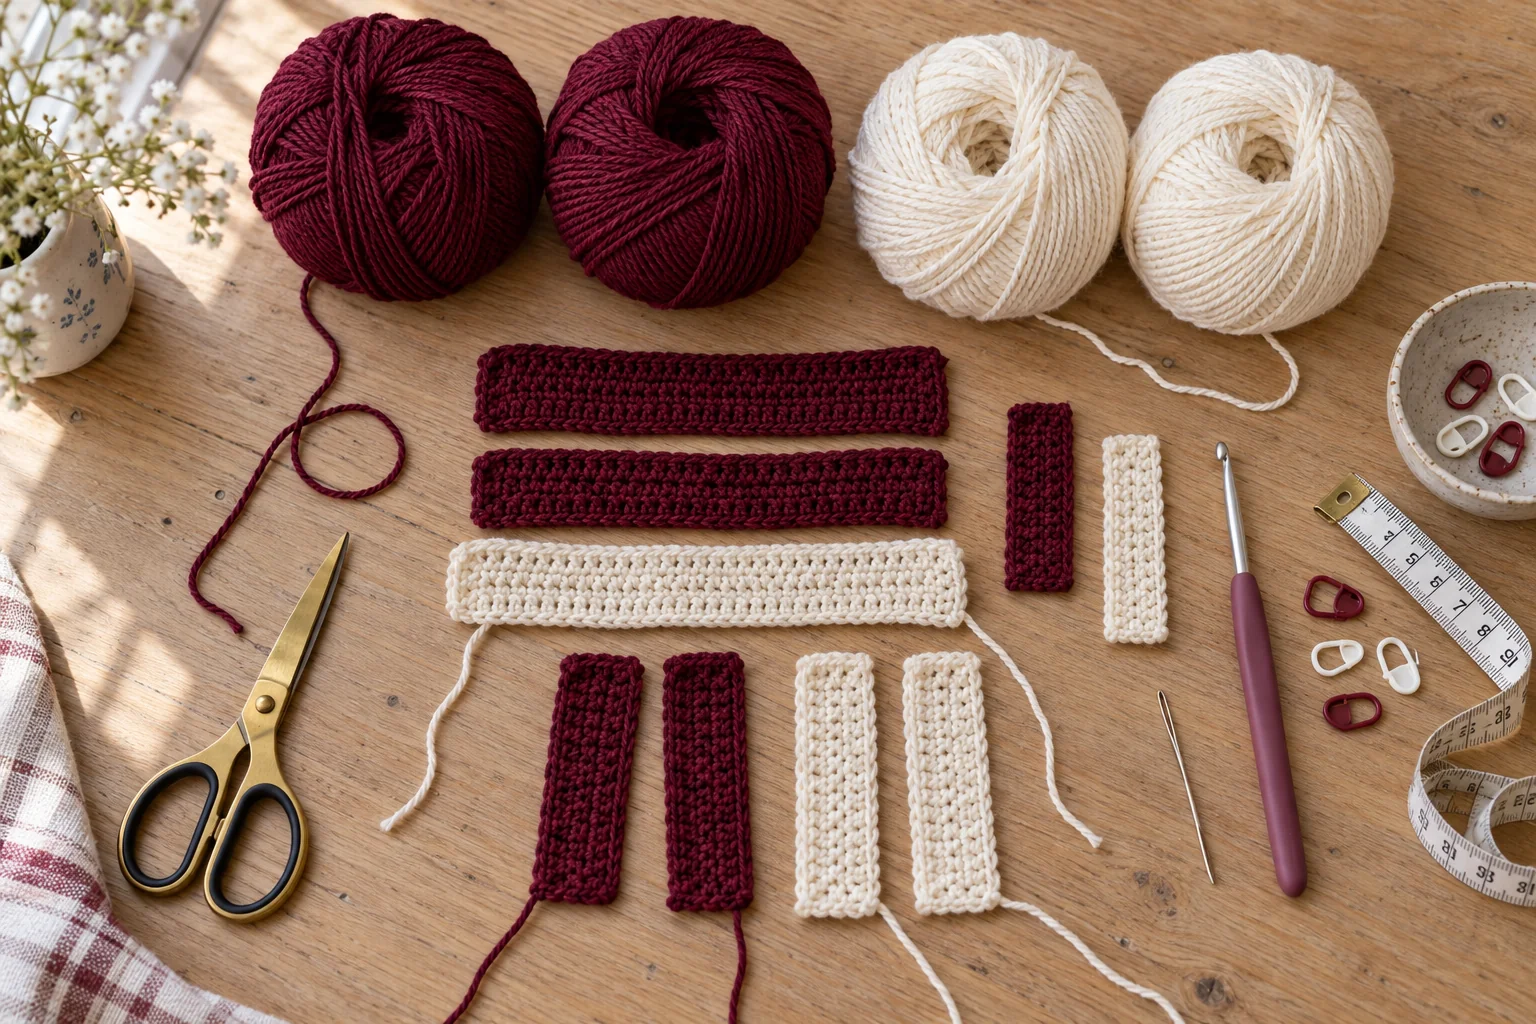
Abbreviations and Counting Rules
ch = chain; sc = single crochet; hdc = half double crochet; st = stitch; sts = stitches. A turning chain raises the yarn to the next row and does not count as a stitch in this pattern. Work through both top loops unless a step says otherwise.
To make a half double crochet, yarn over, insert the hook into the specified stitch, yarn over and pull up a loop, then yarn over and draw through all three loops. For a single crochet, insert the hook, pull up a loop, then yarn over and draw through both loops.
Place markers in the first and last actual stitches of a row if the edges are hard to see. Move the markers as you work. Counting at the end of each row is easier than correcting a missing edge stitch after the rectangle is finished.
Step 1: Crochet the Main Bow Band
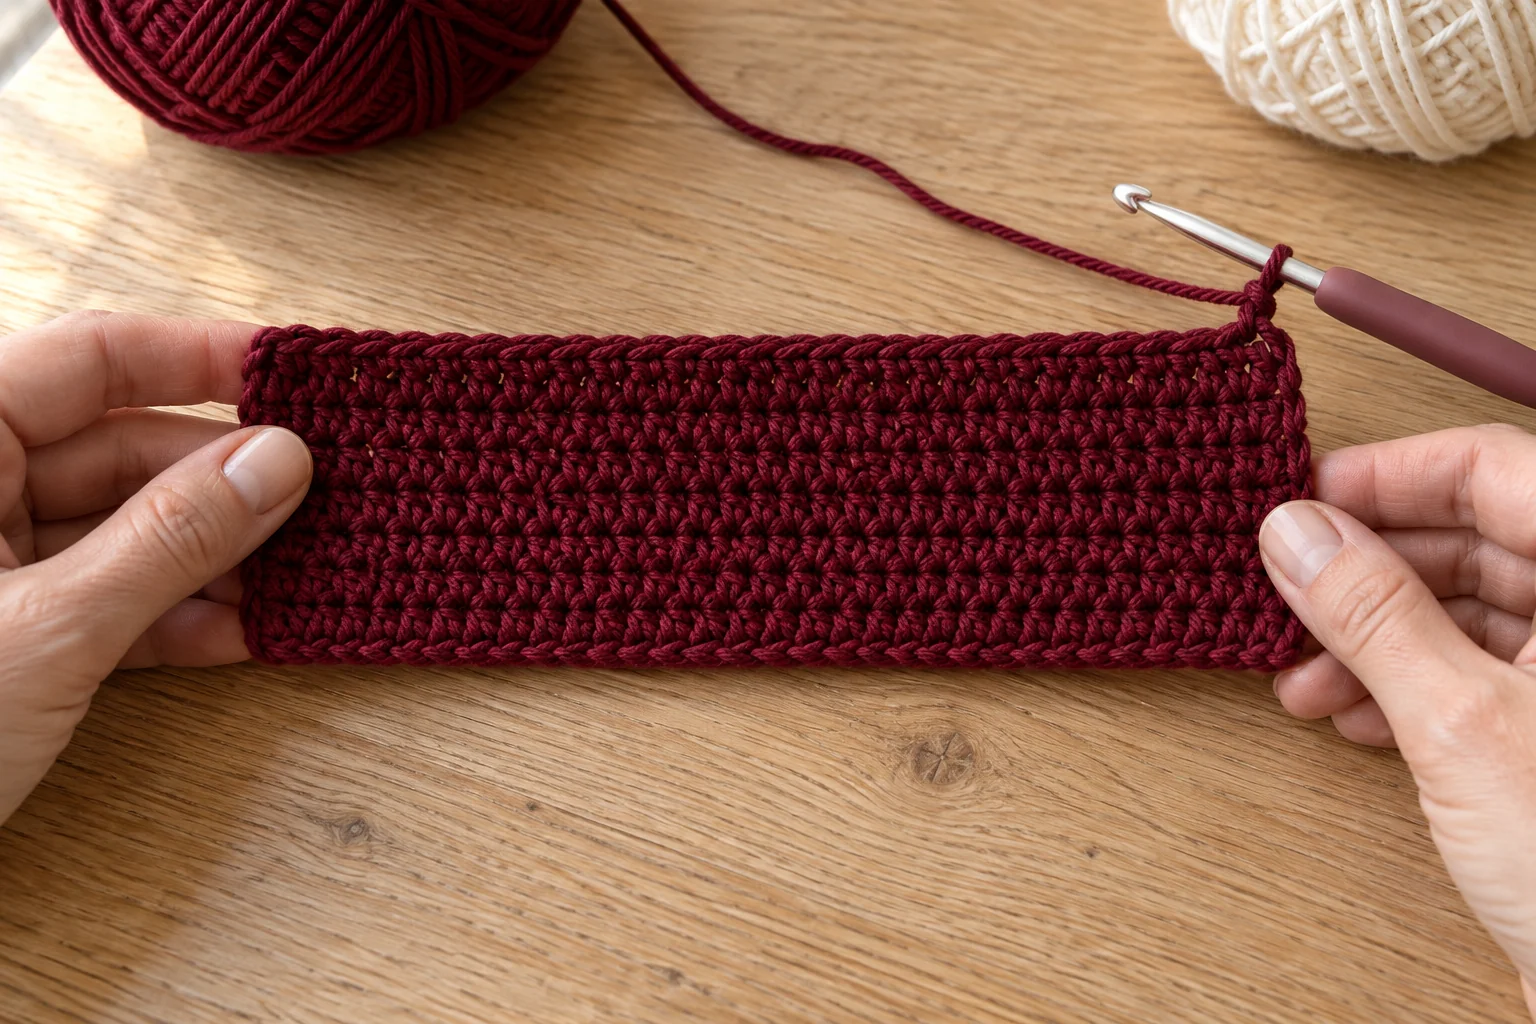
Make three main bands in burgundy and three in ivory. For one band, chain 38 loosely. Row 1: hdc in the third chain from the hook and in every remaining chain. You have 36 hdc. The two skipped chains do not count as a stitch.
Rows 2–8: ch 2, turn, and work 1 hdc in each of the 36 stitches. Finish each row with 36 hdc. Do not work into the turning chain at the end. After Row 8, fasten off, leaving a tail approximately 30 cm long for the seam.
Lay the rectangle flat and check its edges. It should have eight rows of equal width. A little curling is manageable; a visibly narrowing or widening shape usually means the stitch count changed. Correct that before joining the ends, because the seam will make an uneven band harder to hide.
Step 2: Join the Band into a Loop
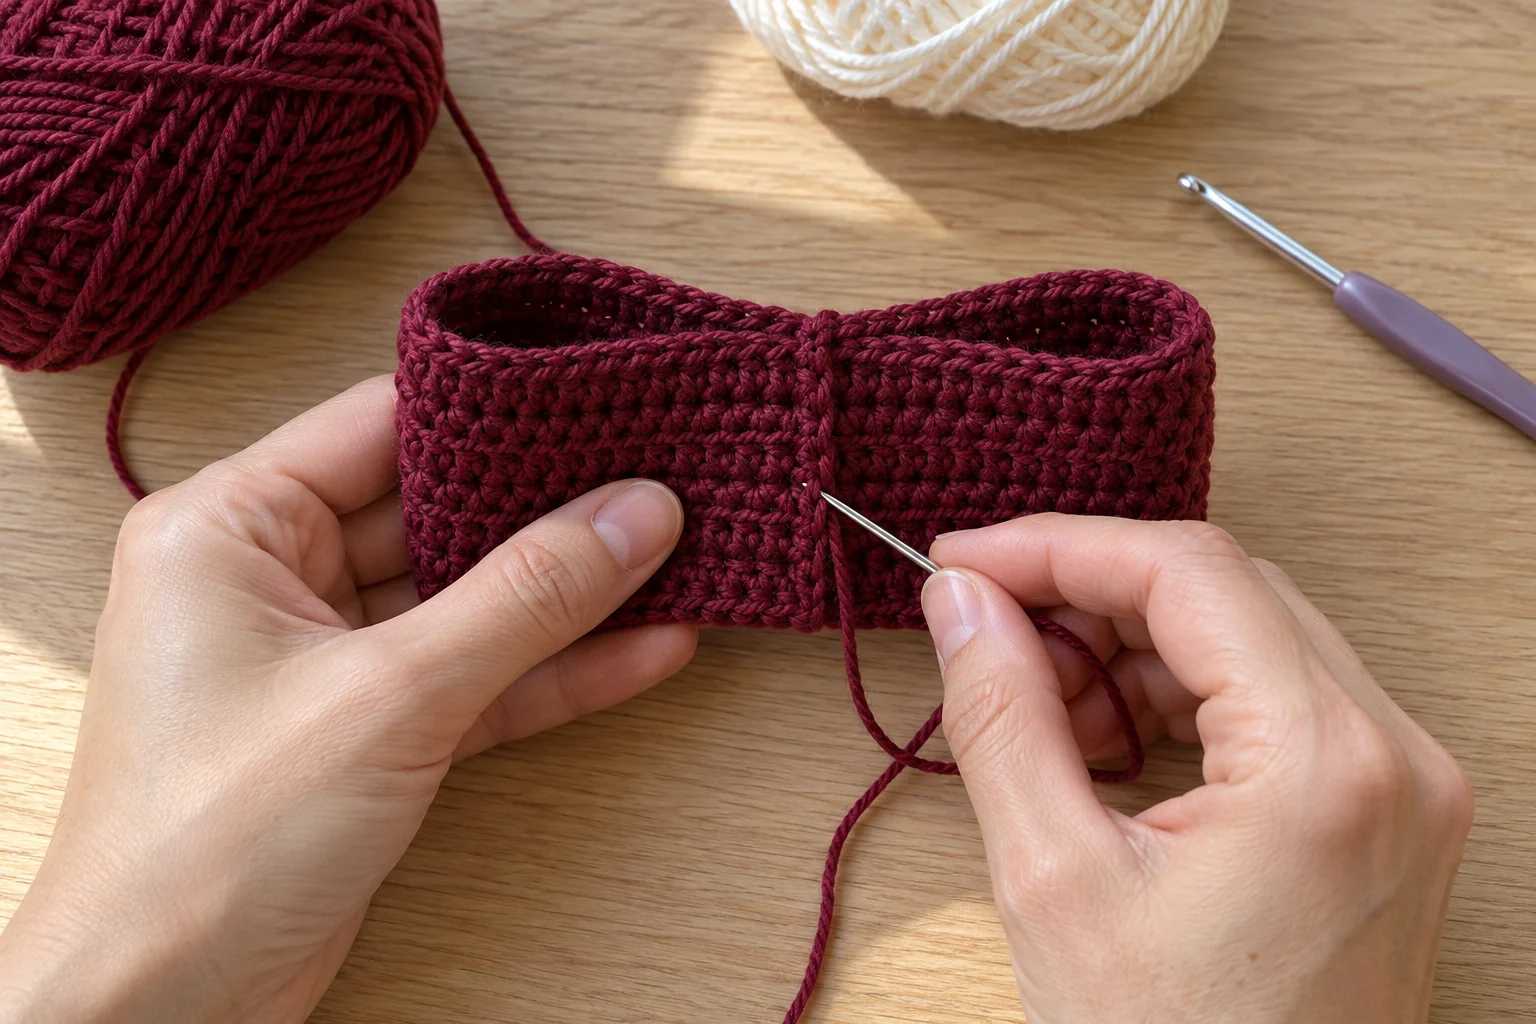
Bring the two short ends of the rectangle together without twisting the fabric. Each short end is eight rows tall. Use the long yarn tail to sew these two ends together, pairing corresponding row ends. This seam closes the strip into a wide, flat ring. Do not join the long foundation and top edges.
Flatten the ring so the seam sits at the center of the back. The folded left and right sides will become the outer edges of the bow loops. Place a clip at the center to hold the seam in position while you prepare the tail strip.
If you need help keeping a seam tidy, see our guide to sewing crochet pieces together. The garland uses flat pieces, but the advice about matching edges and securing yarn ends is useful here too.
Step 3: Crochet the Tail Strip
Make one tail strip in the same color as each band. Foundation: ch 32. Row 1: hdc in the third chain from the hook and in every remaining chain, making 30 hdc.
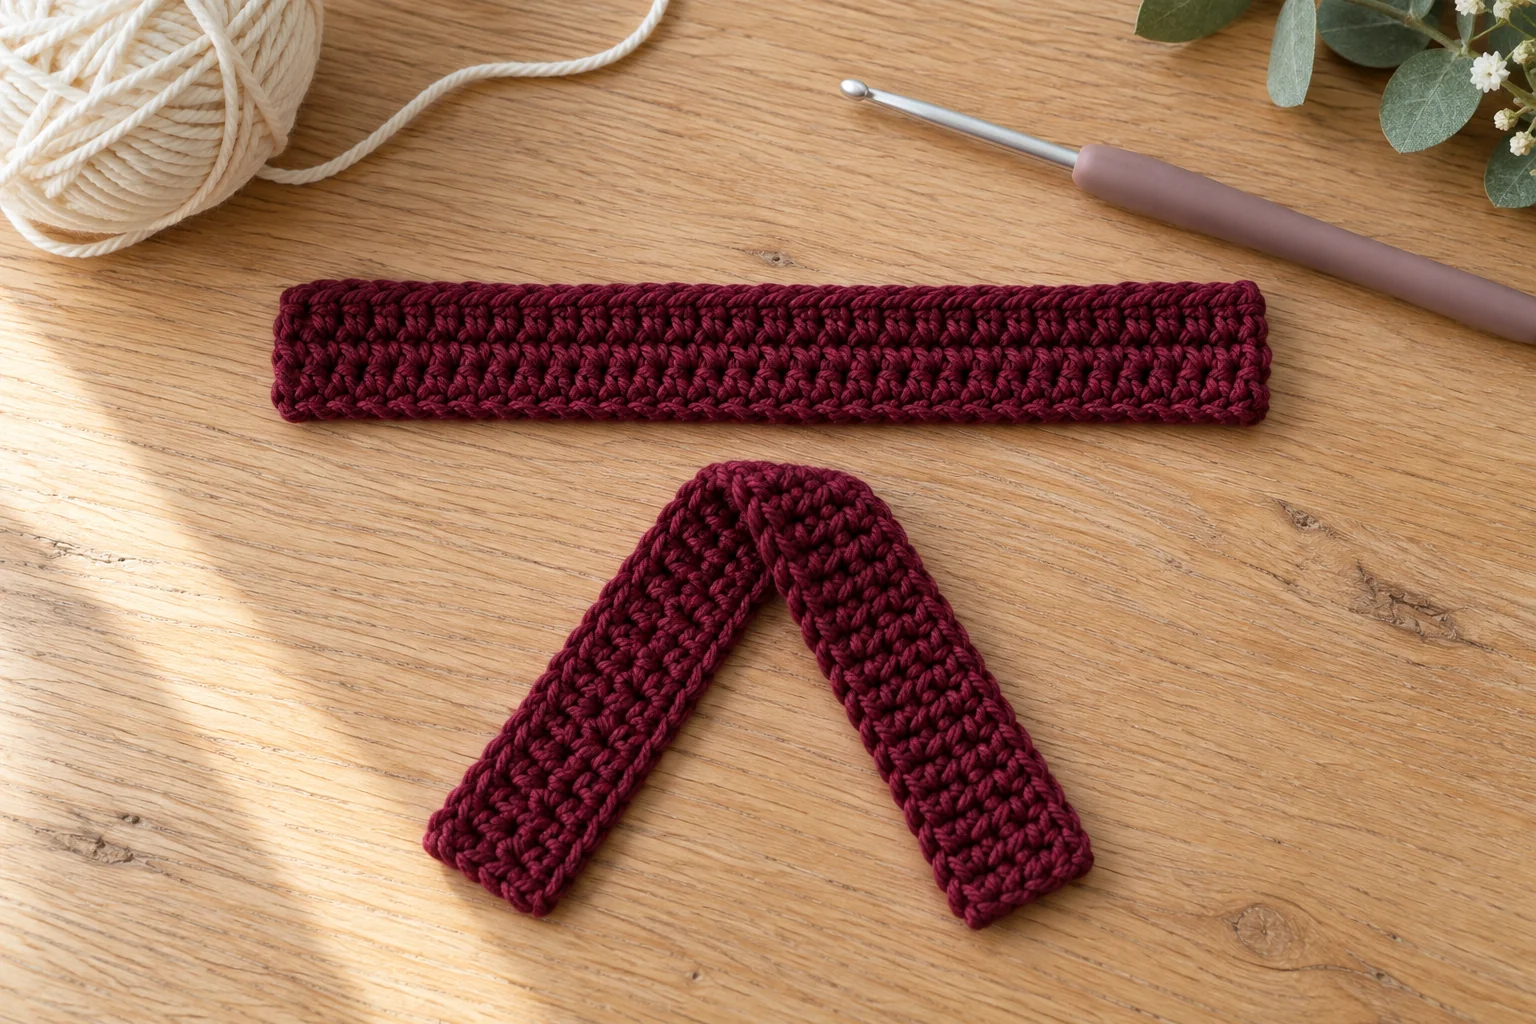
Rows 2–4: ch 2, turn, and hdc in every stitch across. Each row contains 30 hdc. Fasten off and weave in the ends. You now have a short, wide strip with straight ends. This pattern does not create pointed or fishtail tips.
Fold the strip at its midpoint into an inverted V, so the two ends hang downward. Keep the right and left tails close to equal in length. The strip may curve slightly as it folds; smooth it with your fingers instead of pulling it firmly out of shape.
Step 4: Make the Narrow Center Wrap
For each center wrap, ch 5. Row 1: sc in the second chain from the hook and in the remaining three chains, making 4 sc. Rows 2–10: ch 1, turn, and sc in every stitch across, maintaining 4 sc.
Leave the working loop live after Row 10. The number of rows needed for the wrap depends on the thickness of your gathered band and tails. The fit check in the next step determines the final length. Keeping the loop live lets you add or remove rows without undoing a finished fasten-off.
Step 5: Assemble Each Bow
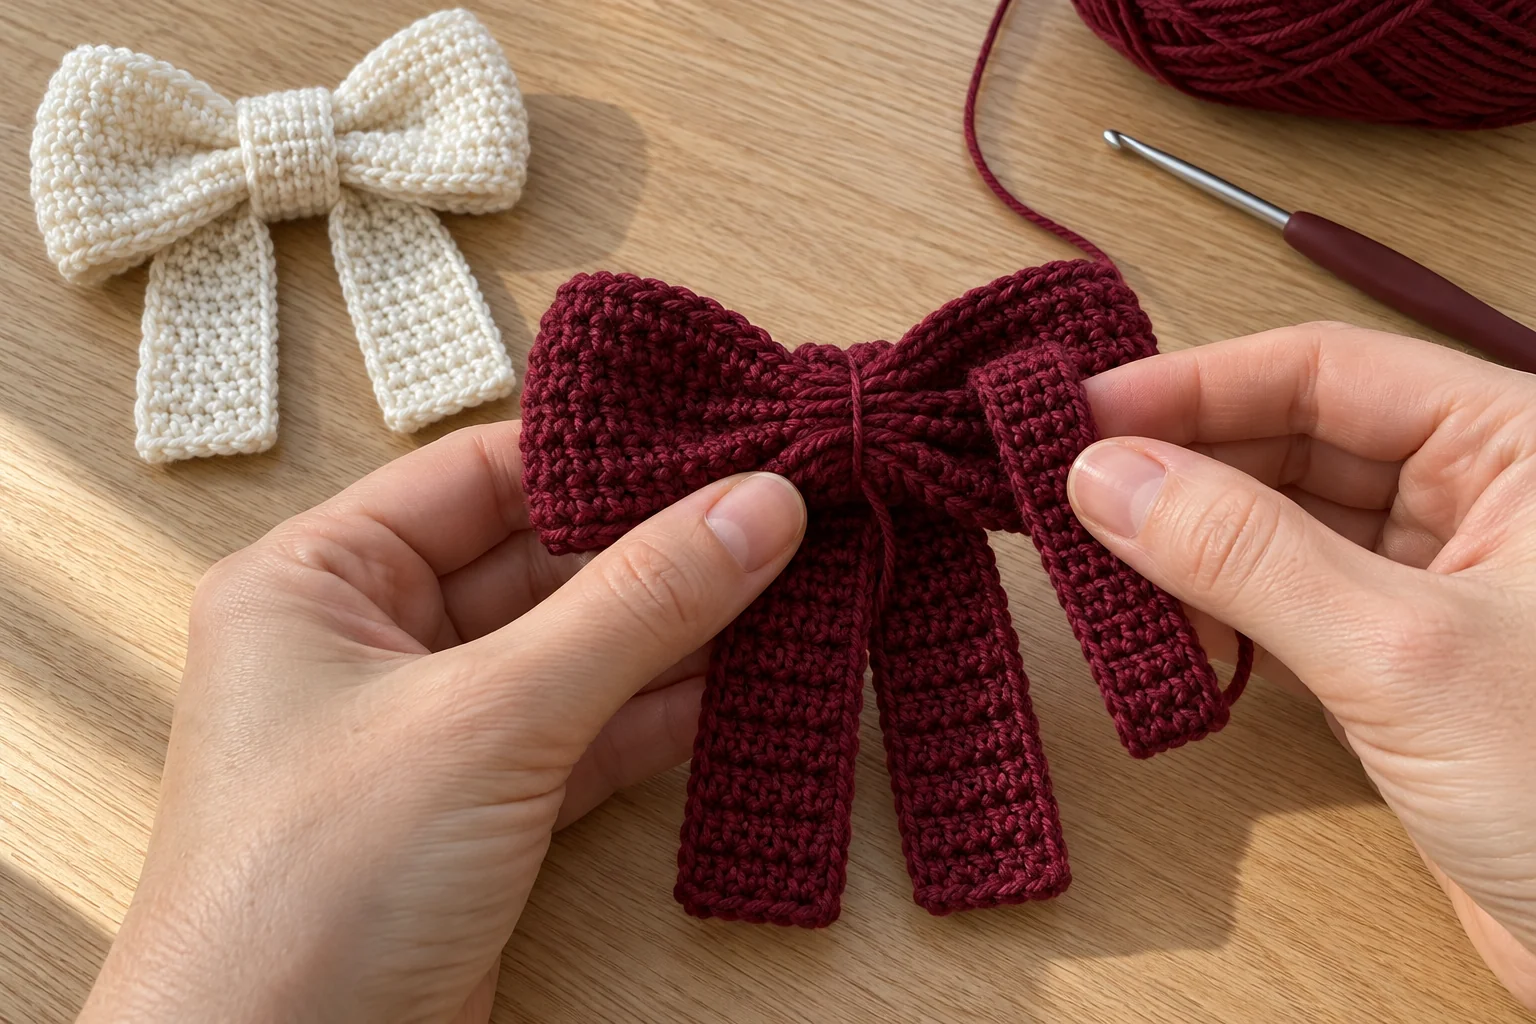
Gather the middle of the flattened band into a small accordion fold, keeping the seam behind that center. Place the folded midpoint of the tail strip behind the gathered band. Its two tails should hang below the bow, and the side loops should remain visible above them.
Wrap a short matching strand around the middle several times and tie securely at the back. This temporary assembly strand holds the layers while you fit the crocheted center wrap. Avoid pulling so tightly that the cotton cuts into the fabric or distorts the loops.
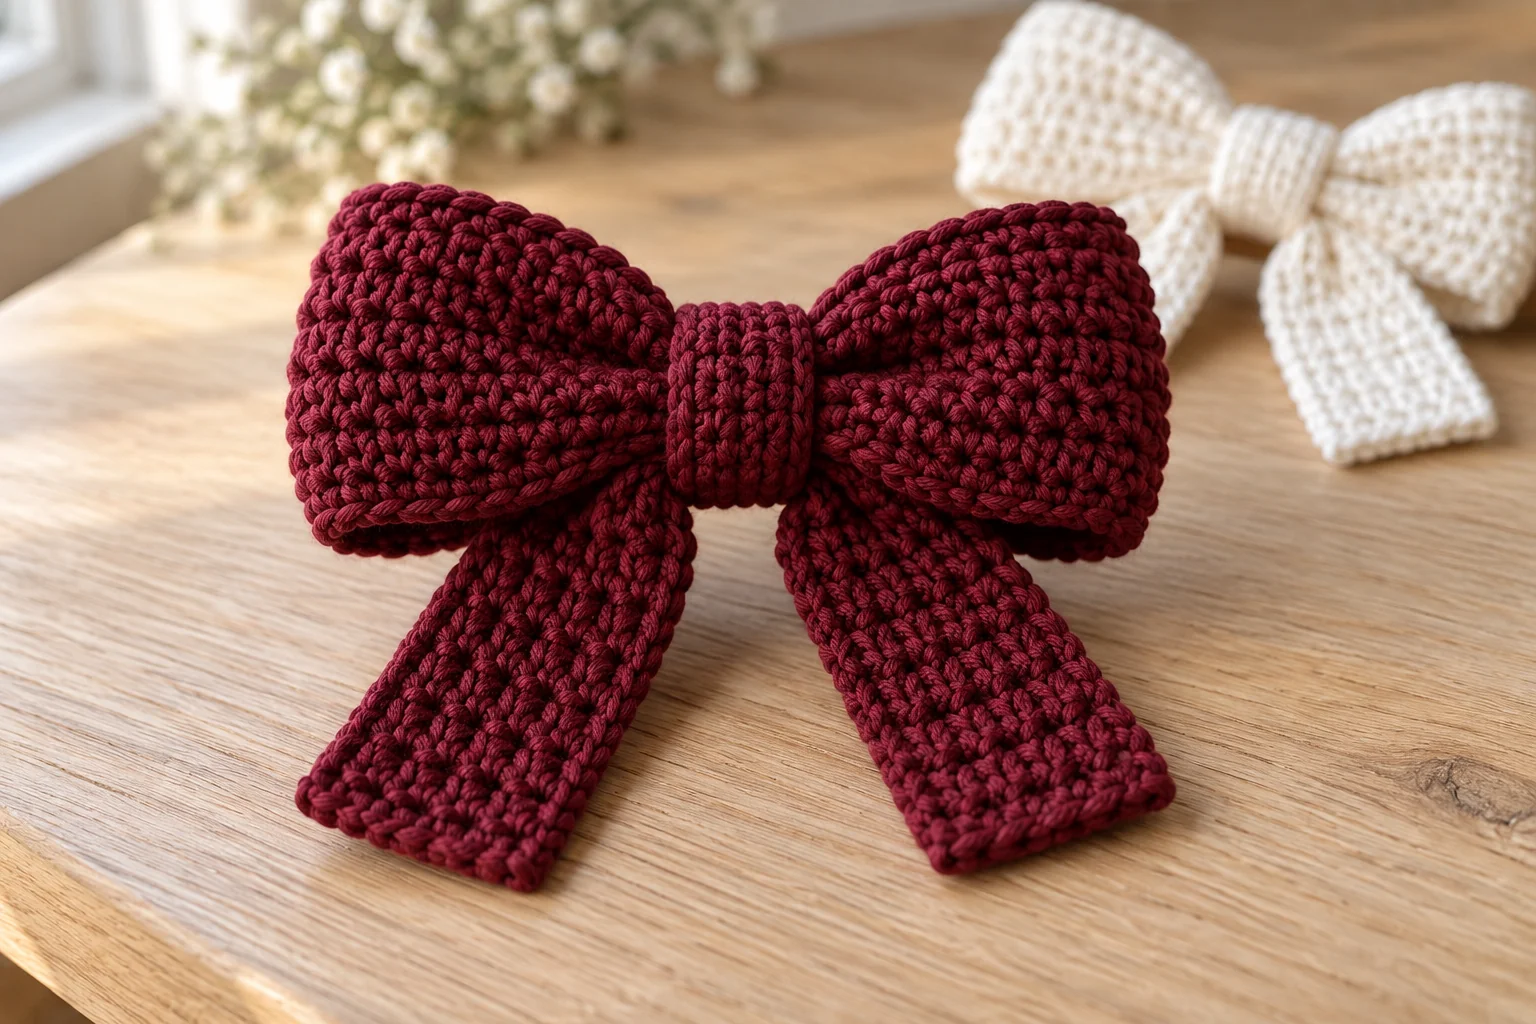
Pass the center wrap around the gathered band and folded tail midpoint. Its ends should meet at the back with light tension, without crushing the bow. Add rows of 4 sc if it is too short, or remove rows if it overlaps loosely. Fasten off with a sewing tail, join the wrap ends at the back, and secure them to the hidden layers so the wrap cannot rotate. Weave in all remaining ends.
Repeat for all six bows, using the first completed bow as a guide for the remaining folds. Compare the loop sizes and tail positions before securing each center. Small adjustments at this stage make the complete set look more consistent.
Step 6: Crochet and Mark the Garland Cord
In burgundy, chain 180, keeping the tension even. Fasten off, then weave the yarn ends back through the chain securely. The cord length is determined by your chain gauge; measure the actual result before choosing where to display it. Do not promise a fixed finished length from the chain count alone.
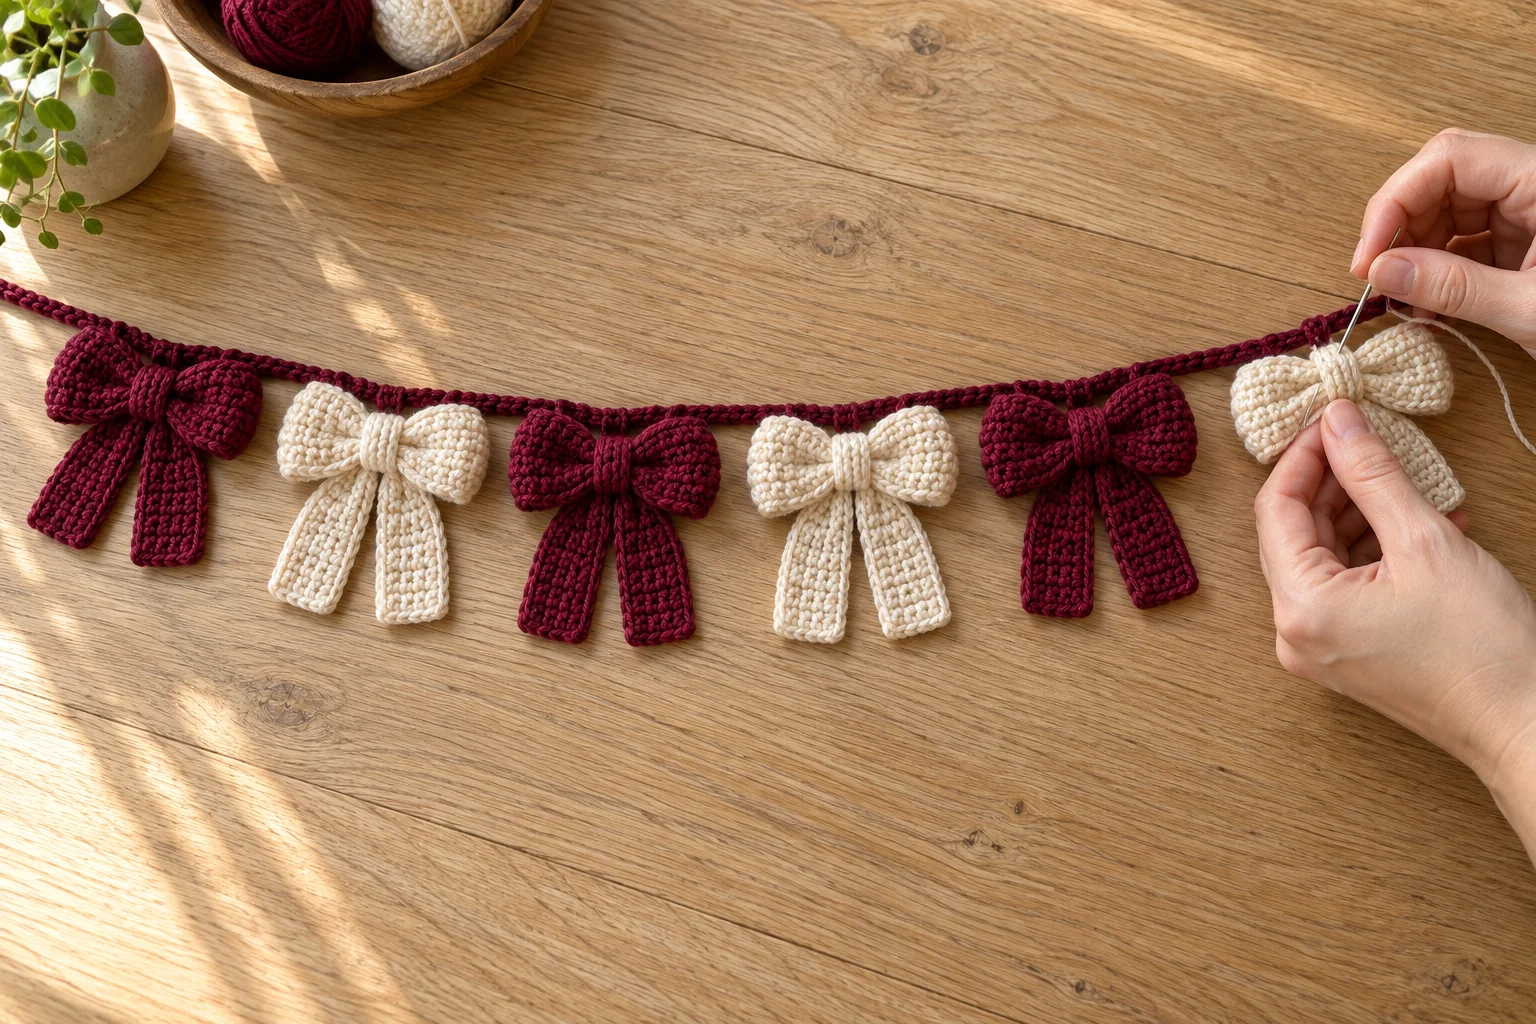
Count the chains from the starting end and place markers in chains 30, 54, 78, 102, 126, and 150. These six positions are separated by 24 chains. The remaining cord at either end gives space for tying the decoration to suitable supports.
Lay the cord on a table with the markers visible. Arrange the bows below them in this order: burgundy, ivory, burgundy, ivory, burgundy, ivory. Check the color sequence and spacing before you start sewing.
Step 7: Attach the Bows and Finish
Using a separate matching strand for each bow, sew the upper back of its center wrap to the marked chain. Make several passes through the wrap and around the cord, catching neighboring chain links if needed to distribute the load. Keep the stitches hidden at the back and avoid sewing through the visible front of the bow.
Secure and weave in each attachment strand. Lift the garland gently over a table to check that every bow stays attached and hangs in the intended direction. Adjust a twisting bow by repositioning its attachment higher on the back of the center, rather than tightening the cord excessively.
Display with a gentle drape. Keep it away from flames, heaters, pets, and places where a child could reach or become tangled in a hanging cord. This is a decorative garland, not a toy, nursery mobile, or weight-bearing strap.
Troubleshooting and Care
The band has sloping edges: count the actual stitches, excluding the turning chains. Every band row needs 36 hdc. The tails are unequal: reposition the strip midpoint before closing the center wrap. The loops look flattened: loosen the gathering slightly and reshape the sides with your fingers.
The center wrap slips: add a few hidden anchoring stitches through the wrap and the underlying gathered fabric. The cord stretches: use closer display supports or make a denser chain with a smaller hook. Avoid adding beads or other heavy decorations without reconsidering the cord and attachment strength.
Follow your yarn label for cleaning. Spot cleaning is often the least disruptive option for a small assembled decoration. If washing is suitable for the chosen yarn, reshape the bows and dry the garland flat. Store it loosely so the centers and tails are not compressed for months.
Frequently Asked Questions
Can a beginner make this garland? Yes, if they are comfortable with half double crochet, single crochet, counting rows, and a little hand sewing. Start with one complete bow before crocheting the other five.
Does the pattern need stuffing? No. The loops are a flattened ring of crochet fabric, and the center is gathered and wrapped.
Can I make individual ornaments? Yes. Omit the garland cord and sew a separate yarn hanging loop securely to the upper back of each bow. Keep the attachment hidden behind the center wrap.
Can I change the number of bows? Yes. Make more or fewer complete sets of the three pieces. Lay them out first and choose a cord length and spacing that suit the actual display area.
Can I make the bow wider? Increase the main band foundation by an even number of chains, maintaining the rule that Row 1 has two fewer hdc than the foundation chain. A new width changes proportions, so check the tail length and wrap fit on a sample.
Are these the same as the bow bag charm? No. This design makes a coordinated hanging decoration with separate tail strips. For a smaller accessory project, try our crochet bow bag charm.
More Christmas Crochet Projects
Pair your crochet Christmas bow garland with our mini Christmas tree or snowman ornament. For a practical gift, try the Christmas drawstring gift bag; for a floral display, explore the poinsettia flower pattern.
Finish by checking all six centers, hiding the last yarn tails, and gently shaping each loop and tail. The repeated construction makes it easy to create a coordinated set while keeping the handmade texture visible.