Crochet Gingerbread Cat Ornament – Free Christmas Pattern
Make a crochet gingerbread cat ornament with cream icing edges, an embroidered face, and a green bow. Free pattern with flat panels and assembly steps.
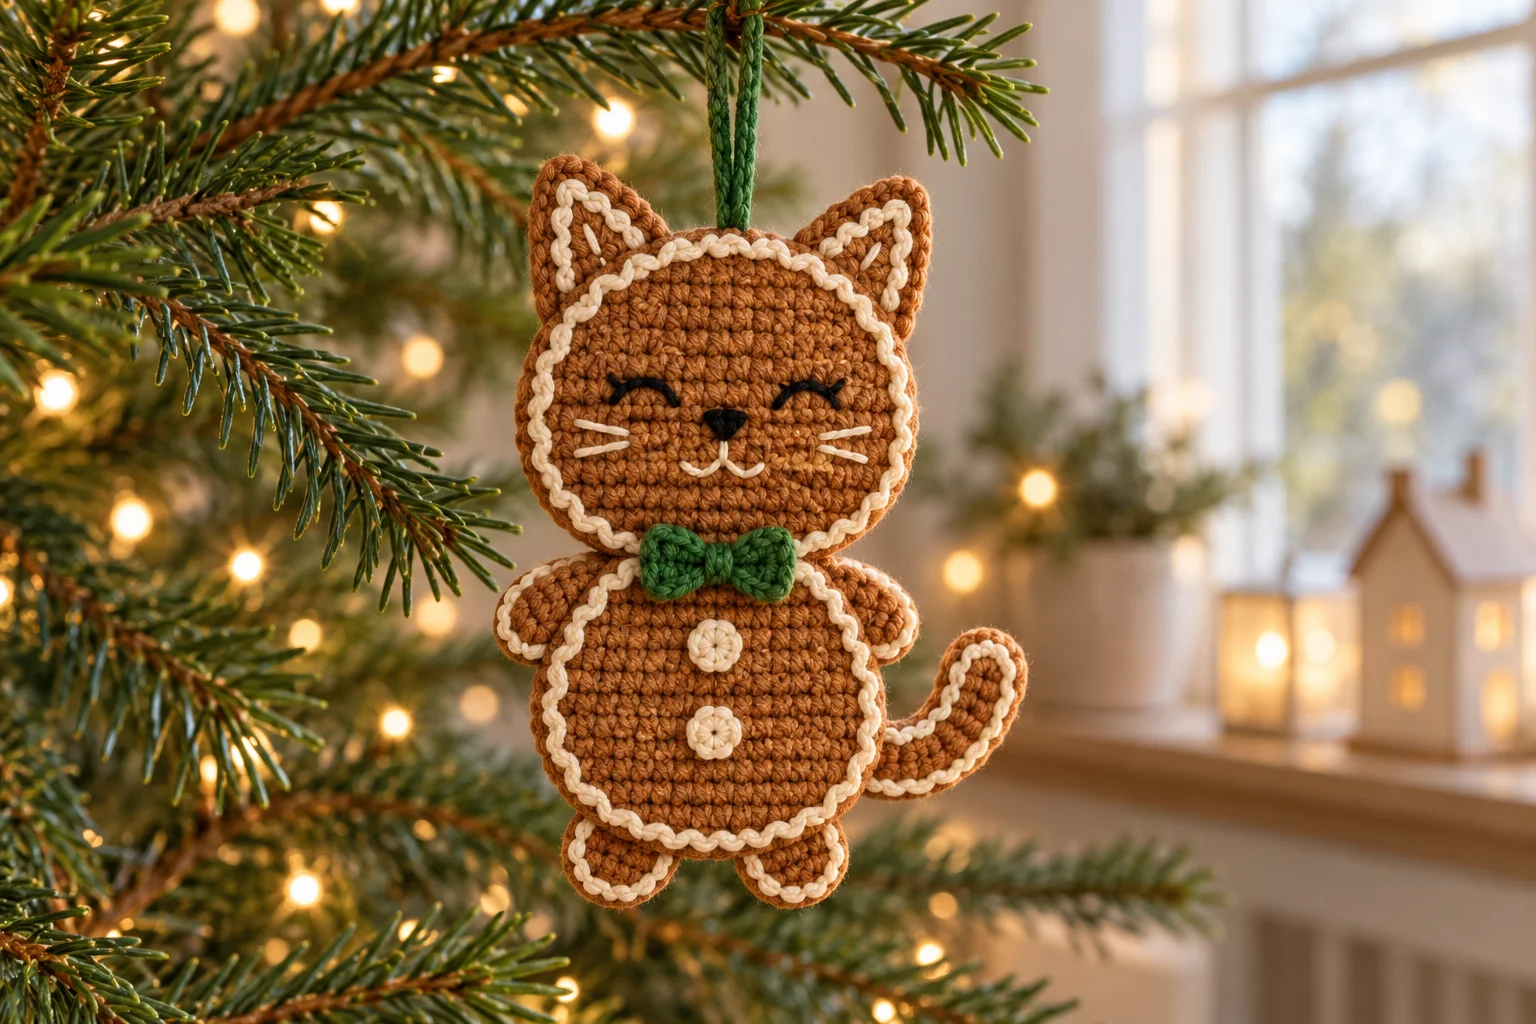
Make a crochet gingerbread cat ornament with a flat cookie-inspired shape, caramel-brown cotton, and cream edging that resembles icing. A small green bow, embroidered face, and two stitched belly circles give the cat a festive finish without beads or plastic buttons. The head and body are lightly padded sandwiches made from pairs of flat crochet circles.
This free pattern explains the four main panels, embroidered details, cream joining edges, ears, tiny limbs, curved tail, neck bow, and hanging loop. It is a different construction from a fully rounded amigurumi cat: use only a small amount of filling so the ornament keeps its shallow, cookie-like profile.
Pattern note: This is an original written design that has not been physically tested. Generated images show the intended appearance rather than a verified sample. Sizes and yarn quantities are preparation estimates. Follow the written counts, compare matching panels before joining them, and adjust the assembly placement to your finished pieces.
Crochet Gingerbread Cat Ornament: Project Overview
The pattern suits a confident beginner who can make a magic ring, increase in rounds, crochet flat rows, and sew small pieces together. All instructions use US crochet terminology. The project is not no-sew: the head and body have crocheted joining edges, while the ears, limbs, tail, bow, and loop are attached with a needle.
The reference colors are caramel brown, cream, forest green, and a small amount of black. The brown forms the cookie, the cream forms its icing details, and the green is used only for the bow and hanging loop. There is no separate muzzle patch, scarf, hat, or chest bib.
With DK cotton and a small hook, plan for an ornament approximately 9–12 cm tall, excluding its loop. This is an estimate rather than a measured size. The head has 30 stitches at its outer edge and the smaller body has 24. Keep the matching front and back panels equal in size so their edges join without puckering.
Materials and Tools
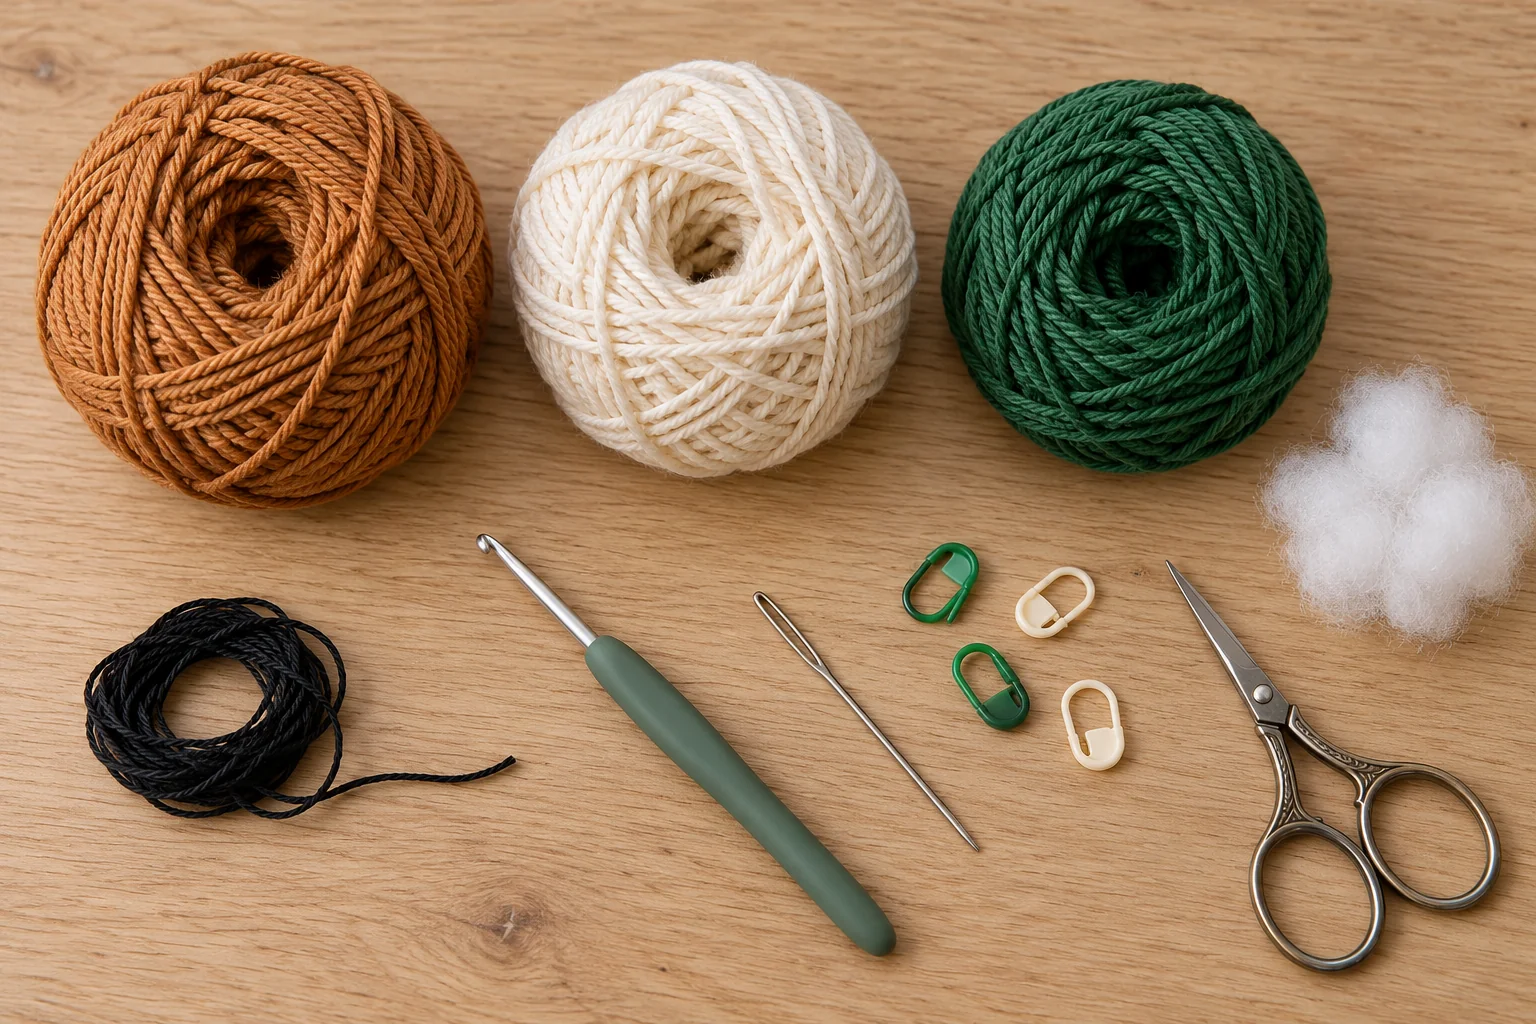
Prepare DK cotton yarn in caramel brown, cream, and forest green, plus black embroidery thread or fine black yarn. As a starting allowance, gather about 30 g brown, 15 g cream, and 5 g green. Exact consumption depends on yarn meterage, tension, and the length of the tails used for sewing.
Use a 2.5–3 mm crochet hook, a blunt yarn needle, scissors, removable stitch markers, and a very small amount of polyester fiberfill. Clips can help keep two circles aligned. A measuring tape is useful for comparing the panels, although this decorative pattern does not require a particular measured gauge.
Use smooth yarn that makes the stitch tops easy to identify. Choose a hook that creates firm fabric without excessive strain on your hands. Thick plush yarn changes the flat construction and makes the icing border look bulkier; it is not the reference material for the tutorial.
Abbreviations and Construction Notes
ch = chain; sc = single crochet; inc = 2 sc in one stitch; st = stitch; sts = stitches. Instructions in square brackets are repeated the stated number of times. Numbers in parentheses give the stitch count at the end of the round or row.
Work the circles and tiny limbs in continuous rounds without joining. Mark the first stitch of each round. For flat rows, the turning chain does not count as a stitch. Both the head and body use two identical brown panels, joined around their outer edge with cream yarn.
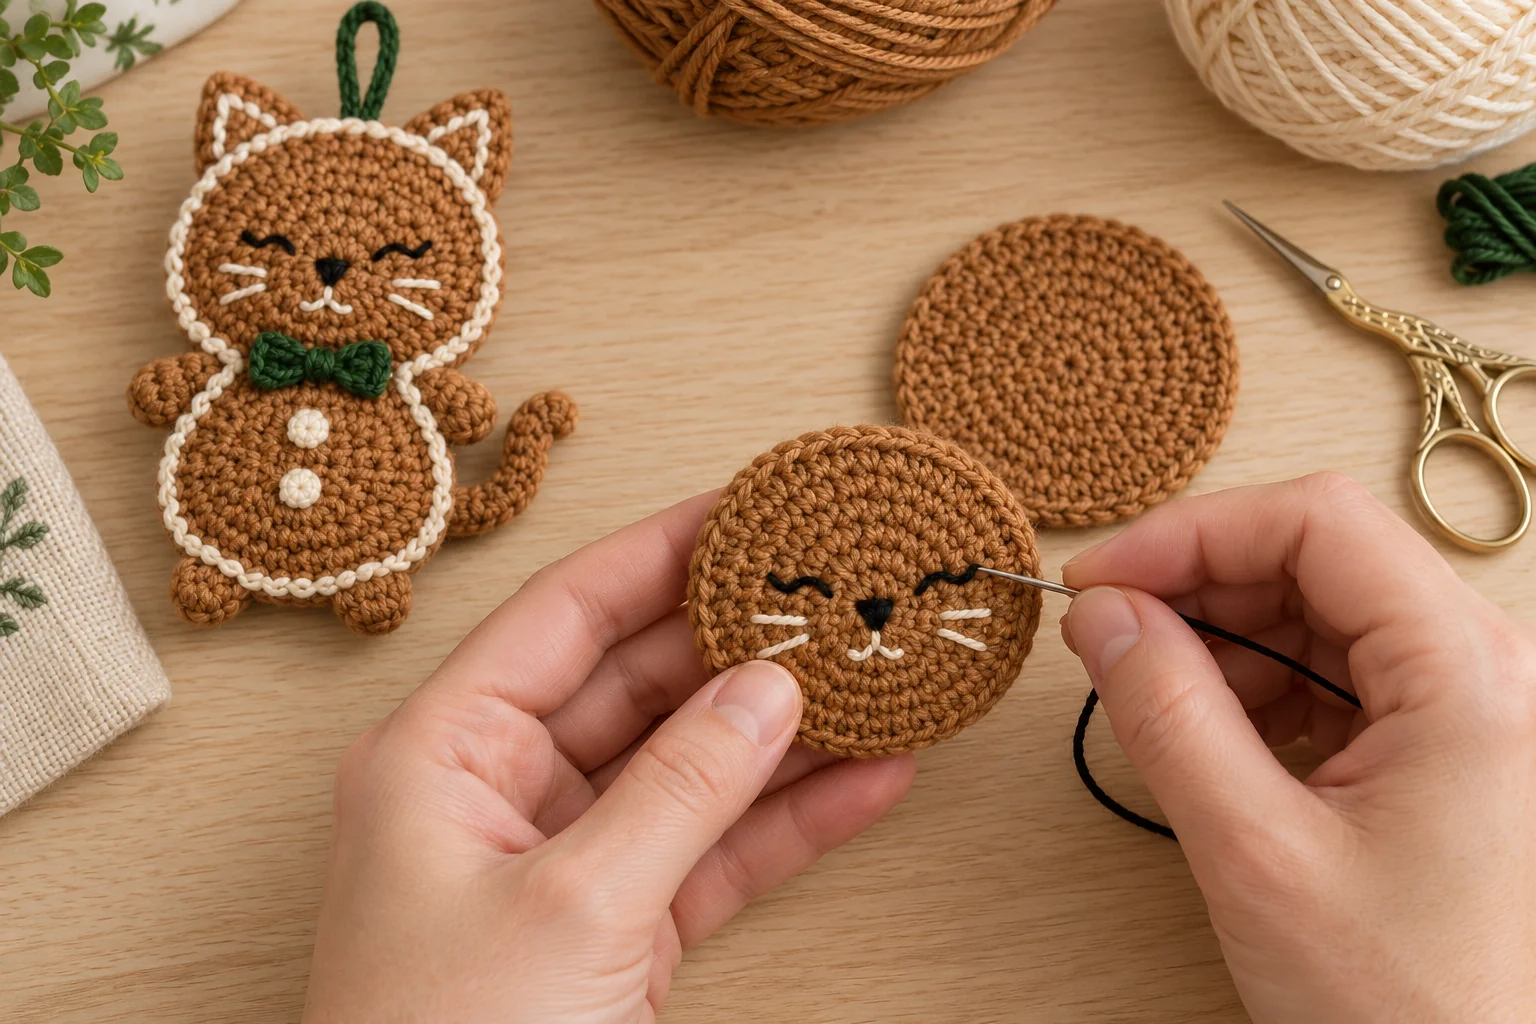
Complete the face embroidery on the front head panel before joining it to the back. This lets you secure the thread ends inside the sandwich. Likewise, embroider the two belly circles on the front body panel before closing that pair.
Step 1: Crochet Two Head Panels
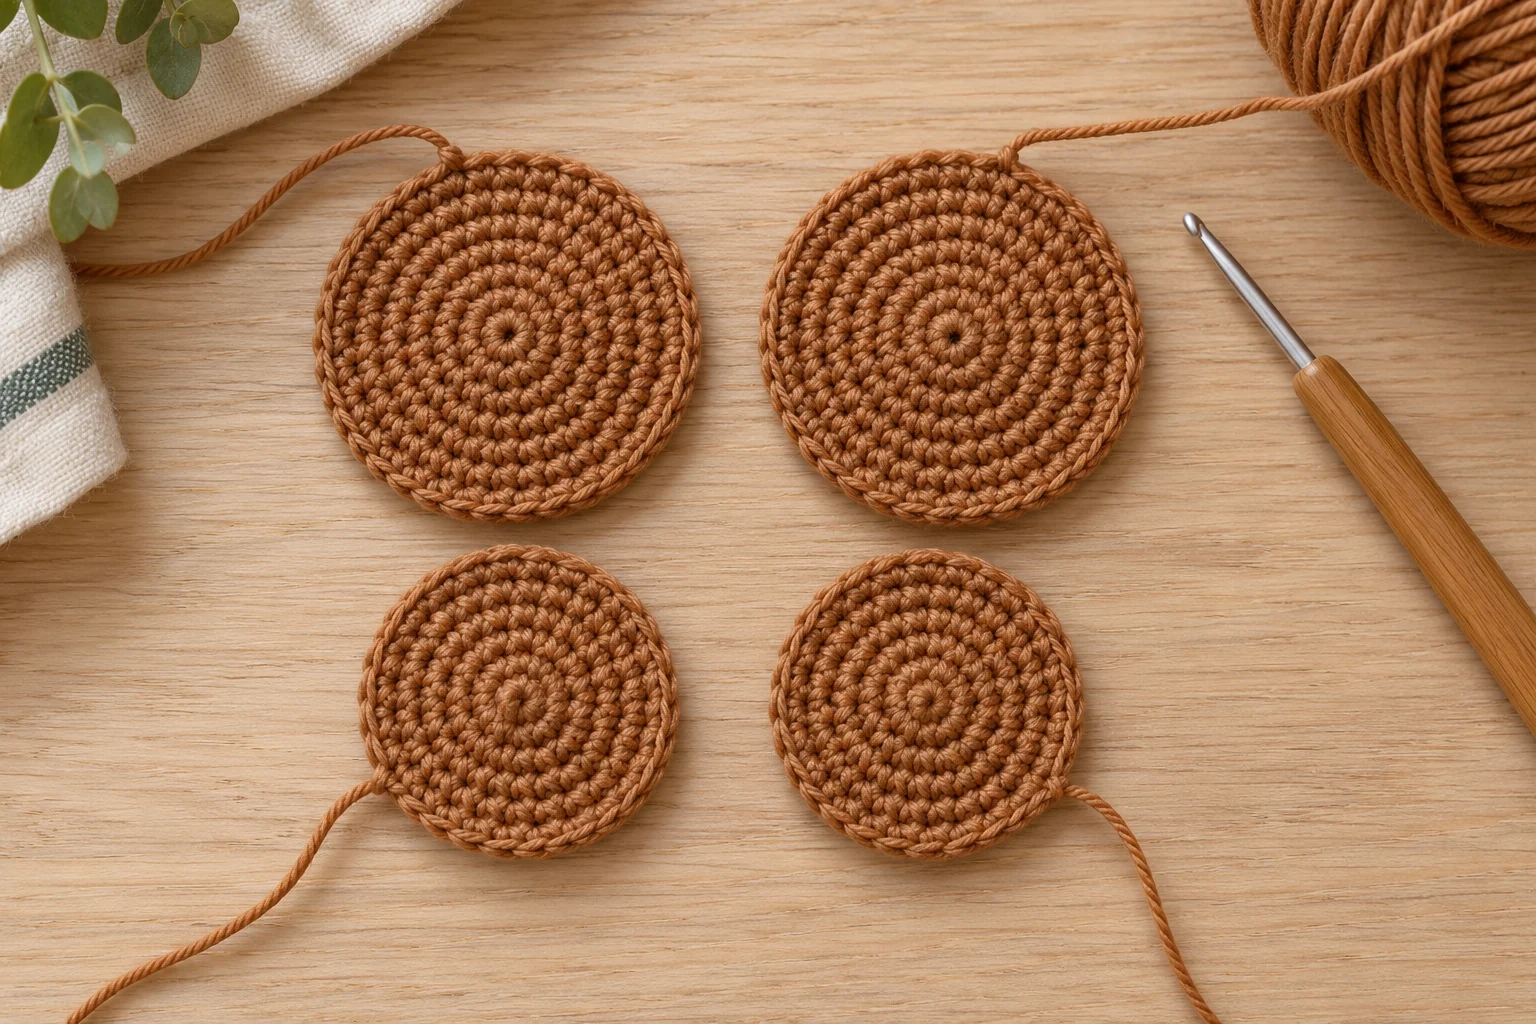
Make two identical circles in brown. Round 1: work 6 sc into a magic ring. Round 2: inc in every stitch. (12 sts) Round 3: [sc in the next st, inc] 6 times. (18 sts)
Round 4: [sc in the next 2 sts, inc] 6 times. (24 sts) Round 5: [sc in the next 3 sts, inc] 6 times. (30 sts) Fasten off and secure the starting ring tail. Do not add a plain round after Round 5.
Lay the two circles together and check that their outside edges match. Both should have exactly 30 stitches. Minor unevenness can be smoothed with your fingers, but a missing increase needs correcting before the cream joining edge is added. Keep the intended right sides facing outward when you later sandwich them.
Step 2: Crochet Two Body Panels
In brown, make two more circles. Round 1: 6 sc into a magic ring. Round 2: inc around. (12 sts) Round 3: [sc in the next st, inc] 6 times. (18 sts) Round 4: [sc in the next 2 sts, inc] 6 times. (24 sts)
Fasten off both body panels, secure the center tails, and compare their sizes. These circles stop one round earlier than the head panels. Set aside one body circle as the front and one as the back so you do not accidentally embroider a head panel with the belly decoration.
Step 3: Embroider the Face and Belly Icing
On the front head panel, mark a small face in the lower-middle area, leaving the upper portion clear for the ears. Embroider two short black curved closed-eye lines on either side of the center. Add a tiny black triangle for the nose below the eyes. Use small stitches that sit on the fabric without pulling it into a crease.
With cream yarn or thread, add a short mouth line beneath the nose and two short whisker accents on each side. This pattern uses stitched lines directly on the brown circle, not an attached cream snout. Secure the thread ends on the reverse, where the second panel will cover them.
On the front body circle, embroider two small cream rings in a vertical line near the center. Form each ring from several short backstitches around a tiny circle. These are icing-style embroidered decorations rather than detachable buttons. Keep the stitching flat and secure the ends on the reverse.
Step 4: Join the Panels with Cream Edging
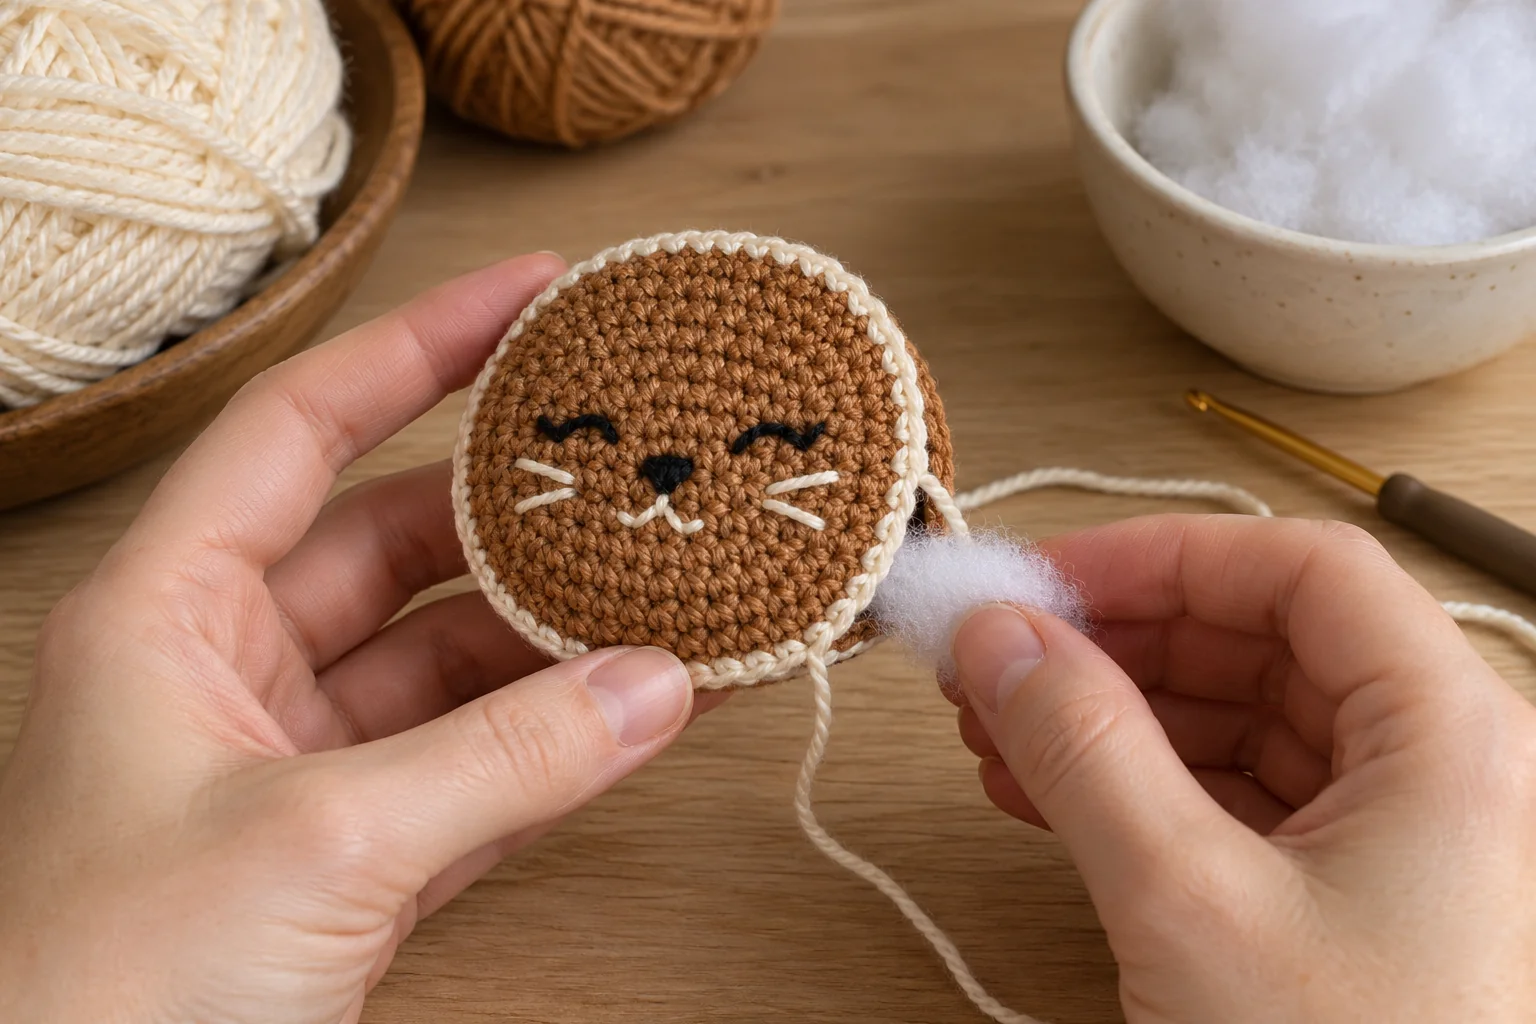
Place the two head panels together with their wrong sides facing inward and embroidered face facing outward. Match their 30 edge stitches. Attach cream yarn through a corresponding pair of edge stitches, then work 1 sc through each matching pair around the outside. You are joining two brown panels, so each joining stitch passes through both layers.
After about 25 joining stitches, pause and insert a tiny amount of fiberfill through the remaining opening. Spread it evenly rather than making a ball. Work the final five joins to reach 30 cream joining stitches, then fasten off and hide the ends. Keep the finished head shallow.
Join the two body panels in the same way, working 24 cream joining stitches around their matching edges. Add a little filling before the final four joins. The cream border is the visible icing outline; do not cover the whole brown panel with additional cream rounds.
Step 5: Make the Ears, Arms, and Feet
Ears — make two in brown: ch 2. Row 1: 2 sc in the second chain from the hook. (2 sts) Row 2: ch 1, turn, inc in both stitches. (4 sts) Row 3: ch 1, turn, inc, sc in the next 2 sts, inc. (6 sts) Row 4: ch 1, turn, sc across. (6 sts) Fasten off with a sewing tail.
The six-stitch edge is the ear base. Use cream thread to embroider a small inner V, leaving the outer brown edges visible. You can also add short cream accent stitches along the sloping sides, keeping the ear flexible. Do not stuff it or make another ear layer.
Arms and feet — make four identical pieces in brown: Round 1: 6 sc into a magic ring. Round 2: sc in every stitch. (6 sts) Fasten off with a sewing tail, leave unstuffed, flatten the opening, and close it through three matching stitch pairs. Two pieces become arms and two become feet.
Step 6: Crochet the Thin Curved Tail
In brown, ch 11. Row 1: sc in the second chain from the hook and each remaining chain. (10 sts) Rows 2–3: ch 1, turn, sc across. (10 sts each row) Fasten off with a long sewing tail.
Roll the strip lengthwise so its two long ten-stitch edges meet. Sew those long edges together to make a narrow, unstuffed tube. Secure the short ends with a few small stitches and keep a tail at one end for attachment. This tail uses no wire or rigid insert.
Bend the tube into a gentle C shape. The seam should face the back. Its curved position will be supported by a few stitches against the cat body, so you do not need to make the tube firm enough to hold the shape on its own.
Step 7: Assemble the Gingerbread Cat
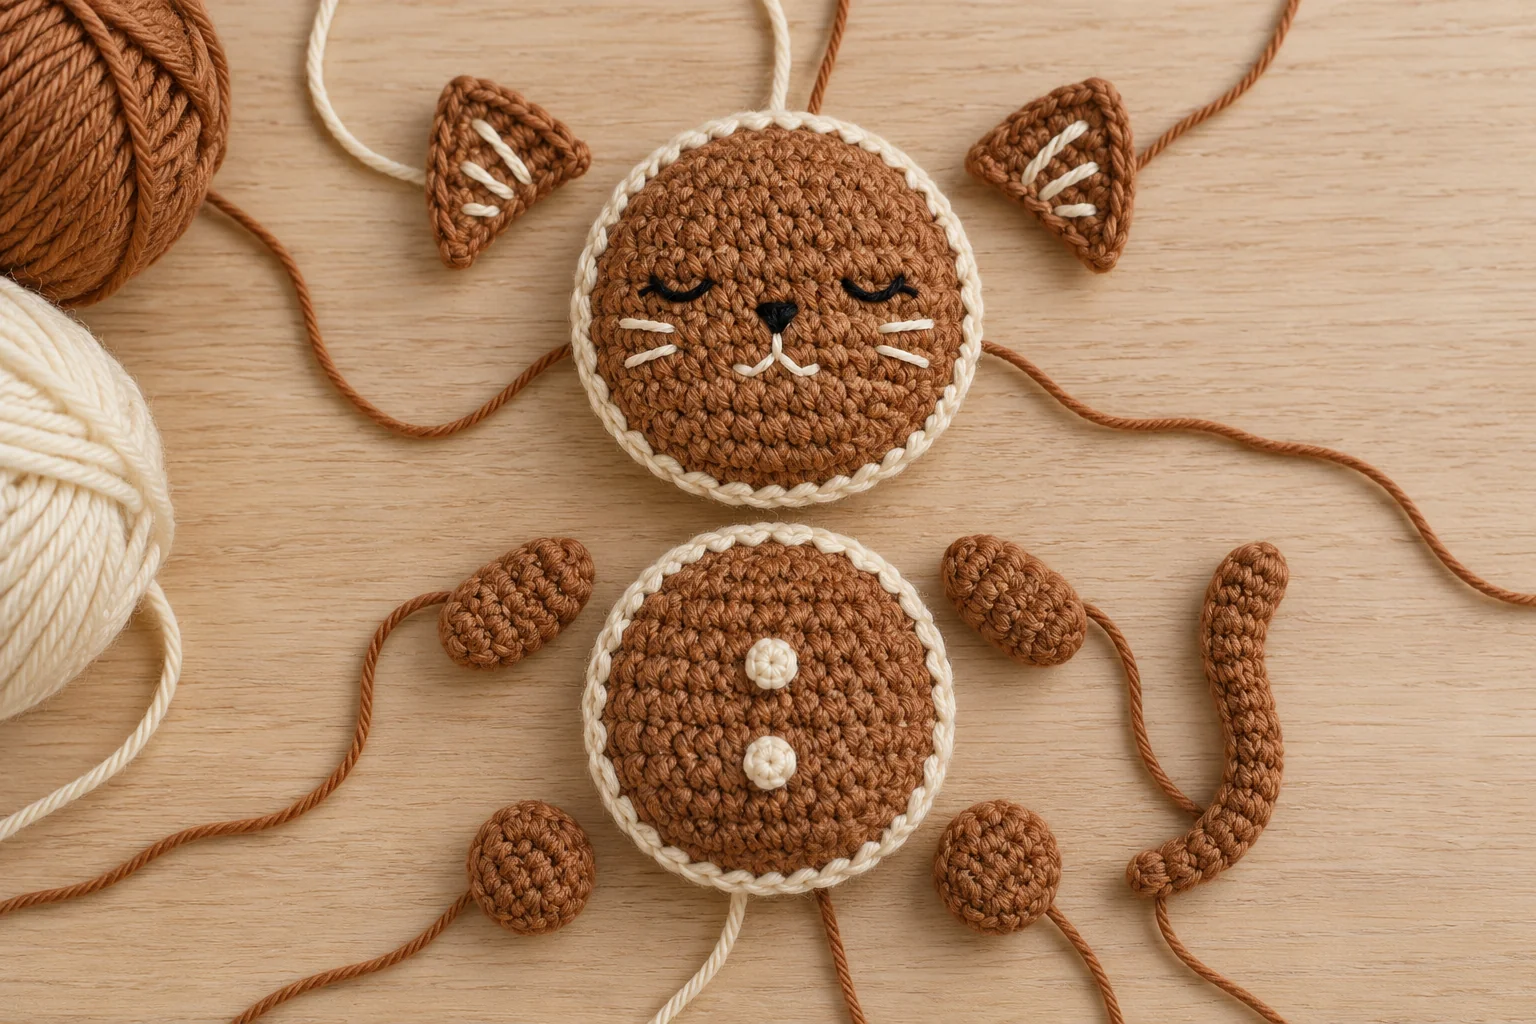
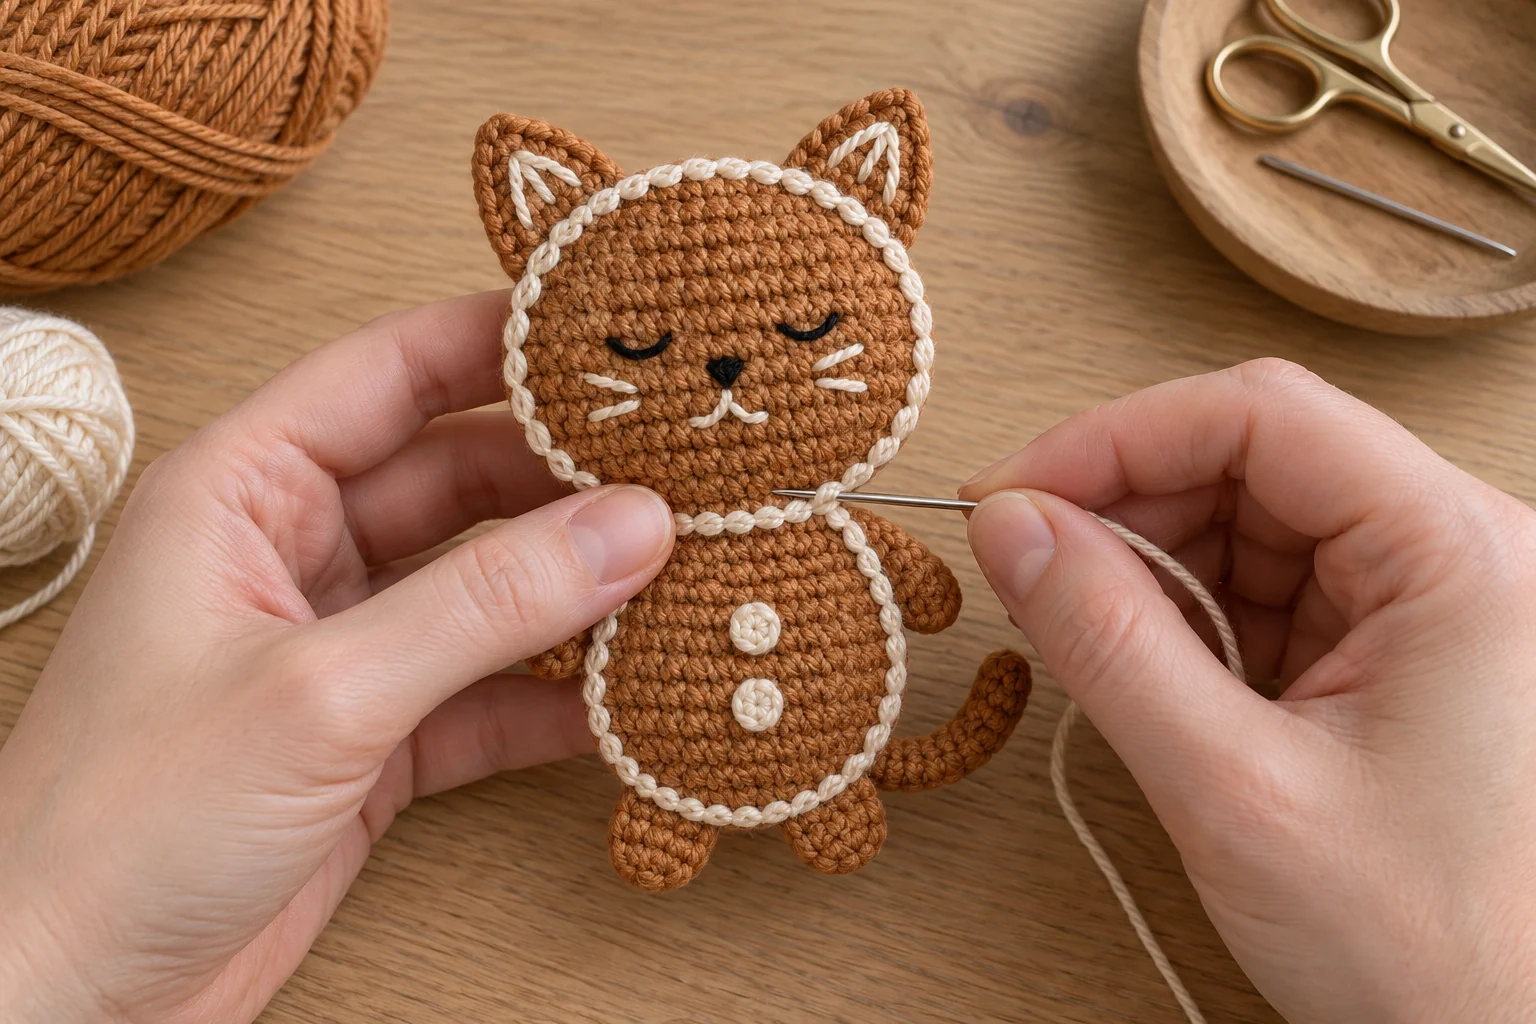
Place the head just above the body, with a small overlap at the neck. Sew the bottom center of the head to the top center of the body across roughly three to four neighboring stitches, catching secure brown fabric just inside the cream edges. Make a second pass if needed while keeping the join flat.
Attach the ear bases to opposite upper sides of the head, with their tips pointing upward and cream accents facing forward. Sew the two arms to the upper sides of the body. Attach the two feet near the lower body edge, checking that their heights match before tightening the stitches.
Sew one end of the tail to the lower back edge of the body and curve it around the side. Add two or three discreet anchor stitches to keep the C shape visible. For general advice on secure finishing, read our guide to sewing amigurumi pieces together.
Step 8: Add the Green Bow and Hanging Loop
Bow: ch 9 in green. Row 1: sc in the second chain from the hook and every remaining chain. (8 sts) Rows 2–3: ch 1, turn, sc across. (8 sts each row) Fasten off and weave in the ends.
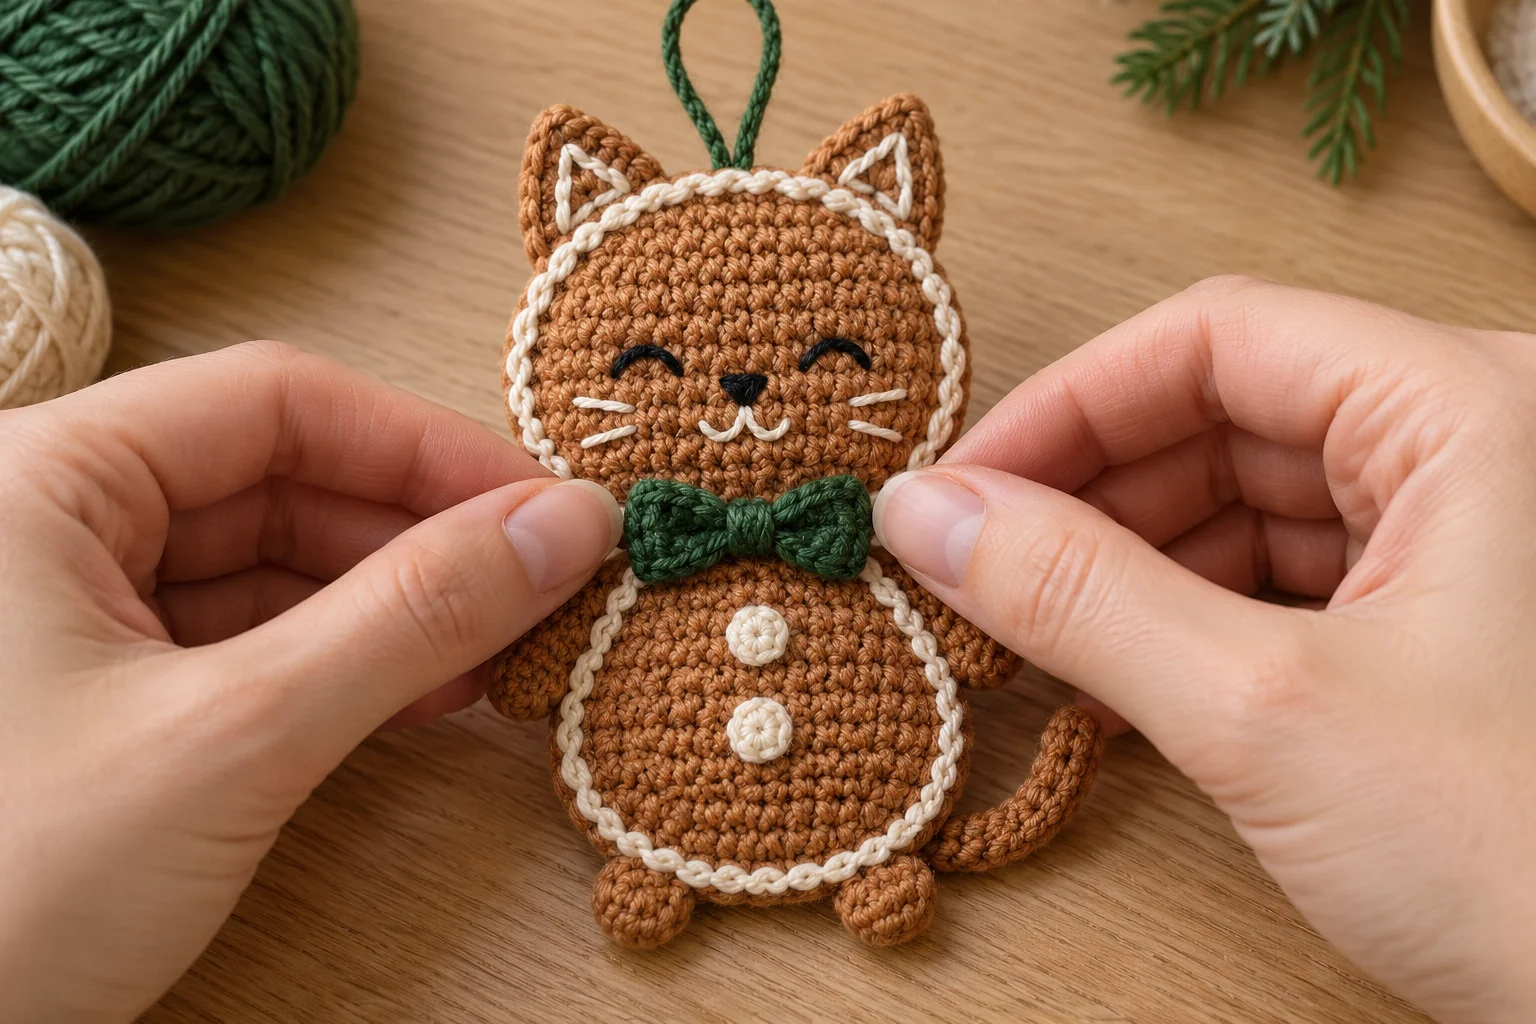
Pinch the middle of this small rectangle into a bow shape. Wrap a separate length of green yarn around the center several times and secure it at the back. Sew the wrapped center to the neck join, keeping the two bow sides visible. This bow has no separate hanging tails.
Hanging loop: ch 20 in green and fasten off with tails at both ends. Bring those ends together and anchor them through several strong stitches at the top center of the head, between the ears. Secure each end separately and weave the tails inside the joined panels. Lift gently over the table to check that the ornament hangs evenly.
Troubleshooting and Care
The circles ripple: confirm the six evenly spaced increases in each shaping round. The cream edge puckers: make sure matching panels have equal stitch counts and avoid pulling the joining stitches too tightly. The ornament looks like a stuffed ball: reduce the filling before finishing the joins.
The neck folds forward: widen the attachment across another neighboring stitch and check the hanging-loop position. The ears lean: attach their full bases and adjust the angle before securing the tails. The tail uncurls: add a discreet anchor stitch against the body instead of inserting wire.
Follow the yarn label for cleaning, reshape gently, and dry completely before storing. Keep away from flames and heaters. The hanging loop and small sewn pieces make this a decoration, not a baby toy or edible item. Store flat so the ears, bow, and tail are not crushed.
Frequently Asked Questions
Is this a flat ornament? Yes. The head and body are pairs of crochet circles with a thin layer of filling between them. They should remain shallow rather than spherical.
Is the cream border embroidered? The main head and body borders are single crochet joins. The whiskers, inner ear accents, and belly circles are embroidered.
Does the pattern use plastic eyes or buttons? No. All facial and belly details are stitched with yarn or embroidery thread.
Can I leave out the filling? Yes, for a completely flat version. Keep the panel joins neat and check that the head and body stay aligned when hanging.
Can I change the bow color? Yes. Red, ivory, or another green shade can change the appearance without altering the bow instructions.
Can I use the same method for a gift tag? The hanging loop can attach the ornament to wrapping. It does not include a writable tag panel; add a separate paper tag if needed.
More Christmas Crochet Patterns
Explore our gingerbread man pattern for another cookie-inspired project. For small tree decorations, try the snowman ornament and mini Christmas tree.
Pair the finished cat with a Christmas gift bag or a candy cane keychain. Your crochet gingerbread cat ornament is ready once the panel joins, hanging loop, and small pieces are secure and all yarn ends are hidden.