Crochet Gingerbread Bear – Free Christmas Amigurumi Pattern
Make a crochet gingerbread bear with a caramel body, embroidered icing details, and a small green scarf. Includes materials, round-by-round instructions, assembly tips, and FAQs.
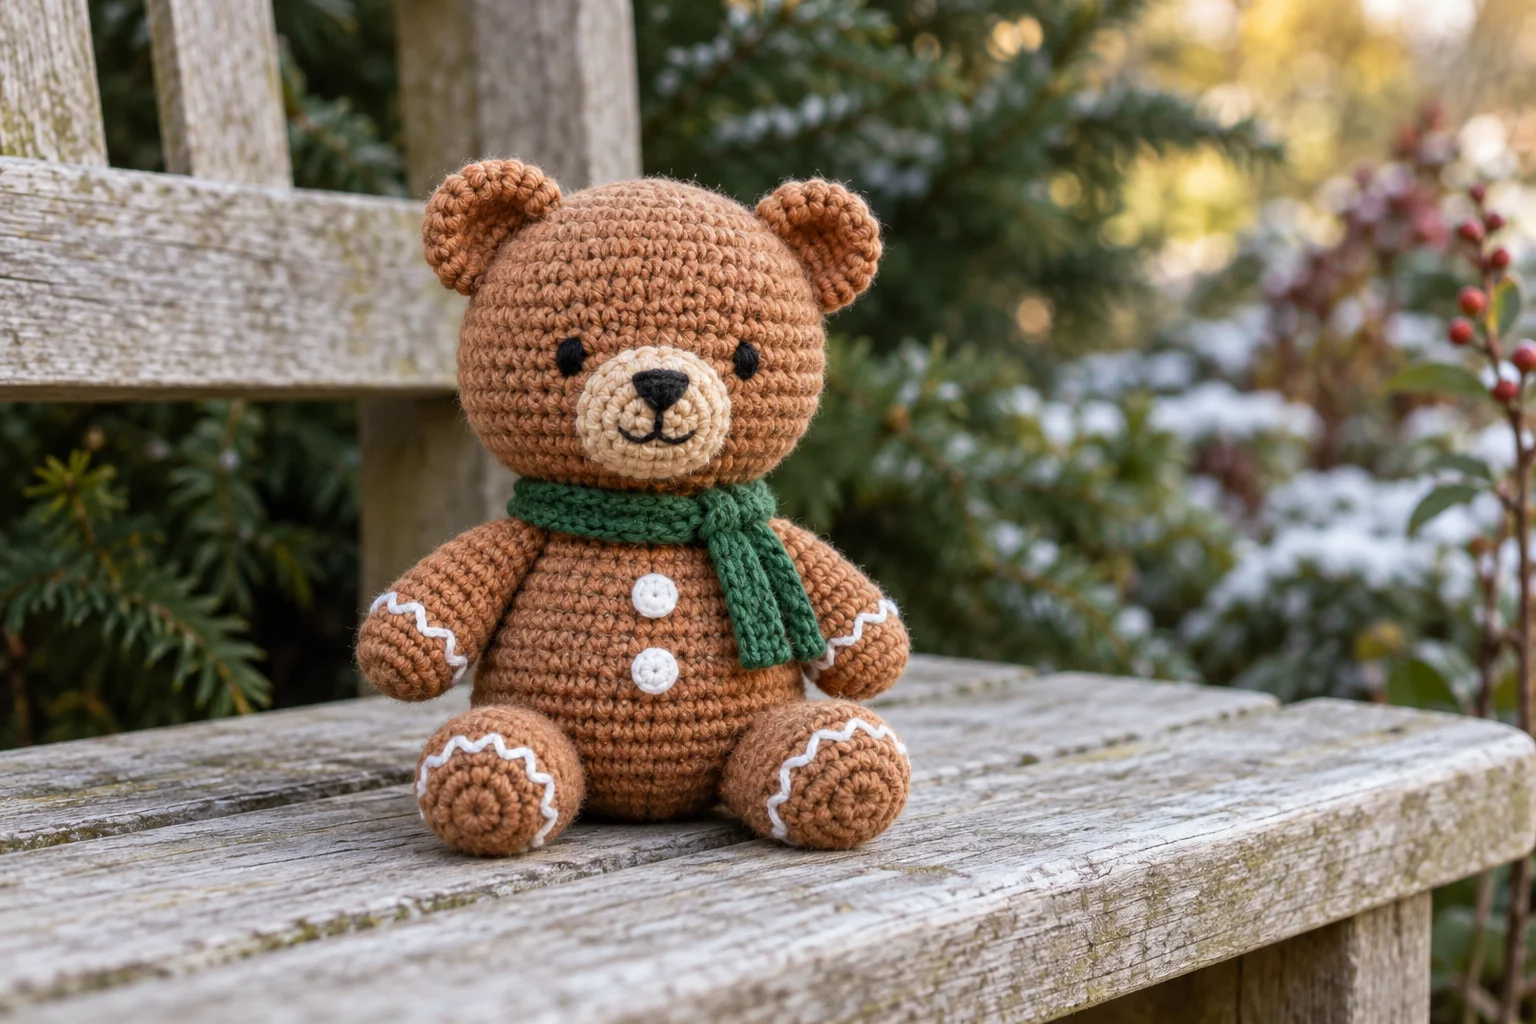
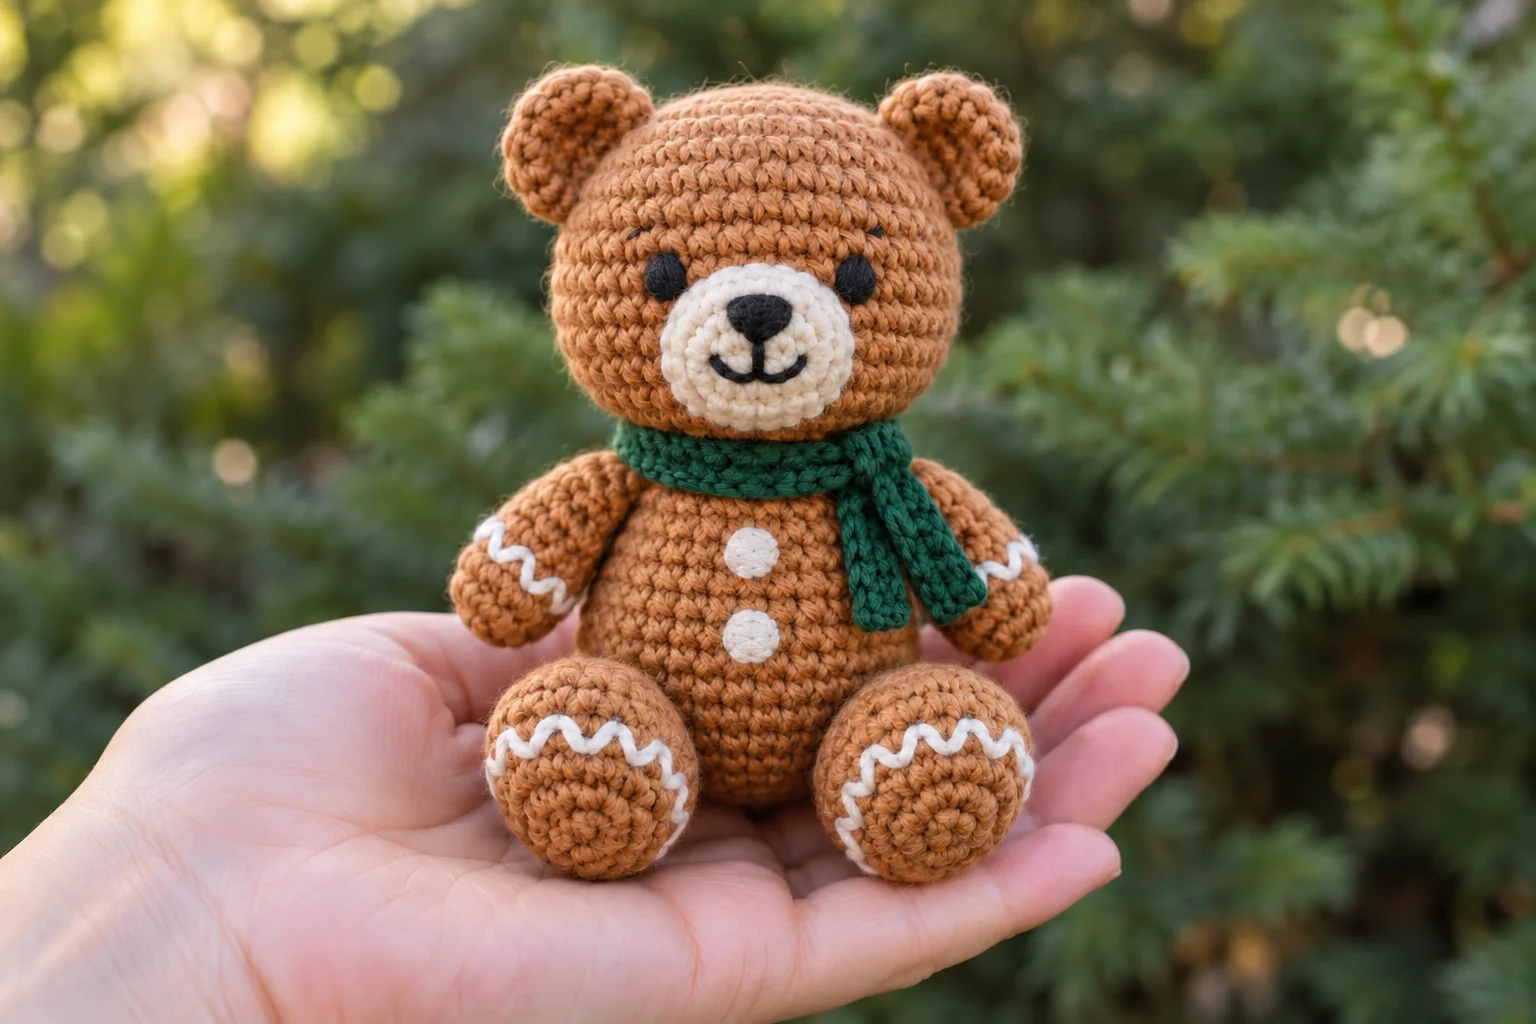
This crochet gingerbread bear combines a caramel-colored teddy shape with white embroidered icing and a small green scarf. The cream muzzle, rounded ears, and forward-facing feet give it a friendly Christmas look without complicated colorwork.
In this free crochet gingerbread bear pattern, you will make the head, body, arms, feet, ears, and muzzle separately, then embroider the decorations and sew the pieces together. All instructions use US crochet terms. The scarf is worked in rows, while the bear pieces use continuous rounds.
Pattern note: This is an original, untested written pattern. The images are illustrative, so use the written stitch counts and construction instructions as your guide. Finished proportions depend on yarn, hook size, stuffing, and tension.
Crochet Gingerbread Bear: Project Overview
This project suits a confident beginner who can work single crochet, increases, decreases, and simple sewing. You will also need to place facial embroidery and match two open edges when attaching the head. Read the assembly instructions before starting so you know which yarn tails to leave.
With DK cotton and a 2.5–3 mm hook, plan for a small bear approximately 13–16 cm tall. This is an estimate rather than a measured sample size. A tighter hook creates a firmer fabric, while thicker yarn produces a larger bear and requires more stuffing.
Materials and Tools
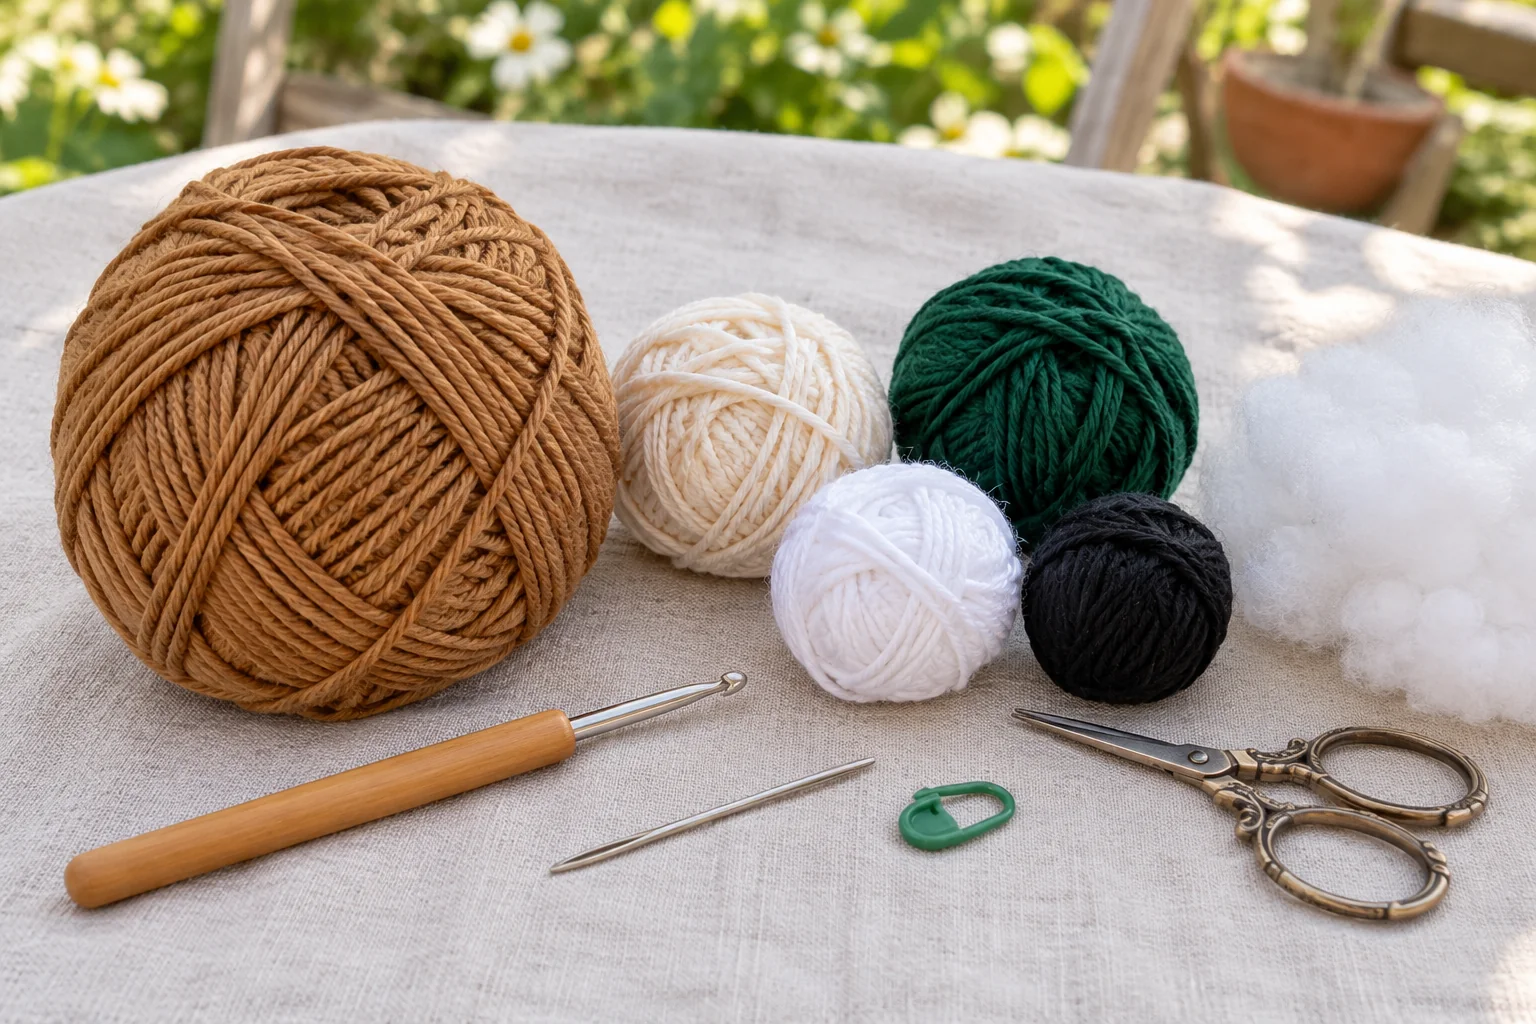
- DK cotton yarn in caramel brown: allow approximately 50 g for preparation.
- Small amounts of cream, white, forest green, and black yarn.
- A 2.5–3 mm crochet hook, adjusted to achieve dense fabric.
- Polyester fiberfill.
- A blunt yarn needle for seams and embroidery.
- Stitch markers, scissors, and sewing pins or removable markers.
Use caramel for all bear pieces except the cream muzzle. White yarn creates the icing details, black yarn creates the face, and green yarn creates the scarf. Keep the yarn weights similar so the small details do not overwhelm the body.
Try a short practice circle before starting. If stuffing would show through the stitches, reduce your hook size or loosen excessive pulling between stitches. Aim for a flexible fabric that closes around the filling without visible holes.
Abbreviations and Pattern Notes
- MR: magic ring.
- ch: chain.
- sc: single crochet.
- inc: work 2 sc into one stitch.
- dec: decrease over the next 2 stitches; an invisible decrease is optional.
- sl st: slip stitch.
- R: round.
Numbers in parentheses show the stitch count at the end of the round. Instructions such as “(2 sc, inc) × 6” mean repeat that sequence six times. Work in continuous rounds without joining unless instructed otherwise. Move a marker to the first stitch of every round.
Stuff gradually instead of filling each piece in one large lump. Leave long tails wherever a piece will be sewn on. Do not close the neck openings of the head and body: both finish with 18 stitches so their edges can be joined.
Step 1: Crochet the Head
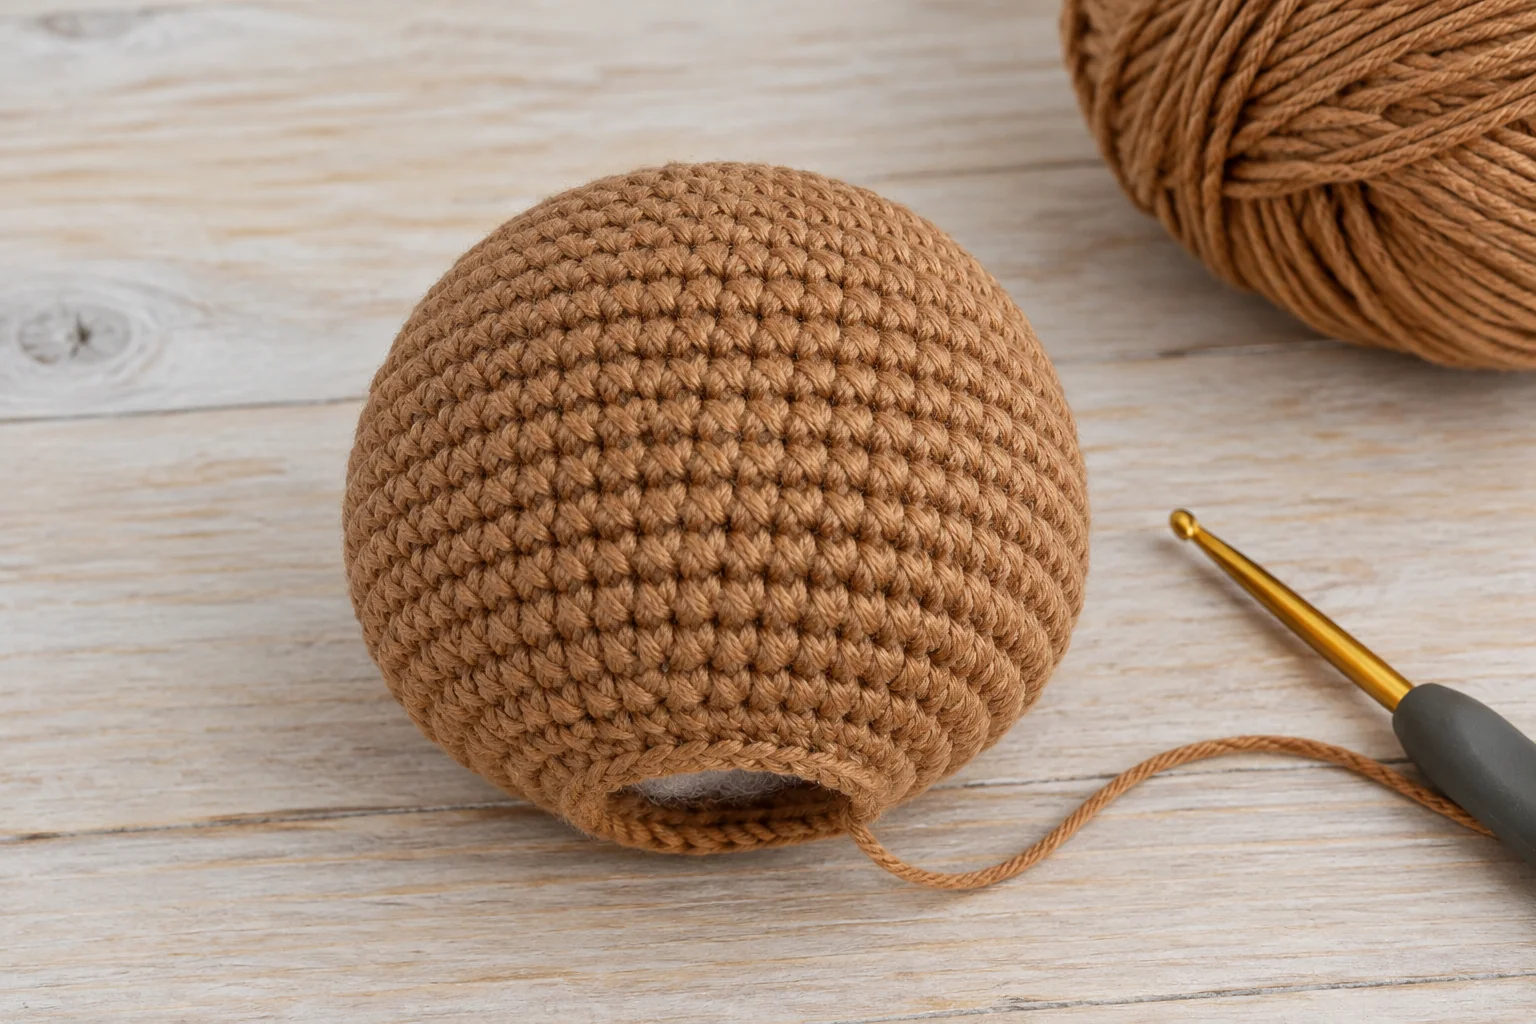
Use caramel yarn.
- R1: 6 sc in MR. (6)
- R2: inc × 6. (12)
- R3: (1 sc, inc) × 6. (18)
- R4: (2 sc, inc) × 6. (24)
- R5: (3 sc, inc) × 6. (30)
- R6: (4 sc, inc) × 6. (36)
- R7: (5 sc, inc) × 6. (42)
- R8–R14: sc around. (42 each round)
- R15: (5 sc, dec) × 6. (36)
- R16: (4 sc, dec) × 6. (30)
- R17: (3 sc, dec) × 6. (24)
- R18: (2 sc, dec) × 6. (18)
Fasten off with a long sewing tail and leave the 18-stitch opening unclosed. Fill the head evenly, keeping the front smooth. Add enough stuffing to support the face without stretching the stitches. You can adjust the filling later through the neck opening.
Step 2: Crochet the Body
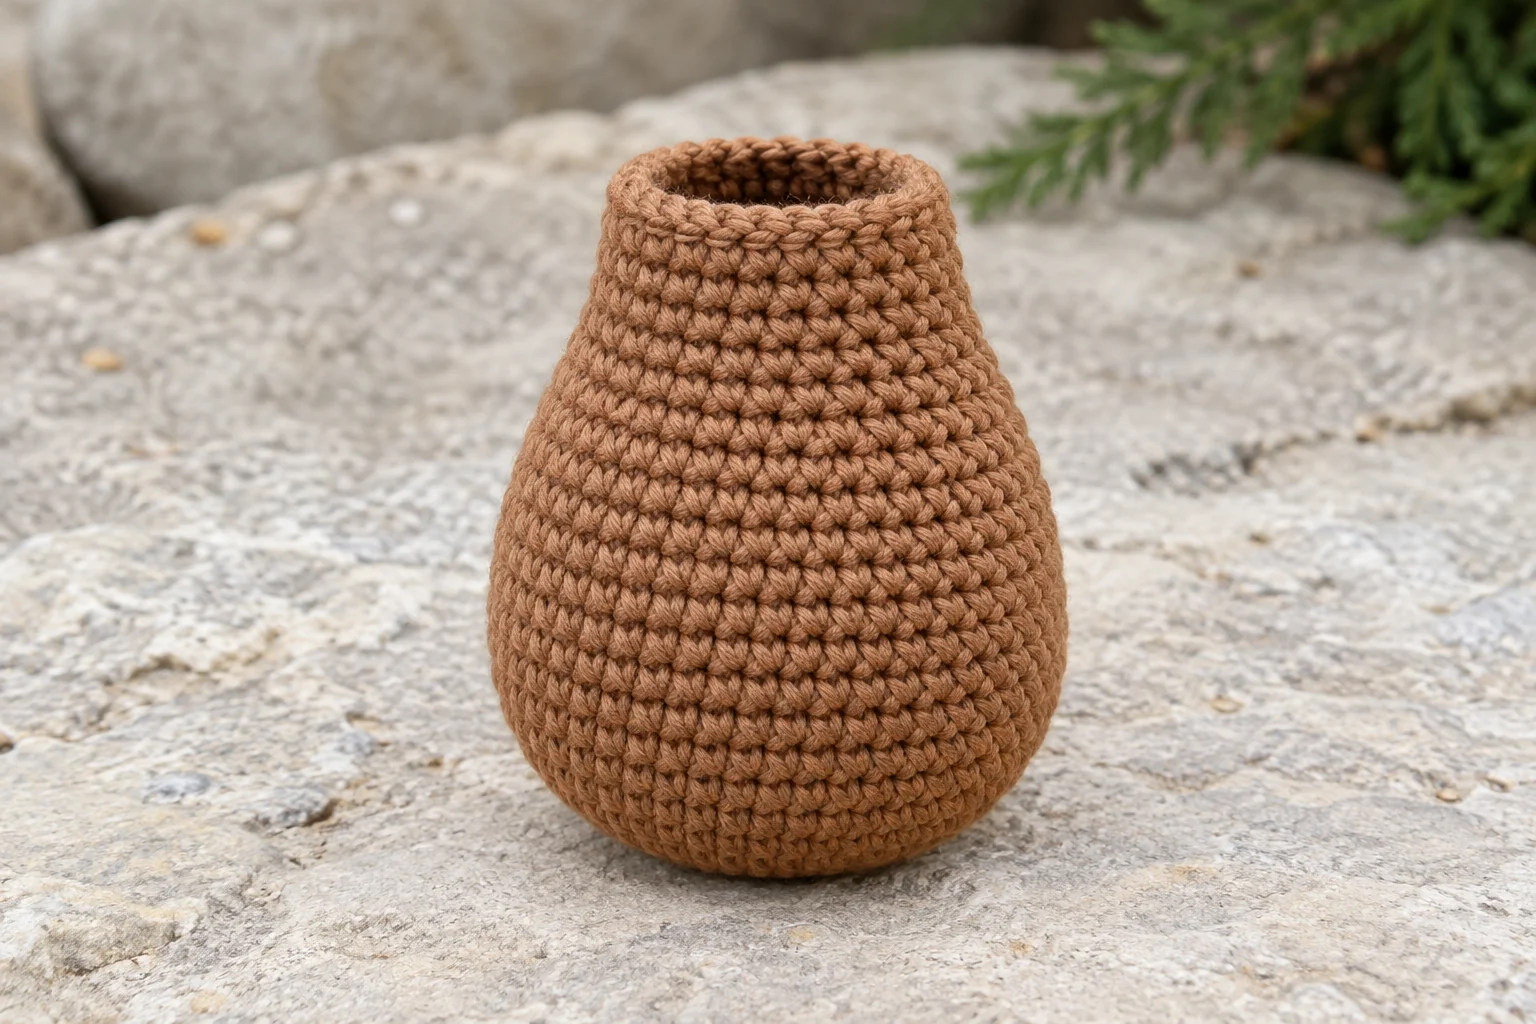
Use caramel yarn and begin at the base.
- R1: 6 sc in MR. (6)
- R2: inc × 6. (12)
- R3: (1 sc, inc) × 6. (18)
- R4: (2 sc, inc) × 6. (24)
- R5: (3 sc, inc) × 6. (30)
- R6: (4 sc, inc) × 6. (36)
- R7–R10: sc around. (36 each round)
- R11: (4 sc, dec) × 6. (30)
- R12–R14: sc around. (30 each round)
- R15: (3 sc, dec) × 6. (24)
- R16: sc around. (24)
- R17: (2 sc, dec) × 6. (18)
- R18: sc around. (18)
Fasten off and leave the neck opening unclosed. Stuff the lower body firmly enough to support the seated shape, then fill the upper body more gently. Set the body on a level surface and smooth its base before adding the decorations.
Step 3: Make the Arms and Feet
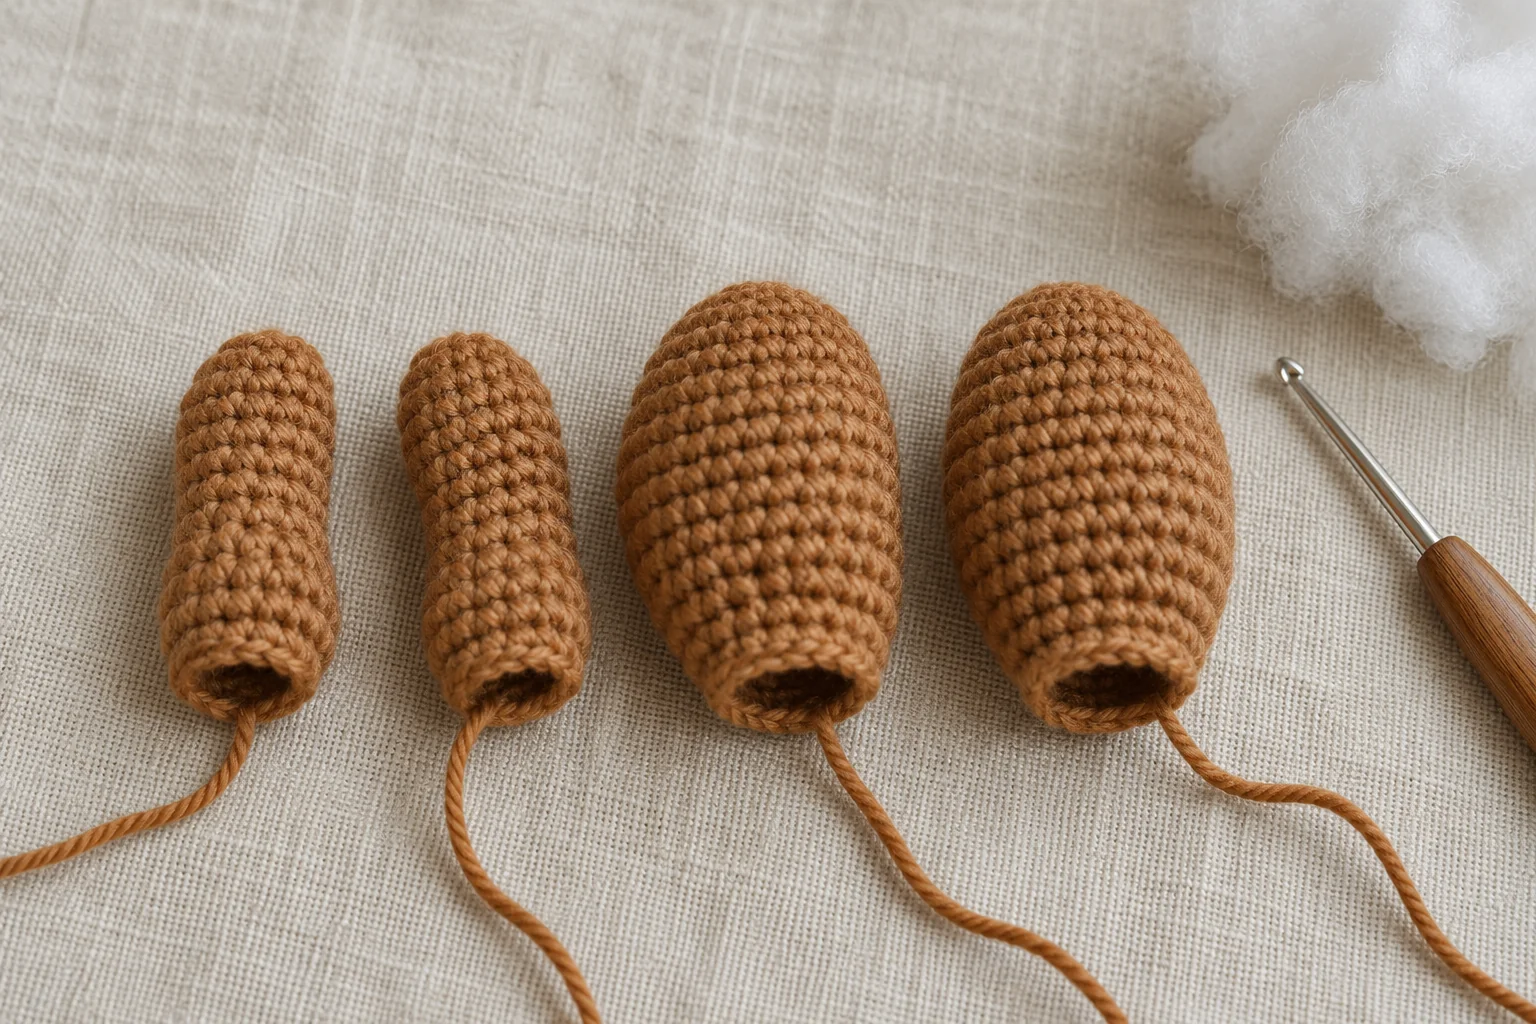
Arms: Make Two
- R1: 6 sc in MR. (6)
- R2: inc × 6. (12)
- R3–R5: sc around. (12 each round)
- R6: (2 sc, dec) × 3. (9)
- R7–R9: sc around. (9 each round)
Leave a long tail. Lightly stuff the rounded hand end, keeping the upper arm mostly empty so it rests against the body. Keep the opening accessible until the embroidery is complete, then gather the nine stitches closed with the tail.
Feet: Make Two
- R1: 6 sc in MR. (6)
- R2: inc × 6. (12)
- R3: (1 sc, inc) × 6. (18)
- R4–R6: sc around. (18 each round)
- R7: (1 sc, dec) × 6. (12)
- R8–R9: sc around. (12 each round)
Leave a long tail and stuff both feet evenly. After embroidering the icing, run the tail through the remaining stitches and gather each opening closed. Compare the pair before sewing: different stuffing amounts can make otherwise matching feet look uneven.
Step 4: Crochet the Ears and Cream Muzzle
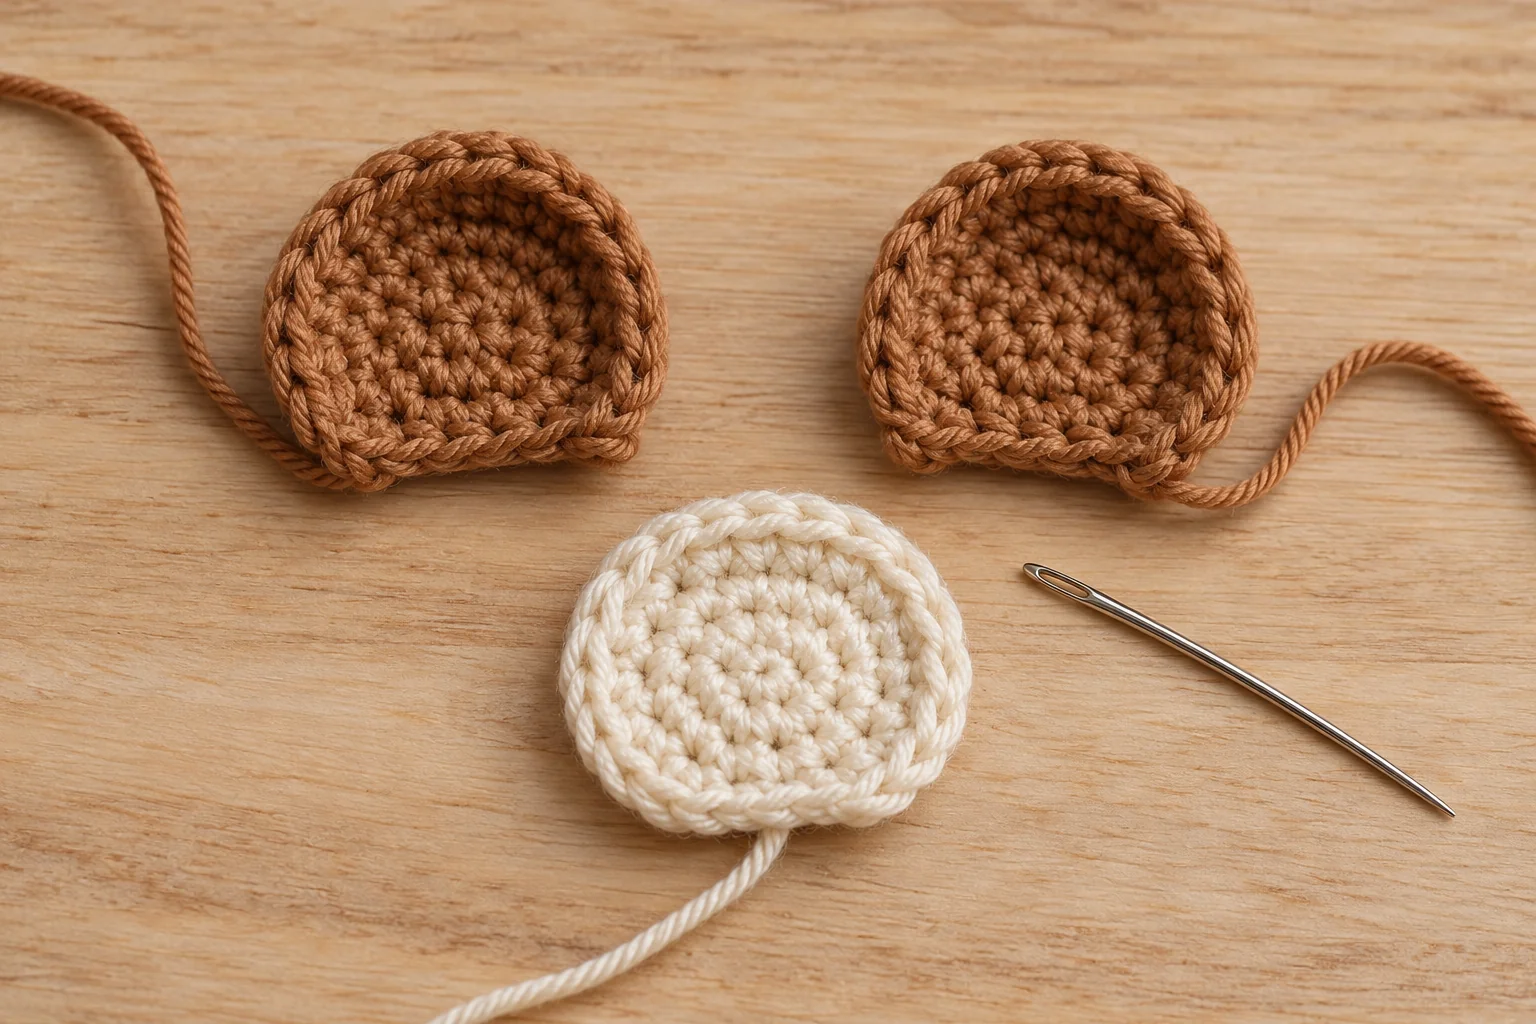
Ears: Make Two
Use caramel yarn.
- R1: 6 sc in MR. (6)
- R2: inc × 6. (12)
- R3: sc around. (12)
Do not stuff. Flatten each opening so its two sides form six paired stitches, and sew through both layers to close. Leave a tail for attaching the flattened edge to the head. The result should be a small rounded semicircle.
Muzzle: Make One
Use cream yarn.
- R1: 6 sc in MR. (6)
- R2: inc × 6. (12)
- R3: (1 sc, inc) × 6. (18)
Finish with a sl st and leave a long sewing tail. Gently shape the circle into a slight oval with your fingers. Embroider a small black triangular nose near the upper center, a short vertical line below it, and a small curved smile. Keep the reverse tidy before attaching the muzzle.
Step 5: Embroider the Face and White Icing
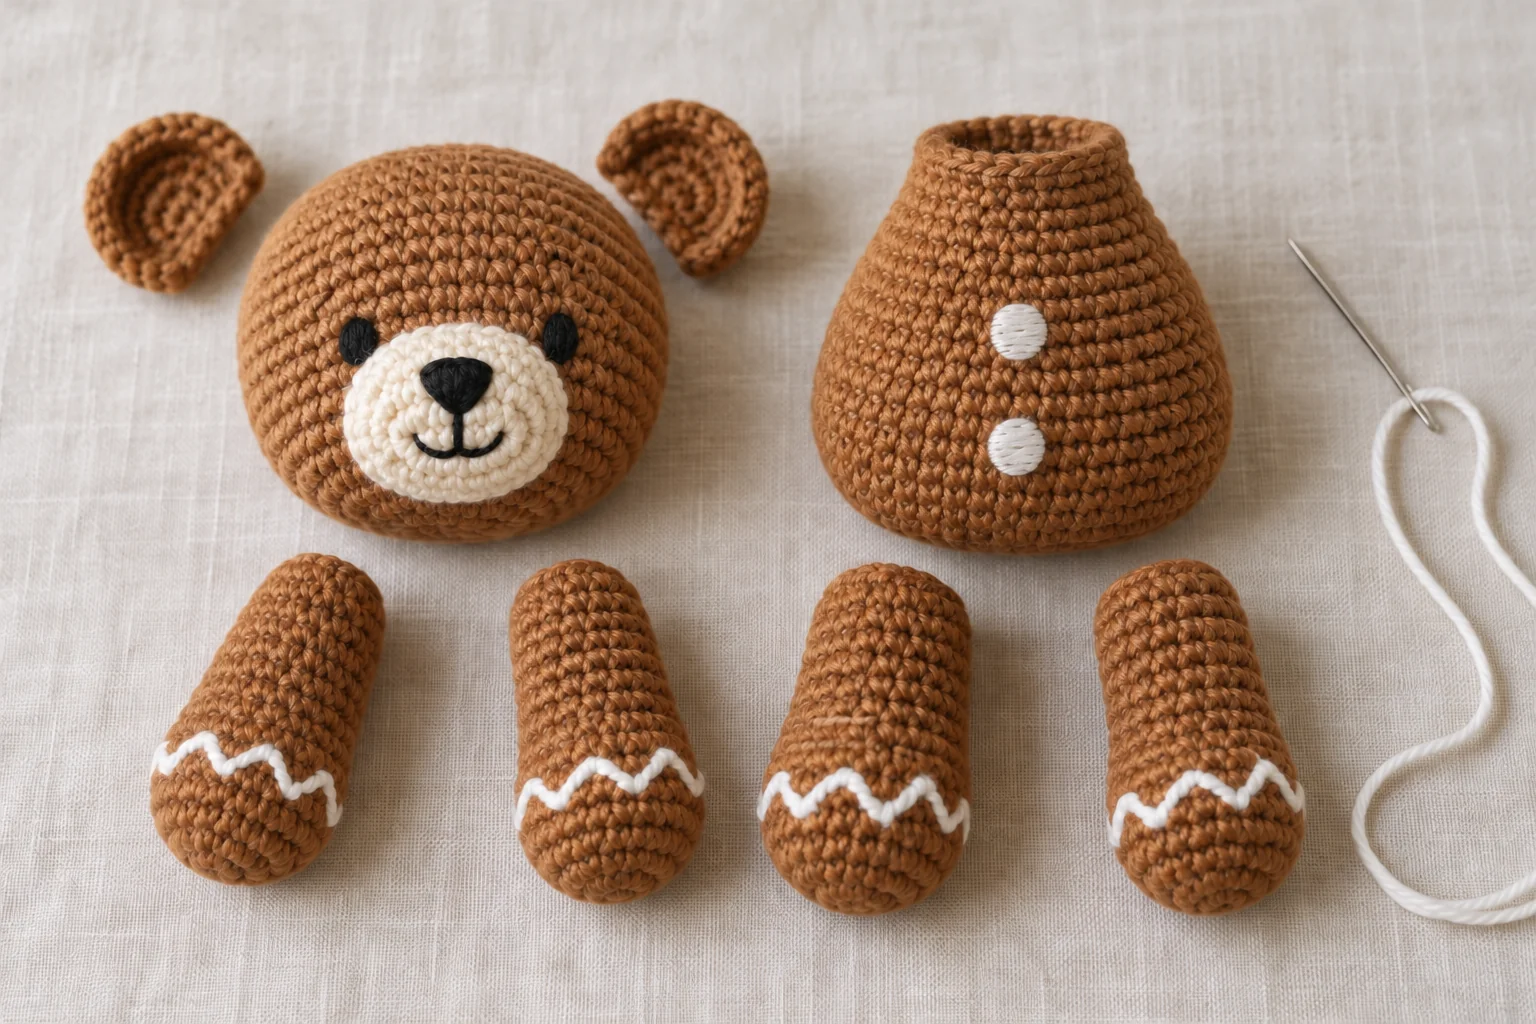
Pin the muzzle over approximately head rounds 11–15. Check its position from the front, then sew around the edge with cream yarn. Avoid pulling tightly enough to flatten the head.
Embroider two black eyes around rounds 10–11, one on either side of the muzzle. Make several short stitches to form small filled ovals. Keep the spacing balanced and bury the yarn ends inside the head through the open neck. This pattern uses embroidered eyes.
With white yarn, add a loose zigzag around each arm near rounds 3–4 and around each foot near rounds 4–5. Alternate the height of the stitches to suggest piped icing. Leave the stitches relaxed so they do not pinch the caramel fabric.
On the front of the body, embroider two small filled white circles: one around rounds 10–11 and one around rounds 7–8. Use short parallel stitches directly into the body. These are embroidered decorations, not separate crochet buttons. Align them vertically before securing the ends.
Step 6: Assemble the Crochet Gingerbread Bear
Pin the head to the body, matching the two 18-stitch neck openings. Face the muzzle toward the decorated front of the body. Sew corresponding edge stitches together with the long caramel tail, adding a little stuffing at the neck before finishing the seam.
Place the ears symmetrically near head rounds 4–7 and sew their flattened edges securely to the head. Check the positions from the front and side before fastening the yarn ends.
Attach the arms just below the neck, keeping the icing visible. Sew each gathered upper end to the body with several small stitches. Position the feet on the lower front so they project forward and support a seated pose.
Pin both feet first, then test the bear on a level surface. Move them slightly outward or forward if the bear tips. Once balanced, sew firmly around each attachment area and weave the remaining tails through the filling.
Step 7: Make and Attach the Green Scarf
Use forest-green yarn.
- Foundation: ch 46.
- Row 1: starting in the second chain from the hook, sc across. (45)
- Row 2: ch 1, turn, sc across. (45)
Fasten off and weave in the ends. Wrap the scarf around the neck and cross its ends at the front or side. Adjust the starting chain if your bear needs a different length; the chain should wrap comfortably with two short ends remaining.
For a display piece, you can secure the overlap with a few matching stitches. Check that the scarf does not cover the mouth or pull the head sideways. Make a final inspection for loose seams, visible stuffing, and trailing yarn ends.
Troubleshooting and Finishing Tips
Stuffing shows through: Use a smaller hook for the next piece and avoid overfilling. Keep increases and decreases snug without tightening the entire fabric excessively.
The head wobbles: Check that the neck seam joins all 18 stitches on both edges. Add a little more stuffing at the join and reinforce any loose section with matching yarn.
The face looks crooked: Reposition the muzzle before completing its seam. Use removable markers to compare the eye positions, and view the head upright rather than only from above.
The bear tips forward: Adjust the foot placement and redistribute stuffing in the base. Test the seated pose while the feet are still pinned.
The icing puckers: Loosen the white embroidery. Surface stitches should rest on the fabric without compressing the underlying rounds.
Frequently Asked Questions
Is this crochet gingerbread bear suitable for beginners?
It is suitable for confident beginners who already know single crochet, increases, and decreases. The separate pieces are straightforward, but sewing and balanced face placement require patience.
Can I use thicker yarn?
Yes, but the bear will be larger and the proportions may change. Choose a hook that gives dense fabric, increase your yarn allowance, and check the scarf length against the finished neck.
Does the pattern use plastic safety eyes?
No. The eyes are embroidered with black yarn. Embroidery does not by itself certify the finished item as safe for children; its intended use and construction still need appropriate assessment.
Are the white tummy circles separate buttons?
No. They are small filled circles embroidered directly onto the body. Use short parallel stitches and keep the two decorations aligned.
Can I leave off the scarf?
Yes. The scarf is a separate accessory, so the bear can be finished without it. You can also change the scarf color while keeping the same row instructions.
How should I clean the finished bear?
Follow the care instructions for both the yarn and filling. Test any cleaning method gently and allow the stuffed bear to dry fully. Avoid assuming every cotton yarn or filling supports machine washing.
Will my bear look exactly like the images?
The images illustrate the design rather than documenting a physically tested sample. Follow the written construction and expect variations from your yarn, tension, embroidery, and assembly.
More Seasonal Crochet Ideas
For another festive character, explore our free crochet gingerbread man pattern. If you are planning projects across the autumn and winter seasons, our crochet witch hat keychain pattern offers a smaller Halloween accessory.
Your crochet gingerbread bear is ready once the seams are secure, the icing details sit smoothly, and the scarf fits comfortably. Take your time with the face and foot placement: these small finishing choices give the bear its expression and seated shape.