Free Crochet Witch Hat Keychain Pattern – Easy Halloween Charm
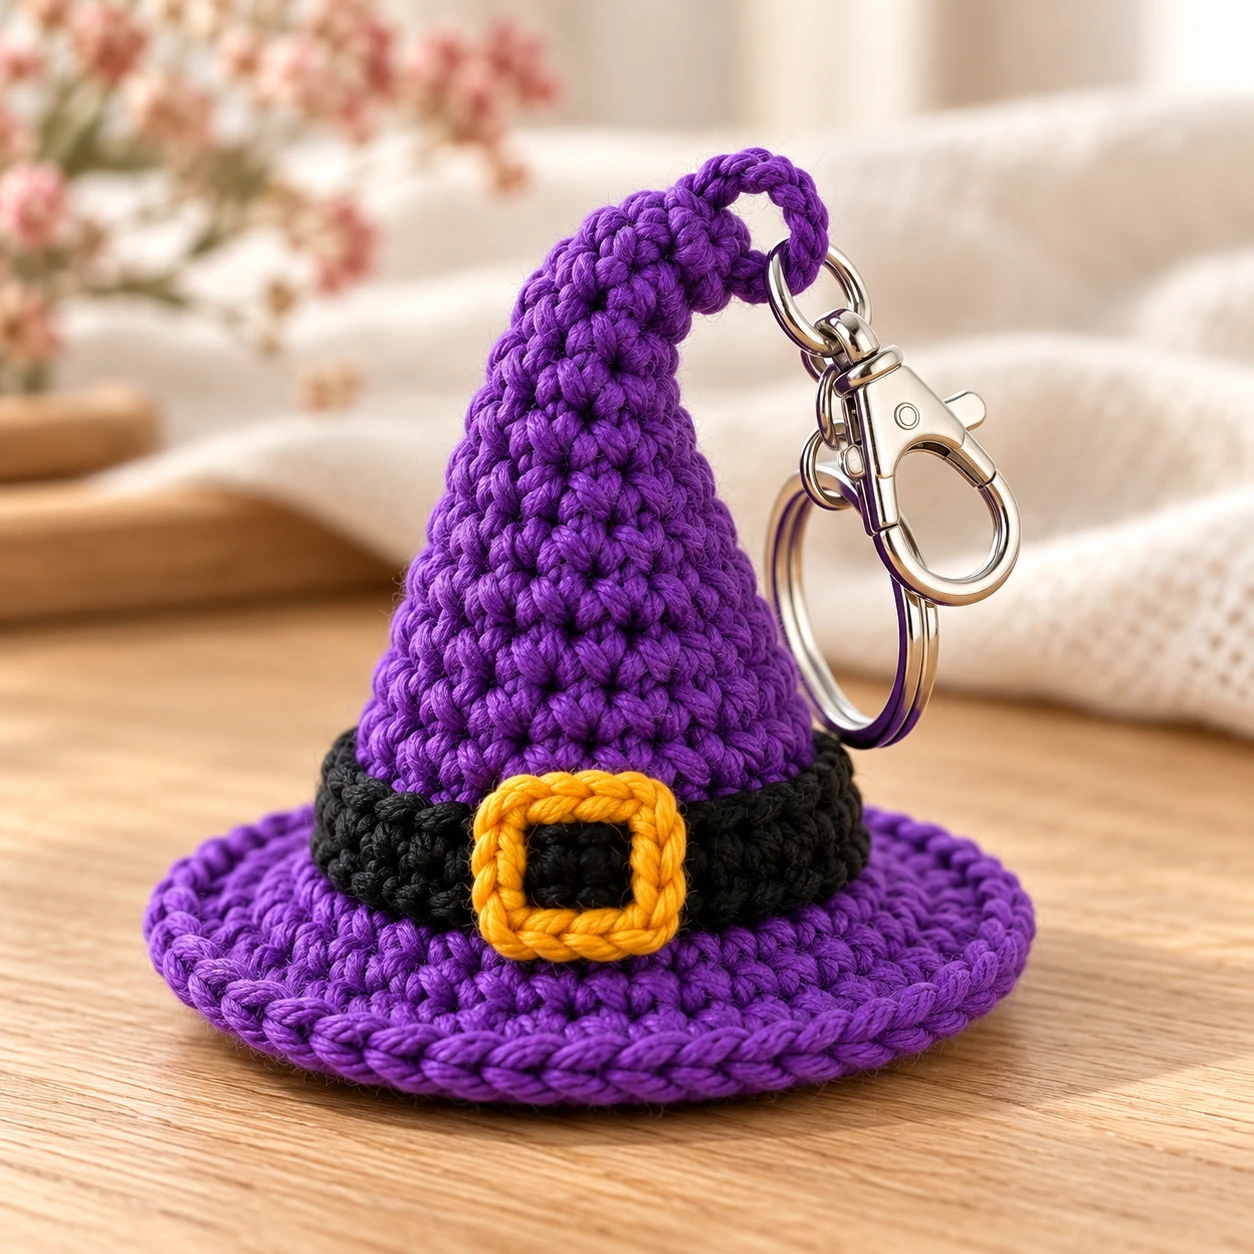
This crochet witch hat keychain pattern makes a small pointed Halloween hat that can hang from keys, a tote bag, backpack, zipper, or purse.
The hat is worked from the tip downward. Slow increases create the cone, and wider increases form the brim directly from the cone, so the brim does not need a separate joining seam. A narrow band and tiny buckle finish the design. The hanging loop is reinforced through several stitches near the top. A small crochet base closes the underside and keeps the filling inside. The finished piece uses very little yarn, so it also works well for leftover yarn from larger Halloween projects.
Pattern Details
Skill level: Confident beginner
Crochet terms: US terminology
Construction: Top-down in continuous rounds
Main stitches: Single crochet, increase, slip stitch
Pieces:
- 1 witch hat
- 1 hat band
- 1 small buckle
- 1 base disk
- 1 hanging loop
- keychain hardware
Recommended hook: 2.5–3 mm
Recommended yarn: DK or light worsted cotton or cotton blend
For a compact keychain, use a hook that gives you a dense fabric. Loose crochet can make the cone look soft and can cause the brim to lose its shape.
Finished Size
Using DK yarn and a 2.75 mm hook, use these measurements as an approximate guide rather than a guaranteed finished size:
Height: 7–9 cm
Brim width: 7–8 cm
Exact measurements depend on yarn, hook size, and personal tension. The metal clasp and hanging loop are not included in the hat height. Measure your finished hat; these dimensions have not been confirmed with a physical sample.
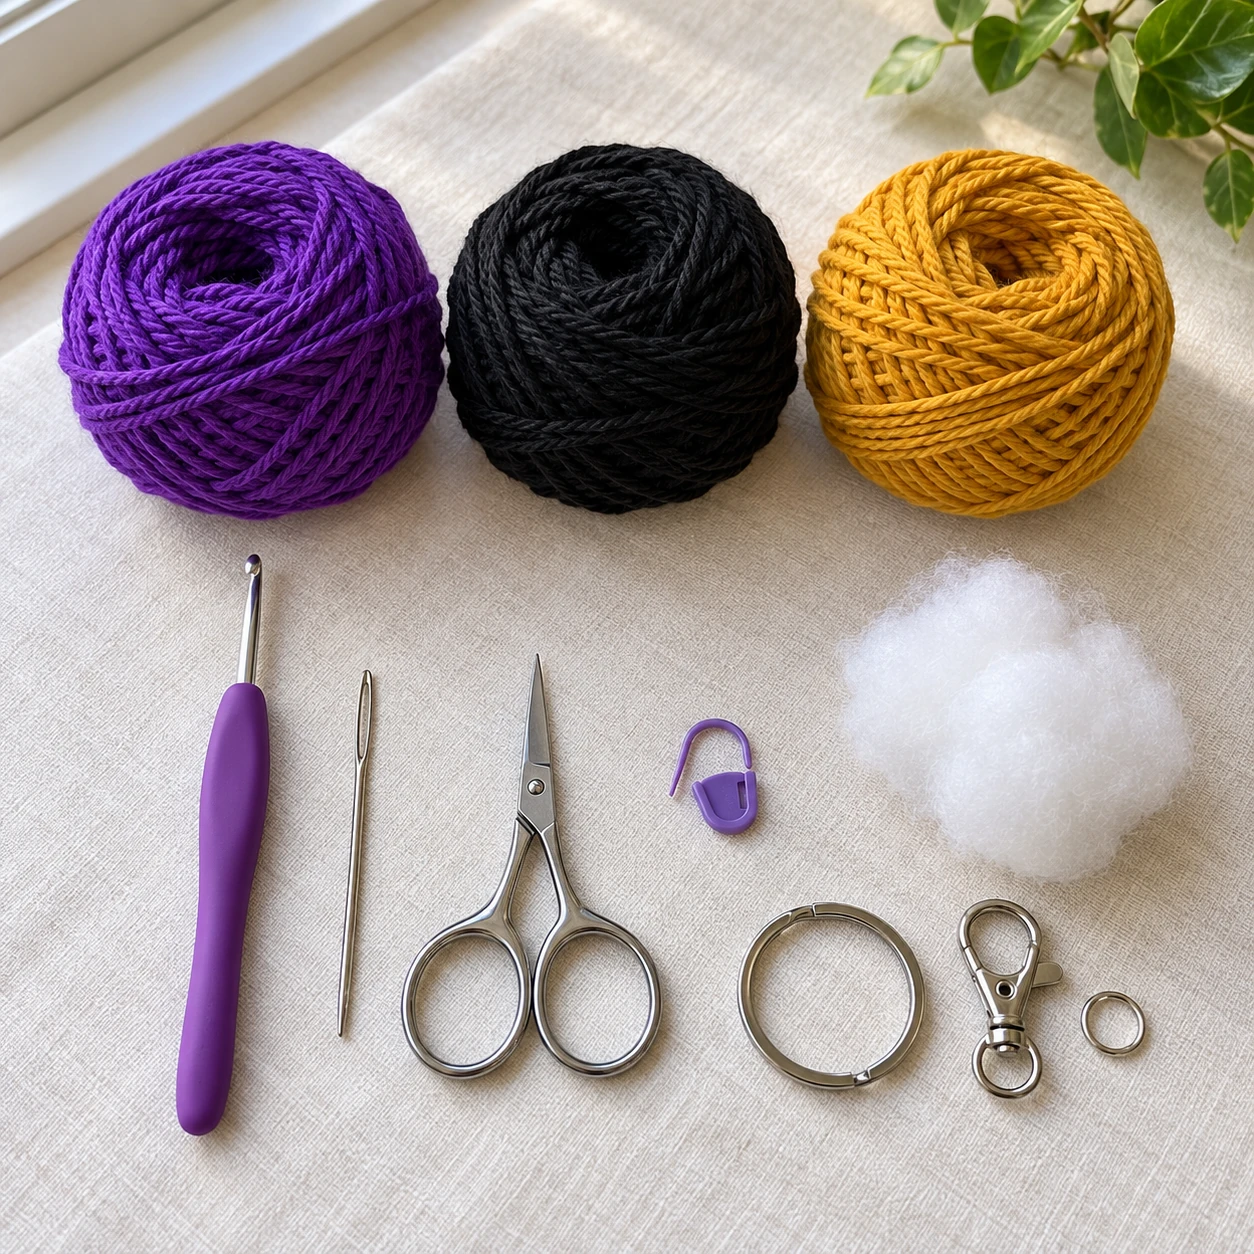
Materials
You will need:
- purple DK or light worsted yarn
- black yarn
- small amount of gold or mustard yarn
- 2.5–3 mm crochet hook
- small amount of polyester stuffing
- yarn needle
- scissors
- stitch marker
- metal jump ring
- lobster clasp or keychain ring
- optional pliers for opening the jump ring
The hat does not need to be firmly stuffed. A small amount of filling is enough to support the cone while keeping the keychain lightweight.
Yarn Colors
The main version uses:
Purple: hat
Black: hat band
Gold or mustard: buckle
Other combinations also work well.
| Hat | Band | Buckle |
|---|---|---|
| Purple | Black | Gold |
| Black | Purple | Orange |
| Lime Green | Black | Purple |
| Orange | Black | Gold |
| Burgundy | Black | Mustard |
| Dark Gray | Orange | Yellow |
A darker main color usually gives the hat a stronger Halloween appearance, while brighter colors make it more playful.
Abbreviations
This pattern uses US crochet terms. Numbers in parentheses show the stitch count at the end of each round. An increase means working two single crochet stitches into the same stitch.
| Abbreviation | Meaning |
|---|---|
| MR | Magic ring |
| ch | Chain |
| sc | Single crochet |
| inc | Increase |
| sl st | Slip stitch |
| st / sts | Stitch / stitches |
| FLO | Front loop only |
| FO | Fasten off |
| rnd | Round |
Pattern Notes
Work the cone in continuous rounds. Place a stitch marker in the first stitch and move it after every round. Do not join rounds unless instructed. Count the stitches regularly. Because the hat increases slowly, one accidental extra increase can noticeably change its shape. Stuff only the lower part of the cone lightly, after reinforcing the hanging loop and before attaching the base disk. The point should remain flexible enough to bend. The brim is crocheted directly from the bottom of the cone. Round 15 uses the front loops only; keep the unused back loops of Round 14 free so you can attach the base disk later.
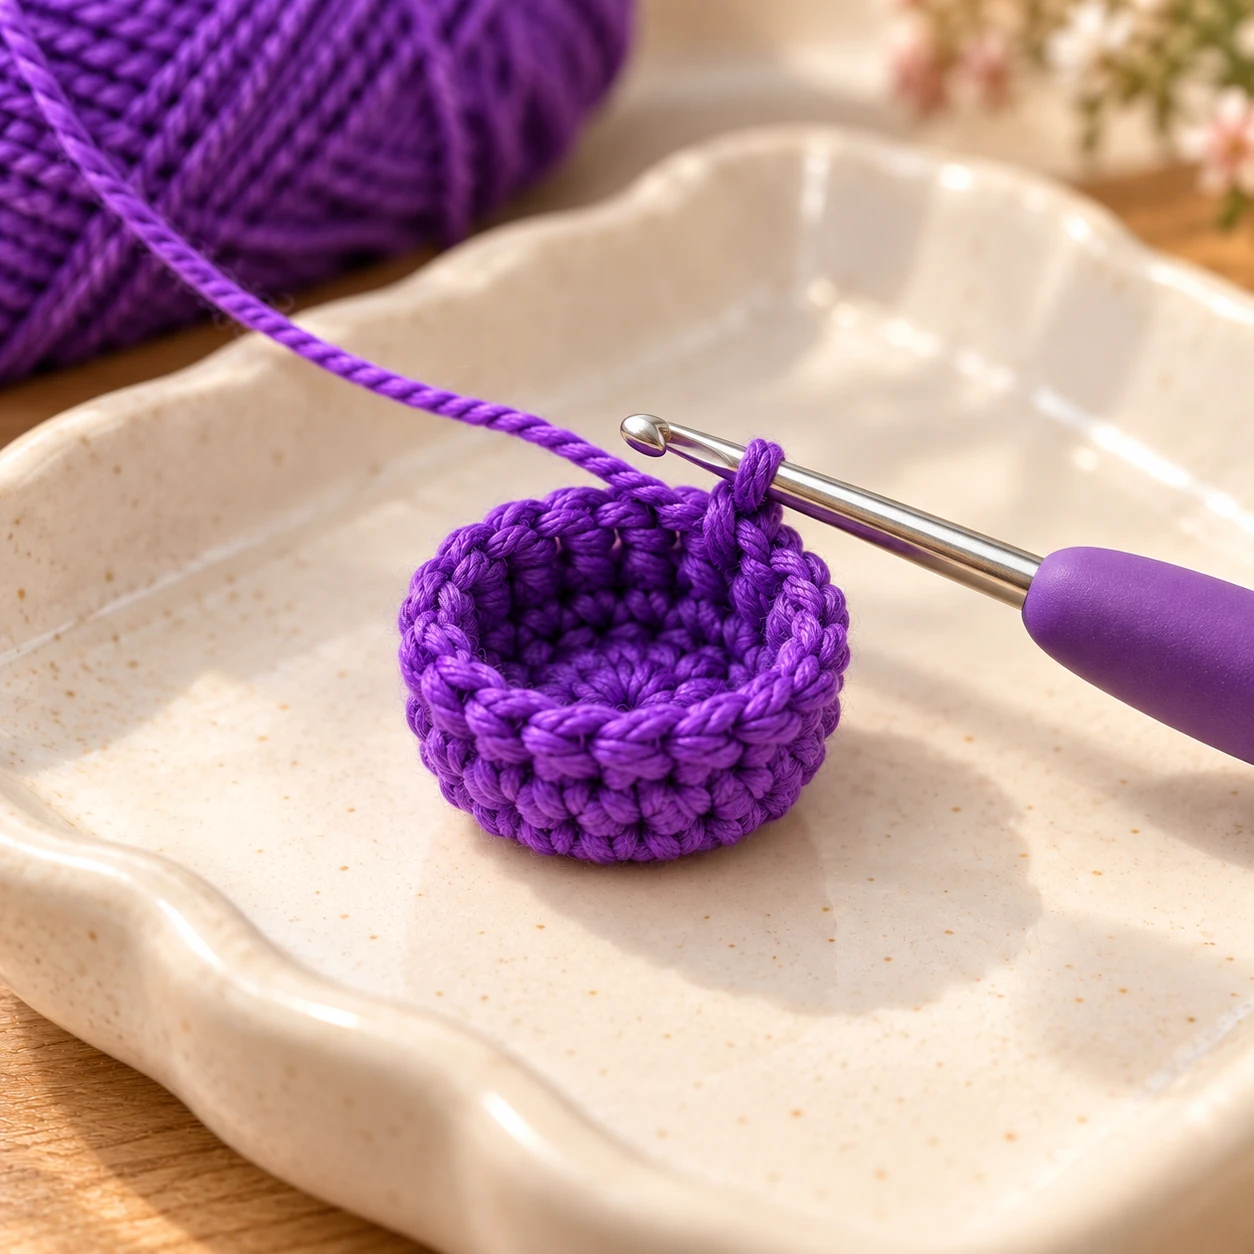
Crochet the Witch Hat
Use purple yarn.
Round 1
Make 6 sc in a magic ring.
(6)
Pull the ring closed.
Round 2
Sc around.
(6)
Round 3
(1 sc, inc) repeat 3 times.
(9)
Round 4
Sc around.
(9)
Round 5
(2 sc, inc) repeat 3 times.
(12)
Round 6
Sc around.
(12)
Round 7
(3 sc, inc) repeat 3 times.
(15)
Round 8
Sc around.
(15)
Round 9
(4 sc, inc) repeat 3 times.
(18)
Round 10
Sc around.
(18)
Round 11
(5 sc, inc) repeat 3 times.
(21)
Round 12
Sc around.
(21)
Round 13
(6 sc, inc) repeat 3 times.
(24)
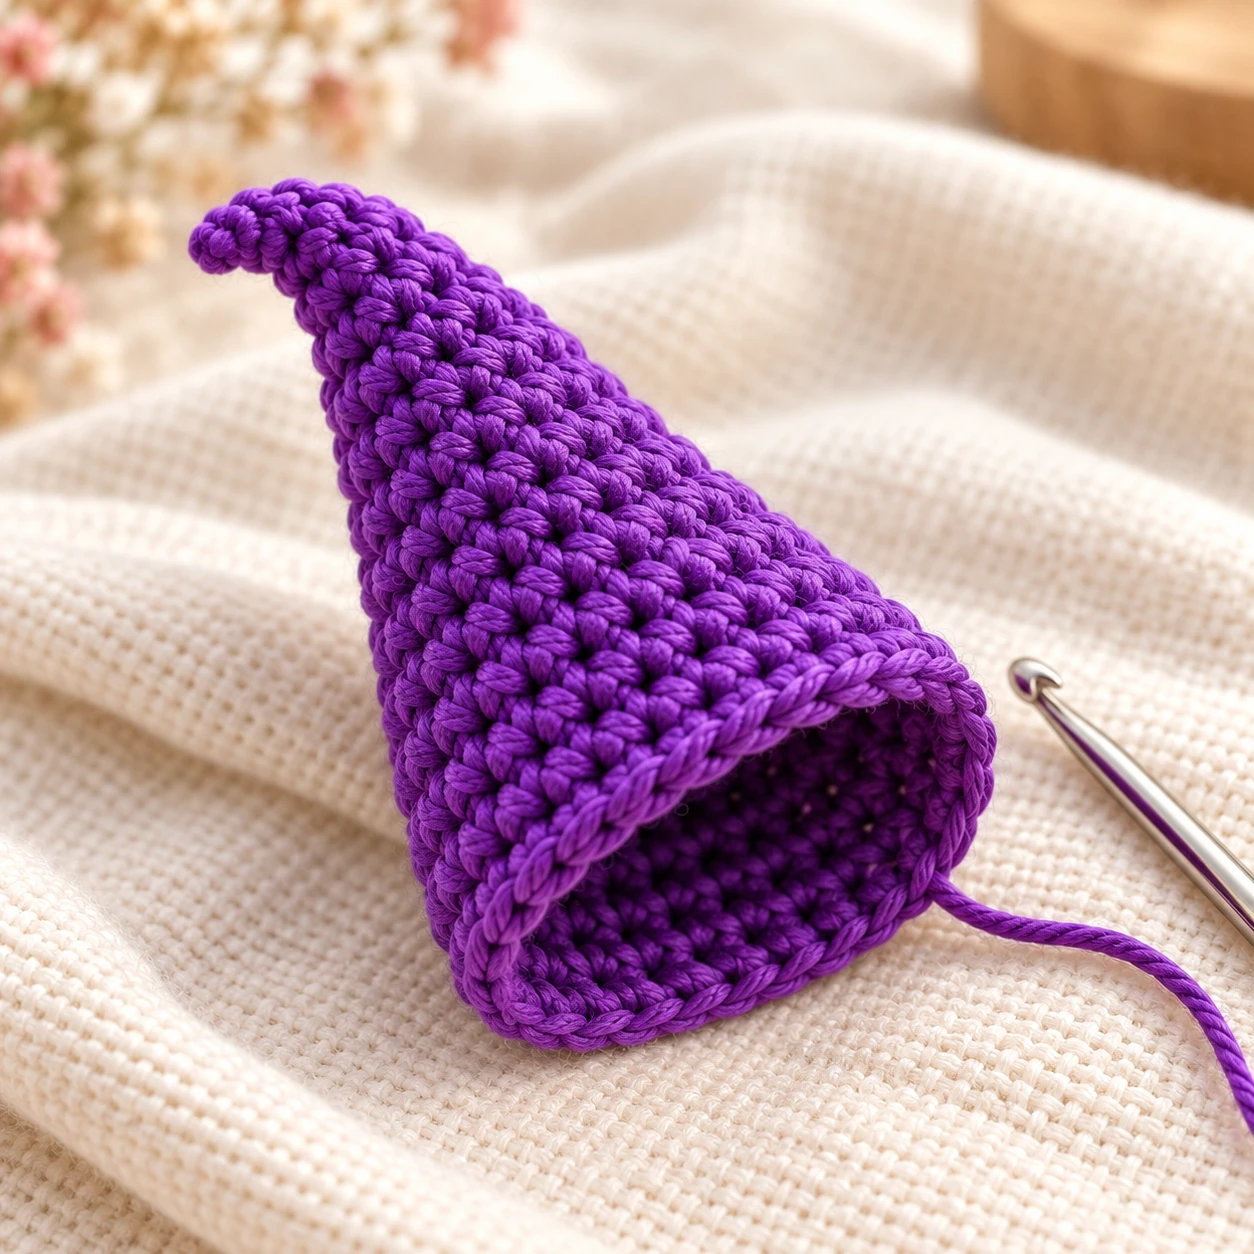
Round 14
Sc around.
(24)
At this point, the piece should look like a narrow cone. Do not fasten off. Leave the cone unstuffed for now. Keeping the underside open makes it easier to shape the point and reinforce the hanging loop. Add the filling just before sewing on the base disk.
Shape the Point
A witch hat looks more natural when the point is slightly bent rather than perfectly straight. Use your fingers to curve the upper third of the cone gently to one side. Thread a short length of matching purple yarn through a yarn needle. Pass the needle through the inside of the cone and catch a stitch near the upper tip. Bring the needle back through the lower part of the bend. Pull very gently until the point curves. Secure the yarn inside the hat. Do not pull hard enough to fold the hat completely. A small curve is enough. You can also leave the hat straight if you prefer a cleaner shape.
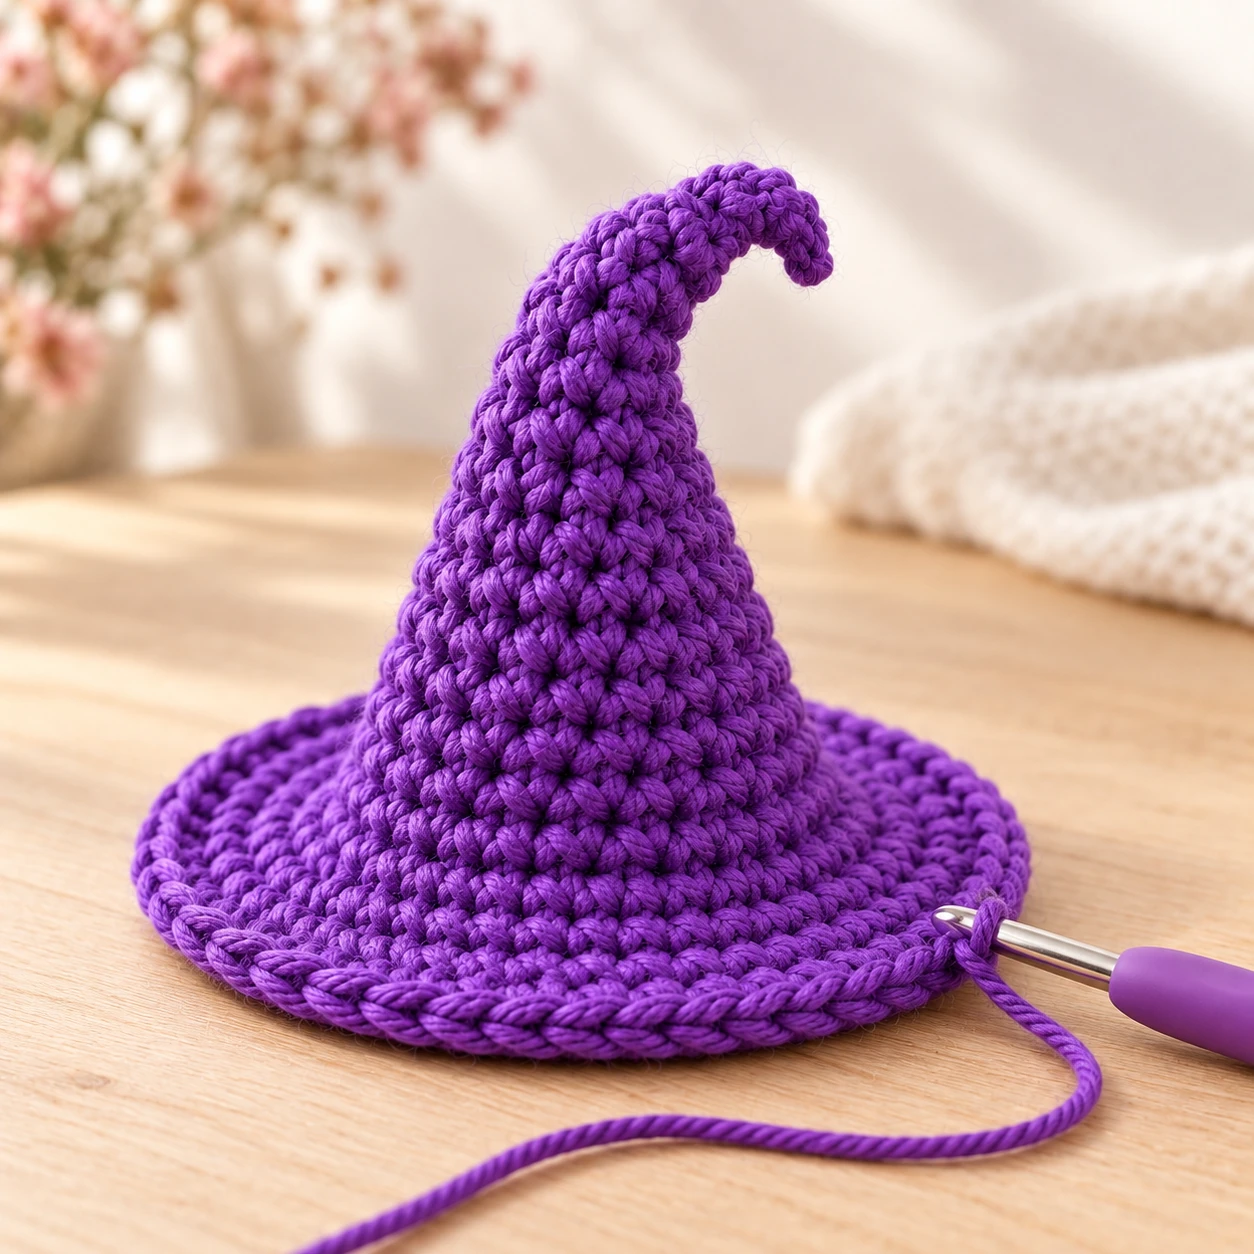
Crochet the Brim
Continue with purple yarn.
Round 15
Work in the front loops only:
(3 sc, inc) repeat 6 times.
(30)
Round 16
(4 sc, inc) repeat 6 times.
(36)
Round 17
(5 sc, inc) repeat 6 times. (42)
Round 18
(6 sc, inc) repeat 6 times. (48)
Join with a sl st in the next stitch and fasten off. The joining slip stitch does not count as an extra stitch. The brim grows by six stitches in every round. Check that it extends beyond the cone without strong ripples. Finger-shape the fabric first; if necessary, block it gently according to the yarn label. Leave the underside open until the hanging loop is reinforced.
Add the Hat Band
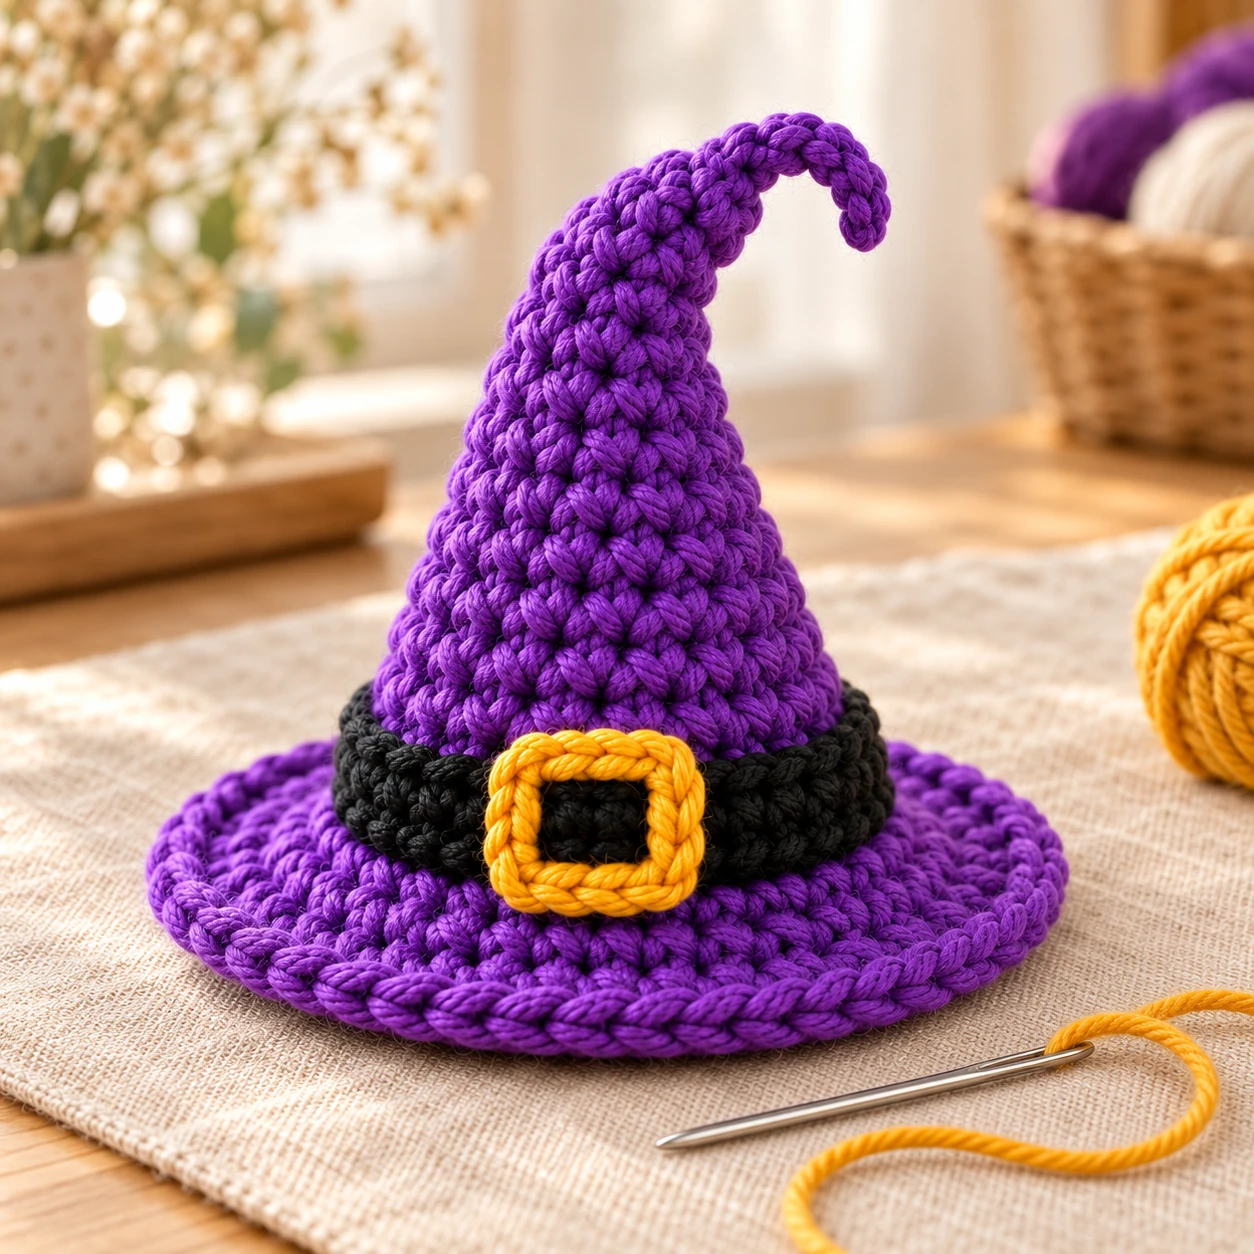
Use black yarn. Make a separate chain band and check its fit around the finished cone before sewing it in place.
Band
Ch 27. Starting in the second chain from the hook, sl st across. Fasten off, leaving a long sewing tail. Wrap the band around the base of the cone, directly above the brim. Check the length before sewing. If the band is too short, remake it with one or two additional chains. If it overlaps too much, remove one or two chains. Sew the ends together at the back. Add several small stitches around the band to keep it from sliding upward. Do not sew through every stitch. Three or four anchor points are enough.
Make the Buckle
Use gold or mustard yarn. The buckle is intentionally small so it does not overwhelm the mini hat.
Buckle
Ch 8. Join to the first chain with a sl st to form a small ring. Fasten off. Use your fingers to shape the ring into a square or rectangle. Place it over the black band on the front of the hat. Sew the four corners lightly to the band. If you want a sharper buckle, embroider a small square directly over the band instead. This can be easier when working with very fine yarn.
Add the Hanging Loop
Attach the loop while the underside of the cone is still open. Use a strong strand of matching yarn approximately 30 cm long, leaving enough length for several reinforcing passes. Thread one end onto a yarn needle. Bring the needle from inside the cone to the outside through a stitch near the tip. Leave a long tail inside. Form a loop extending about 2 cm above the hat, then insert the needle through a different nearby stitch and back into the cone. Follow the same path again to double the loop. Keep the two strands the same length. Inside the cone, weave each tail back and forth through several nearby stitches, changing direction at least twice. Spread the attachment across several stitches rather than pulling on one strand at the tip.
Pull the loop gently to check that the cone keeps its shape and the attachment stays secure. Do this before adding the stuffing or closing the underside. If the fabric puckers, loosen the anchoring stitches and distribute them more widely.
Close the Underside
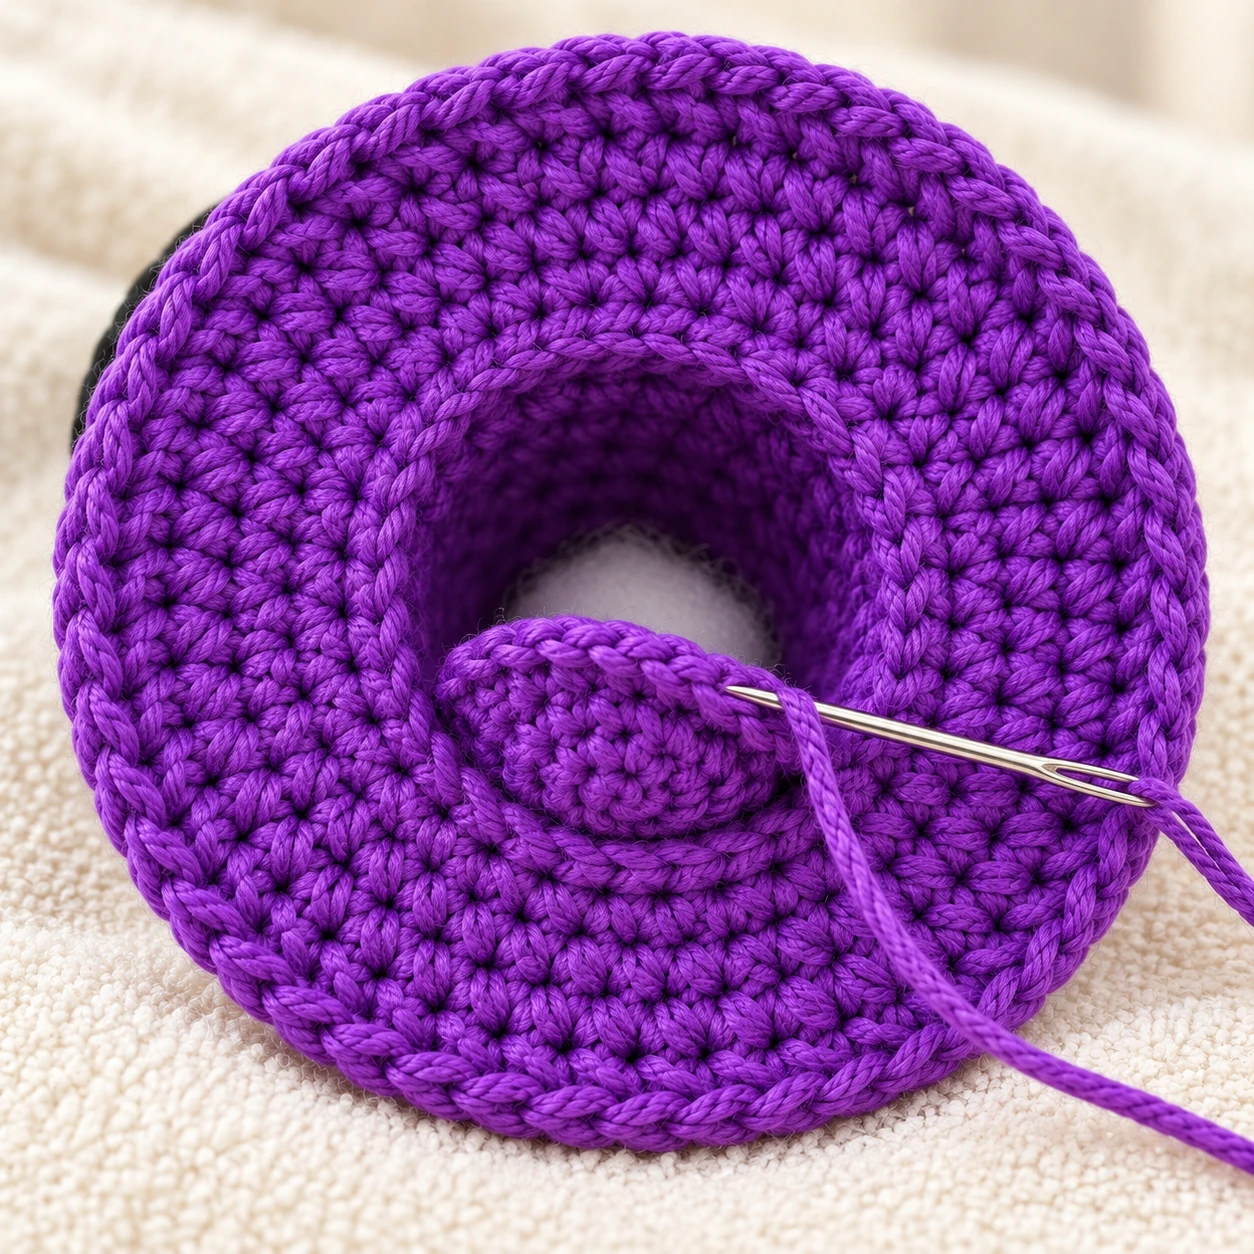
Make one base disk with purple yarn, using the same hook and tension as the cone. Work in continuous rounds and mark the first stitch.
| Round | Instructions | Stitch count |
|---|---|---|
| 1 | 6 sc in a magic ring | 6 |
| 2 | Inc in every stitch | 12 |
| 3 | (1 sc, inc) six times | 18 |
| 4 | (2 sc, inc) six times | 24 |
Fasten off, leaving a long sewing tail. This disk closes the 24-stitch cone opening; it is separate from the wider brim. Add a little fiberfill to the lower cone. Leave the point mostly empty so it can bend. Place the disk against the underside and align its 24 stitches with the 24 unused back loops of Round 14. Pin four evenly spaced points to keep the disk centered. Sew one disk stitch to one unused back loop all the way around. Before the last few stitches, adjust the filling and check that nothing protrudes through the seam. Finish the join, secure the tail, and weave it into the fabric. The base should sit inside the brim without pulling the outer edge inward.
For help keeping this seam even, use our guide to sewing amigurumi pieces together neatly.
Attach the Keychain Hardware
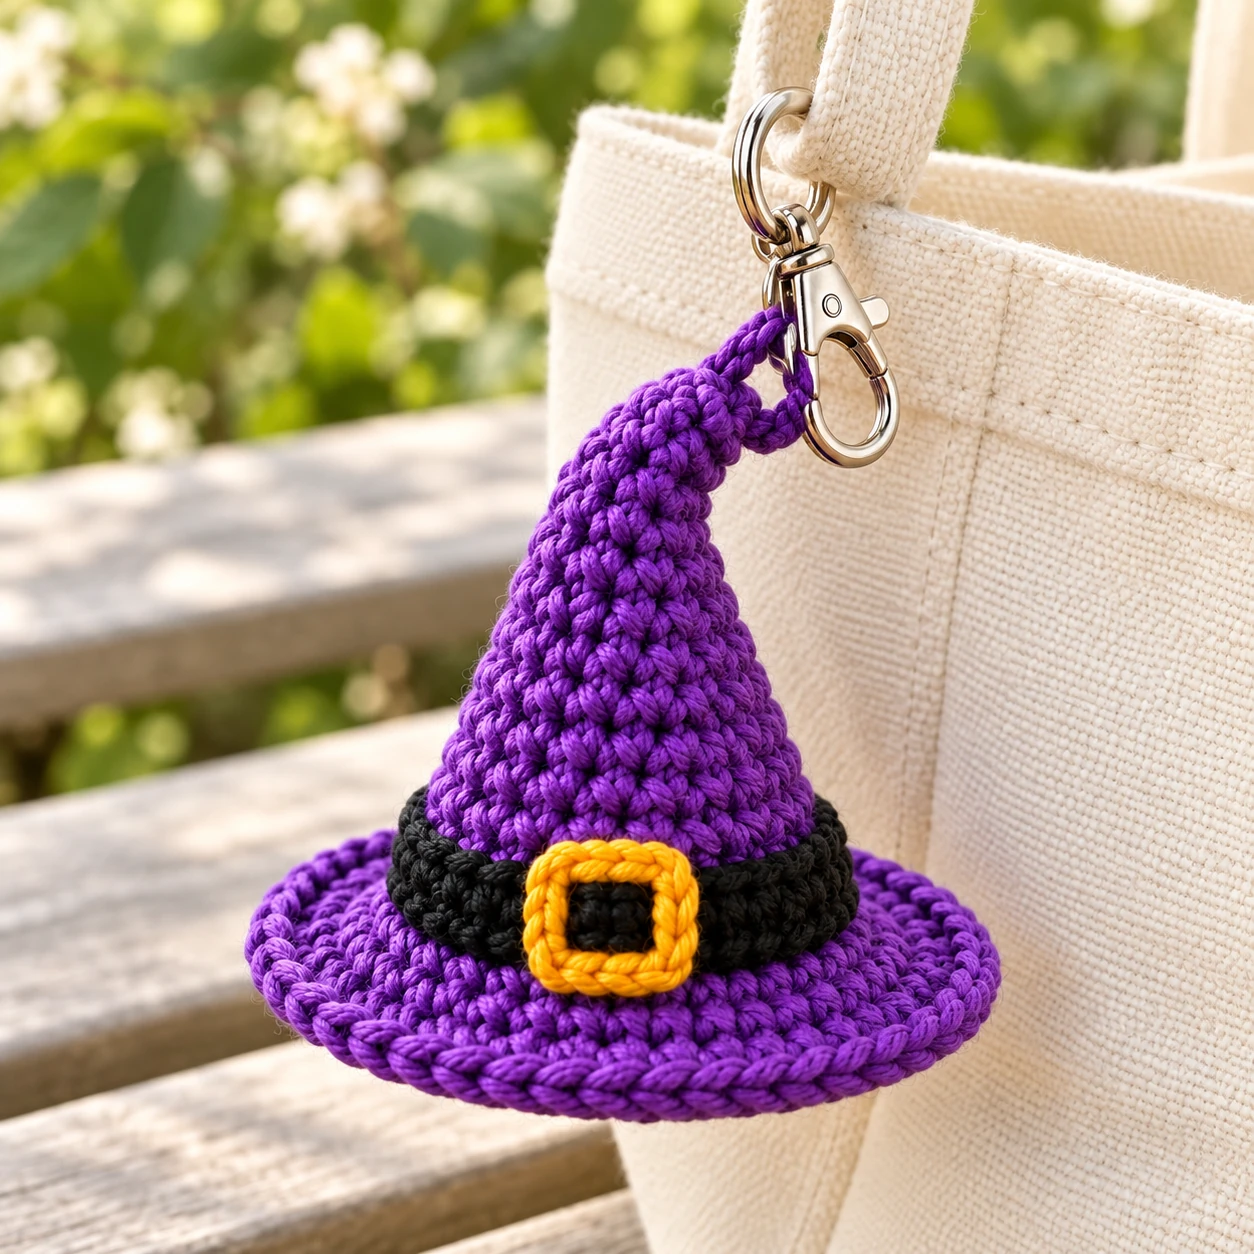
Open a metal jump ring. Whenever possible, twist the ends sideways rather than pulling them directly apart. This helps the ring keep its circular shape. Pass the jump ring through the yarn loop. Add the lobster clasp or keychain ring. Close the jump ring completely. Check that there is no gap where the yarn loop could escape. Give the hardware a gentle pull before using the finished charm. The crochet loop should remain firmly attached to the hat. For another small accessory using a yarn loop and clasp, try the crochet mushroom keychain pattern.
Optional Direct Key Ring Attachment
You can skip the lobster clasp and attach a split key ring instead. Pass the yarn loop through the split ring carefully. This gives the finished piece a simpler appearance and reduces the amount of metal hardware. A lobster clasp is more convenient if you plan to move the hat between bags. A split key ring works well when the hat will stay permanently on a set of keys.
Finishing and Shaping
Check the hat from every side. The point should curve smoothly. The black band should remain level around the cone. The buckle should sit near the center front. Flatten the brim with your fingers. If the filling looks uneven, redistribute it with your fingers. If necessary, unpick a small section of the base seam, adjust the filling, and sew it closed again. Weave all remaining yarn tails through several stitches before trimming. Avoid cutting tails directly beside a knot. Because a keychain moves frequently, securely woven ends are more important than they are on a decorative item that remains on a shelf.
Making the Brim Firmer
If your yarn produces a soft brim, there are several ways to improve it. The simplest option is to use a smaller hook. You can also work an additional round of slip stitches around the outer edge. Insert the hook into each stitch and work one loose slip stitch. Do not pull tightly. A tight slip-stitch round can cause the brim to curl. Another option is to use cotton yarn, which often gives small accessories more structure than very soft plush yarn.
Adjusting the Size
For a smaller zipper charm, use finer yarn and a matching smaller hook while keeping all stitch counts unchanged. For a larger bag charm, use thicker yarn and a suitable hook. The cone, brim, and base disk must all use the same yarn weight and compatible tension. Changing the cone stitch count also changes the required brim increases and base disk size. For this version, keep the cone at 24 stitches and the disk at 24 stitches so the closure remains straightforward. Measure the band against your finished cone rather than relying on the starting chain alone.
Color Ideas
The same crochet witch hat keychain pattern can look completely different with a small color change.
Classic Witch Hat
Black hat
Purple band
Gold buckle
Cute Purple Witch
Purple hat
Black band
Yellow buckle
Pumpkin Witch
Orange hat
Black band
Green buckle
Candy Witch
Pink hat
Purple band
White buckle
Gothic Witch
Charcoal hat
Burgundy band
Silver-gray buckle
Green Halloween Witch
Lime green hat
Black band
Purple buckle
You can also embroider tiny stars, moons, dots, or spiderweb lines onto the cone after the hat is complete. Keep additional decoration light so the small shape remains easy to read. Pair the finished charm with the crochet Halloween trick-or-treat bag for a coordinated orange-and-purple set.
Optional Hanging Star
A tiny star can be added beside the buckle or attached to the hat tip. For a simple embroidered version, use yellow yarn and make five short stitches that meet in the center. This works better on a keychain than attaching a bulky separate crochet star. It also keeps the finished charm light.
Optional Face
A witch hat keychain does not need a face, but a kawaii version can be made by adding embroidered eyes near the lower front of the cone. Use black embroidery thread or fine black yarn. Make two small vertical stitches for the eyes. Add a tiny curved smile between them. Pink cheek stitches can be added below the eyes. Do not use safety eyes on a very small keychain if you want the front to remain light and flexible. Embroidery also avoids adding extra plastic components. For another Halloween project with facial details, see the crochet poison apple pattern.
Common Problems
The Hat Looks Too Wide
The increases may have been added too quickly. Check the stitch counts after every increase round. The cone uses an increase round followed by a plain round so the shape grows gradually.
The Point Is Too Short
Your stitches may be shorter than expected. Add one or two plain rounds before the next increase. This lengthens the cone without making it wider.
The Brim Is Wavy
Too many increases or very loose tension can cause rippling. Check that Round 15 begins with 24 stitches and finishes with 30. The following rounds should finish with 36, 42, and 48 stitches. If your brim remains wavy, try a smaller hook for the brim.
The Brim Curls Up
Tight tension can pull the outer rounds inward. Work the final round more loosely. Light blocking can also help if your yarn allows it.
The Band Keeps Sliding
Anchor it with several small stitches around the hat. Do not depend only on joining the two band ends together.
The Tip Will Not Stay Bent
Use a hidden strand of matching yarn to hold the curve. Take small stitches through the inside so they do not show from the front.
The Keychain Loop Feels Weak
Do not attach the hardware to a single crochet strand. Use a doubled yarn loop anchored through several stitches. For a frequently used keychain, check the loop occasionally for wear.
The Hat Is Too Soft
Remove excess stuffing if it distorts the base, and choose a slightly smaller hook if the stitches are loose. A dense stitch fabric gives the cone more structure.
Frequently Asked Questions
Is this crochet witch hat keychain pattern suitable for beginners?
It is best for a confident beginner who already knows how to make a magic ring, single crochet, increases, slip stitches, and basic sewing.
What yarn works best for a witch hat keychain?
DK cotton or a firm cotton blend works especially well because it creates visible stitches and enough structure for the brim. Light worsted acrylic can also be used.
Can I use worsted-weight yarn?
Yes. The finished witch hat will usually be larger. Use a hook size that keeps the stitches compact.
Does the hat need stuffing?
Only a small amount. The stuffing supports the lower cone while the point stays flexible enough to curve. Sew the base disk in place to keep the filling enclosed.
Can I make the witch hat without a buckle?
Yes. The black band alone is enough to define the design. You can also replace the buckle with a small embroidered star.
Can I attach it directly to a zipper?
Yes. Use a lobster clasp small enough to fit the zipper pull. Check that the clasp opens and closes smoothly before attaching it.
Can I turn this into a Halloween ornament?
Yes. Replace the keychain hardware with a longer yarn hanging loop. Keep the same cone, brim, and closed base. Reinforce the yarn loop in the same way before hanging it.
How do I stop the brim from bending?
Use firm yarn, tighter tension, and a smaller hook. An additional loose slip-stitch round around the edge can also add structure.
Can I use plush yarn?
You can, but plush yarn will create a much larger hat and may hide the small buckle and band details. A smooth yarn is easier to control for a miniature keychain.
Can children use this keychain?
The finished item contains small components such as metal rings and clasps. Treat it as a decorative accessory rather than a toy for very young children.
How can I make several hats quickly?
Work each cone and its integrated brim without fastening off between them. Make several hats this way, then batch the base disks, bands, and buckles. Reinforce each hanging loop before stuffing and closing its hat.
Working the project in batches reduces the number of yarn and tool changes.