Crochet Halloween Trick-or-Treat Bag Pattern – Free & Easy
Make a sturdy crochet Halloween trick-or-treat bag with a jack-o’-lantern face, reinforced handles, roomy body, and easy step-by-step instructions.
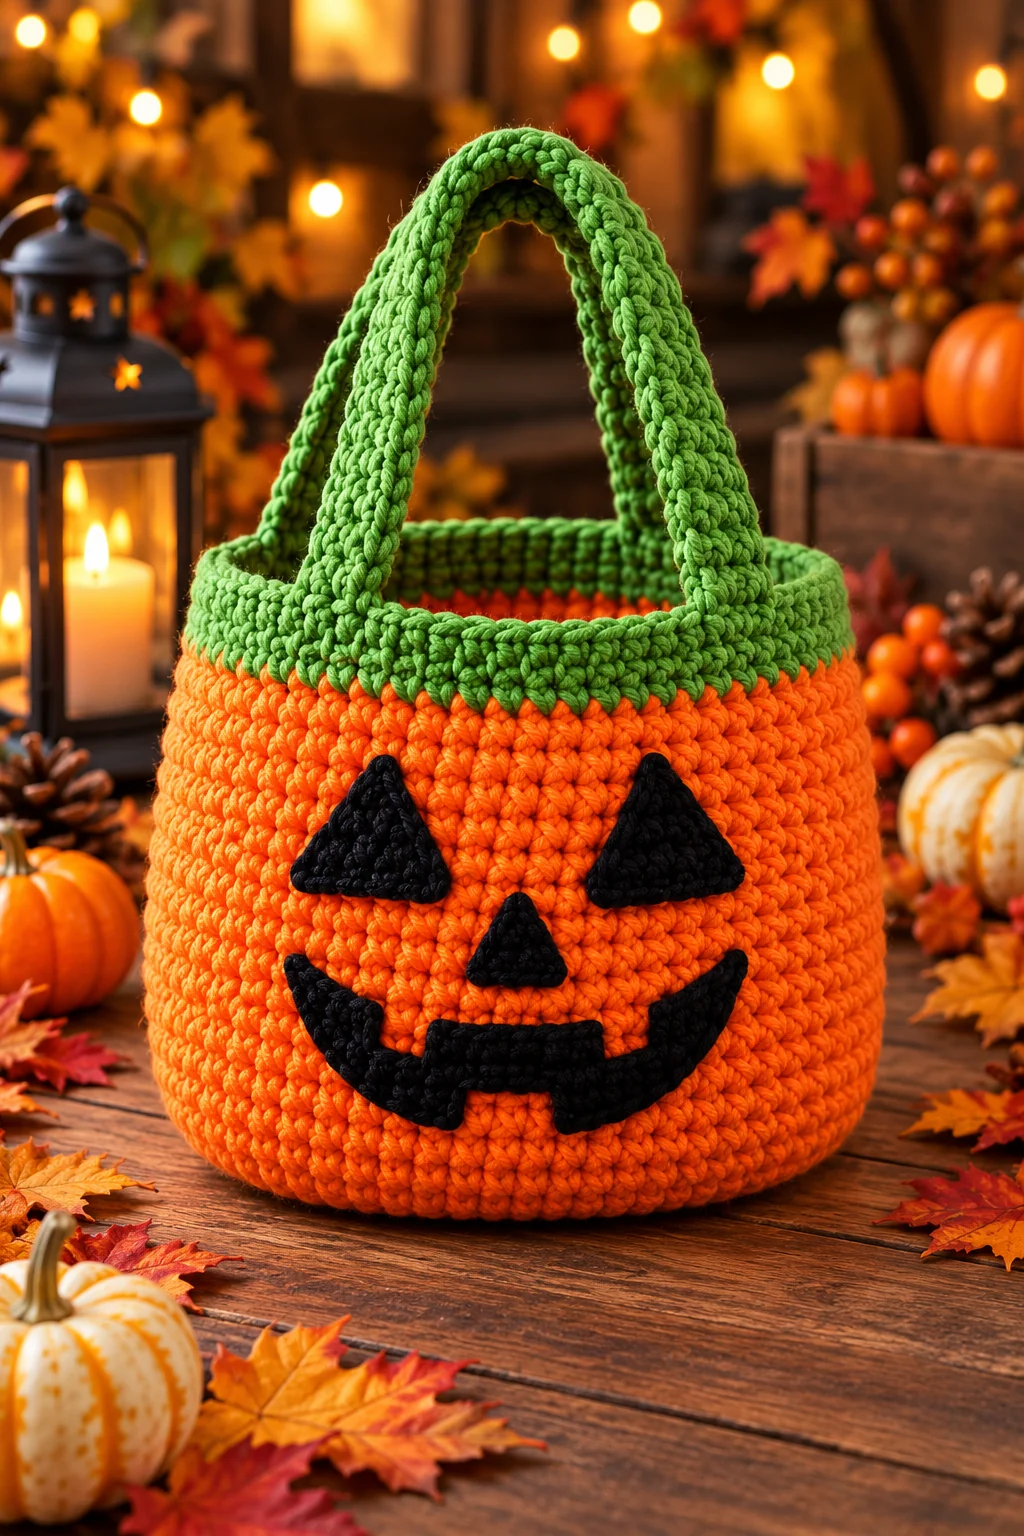
This crochet Halloween trick-or-treat bag pattern makes a bright orange candy bag with a black jack-o’-lantern face, a green top band, and two sturdy crochet handles.
The bag is worked from the bottom up. You will crochet a flat circular base first, continue straight up for the body, then add the green band, face details, and handles.
The finished bag is roomy enough for Halloween treats while still being comfortable to carry.
Pattern Details
| Detail | Information |
|---|---|
| Skill level | Confident beginner |
| Terminology | US crochet terms |
| Yarn weight | Worsted weight / medium #4 |
| Hook size | 5 mm |
| Construction | Circular base, straight body, separate handles |
| Main color | Pumpkin orange |
| Accent colors | Black and green |
| Gauge | Not critical |
| Finished size | Medium child-sized candy bag |
Materials
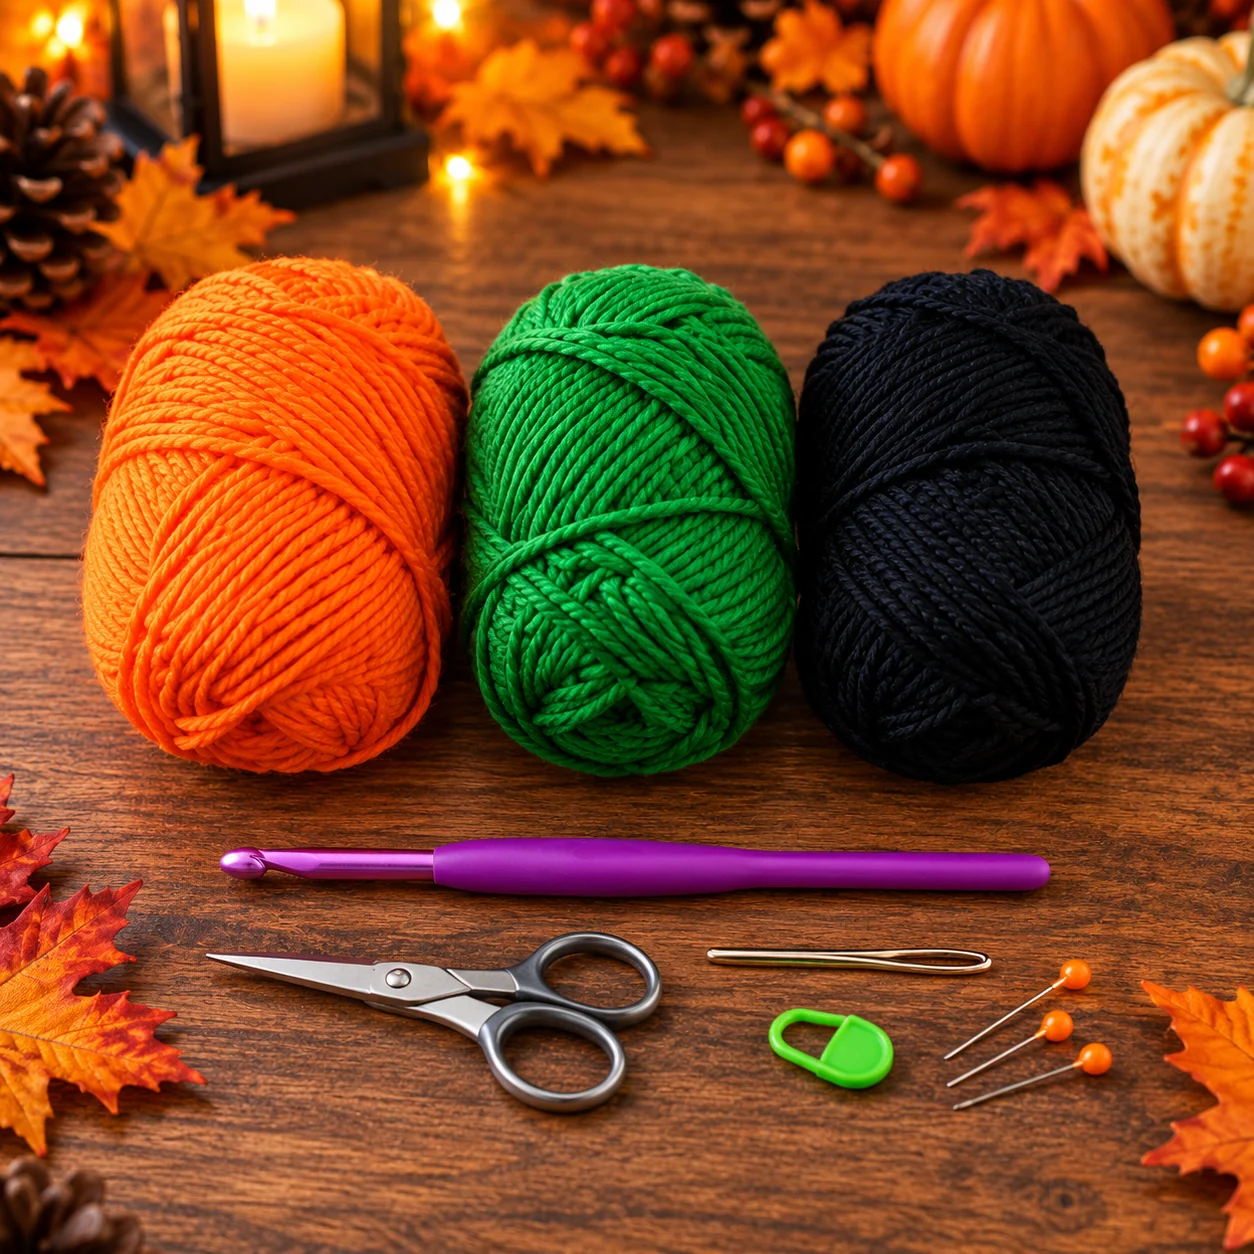
- 180–220 g orange worsted-weight yarn
- 25–35 g green worsted-weight yarn
- 20–30 g black worsted-weight yarn
- 5 mm crochet hook
- Yarn needle
- Scissors
- Stitch marker
- Pins
- Optional fabric lining
- Optional plastic canvas for the base
A firm cotton, cotton blend, or acrylic yarn works well for this project. Very soft yarn can be used, but the finished bag may stretch more when filled.
Crochet Abbreviations
| Abbreviation | Meaning |
|---|---|
| MR | Magic ring |
| ch | Chain |
| sc | Single crochet |
| inc | Increase |
| sl st | Slip stitch |
| st / sts | Stitch / stitches |
| BLO | Back loop only |
| FO | Fasten off |
| rnd | Round |
Before You Start
Work the bag in continuous rounds unless a section says otherwise. Place a stitch marker in the first stitch of each round and move it upward as you work.
Check your stitch count regularly, especially during the straight body rounds. The base should lie flat before you begin building the sides. For tips on pinning and sewing the facial pieces, see our guide to neat amigurumi assembly. For a matching seasonal decoration, try the no-sew crochet pumpkin pattern.
Crochet the Bag Base
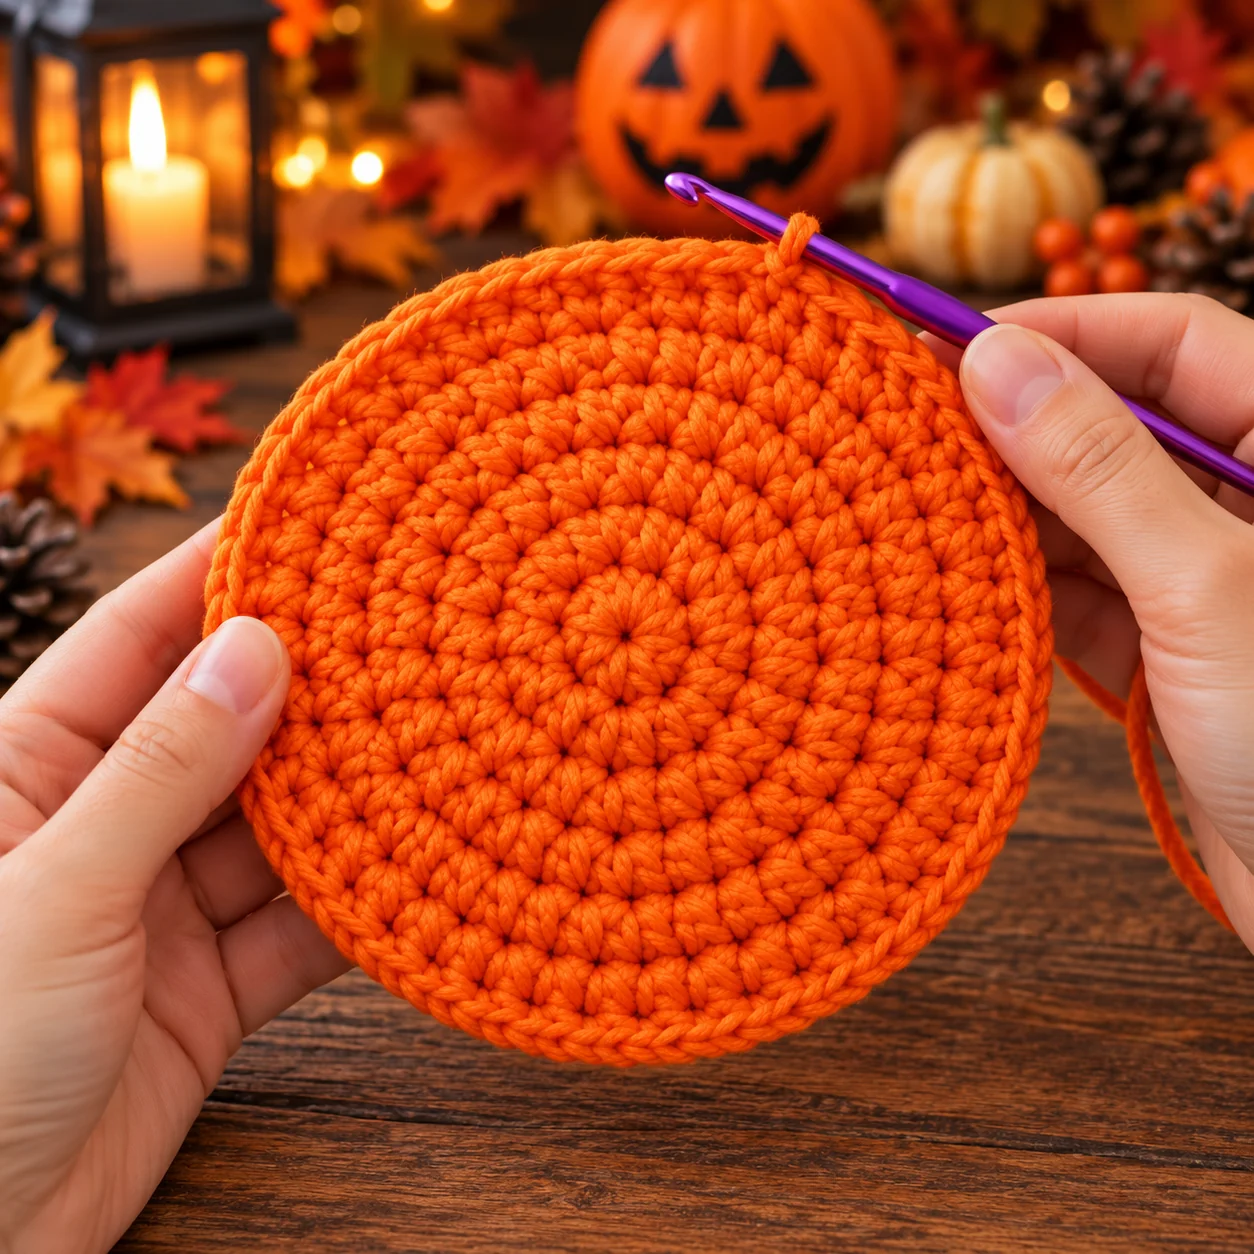
Use orange yarn.
Round 1
Make 6 sc in MR. 6 sts
Round 2
Inc in every stitch. 12 sts
Round 3
(1 sc, inc) repeat 6 times. 18 sts
Round 4
(2 sc, inc) repeat 6 times. 24 sts
Round 5
(3 sc, inc) repeat 6 times. 30 sts
Round 6
(4 sc, inc) repeat 6 times. 36 sts
Round 7
(5 sc, inc) repeat 6 times. 42 sts
Round 8
(6 sc, inc) repeat 6 times. 48 sts
Round 9
(7 sc, inc) repeat 6 times. 54 sts
Round 10
(8 sc, inc) repeat 6 times. 60 sts
Round 11
(9 sc, inc) repeat 6 times. 66 sts
Round 12
(10 sc, inc) repeat 6 times. 72 sts
Lay the base flat and check the shape. It should form a broad circle without strong waves or curling.
Crochet the Bag Body
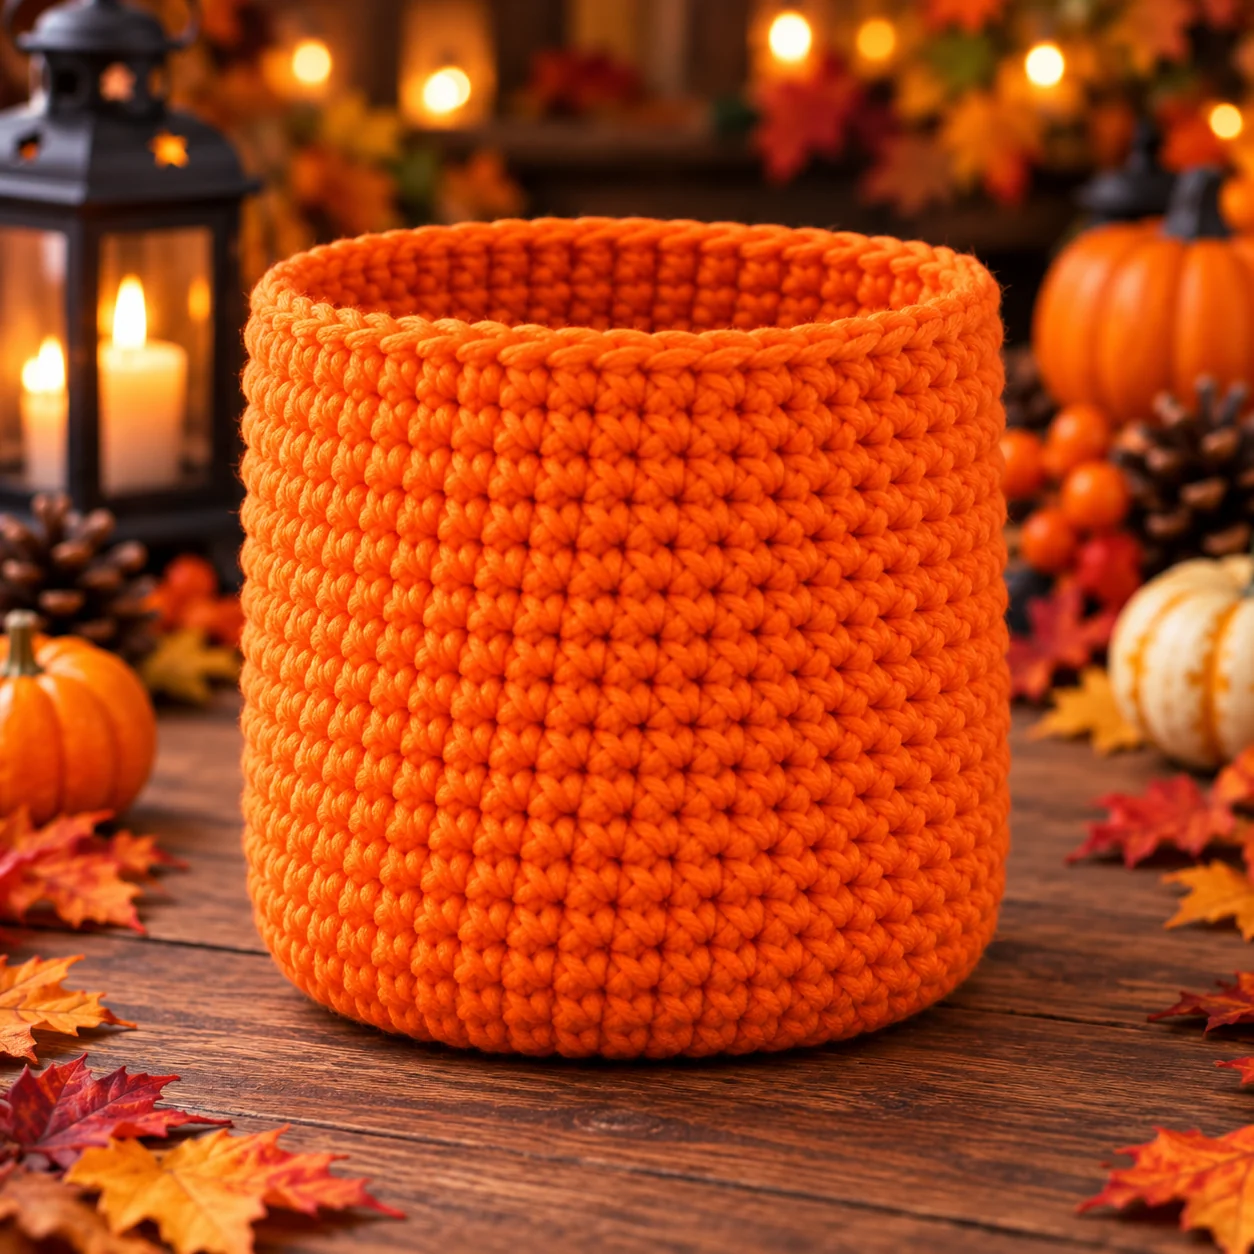
Round 13
BLO sc around. 72 sts
Working in the back loops creates a defined fold between the base and the side wall.
Rounds 14–32
Sc around. 72 sts
Do not add any increases. Keep checking the stitch count so the bag stays straight.
Add the Green Top Band
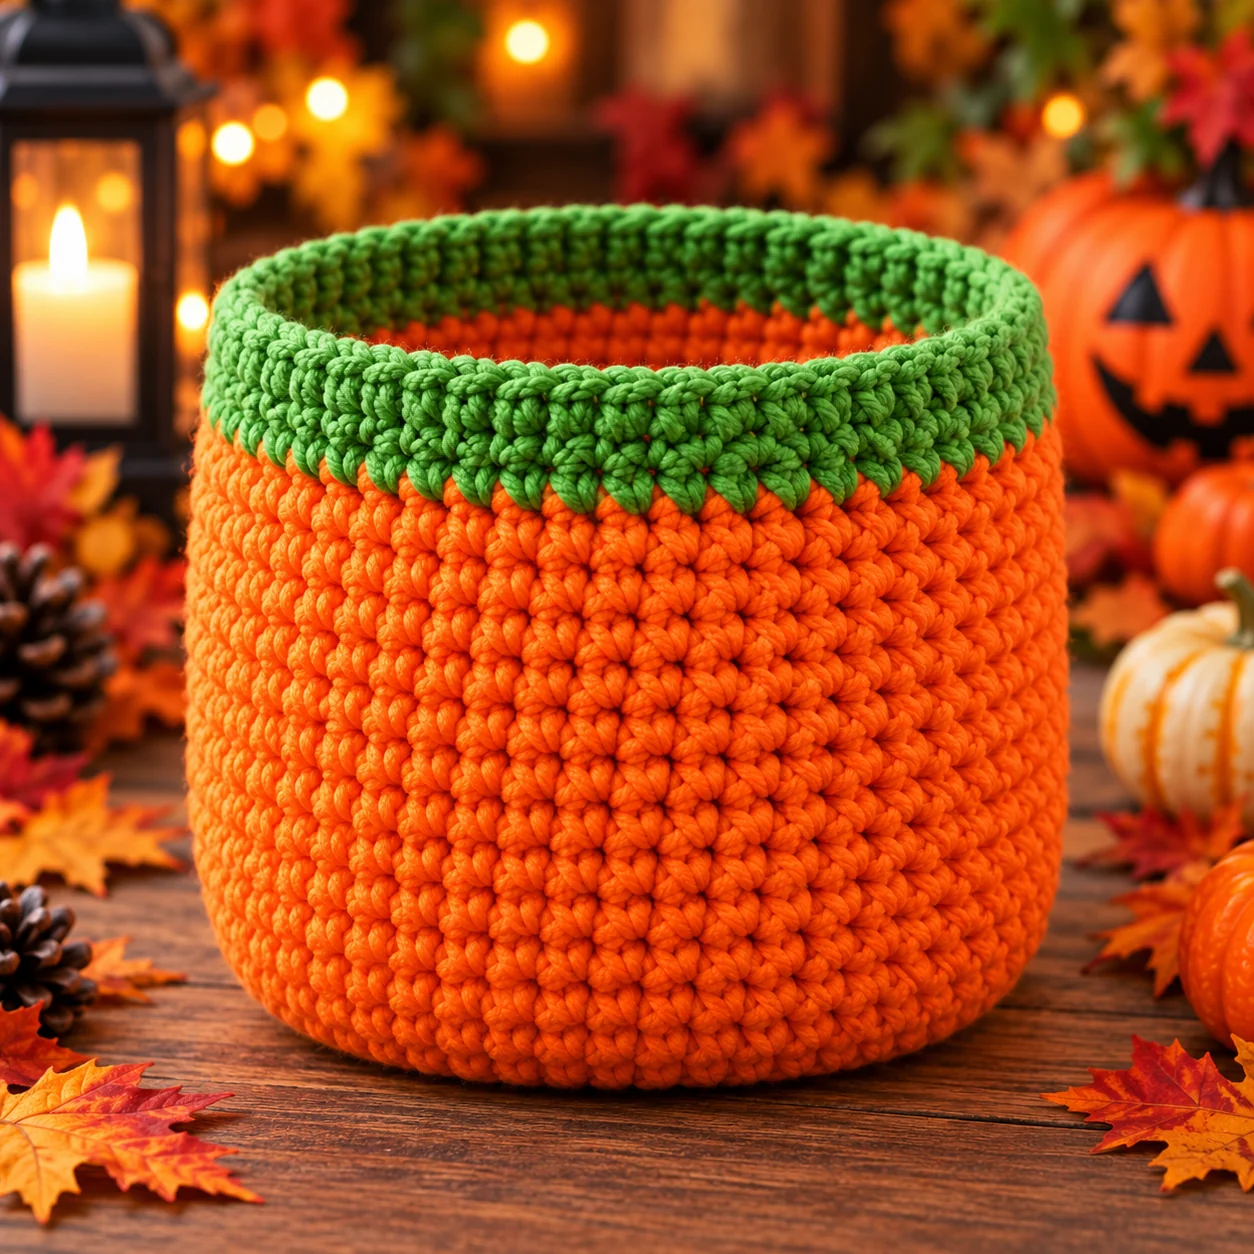
Change to green yarn.
Rounds 33–35
Sc around. 72 sts
Round 36
Sl st loosely around. Fasten off.
Make the Jack-o’-Lantern Eyes
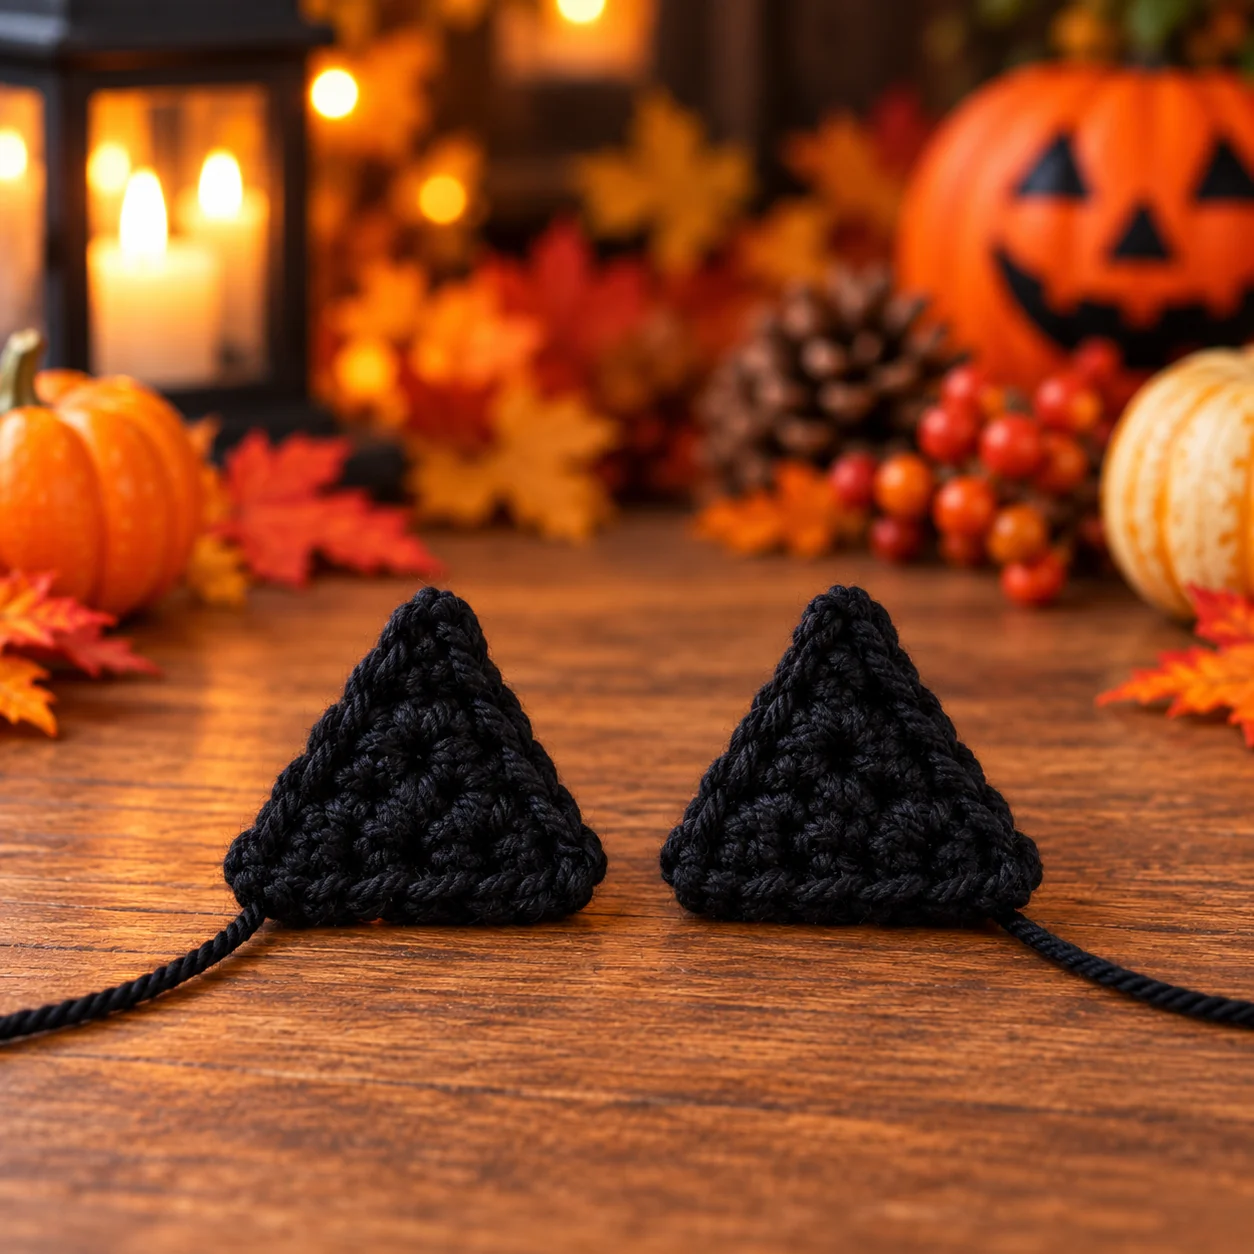
Make 2 with black yarn. After every row except the last, ch 1 and turn. The turning chain does not count as a stitch; work the next row into the first single crochet.
Row 1
Ch 2. Work 2 sc in the second chain from the hook. 2 sts
Row 2
Inc in each stitch. 4 sts
Row 3
Sc across. 4 sts
Row 4
Inc, sc in next 2 sts, inc. 6 sts
Fasten off, leaving a long sewing tail. Gently shape the piece into a triangle and repeat for the second eye.
Add the Pumpkin Mouth
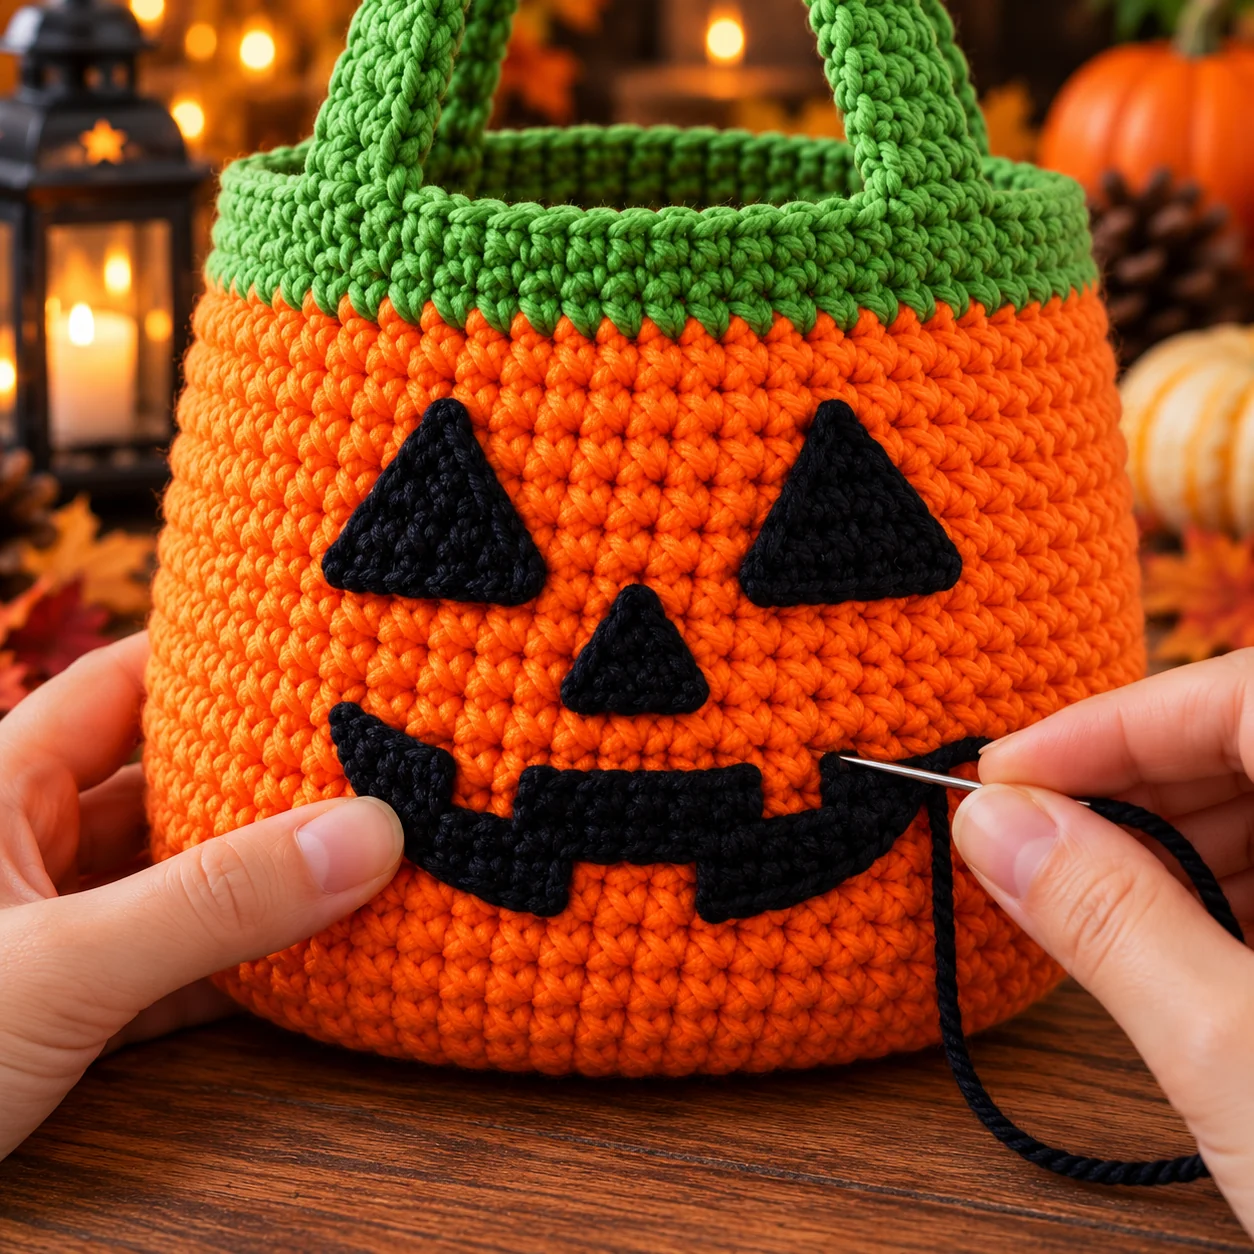
Use black yarn and a yarn needle. Create a wide curved smile with long stitches. For a classic jack-o’-lantern look, add a few short vertical or angled stitches along the smile.
Optional Pumpkin Nose
Make a smaller black triangle using the same method as the eyes, stopping after Row 2 or Row 3. Place it between the eyes and mouth and sew securely.
Crochet the Handles
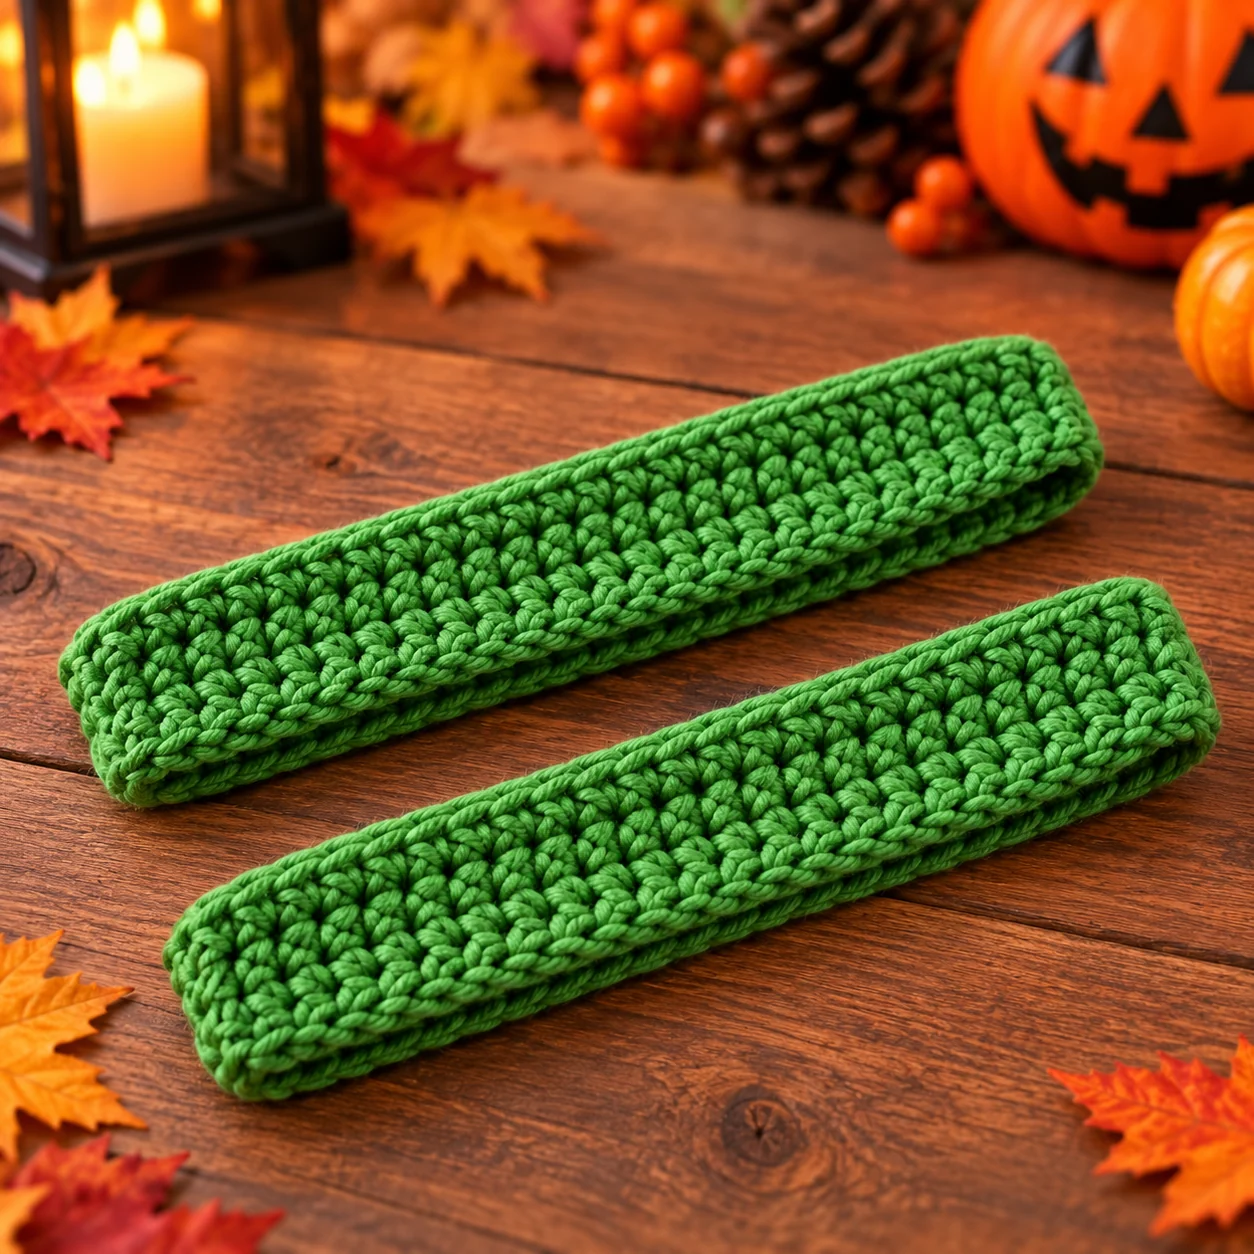
Make 2 with green or black yarn. After Rows 1–4, ch 1 and turn. The turning chain does not count as a stitch. Work into all 50 stitches on each row, including the first and last.
Handle
Ch 51.
Row 1
Sc in second ch from hook and across. 50 sts
Rows 2–5
Sc across. 50 sts
Fasten off, leaving a long sewing tail. Repeat for the second handle.
Attach the Handles
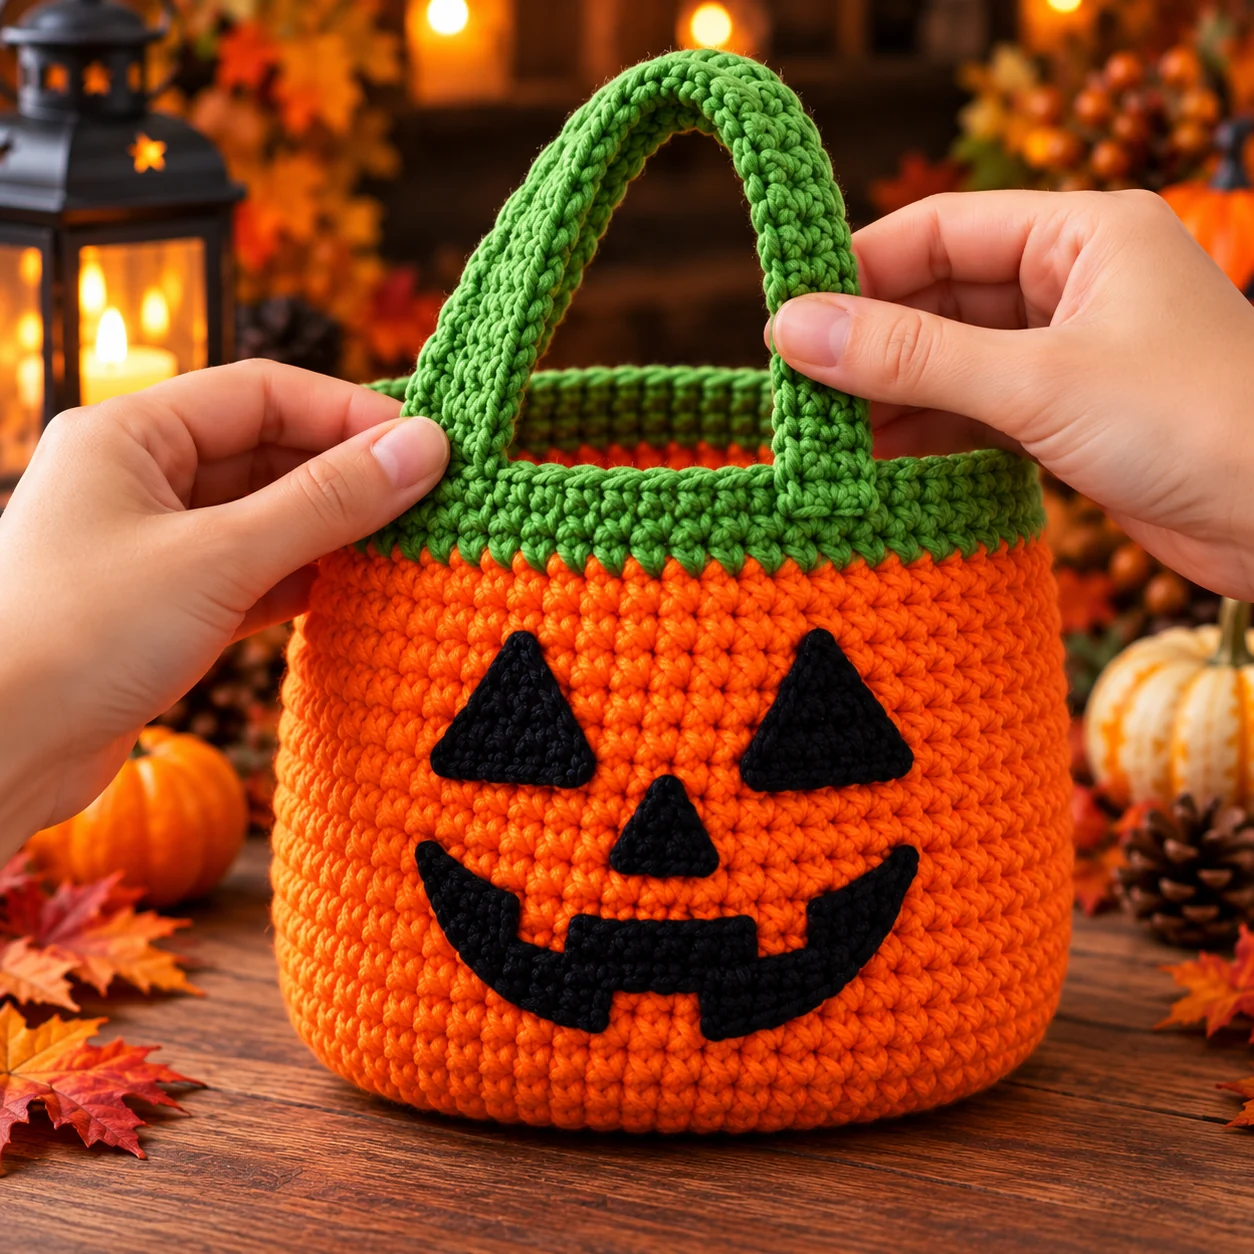
Place each handle end approximately 7–9 stitches inward from the side edges and pin both ends. Position the second handle using the same spacing.
Sew the Handles Securely
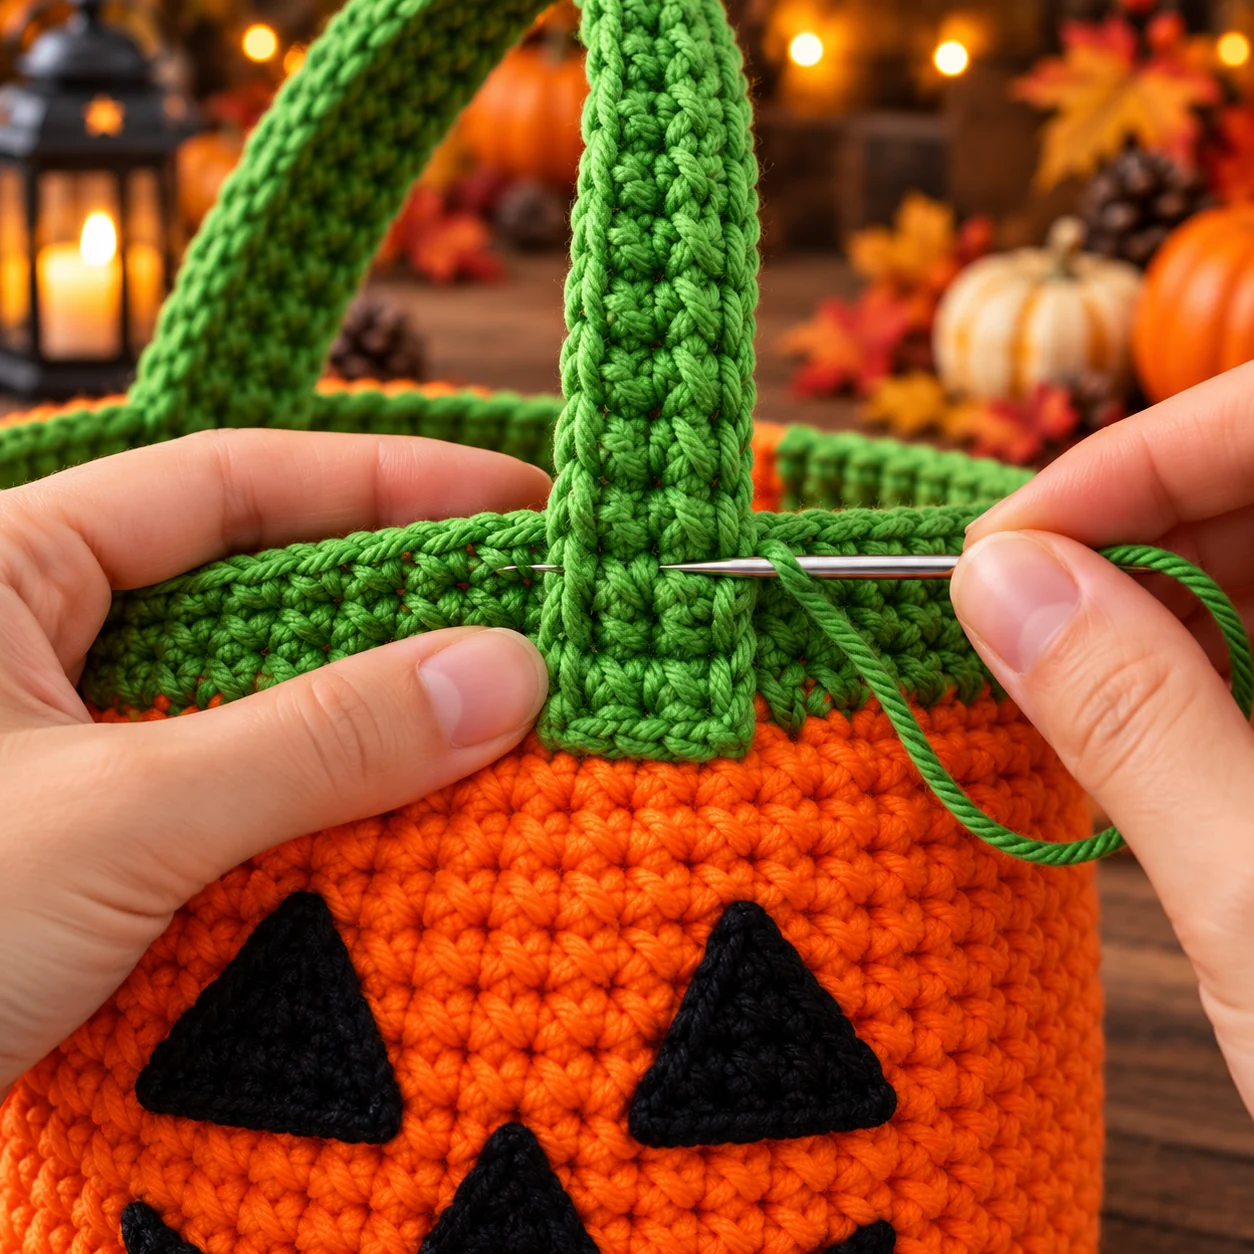
Sew each handle end through several rows of the green band. Work the stitches in a small square and add a diagonal stitch across the square for extra reinforcement.
Check the Fit Before Finishing
Measure the bag after the orange body rounds. Lay it flat without stretching and measure from the base fold to the opening. To adjust the height, add or remove plain single crochet rounds before changing to green. Keep 72 stitches in every body round. Adding height does not make the base wider.
Try the handles in position before sewing. Pin one handle to the front and the other to the back, then compare their height and spacing with the bag lying flat. For a shorter carry handle, reduce the starting chain and work one fewer single crochet than the number of chains. Make both handles with the same stitch count.
After attaching the handles, place a small, light load inside and lift the bag gently. If the top band pulls out of shape, reinforce the attachment area before adding more weight. A lining helps distribute the load but does not replace secure handle seams.
Strengthen the Bag
Use firm yarn, reinforce the handles, and add a fabric lining or plastic canvas base if you want extra structure.
Optional Fabric Lining
Measure the inside height and circumference of the finished bag. Cut fabric slightly larger than the measurements, sew the lining, place it inside the crochet bag, fold the top edge inward, and hand sew it to the inside of the green band.
Finishing
- Check that both handles are even.
- Make sure the face is centered.
- Check that the opening is not too tight.
- Make sure the base sits flat.
- Secure all yarn tails.
- Confirm that the facial pieces are firmly attached.
Halloween Color Variations
| Theme | Bag Color | Details | Handles |
|---|---|---|---|
| Jack-o’-Lantern | Orange | Black face | Green |
| Ghost | White | Black face | Gray |
| Frankenstein | Green | Black details | Purple |
| Candy Corn | White, orange, yellow | Simple face | Orange |
| Witch | Purple | Black details | Lime green |
| Monster | Lime green | Purple and black | Black |
Common Problems
Why Is My Base Curling?
Your tension may be too tight. Relax your stitches slightly or try a larger hook for the base.
Why Is My Base Wavy?
Check the increase sequence carefully. Too many increases can cause strong waves.
Why Is the Bag Leaning?
You may have added or skipped stitches during the body rounds. Check the stitch count every few rounds.
Why Does the Opening Feel Tight?
The final slip-stitch round may be too tight. Undo it and work the stitches more loosely.
Why Are the Handles Stretching?
Add another row or two and reinforce the attachment points.
Why Is the Pumpkin Face Crooked?
Pin every facial piece before sewing and check placement from a distance.
Frequently Asked Questions
Is this crochet Halloween trick-or-treat bag pattern beginner-friendly?
Yes. It is suitable for confident beginners who know the magic ring, single crochet, increases, chains, and basic sewing.
What yarn is best for a Halloween candy bag?
A firm worsted-weight cotton, cotton blend, or acrylic yarn works well.
What hook size should I use?
This pattern uses a 5 mm crochet hook. If your fabric feels too loose, try a 4.5 mm hook.
Does the bag need a lining?
No. A lining is optional, but it can reduce stretching and help the bag keep its shape.
Can I make the bag without the jack-o’-lantern face?
Yes. Leave off the face and use the orange-and-green bag as a simple fall tote.
Can I make the face from felt?
Yes. Sew the pieces securely rather than relying only on glue.
Can I make one long shoulder strap?
Yes. Crochet a longer strap using the same row construction and attach it securely to opposite sides of the bag.
Can I wash the finished bag?
Follow the washing instructions on your yarn label and consider any lining or base insert materials.