Crochet Mouse in a Teacup – Free Mini Gift Pattern
Make a crochet mouse in a teacup with round ears, a stitched face, and a soft blue cup. Free mini gift pattern with clear assembly instructions.
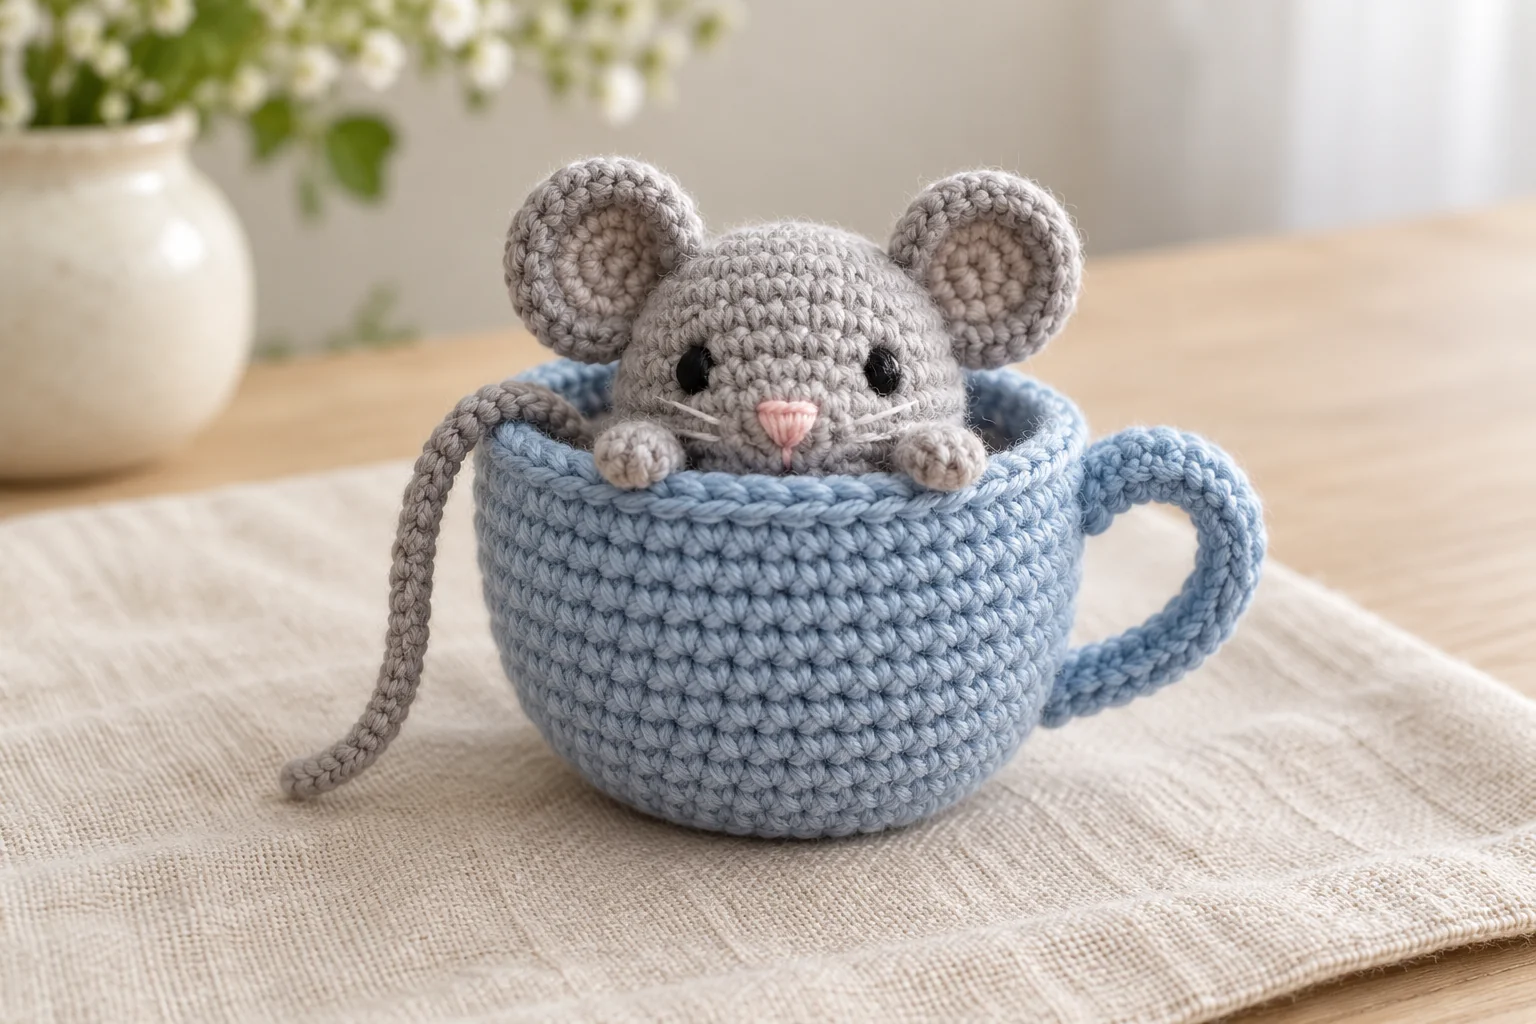
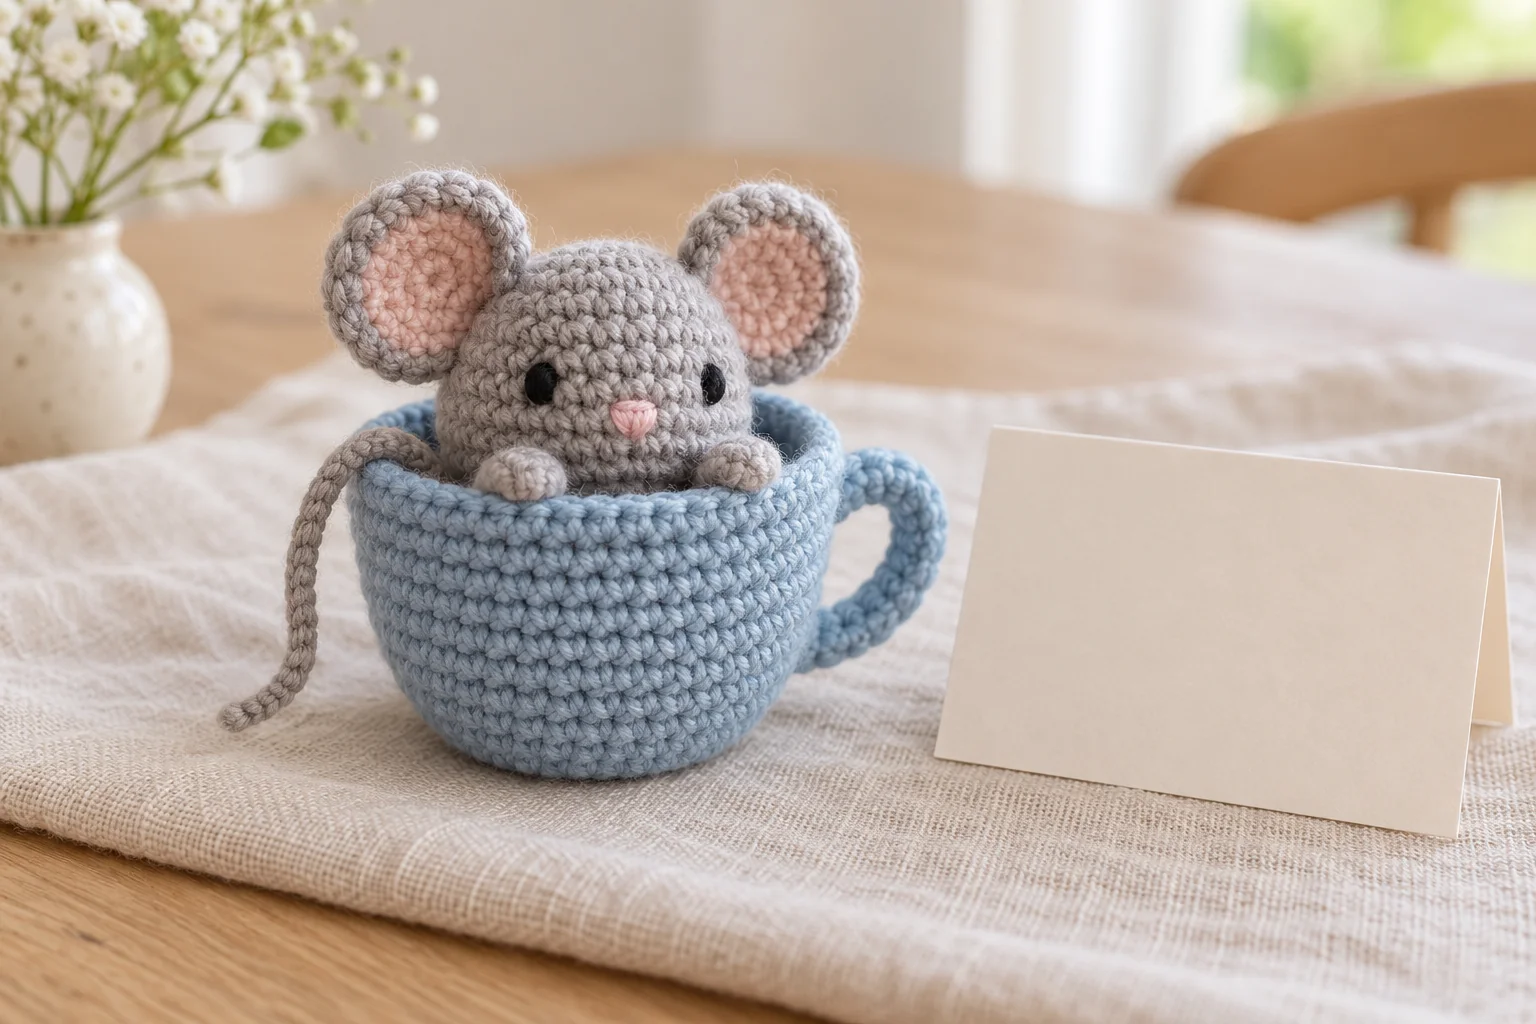
This crochet mouse in a teacup turns a familiar everyday shape into a small handmade character. A grey mouse peeks above a dusty-blue cup, with round ears, a pink stitched nose, and a thin tail draped over the rim. The cup is filled and closed, making the finished piece a display ornament.
The construction stays manageable: crochet a cup, a flat closing disc, a mouse head, two ears, two tiny front paws, a handle, and a chain tail. The head sits on the closing disc, which hides the filling below. You can adjust its position before the cup is finally sealed.
Design note: this original written pattern has not been physically sample-tested. Measurements and yarn estimates are approximate. AI-generated images show the intended design and may differ in small details. Check the cup and closing disc together before sewing, and use the written counts for construction.
Crochet Mouse in a Teacup Materials and Size
Choose smooth DK cotton in dusty blue and grey, with scraps of pink and black embroidery yarn. Gather a 2.5–3 mm hook, a stitch marker, a blunt needle, scissors, and washable polyester filling. Estimate 15–20 g blue and 10–15 g grey, allowing extra yarn for sewing tails.
The intended finished height is approximately 8–10 cm including the ears. The cup is deliberately miniature and decorative. It cannot hold drinks, food, hot objects, or a real candle. Do not insert a rigid cup or container inside this version.
This project suits a confident beginner who can work small rounds, chain stitches, and simple seams. For another gift-sized project, see the crochet bow bag charm. Coordinating colors can tie two different handmade gifts together.
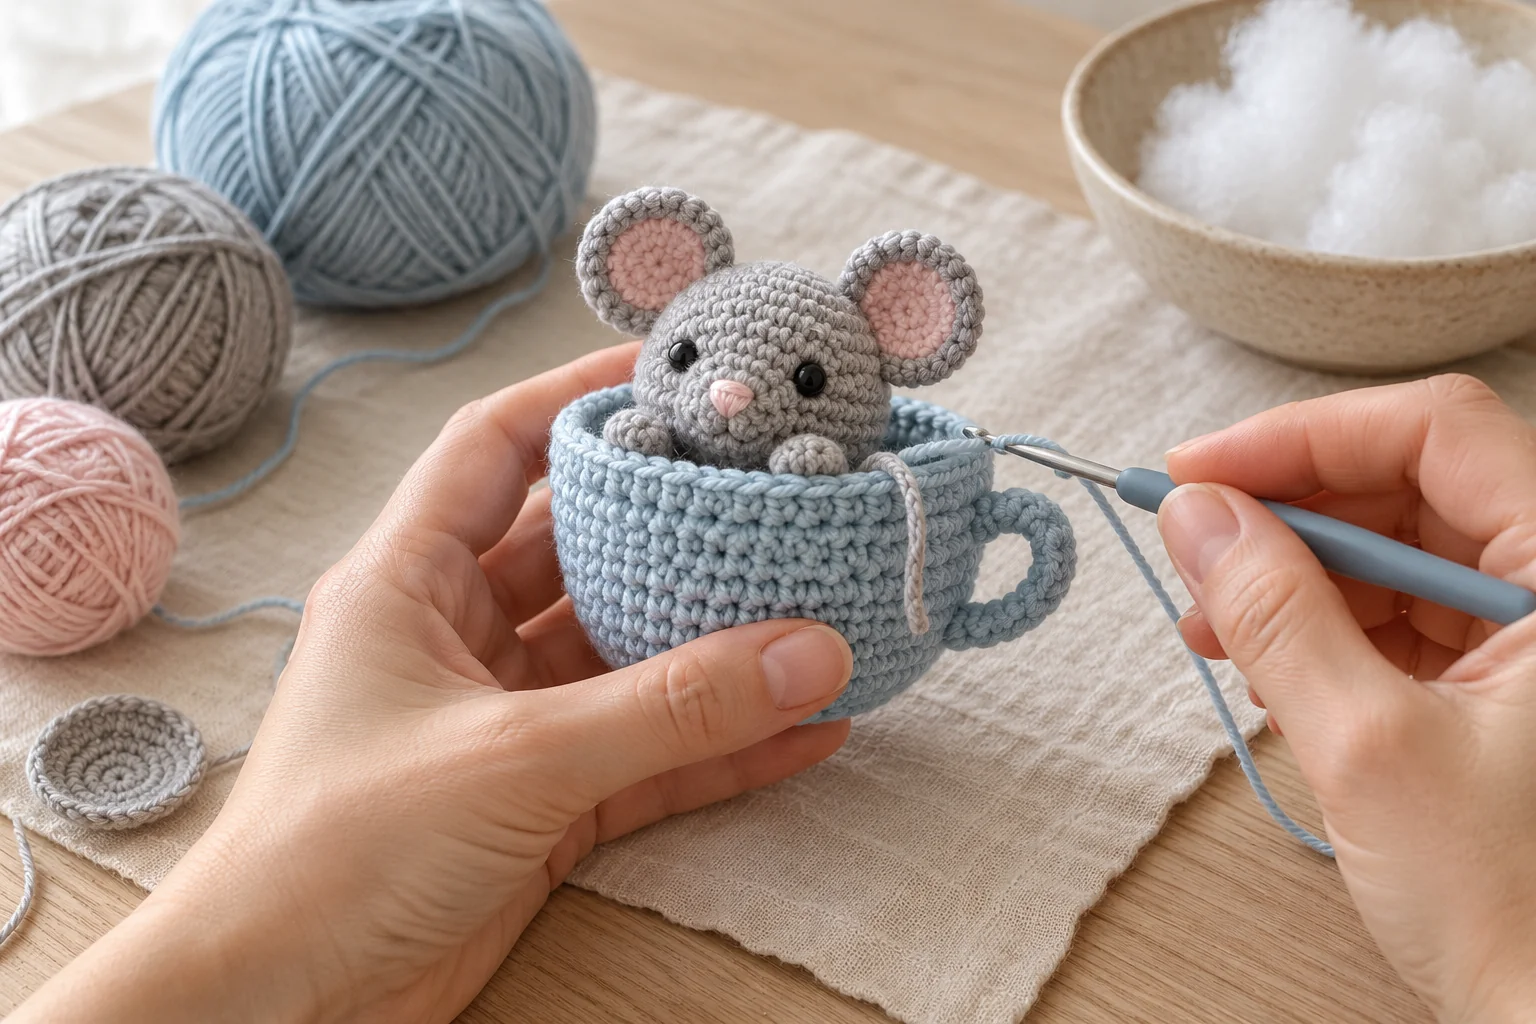
Reading This Crochet Mouse in a Teacup Pattern
US crochet terms are used. ch = chain; sc = single crochet; inc = 2 sc in one stitch; dec = single crochet two stitches together; sl st = slip stitch; BLO = back loop only. Numbers in parentheses show the completed stitch count.
Work continuous rounds and mark the first stitch. Unless a joining slip stitch is specified, do not join or chain between rounds. Tight, even single crochet helps keep the filling inside.
The cup and closing disc both finish with 24 stitches. Their matching edges simplify the final seam. The crochet mouse in a teacup head is smaller, leaving a visible blue rim around it. Keep all sewing tails until you have checked the complete arrangement.
For a standard reference when reading stitch instructions, consult the Craft Yarn Council crochet abbreviations. Check the US terms against the definitions in this pattern before starting.
Step 1: Crochet Mouse in a Teacup Cup Base
With blue, make a magic ring. Round 1: 6 sc into the ring. (6) Round 2: inc around. (12) Round 3: repeat [sc, inc] six times. (18) Round 4: repeat [2 sc, inc] six times. (24)
Pull the starting ring closed and secure its tail. Lay the circle on the table and check the outline. The cup will stand more neatly if the base is not heavily cupped or ruffled.
Round 5: sc in BLO around. (24) This creates a turning ridge at the base. Keep the unused front loops on the outside. Do not work extra stitches into the ridge later; it is a visual detail.
Step 2: Crochet Mouse in a Teacup Cup Walls
Rounds 6–10: sc in both loops of each stitch. (24 each round) The five even rounds create a short cylindrical cup. Keep the sides upright by maintaining the same stitch count.
Finish with a sl st in the next stitch and fasten off. Weave the finishing tail into the inside wall. Leave the opening unfilled while you make the handle and mouse details.
If you prefer a slightly taller cup, add one or two even rounds now. Record that change, since it affects the final height and yarn use. Do not change the 24-stitch rim count; the closing disc needs to match it.
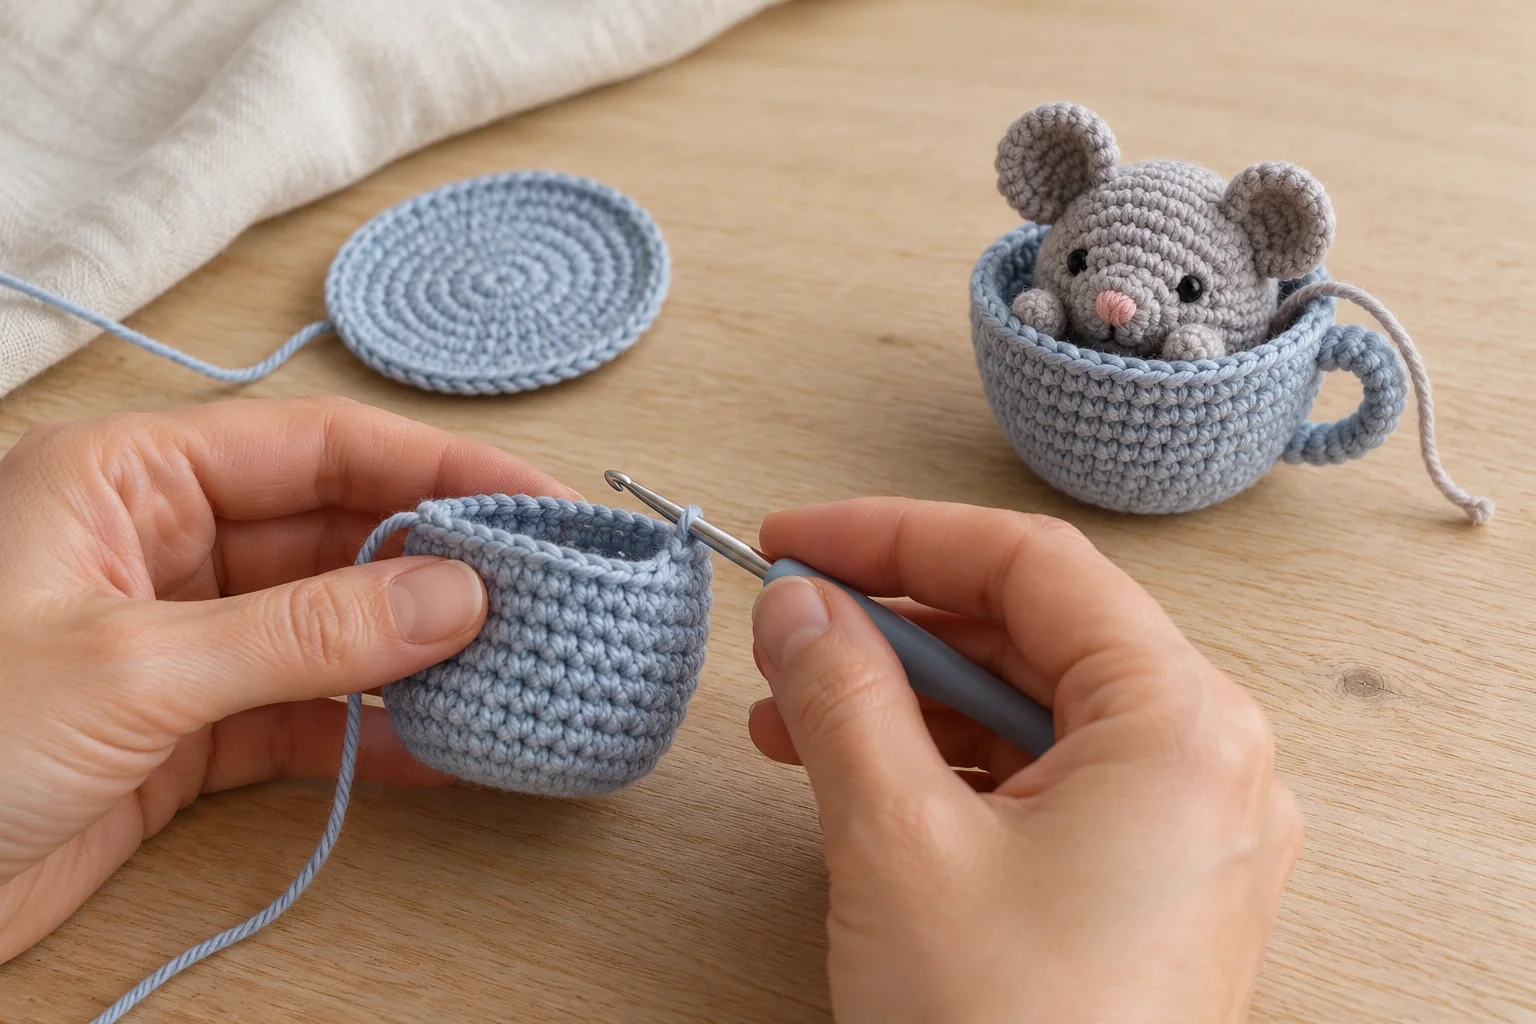
Step 3: Crochet Mouse in a Teacup Cup Handle
With blue, ch 8. Starting in the second chain, sc in each chain across. (7) Fasten off with a long tail. Keep the starting tail as well.
Curve the strip into a small C shape. Sew one end to the outside of the cup just below the rim and the other end near the lower wall. Use several stitches at each attachment point.
The handle should project from the side without twisting the cup wall. Adjust its curve before tightening the sewing. It is a decorative handle, so do not use it to carry or pull the stuffed ornament.
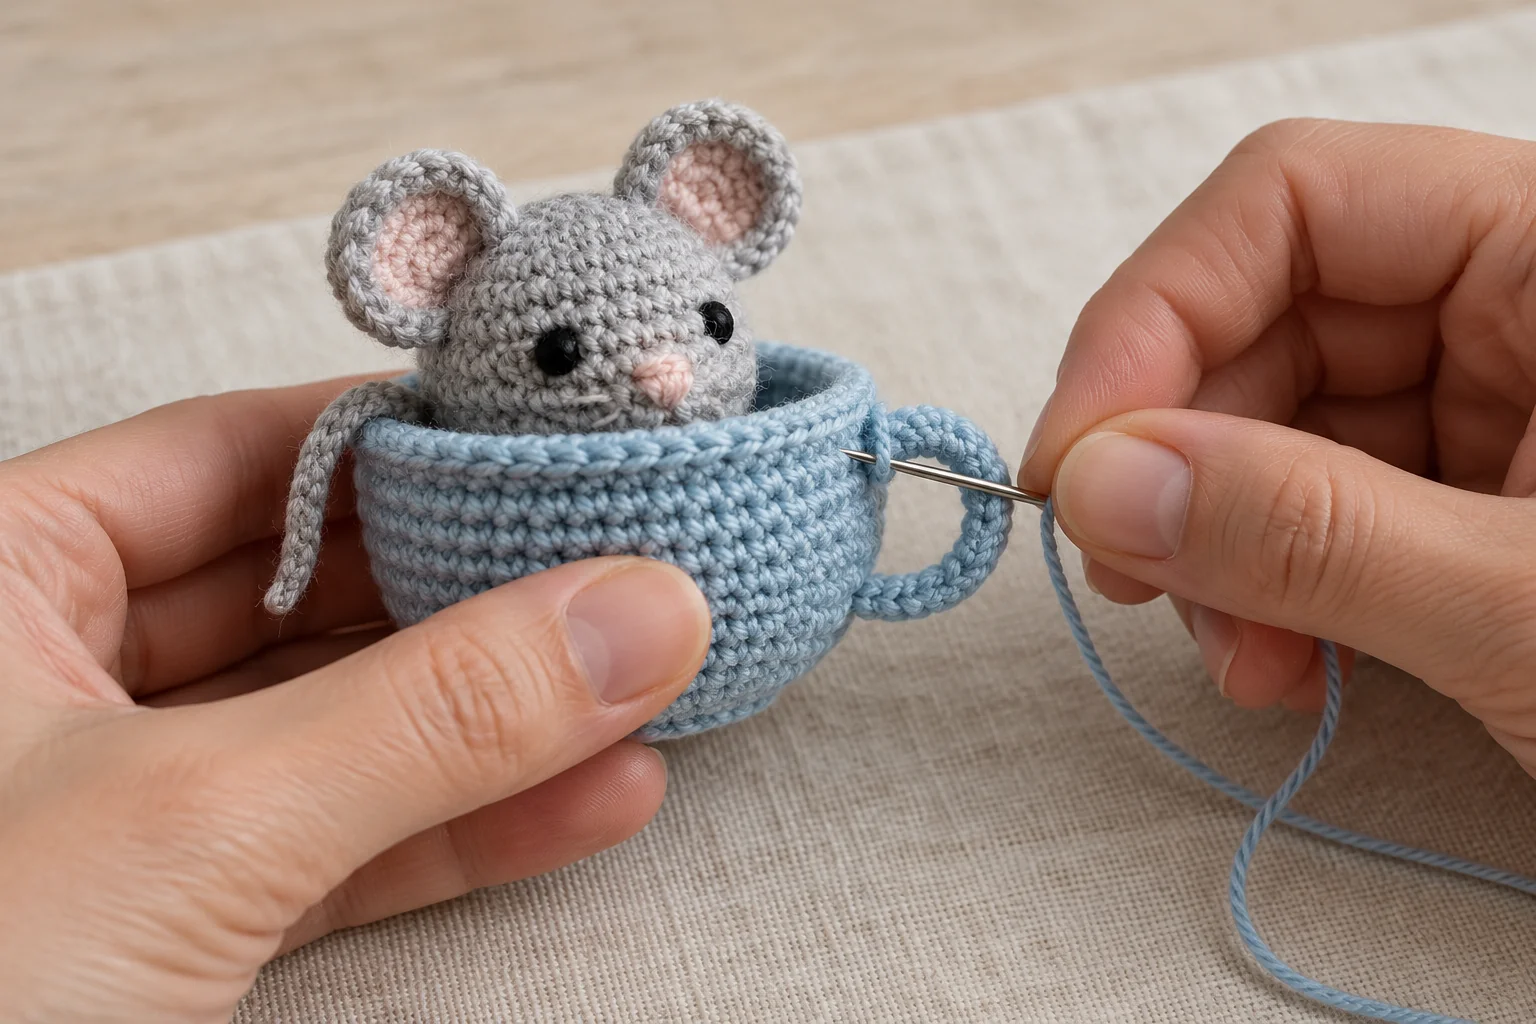
Step 4: Crochet Mouse in a Teacup Closing Disc
With blue, work a flat circle: Round 1, 6 sc in a magic ring. (6) Round 2, inc around. (12) Round 3, repeat [sc, inc] six times. (18) Round 4, repeat [2 sc, inc] six times. (24)
Join with a sl st and fasten off with a long sewing tail. Secure the ring tail on the back. This disc will sit just inside the cup rim, covering the filling.
Place it over the empty cup to check the fit. It should match the opening without being stretched. If your tension changed between pieces, remake the disc rather than pulling it hard enough to distort the cup.
Step 5: Crochet Mouse in a Teacup Mouse Head
With grey, work 6 sc into a magic ring. (6) Round 2: inc around. (12) Round 3: repeat [sc, inc] six times. (18) Rounds 4–5: sc around. (18 each round)
Round 6: repeat [sc, dec] six times. (12) Add small wisps of filling, keeping the head gently rounded. Round 7: dec six times. (6) Fasten off, close through the front loops, and leave a tail for attachment.
Choose the front of the head. Embroider a small pink nose slightly below center, two short black eyes above it, and optional tiny whisker marks. Keep every stitch short and close to the fabric.
This mouse has a rounded face rather than a long pointed snout. The nose placement and large ears suggest the character. Avoid adding loose whisker strands that could catch on other objects.
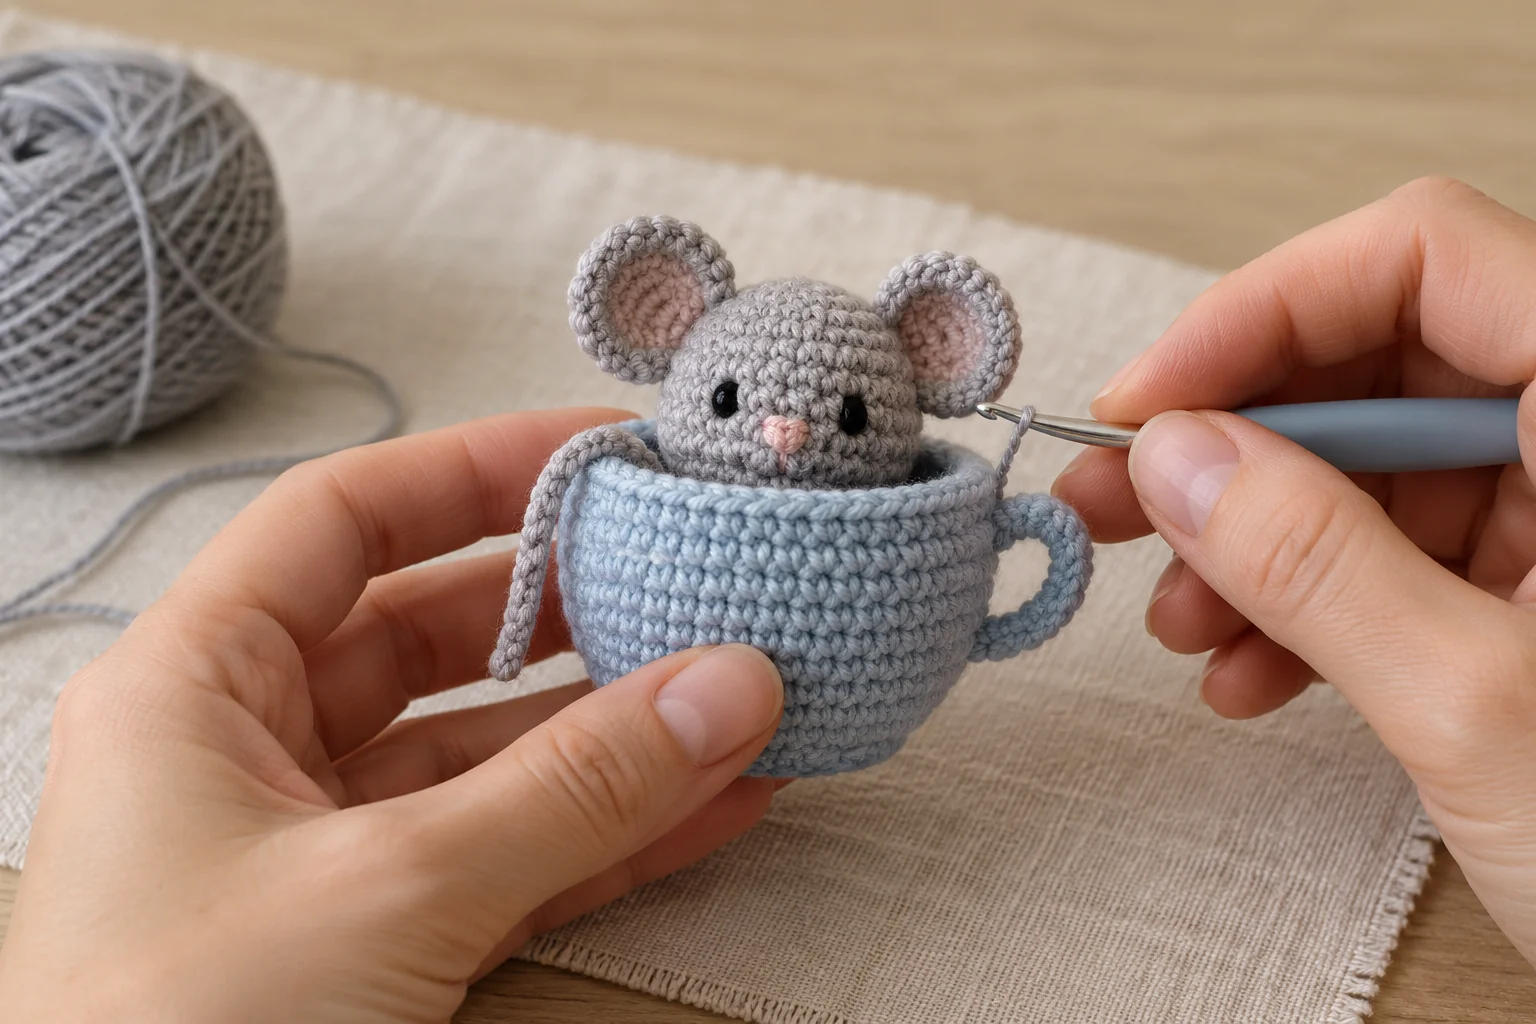
Step 6: Crochet Mouse in a Teacup Ears and Tail
For each ear, work 6 grey sc into a magic ring. (6) Round 2: inc around. (12) Join with a sl st and fasten off with a sewing tail. Make two flat circles.
Sew the lower edge of each ear to the upper sides of the head. Fold the base very slightly if you want a cupped shape. Compare the ears from the front before securing the second one.
For two tiny front paws, work 4 grey sc into a magic ring, then work a second round of 4 sc. Fasten off with a tail and leave each paw unstuffed. Make two matching pieces. Sew them beside the head on the closing disc, with their rounded ends resting over the front rim.
For the tail, ch 18 in grey and fasten off, leaving a sewing tail at one end. Keep the chain relaxed and thin. The tail does not need a second row; it should drape softly over the cup rim.
The guide to sewing amigurumi pieces together can help with hidden attachment stitches. Secure each ear over several stitches rather than relying on one strand.
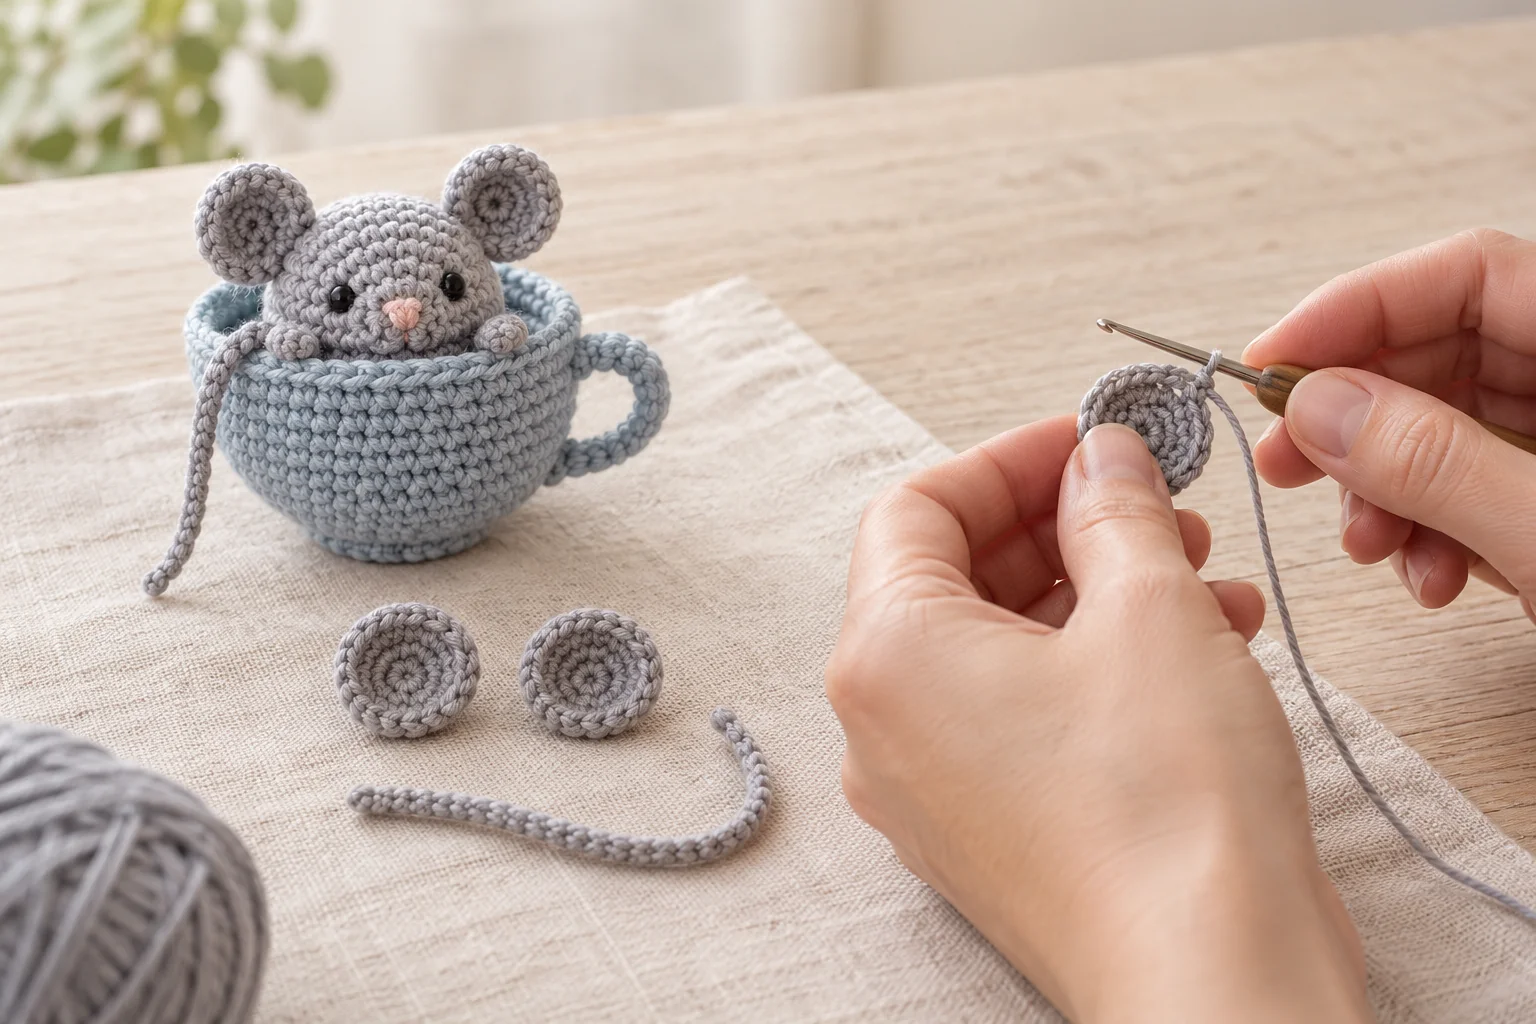
Step 7: Crochet Mouse in a Teacup Assembly
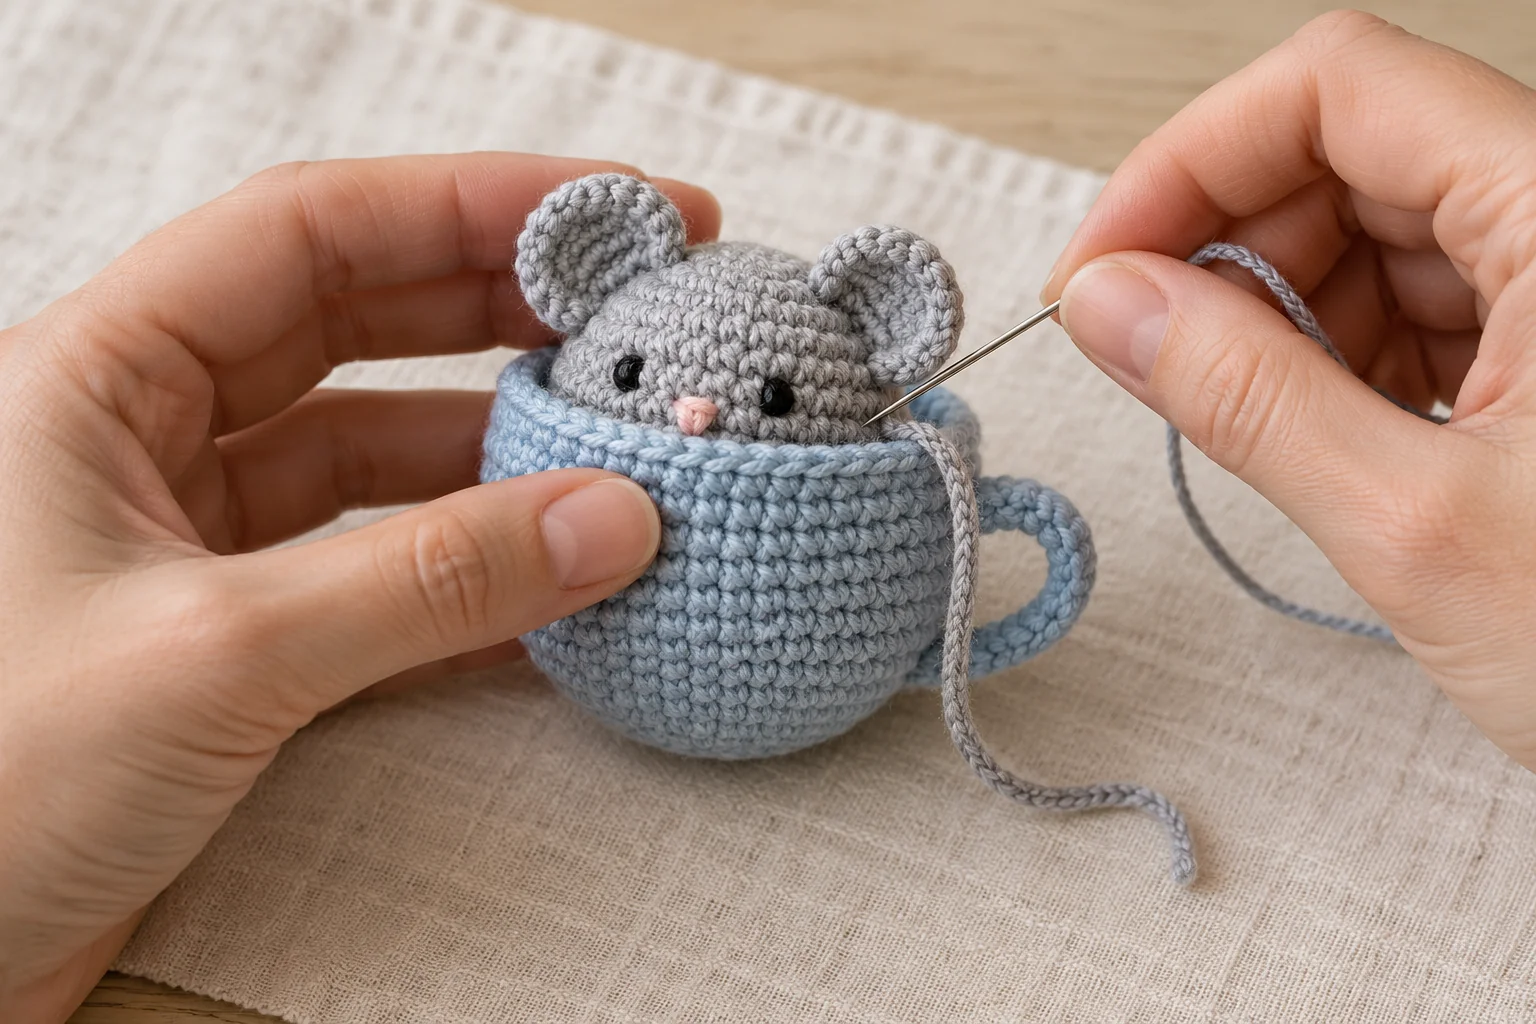
Sew the crochet mouse in a teacup head onto the blue closing disc, slightly toward the back so a small blue area shows in front. Catch several head stitches through the disc and check that the head does not wobble.
Sew one end of the chain tail beside the head. Arrange the loose length over the side opposite the cup handle. Tack it at the rim if you want to keep its curve in place.
Fill the cup lightly, spreading small pieces toward the sides and base. Insert the closing disc beneath the rim and sew its 24 edge stitches to the 24 cup stitches. Work one to one, pausing to check the head orientation.
Before closing the final few stitches, adjust the filling and confirm that the handle, face, and tail are visible. Close the seam, secure the yarn, and bury the tail. The crochet mouse in a teacup should appear to peek out of the cup.
Display Ideas and Care
Pair the crochet mouse in a teacup with a crochet book sleeve for a reading-themed gift, or place a crochet tulip nearby for a soft spring display.
For a contrasting tiny character, the crochet penguin offers a different silhouette. Check the actual sizes before presenting several pieces together.
Follow the yarn and filling care labels. Reshape the cup gently after cleaning and let it dry fully. This decorative piece includes small sewn components and is not a tested toy. Keep it away from young children and pets.
Crochet Mouse in a Teacup: Frequently Asked Questions
Before finishing your crochet mouse in a teacup, review these questions about the construction, materials, and final use.
Is the teacup usable?
No. It is filled and sewn closed as part of the ornament. Do not use it for drinks, food, or hot items.
Can I change the cup color?
Yes. Use the same yarn weight and keep the cup and closing disc at matching tension.
Why does the head wobble?
Its attachment may be too narrow. Sew through a broader area of the head and closing disc before sealing the cup.
Can I omit the tail?
Yes. The ears and embroidered face still identify the crochet mouse in a teacup. Remove the tail from the assembly plan before closing the cup.
Do the ears need filling?
No. They are flat discs. A small fold at the base provides shape without stuffing.
How can I make the base sit better?
Use moderate filling and spread it evenly. Avoid a hard lump directly beneath the closing disc.
Finish Your Tiny Teacup Mouse
Check the head, ears, paws, handle, and tail attachments one last time. Your crochet mouse in a teacup is ready to join a small handmade display. Keep notes on colors and finished size for a matching collection.