Crochet Orange Slice Ornament – Free Citrus Pattern
Crochet a flat orange slice ornament with a cream pith ring, six embroidered citrus segments and a reinforced hanging loop.
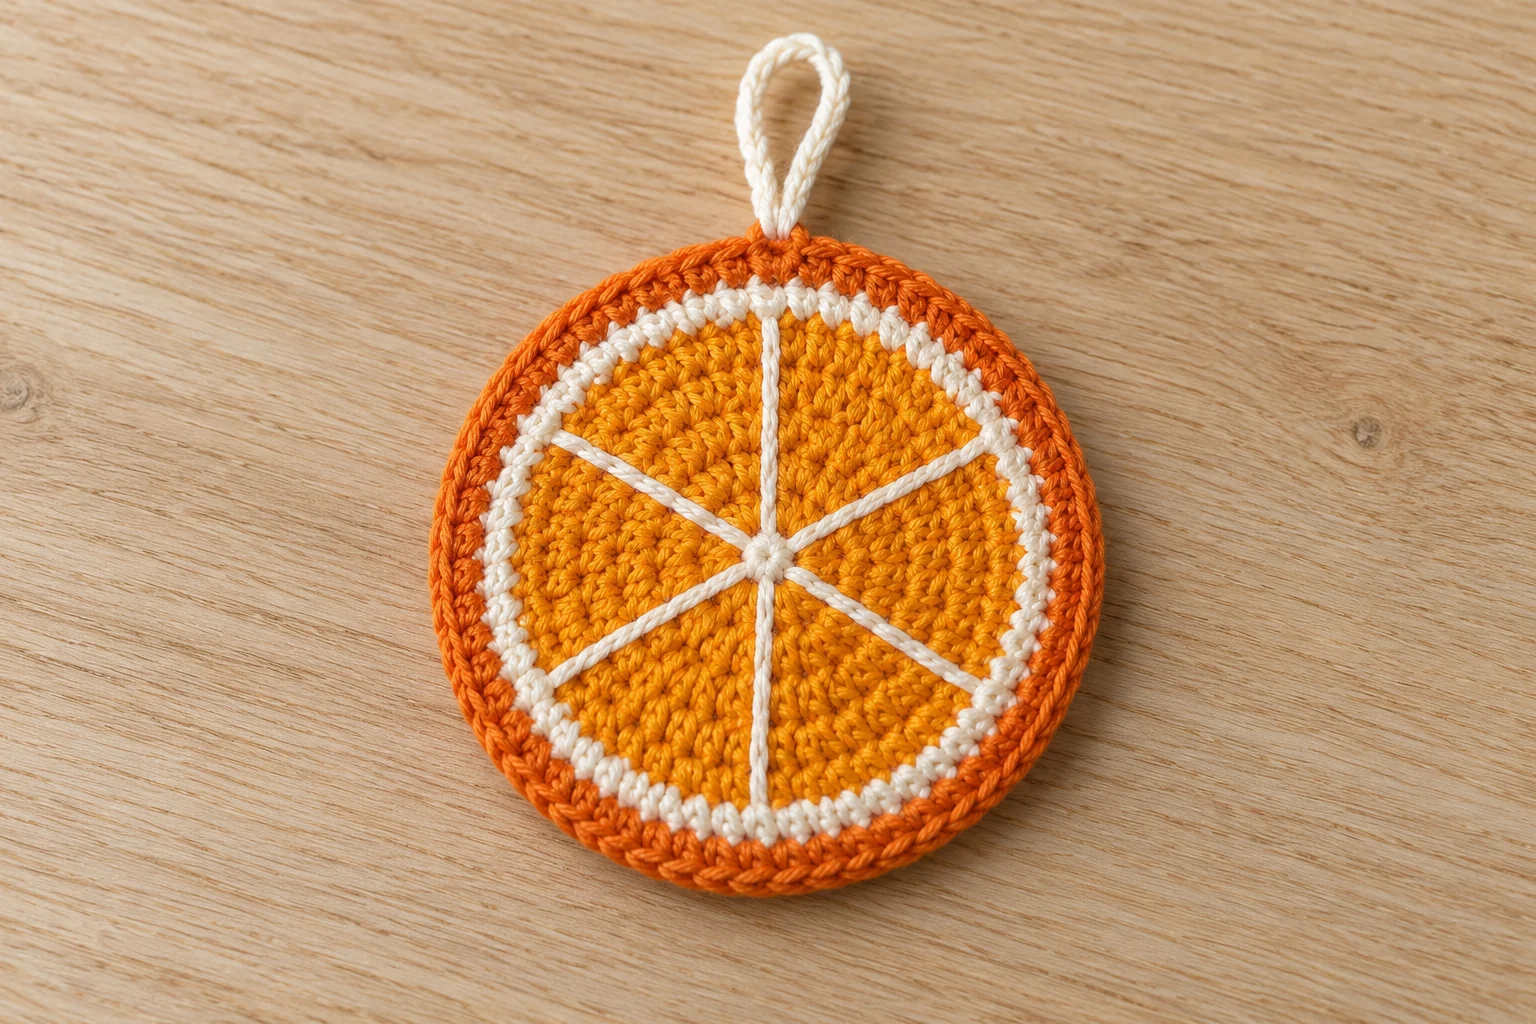
This crochet orange slice ornament uses a flat golden-orange circle, a cream pith ring and a darker orange peel. Six embroidered lines divide the center into citrus segments. The whole decoration is yarn, so you can enjoy the dried-orange look without preparing or storing real fruit. It is a useful small project for a warm, natural Christmas palette.
The pattern below gives every round count and explains how to keep the disk flat. You will crochet the circle first, add the segment embroidery second and attach a reinforced hanging loop last. There is no stuffing, wire, glue or separate plastic insert. Make one slice before starting a batch so you can check your yarn, edge tension and preferred size.
Crochet Orange Slice Ornament at a Glance
Skill level: confident beginner. Techniques: a magic ring, single crochet, increases, slip stitch and simple embroidery. Construction: one flat circle worked in continuous rounds, with two color changes and six straight dividing lines. US crochet terms are used throughout. The final diameter depends on your yarn and tension; measure your own first sample rather than relying on an exact size from a different yarn.
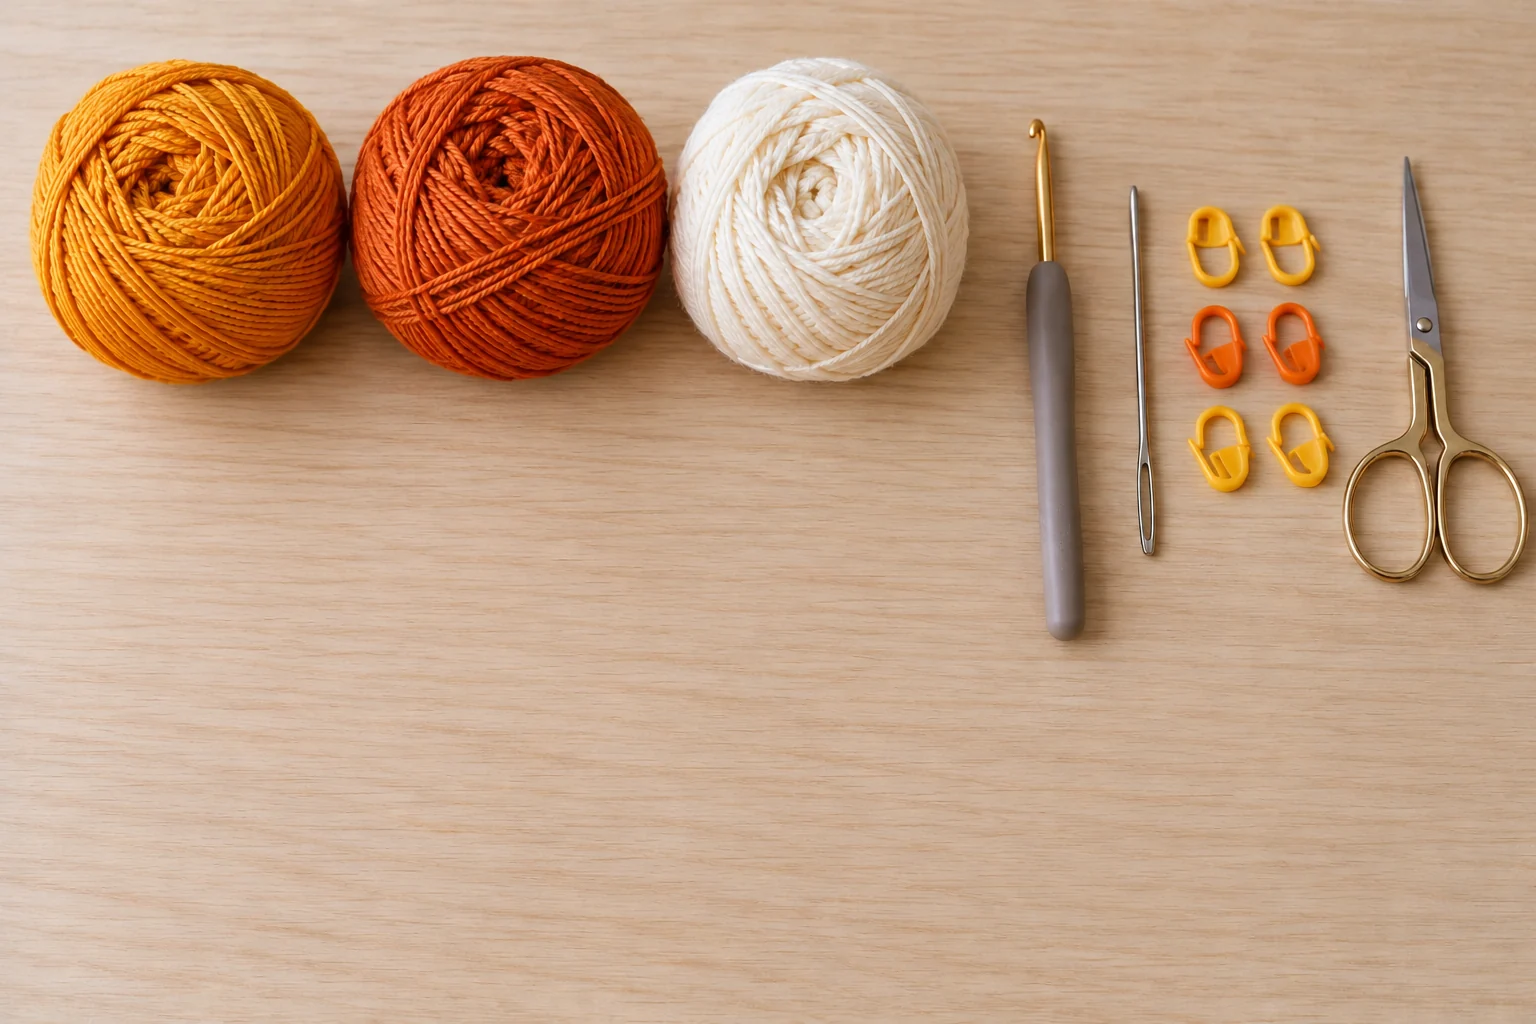
Choose three related shades with enough contrast to show the rings. A bright golden center, warm ivory pith and deep burnt-orange peel create a clear citrus outline. A rust center with pale oatmeal pith gives a quieter look. Avoid a very fuzzy yarn for your first slice because the embroidery is easier to place when you can see the stitch tops.
Materials and Color Choices
Gather smooth sport or DK cotton in golden orange, cream and deep orange; a hook appropriate for that yarn; a removable stitch marker; a blunt tapestry needle; scissors; and a ruler. You will also need a small amount of matching yarn for the hanger. Use the yarn label as a starting point for hook size, then adjust after checking that your circle lies flat without holes.
Cotton holds a crisp, flat edge and makes the segment lines easy to see. Another smooth yarn can work, but it may produce a softer slice. Keep all three yarns the same weight. If the outer color is much thicker than the center, the peel round may ripple even when the stitch count is correct. Set aside enough cream for both the pith round and embroidery.
No stiffener is required by this pattern. Start with a dry, unblocked circle and assess its shape before adding any finishing treatment. If you later choose to use a textile stiffener, follow its instructions and test it on a separate swatch because it can change the color and feel of the yarn. Keep the ornament away from moisture and open flame.
US Terms and Round Rules
Abbreviations: ch means chain; sc means single crochet; inc means work 2 sc in the same stitch; sl st means slip stitch; st means stitch. A magic ring is an adjustable starting loop. For standard terminology, see the Craft Yarn Council crochet abbreviations. Each increase consumes one stitch from the previous round and makes two new stitches.
Work in a continuous spiral unless a color-change instruction says otherwise. Put the marker in the first stitch of each round and move it upward as you finish that round. Do not add a turning chain between spiral rounds. Counts in parentheses show the total stitches after the round. Count before moving on, especially at the cream ring, where a missed increase is easy to overlook.
Step 1: Crochet the Orange Center
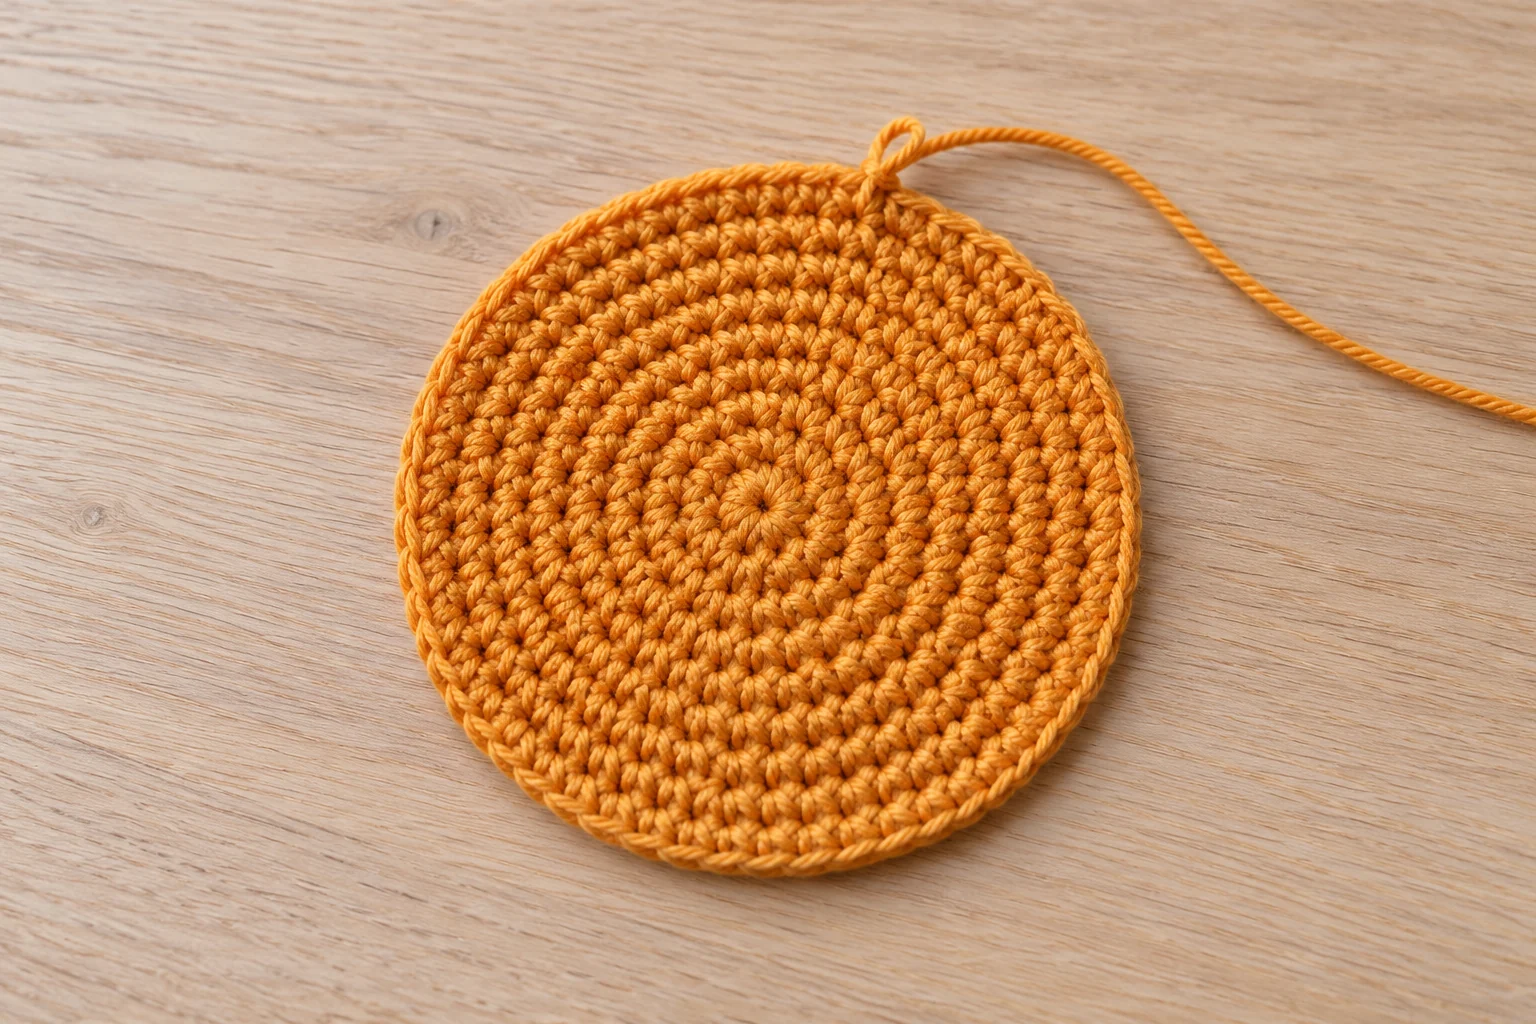
With golden orange, make a magic ring. Round 1: work 6 sc into the ring. Pull the center closed. (6) Round 2: inc in each stitch around. (12) Round 3: repeat [sc, inc] six times. (18) Round 4: repeat [2 sc, inc] six times. (24)
Round 5: repeat [3 sc, inc] six times. (30) Round 6: repeat [4 sc, inc] six times. (36) Round 7: repeat [5 sc, inc] six times. (42) These seven rounds form the fruit-colored center. Stop and lay the circle on a table without stretching it. A small center bump can relax during finishing, but a deep cup or broad waves should be corrected now.
If the center cups upward, check for a missing increase and overly tight tension. If it ripples, check for extra stitches or loose increases. The count alone cannot correct yarn tension, so compare both the arithmetic and the fabric. Do not add a random extra increase as a quick fix: it will move the marked segment positions later and can create a lopsided outline.
Step 2: Add the Cream Pith Ring
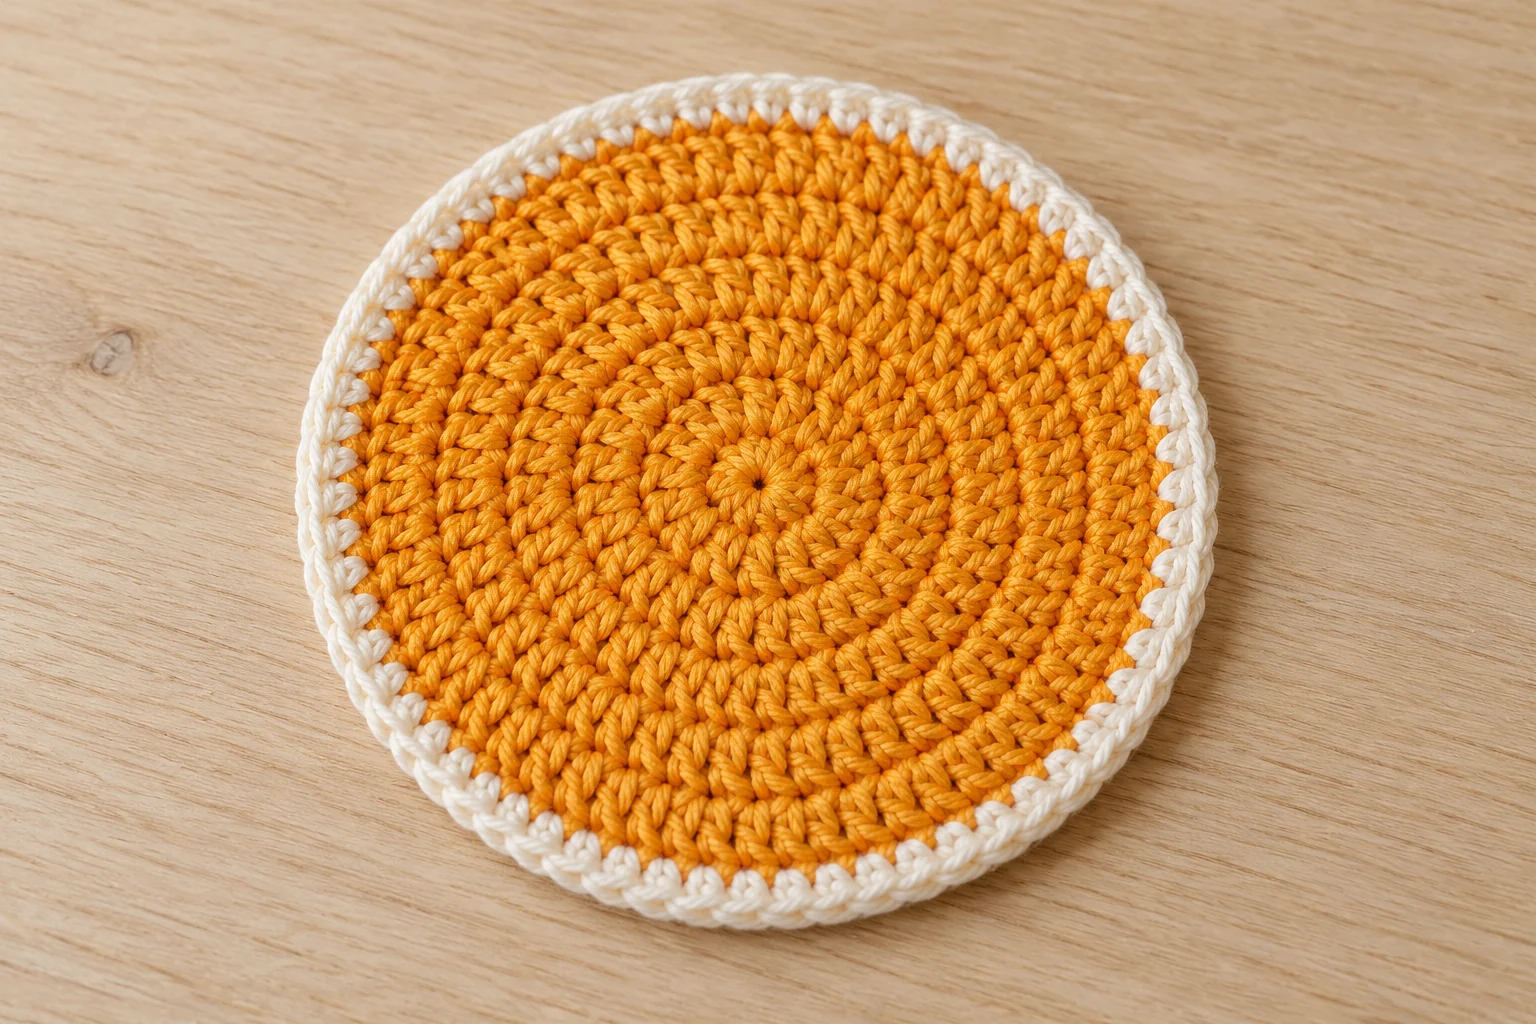
Change to cream on the final pull-through of the last stitch of Round 7. Leave a tail long enough to weave securely. Round 8: repeat [6 sc, inc] six times. (48) Work into both loops of each stitch. This single cream round creates the pale ring between the center and the peel. Do not fasten off the orange tail until you have checked that the color change is secure.
At the end of the cream round, inspect the join area. A spiral creates a small step where one color changes to the next. Position that area at the top of the slice, where the hanger will be attached. Do not pull the tails tightly to hide the step; that can pinch the edge. Weave the ends back through several stitches on the wrong side once the next round is secure.
Step 3: Crochet the Dark Orange Peel
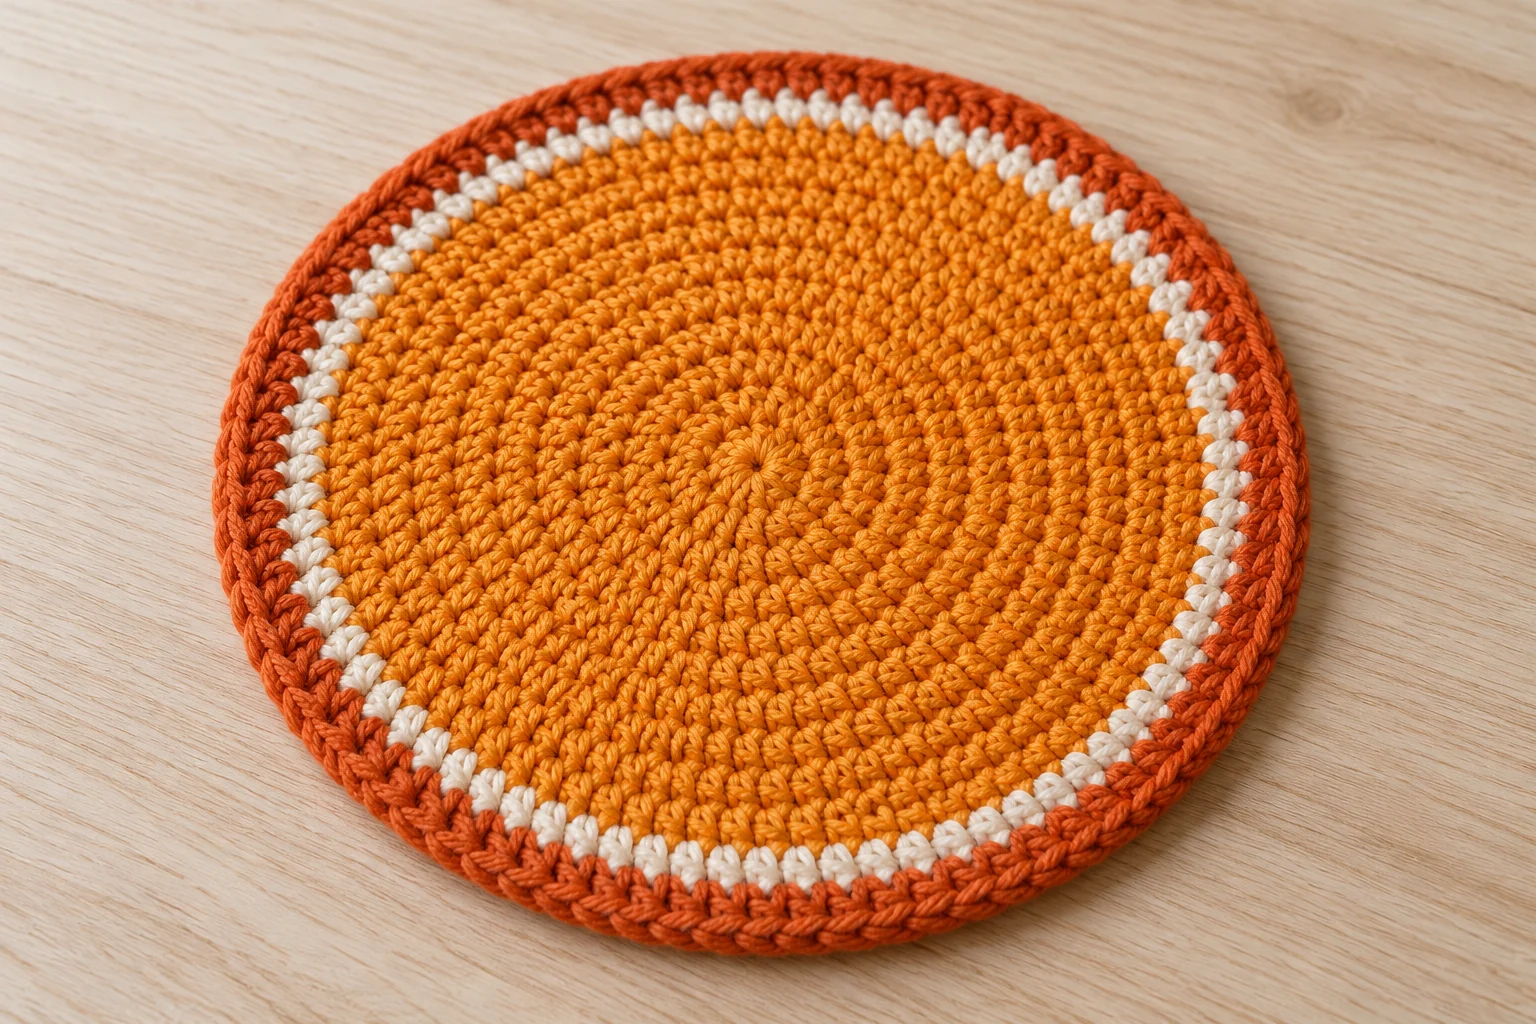
Change to deep orange on the final pull-through of Round 8. Round 9: repeat [7 sc, inc] six times. (54) Sl st in the next stitch, fasten off and weave the end through the back of the peel stitches. The finishing slip stitch is a join and is not an extra stitch in the round count. Keep it relaxed so it does not make a small notch.
Spread the finished disk flat and check the outline. The peel should frame the cream evenly. For a cleaner finish, place the closing join and the earlier color-change steps together at the top. This is the natural place for the hanging loop. Avoid working another tight border around the slice: an unplanned round changes both the shape and the proportions of the three colors.
Step 4: Mark Six Citrus Segments
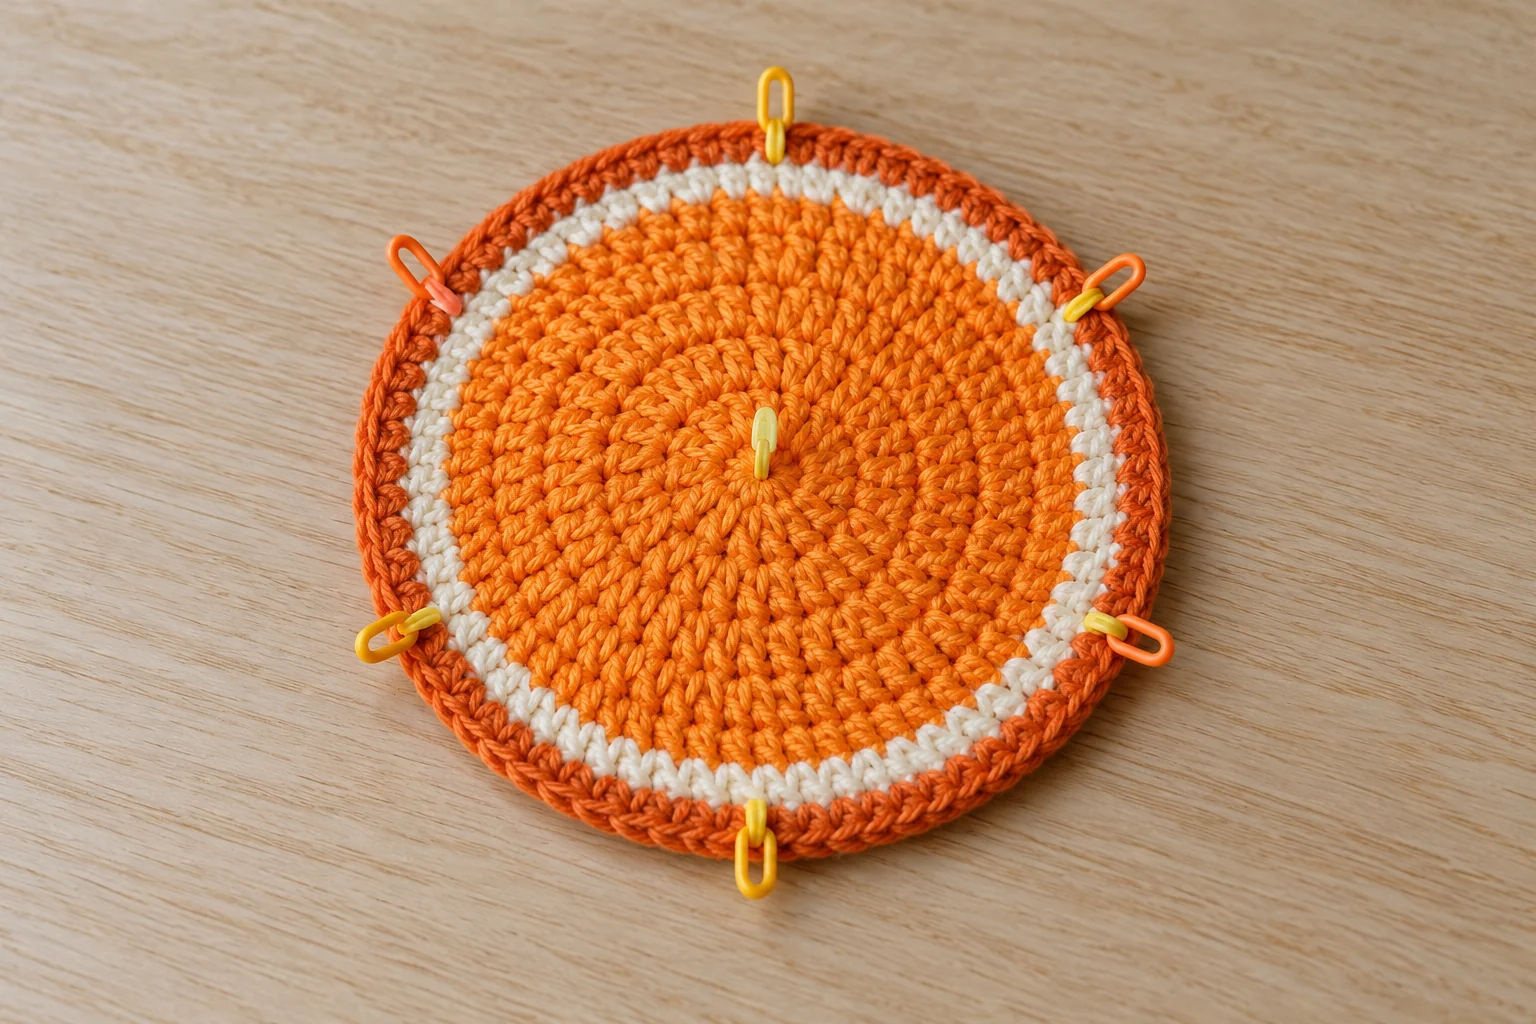
Find the cream ring of 48 stitches. Place six temporary markers, one every 8 stitches, around that ring. These markers identify the outer endpoints of six segment lines. The lines start close to the center and travel straight toward these endpoints. Leave the deep orange peel free of embroidery so its outer outline remains easy to see.
Before sewing, lay six short pieces of cream yarn on the surface to preview the spacing. Look at the disk from above and adjust the visual placement slightly if your spiral makes the center appear off to one side. The goal is six balanced wedges, not six deeply pulled channels. Use only the temporary markers for planning; remove them all when the embroidery is complete.
Step 5: Embroider the Segment Lines
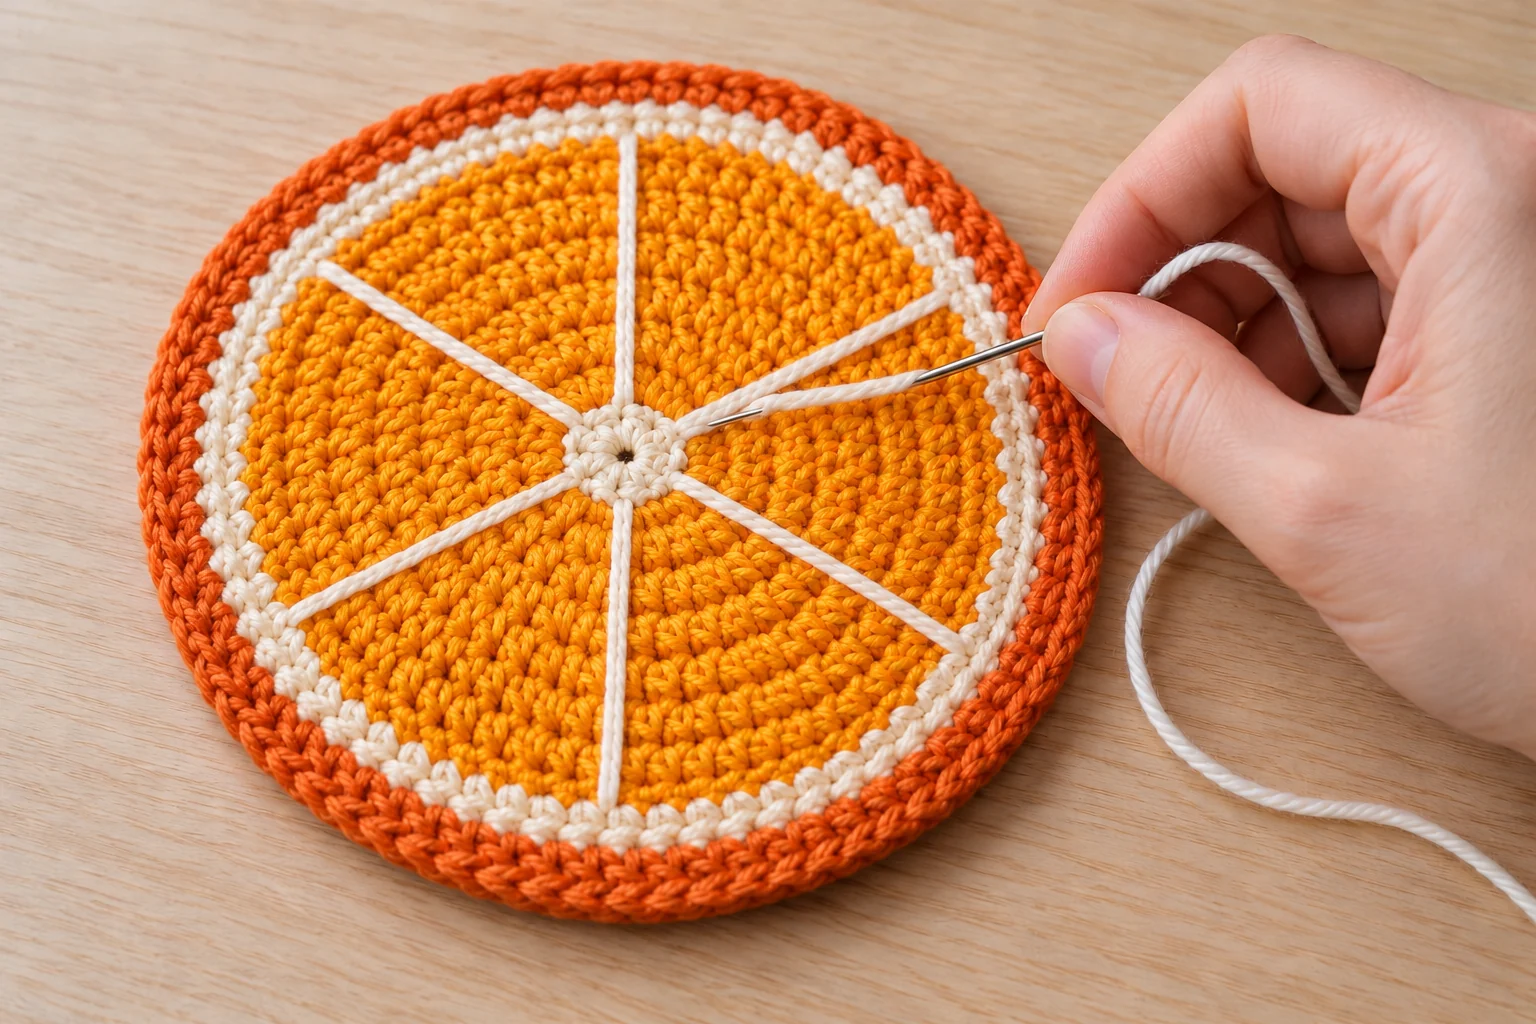
Thread a comfortable length of cream yarn onto the blunt needle. Secure it on the back without a bulky knot. Bring the needle up near the center and make short backstitches along a straight path to the first marker on the cream ring. Several small stitches are easier to control than one long loose strand across the full radius.
Keep the yarn resting on the surface. Pulling it tight will gather the circle into a bowl. Return through the back of the fabric to begin the next line, avoiding long unsecured floats that could catch. Repeat until all six lines are complete. Pass the tail through several existing stitches on the back, change direction once and trim only after checking the front.
Turn the ornament over and check that the back lies reasonably smooth. This is a single-layer decoration, so some embroidery travel will be visible. If you want a completely covered back, make a second disk and sew it behind the decorated one, matching stitch for stitch around the peel. That optional version uses additional yarn and creates a thicker ornament; it does not need stuffing.
Step 6: Attach the Hanger and Finish
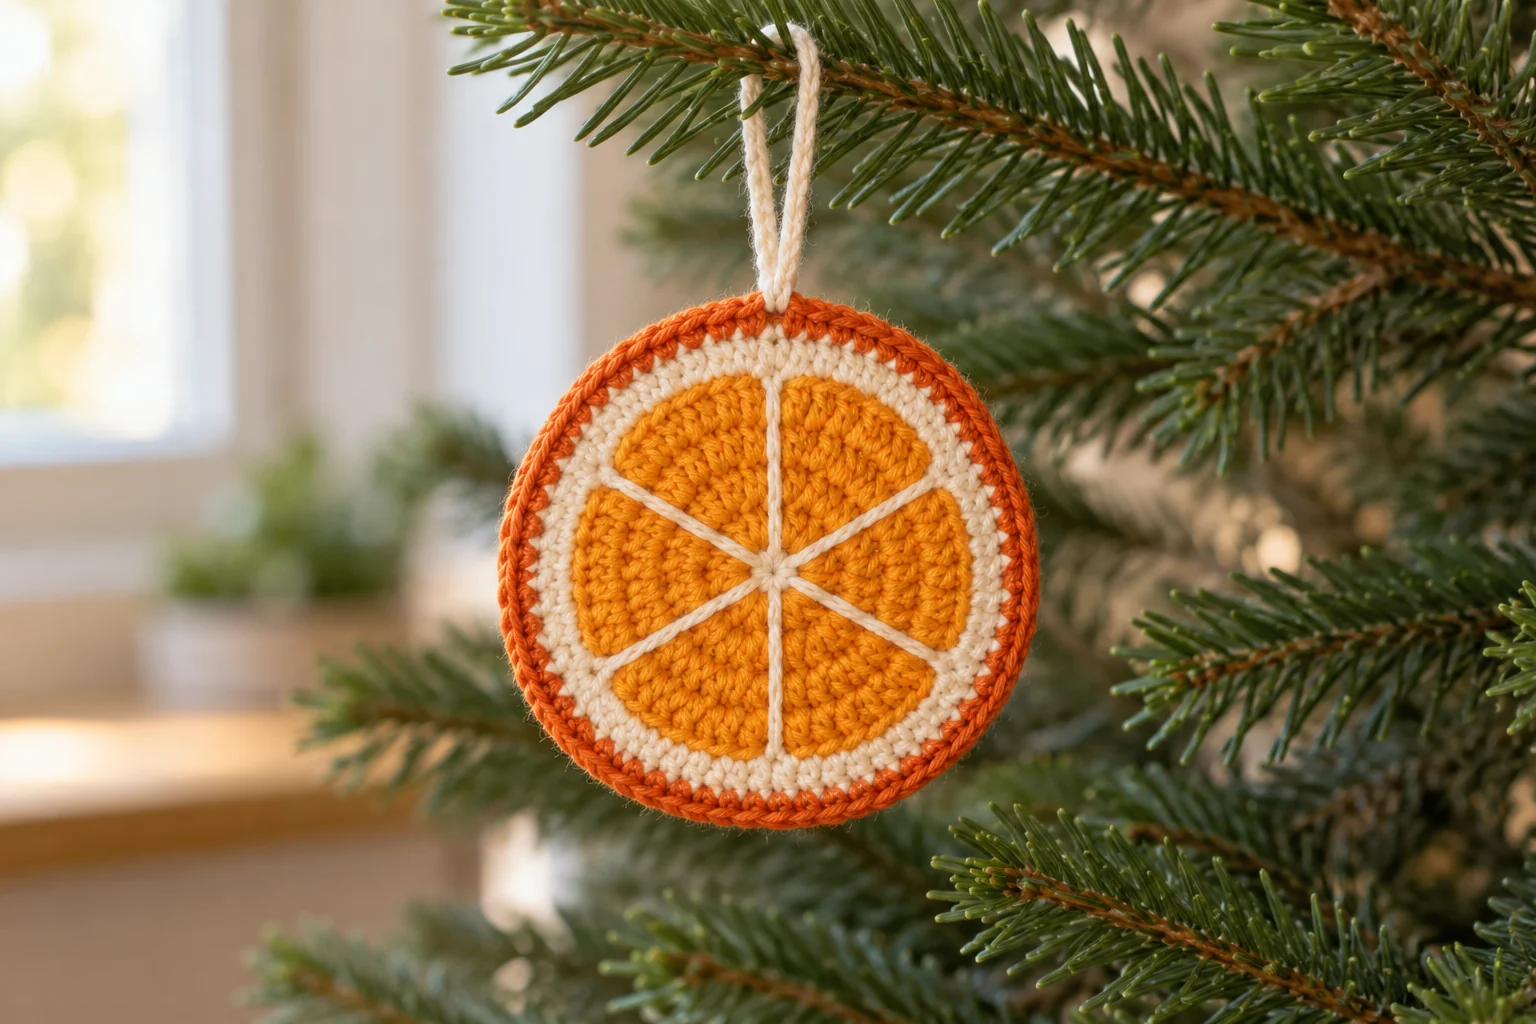
With deep orange or cream, ch 24 and fasten off, leaving a tail at each end. Fold the chain into a loop. Sew both ends through several peel stitches at the top, using the area near the color-change joins. Reinforce the attachment by passing through the same group of fabric stitches more than once without drawing them together.
Lift the ornament by the hanger over a table and check that it hangs upright. If it leans sideways, move the attachment point rather than making one end of the loop dramatically shorter. Gently damp-block the slice according to the yarn care instructions, shape it into a circle and allow it to dry completely flat. Do not hang it while wet.
Crochet Orange Slice Ornament Troubleshooting
A curling edge usually means the outer round is too tight, an increase was missed or the yarn weight changed between colors. Recount 42 stitches in the center, 48 in the pith and 54 in the peel. A wavy edge suggests extra stitches or looser tension. Remove and rework the affected round instead of forcing a strongly distorted slice flat with blocking.
If the segment lines look uneven, remove only the embroidery and mark the six endpoints again. If the center hole opens, secure the starting tail through several stitches on the back before trimming. If the ornament folds when suspended, try a slightly firmer fabric on your next sample or add the optional second disk. Embroidery tension should never be used to stiffen the circle.
Frequently Asked Questions
Is this pattern made with real dried orange?
No. Every visible part is crocheted or embroidered yarn. The color arrangement suggests a dried citrus slice, but there is no fruit inside the ornament and no drying process.
Can I use acrylic instead of cotton?
Yes, if you like the resulting fabric. Use matching weights for all colors and check that the disk lies flat. Acrylic and cotton can behave differently during blocking, so follow the label for the yarn you actually use.
How many segments does the slice have?
This version has six wedges formed by six cream dividing lines. Mark the 48-stitch cream round every 8 stitches to make the spacing easier to plan.
Why are the segment lines sewn rather than crocheted?
Embroidery keeps the round pattern simple and lets you control each line after the disk is complete. It also avoids carrying several colors around every center round.
Can I make a lemon slice with the same counts?
Yes. Use yellow in the center and a deeper yellow for the peel, keeping the cream pith. The result is still a round stylized slice; this pattern does not include an oval lemon shape.
Can I turn several slices into a garland?
Yes. Finish and dry each slice first, then sew the top edge of each one to a separate cord at even intervals. Check each attachment before hanging the garland and keep the cord out of reach of small children.
Build a Warm Christmas Crochet Collection
Pair these citrus slices with the mini crochet Christmas tree for a green-and-gold arrangement. The crochet Christmas bow garland adds a different shape, while the crochet poinsettia flower brings a larger accent.
For small gifts, place one finished slice beside a crochet Christmas gift bag. Keep the slice, tag and wrapping separate until all yarn is dry. Save your chosen yarn shades and hook size with the pattern so later ornaments match the first batch.