Crochet Christmas Napkin Ring – Free Ribbed Band Pattern
Make a ribbed crochet Christmas napkin ring with two green leaves, an adjustable row count and a smooth sewn seam.
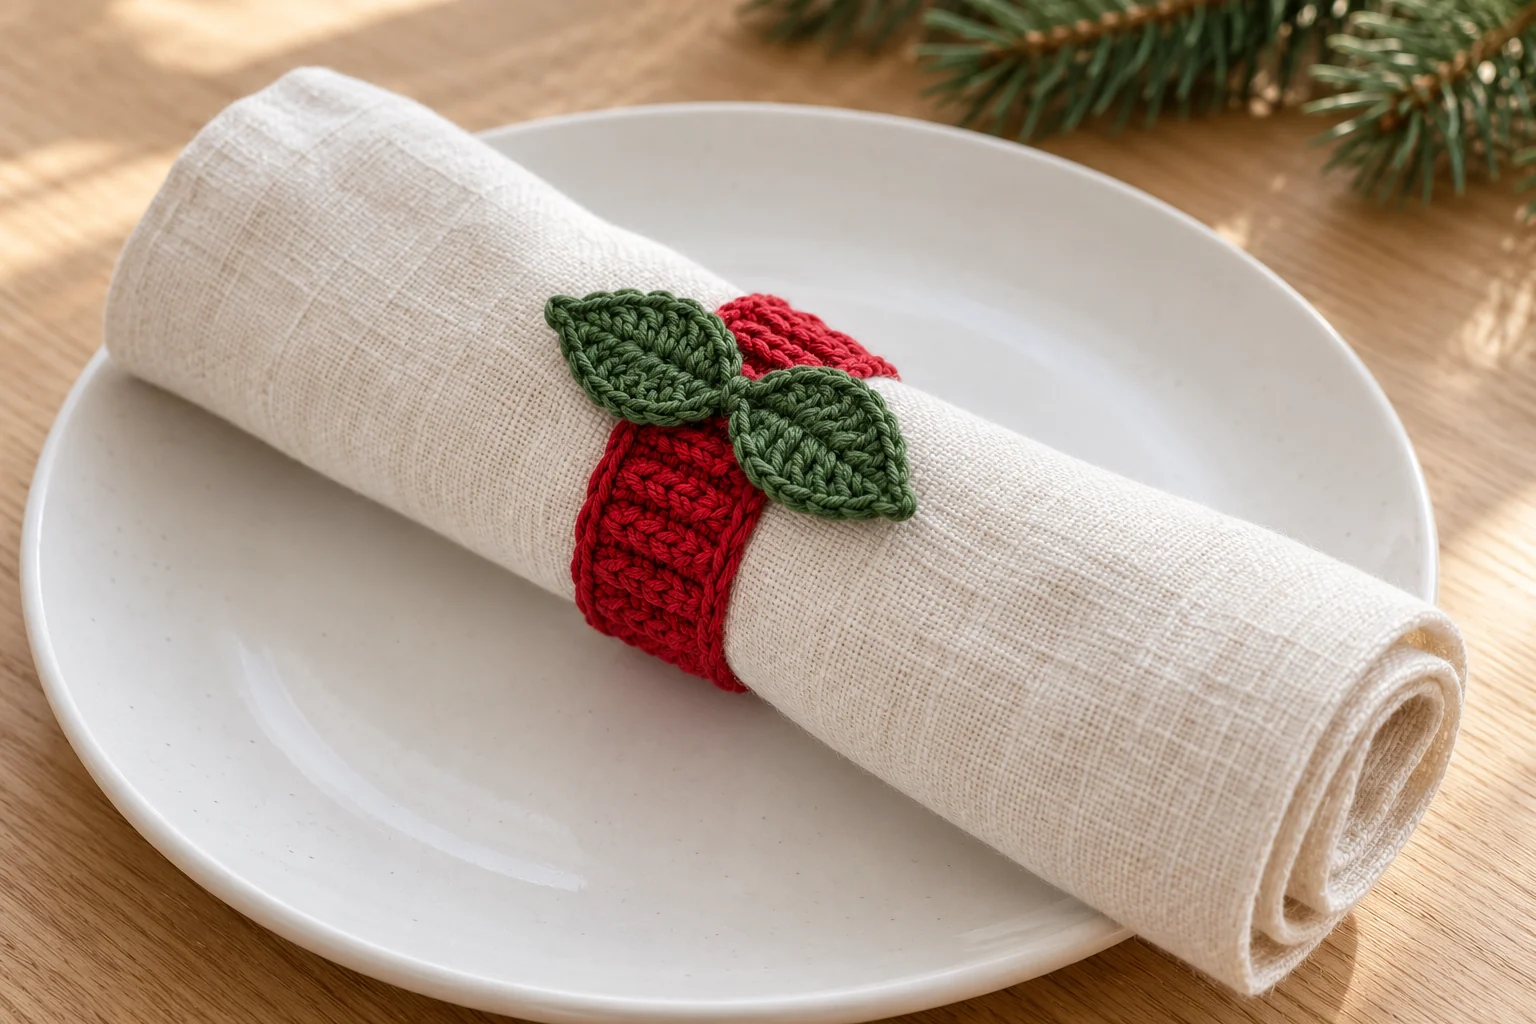
This crochet Christmas napkin ring combines a narrow ribbed red band with two small green leaves. It slips around a rolled cloth napkin and adds a handmade accent without covering the whole place setting. The band is worked flat, joined into a ring and decorated only after the fit has been checked. There are no beads, buttons or glued-on pieces.
The instructions give a starting row count, a practical fit check and a simple leaf shape worked along both sides of a chain. Because napkins vary in thickness, fitting the band to your own rolled napkin is more useful than chasing a fixed finished circumference. Make one complete sample before preparing a matching set for the table.
Crochet Christmas Napkin Ring Overview
Skill level: confident beginner. US crochet terms. You will use chain, single crochet, half double crochet, double crochet, slip stitch and sewing. The red band uses single crochet in the back loop only to create shallow ribs. Each leaf is a separate flat piece. Sew both leaves to the outside of the joined band, keeping the inside smooth enough to slide over the napkin.
The starting band has 8 stitches across and 30 rows along its length. The stitch count stays at 8 in every row. The length can be changed by adding or removing whole rows before joining. No stuffing, wire or stiffener is needed. Choose smooth yarn so the finished ring is easy to handle and the leaf edges remain clear.
Materials for a Coordinated Table Set
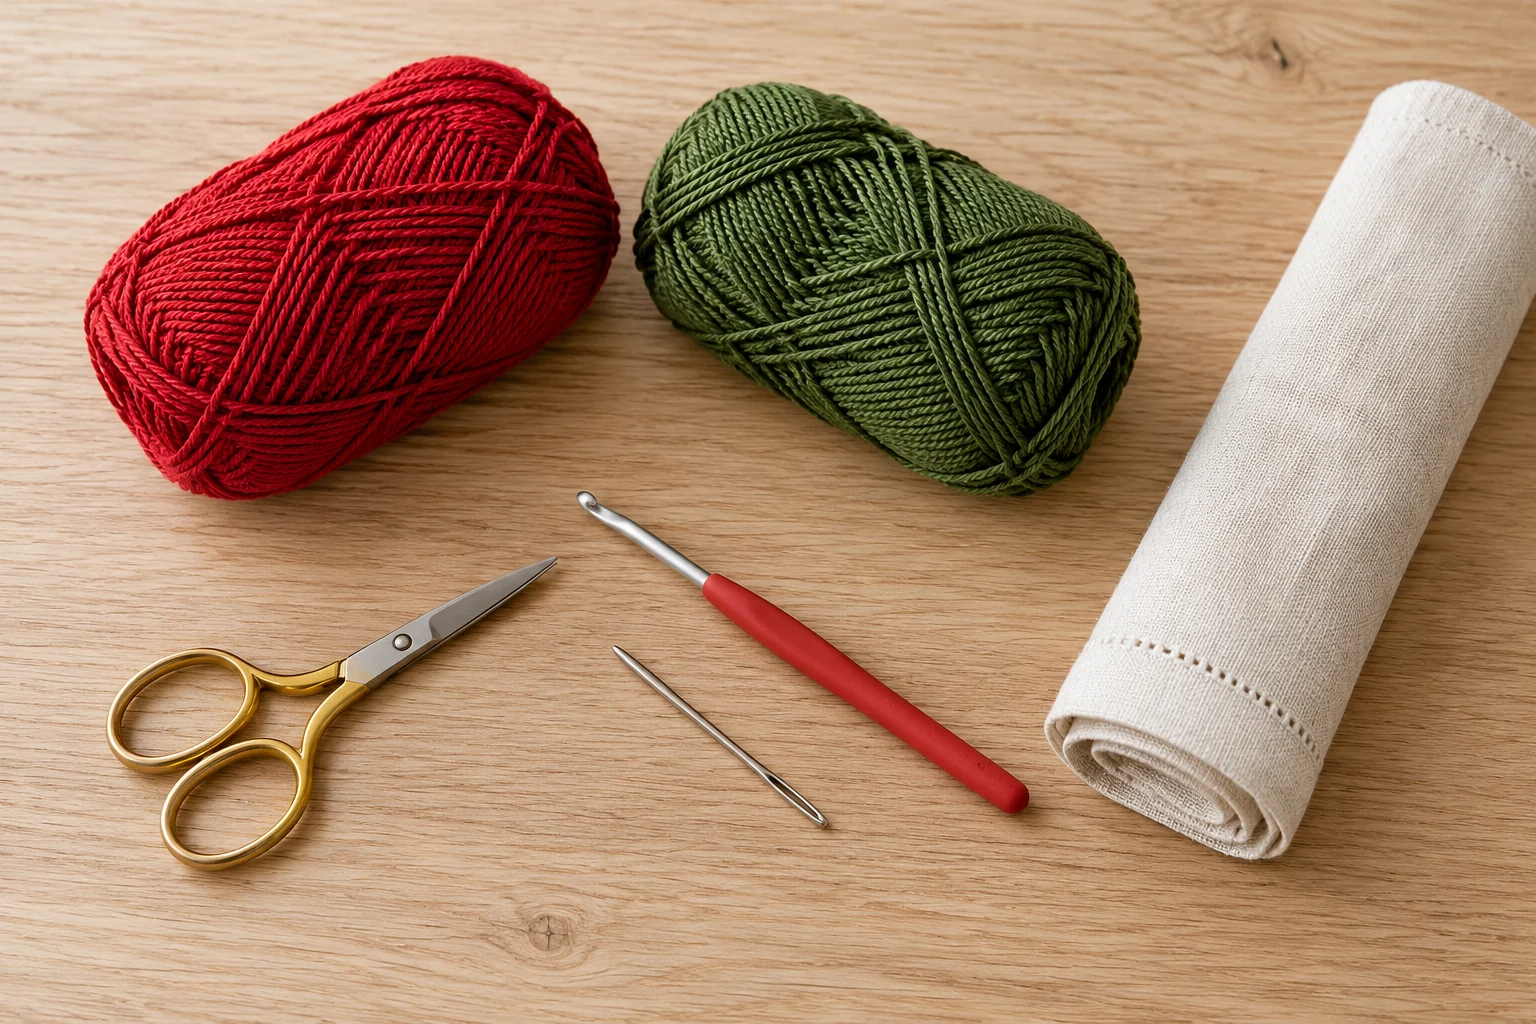
Gather red and green cotton yarn of the same weight, an appropriate crochet hook, a blunt tapestry needle, scissors and a removable marker. Keep the actual cloth napkin nearby for measuring. Smooth sport or DK cotton makes a compact band, but another weight can work if you check the fit and accept that the width will change.
Use a hook that gives a flexible, reasonably dense fabric. A very tight band can be uncomfortable to crochet and difficult to slide over the napkin. A very loose band may stretch and twist. Crochet the first few rows, fold them around the napkin and assess the texture before making the full strip. Use the same yarn, hook and napkin fold for every ring in a set.
Deep red with forest green gives a classic Christmas combination. Cream with sage leaves creates a quieter setting. A plain band is also useful if you prefer a smaller accent. Select yarn colors that work with the napkins you already own rather than changing the band construction to match a photograph. Keep a note of the yarn labels if you plan to add more rings later.
US Terms and Reading the Rows
Abbreviations: ch means chain; sc means single crochet; hdc means half double crochet; dc means double crochet; sl st means slip stitch; BLO means back loop only. The Craft Yarn Council abbreviation guide explains the standard terms. When you turn the band, the back loop is the loop farther from you at the top of the stitch.
The turning chain does not count as a stitch. Work into the first actual stitch after turning and do not work into the previous turning chain at the far end. Count 8 stitches at the end of each row. If your strip narrows gradually, you are probably skipping an end stitch; if it widens, you may be crocheting into a turning chain.
Step 1: Start the Red Ribbed Band
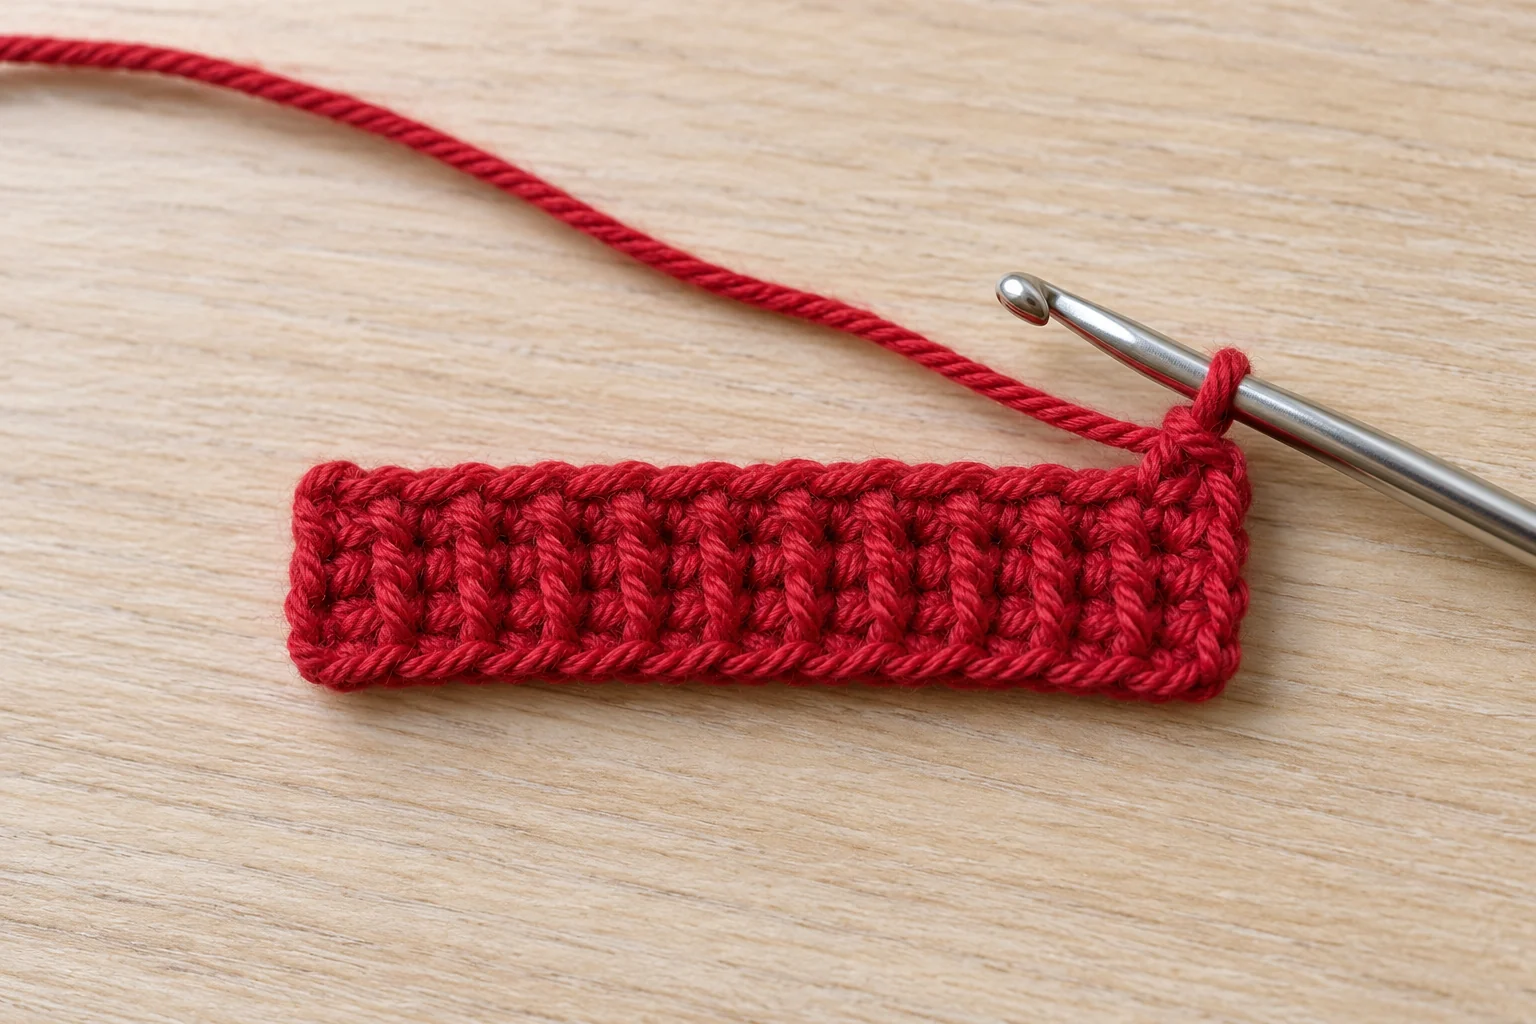
With red, ch 9. Row 1: sc in the second chain from the hook and in each remaining chain. (8) Ch 1 and turn. Place a marker in the first stitch if you find it difficult to recognize the edge. This first row is worked through the chain in your usual way; the ribbed texture begins on the following row.
Row 2: sc BLO in each of the 8 stitches. (8) Ch 1 and turn. Keep the first and last stitches the same height as those in the center. Do not pull the turning chain tight to straighten the edge. An even, relaxed edge is easier to join and makes a more comfortable ring around the cloth.
Step 2: Continue the Ribbing and Check Fit
Rows 3–30: repeat Row 2. Every row contains 8 sc BLO. Pause after Row 30 with the yarn still attached. Roll the napkin in the shape you intend to use at the table. Wrap the strip around its middle with the short ends meeting. It should hold the roll without needing to be stretched hard or compressing the cloth into a narrow waist.
If the ends cannot meet comfortably, add more rows one at a time and check again. If the strip overlaps substantially, remove rows. Remember that the seam will bring the short ends together, not overlap them by several rows. The ribbing stretches, so aim for a gentle fit with some give. Do not make every ring to 30 rows if your first sample clearly needs a different count.
Once the length works, record the final row count. For a matching set, repeat that count with consistent tension and the same napkin fold. Leave a sewing tail about four times the band width before fastening off. This gives enough yarn for a small seam and secure weaving without adding another knot at the join.
Step 3: Join the Band into a Ring
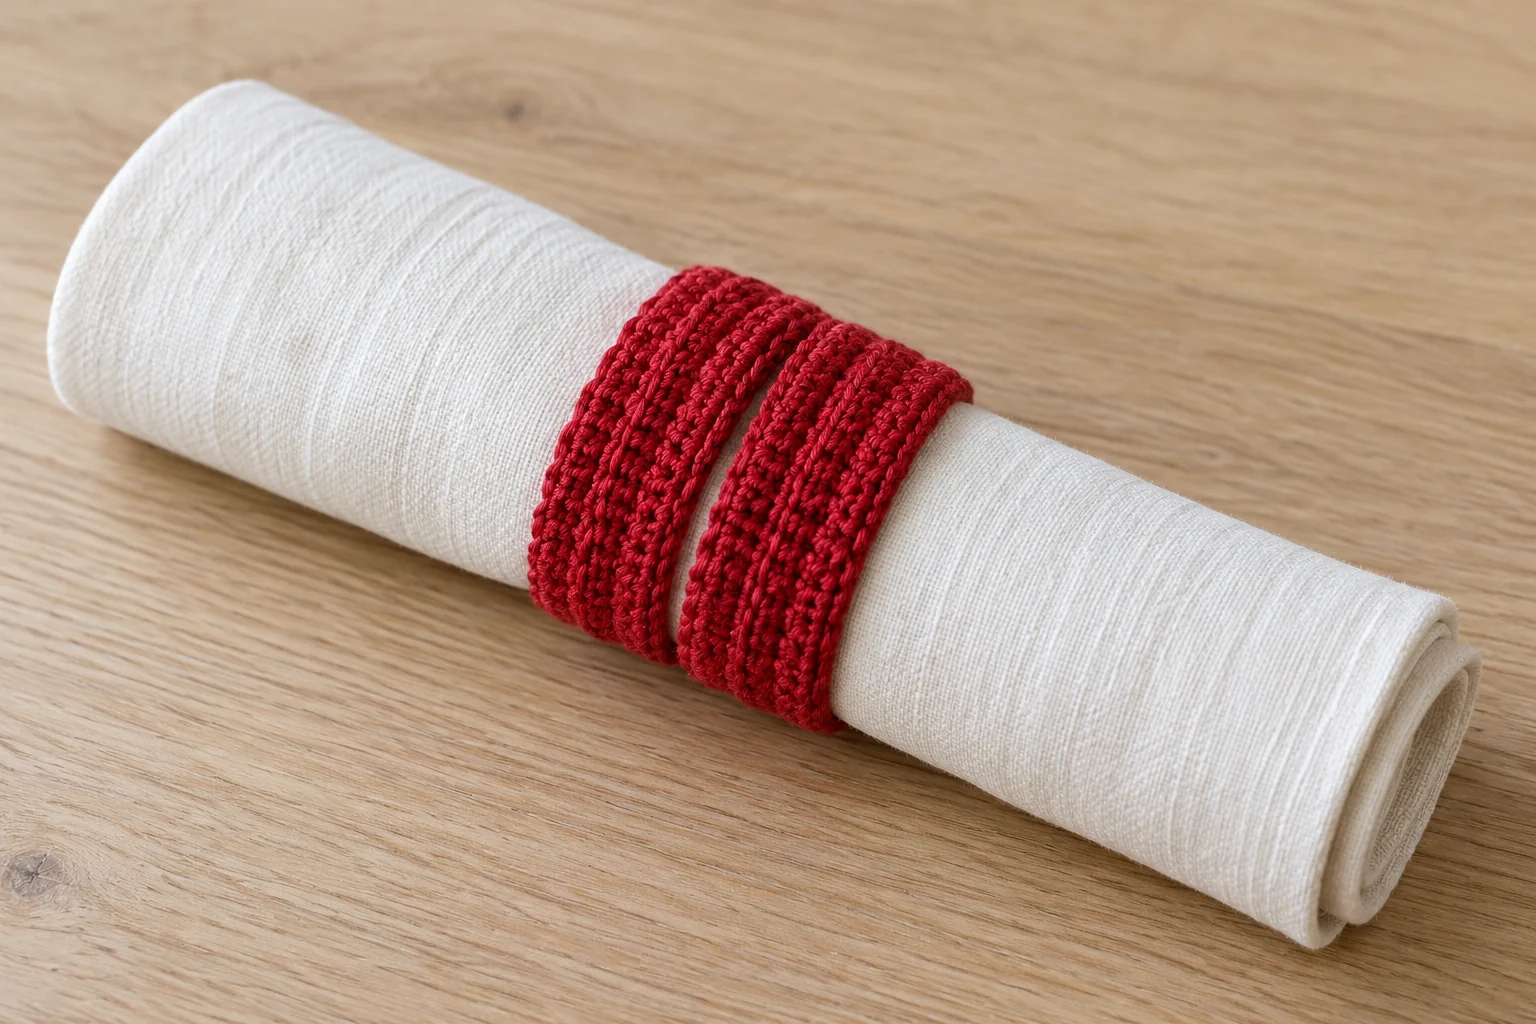
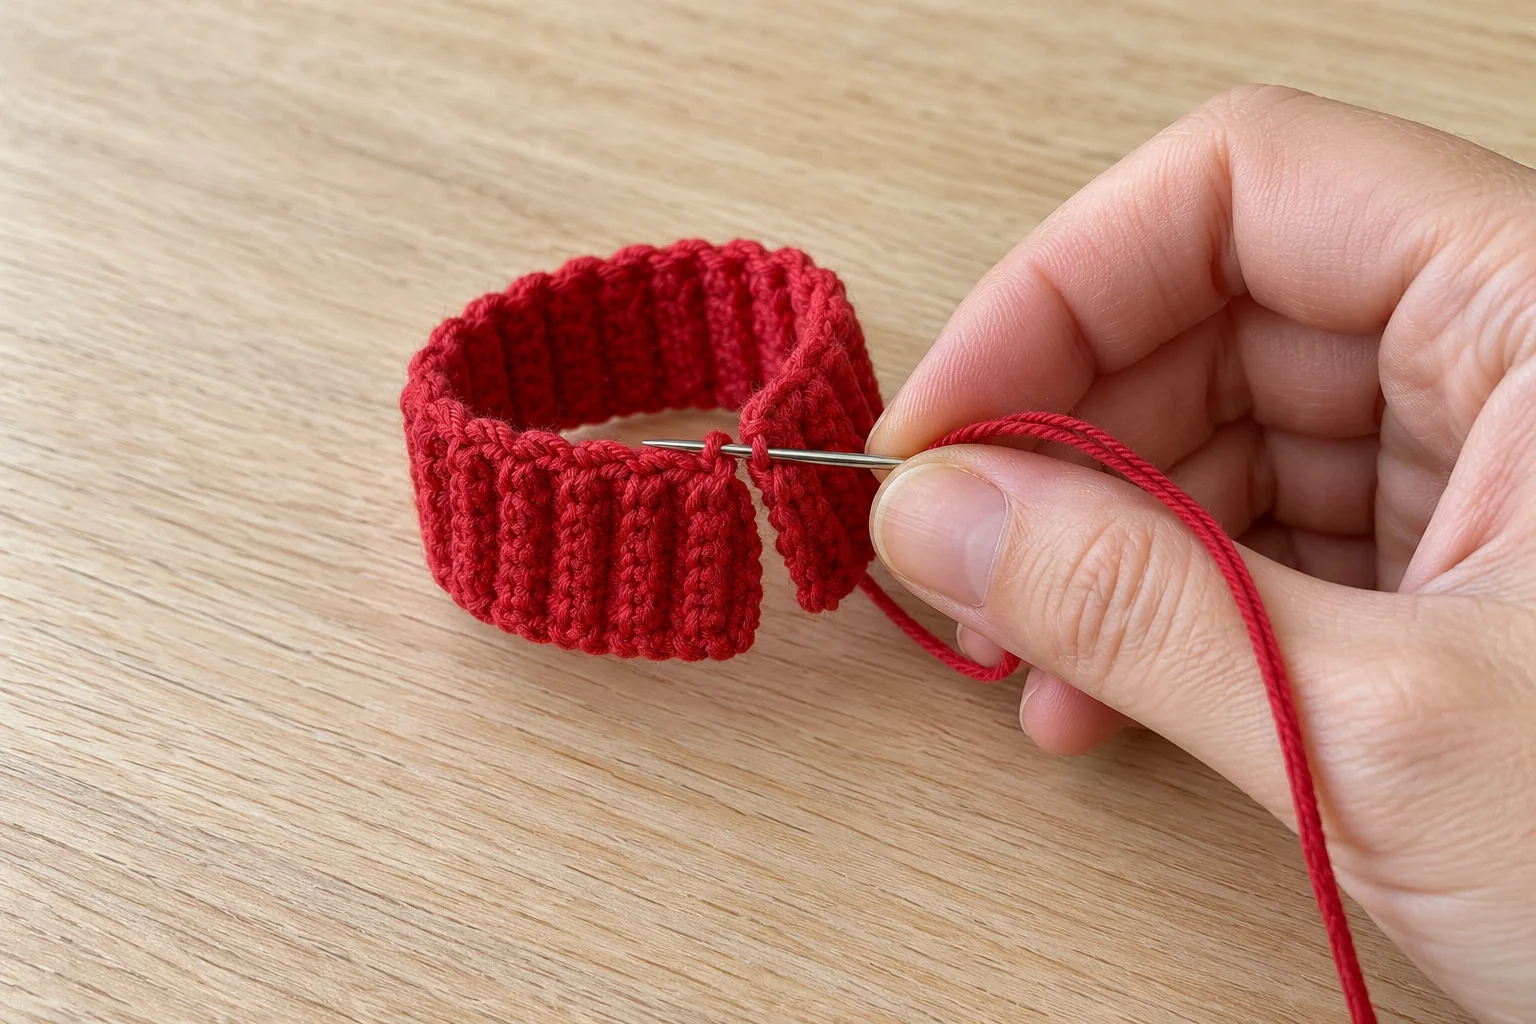
Lay the strip flat without twisting it. Bring the two short ends together. Use the tail and a blunt needle to whipstitch the 8 end stitches to the corresponding 8 foundation-edge positions. Match one pair at a time and keep the seam flexible. A tight seam can pinch the band into an hourglass shape.
Weave the tail through the seam and nearby stitches, changing direction before trimming. Turn the ring so the tidiest side faces outward. Slide it over the rolled napkin now, before sewing on the leaves. If it is too tight or loose, undo the seam and adjust the strip. It is much easier to change the length at this stage than after the decorations are attached.
Step 4: Crochet Two Small Green Leaves
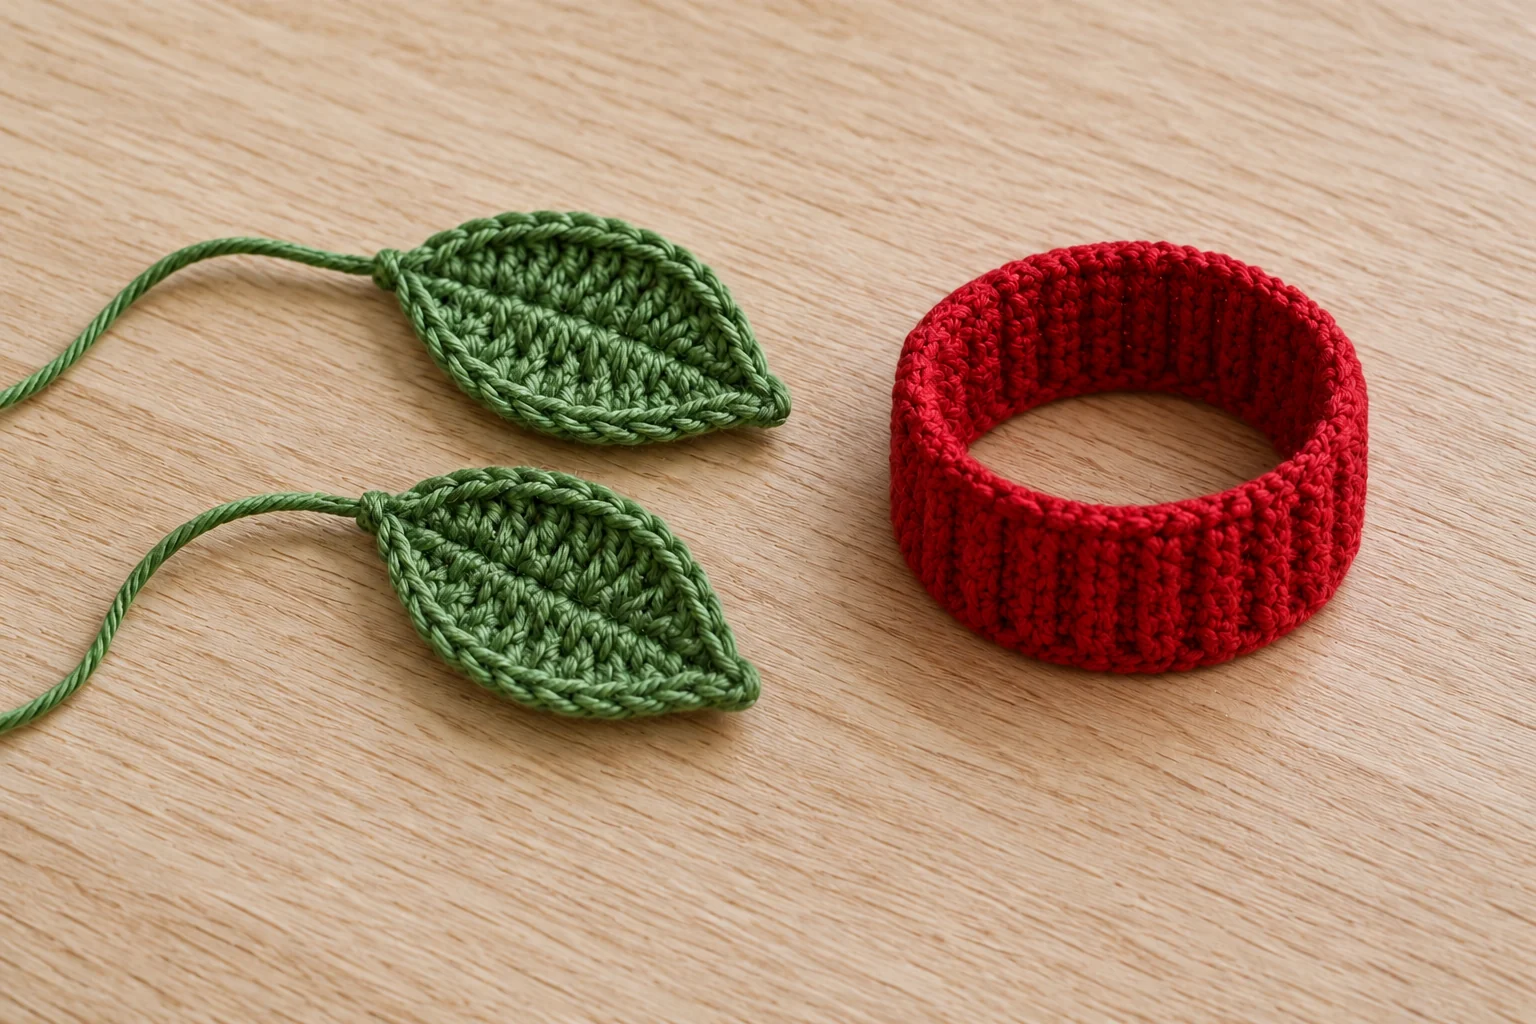
Make each leaf separately. With green, ch 7. Starting in the second chain from the hook, work sc, hdc, dc, dc and hdc in the next five chains. Work 3 sc in the final chain to turn around the tip. You have now used all six available chains on the first side. Do not turn the work as you would for a flat row.
Rotate the chain so you can work along its unused underside. In the remaining five chain positions, work hdc, dc, dc, hdc and sc back toward the starting end. Sl st into the first sc to close the outline. Fasten off with a long sewing tail. The leaf has 13 ordinary stitches around its outline; the closing slip stitch is only a join.
Make a second identical leaf. Smooth both leaves between your fingers and compare their outlines. A small natural curve is fine. If a leaf folds tightly lengthwise, check that you did not skip the 3 sc at the tip or pull the starting chain too tight. Weave in the short starting tail, keeping the long finishing tail for attachment.
Step 5: Arrange and Sew the Leaves
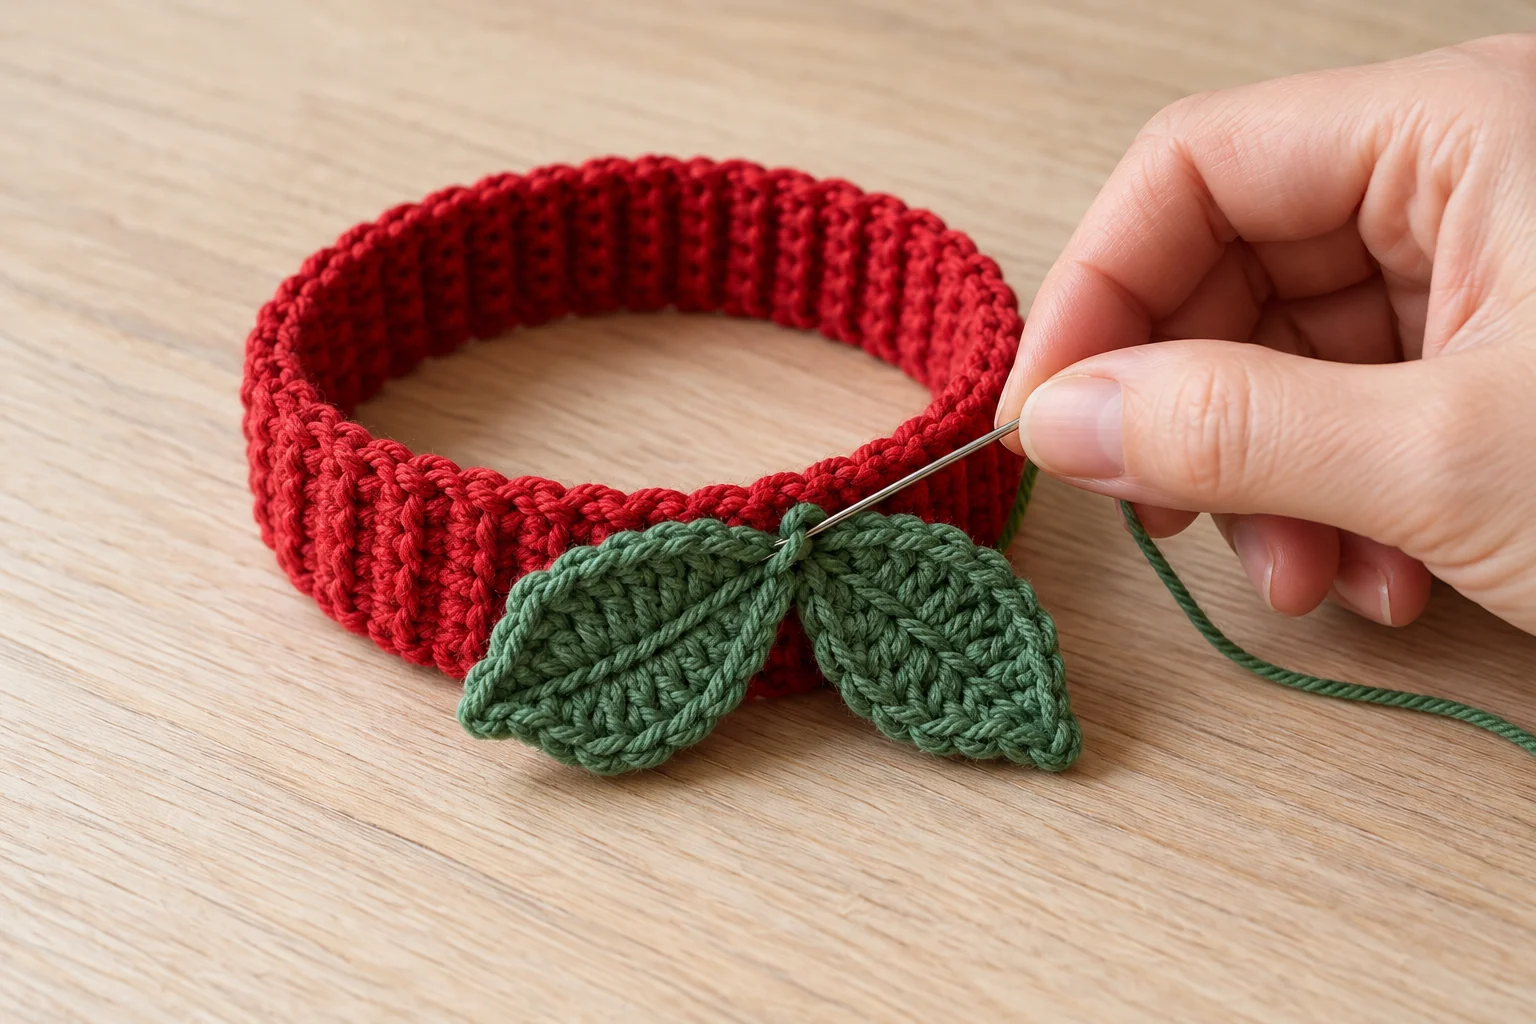
Put the napkin ring on the table with its seam facing upward. Lay the two leaves over that seam with their bases slightly overlapping and their points angled apart. Leave some red band visible around them. Remove the napkin before sewing so the needle cannot catch the cloth. Pinning is optional; holding the pieces with removable markers is often enough.
Use the green tails to sew the base and central underside of each leaf to the band. Take several small stitches through the leaf and the outer band fabric. Secure the leaves well while keeping their tips free. Avoid a single loose stitch at the base: it lets the leaf swing around and can expose long strands inside the ring.
Check the inside after every few stitches. Keep traveling yarn close to the fabric and weave the ends through existing stitches rather than leaving a long float. Do not pull the leaves together so tightly that they fold the band. When both are attached, smooth the ring and trim the tails only after confirming that the sewing is secure.
Step 6: Finish and Prepare the Place Setting
If your yarn benefits from blocking, dampen the ring according to its care instructions. Shape the leaves gently and dry the band around a suitable smooth form without stretching it excessively. Remove the form once dry. Do not put a damp ring around a napkin, because moisture can transfer to the cloth or table.
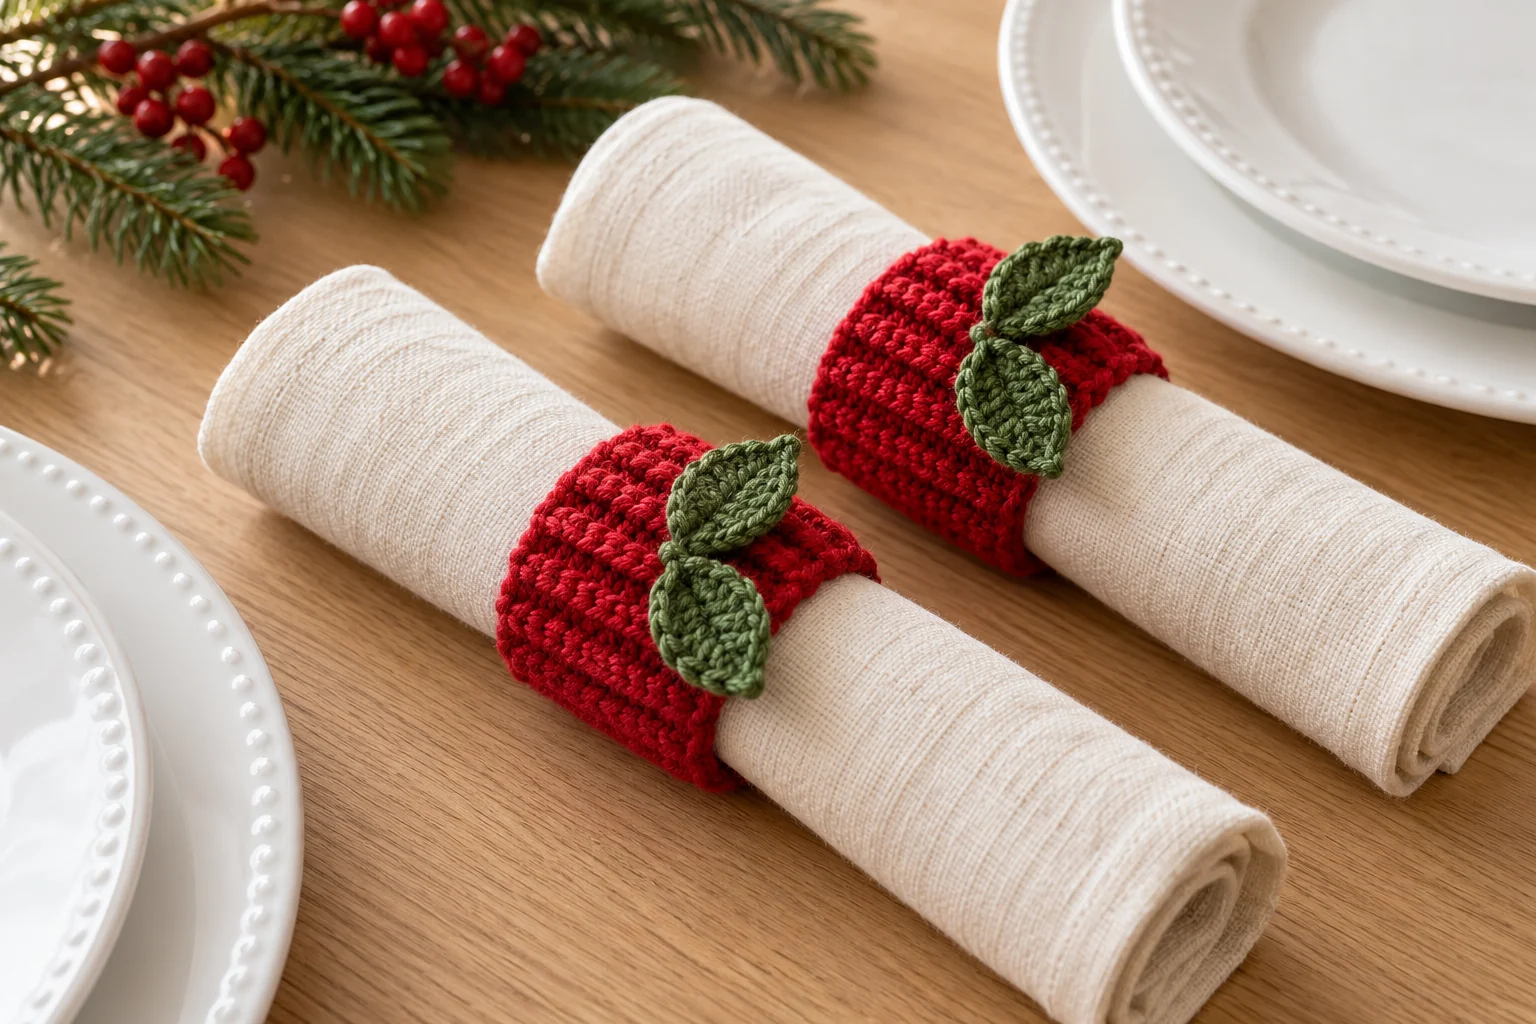
Roll each napkin consistently and slide the ring toward its middle. Turn the leaves upward, then check that the band releases easily when the napkin is pulled out. Store the finished rings flat or loosely nested so the leaves are not crushed. This is a decorative textile accessory; it is not a trivet or a heat barrier for serving dishes.
Fixing Common Band and Leaf Problems
A twisting ring usually comes from joining the strip with a half-turn in it. Open the seam, lay the strip flat and join it again. A seam that stands out sharply may be too tight or bulky. Rework it with smaller, even stitches and weave the tail away from the edge. Covering a poor seam with leaves does not fix a distorted fit.
If the band stretches too much, use fewer rows only after checking that it still slides over the napkin. A smaller hook or firmer yarn may be a better solution for the next sample. If the leaves flop, secure a little farther along their central underside. If their tips curl, flatten them gently during drying rather than stitching the entire perimeter to the band.
Frequently Asked Questions
Can I change the band width?
Yes. Chain one more than your desired number of single crochet stitches, then keep that stitch count in every row. A wider band needs a new fit check and may require larger leaves to keep the same proportions.
How many rows should I use for a thick napkin?
Start by checking the strip after 30 rows, then add rows until the ends meet around your chosen roll without hard stretching. The right number depends on the cloth, fold, yarn and your tension.
Do I need to block the napkin ring?
Only if the fabric or leaves need gentle shaping. Follow the yarn label. Let everything dry completely before using it with table linens.
Can I make the band without the leaves?
Yes. Finish the seam neatly and use the ribbed band alone. You can also vary the band color between place settings while keeping the same yarn and dimensions.
Can the finished rings be washed?
Use the care instructions for the yarn and any other materials you actually used. Test one sample first and reshape the leaves while drying. Do not assume that a handmade ring can use the same hot wash as the napkins.
How do I keep a set consistent?
Write down the hook, yarn, final row count and napkin fold from the first successful sample. Compare each strip to that sample before seaming, then place the leaves in the same position on every ring.
More Handmade Christmas Details
For a larger table accent, try the crochet poinsettia flower. Add a crochet Christmas gift bag beside a place setting, or carry the red color into a Christmas bow garland.
The mini Christmas tree pattern offers another small decoration for the same room. Keep the table arrangement comfortable for guests, leaving enough space for dishes and for removing the napkin rings before eating.