Crochet Black Cat Pouch – Free Halloween Drawstring Bag Pattern
Make a small crochet black cat pouch with pointed ears, an embroidered face, and a two-cord drawstring closure. Includes round-by-round instructions and finishing tips.
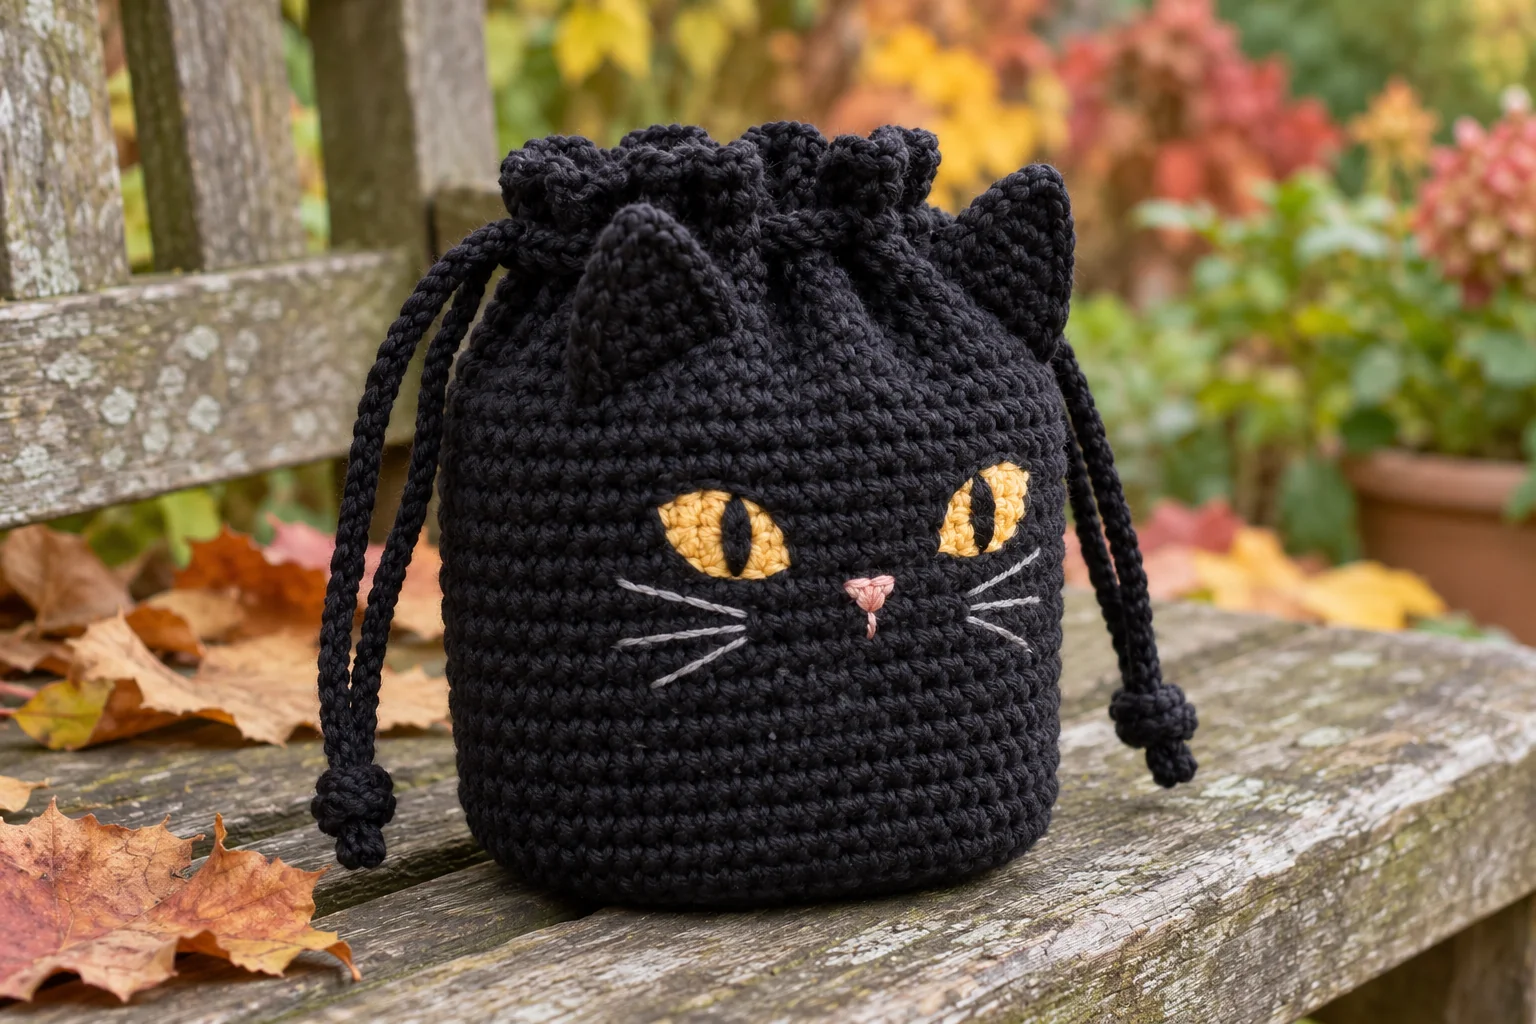
A little black cat bag adds a playful touch to handmade Halloween gifts. This crochet black cat pouch combines a simple rounded body with pointed ears, golden yellow eyes, a pink embroidered nose, and delicate gray whiskers. Two drawstrings gather the opening while keeping the cat’s face visible on the front.
Use it for wrapped treats, small accessories, or a seasonal gift tucked inside a larger bag. The black yarn gives it a classic Halloween look, while the stitched face adds character without requiring plastic eyes.
The construction starts with a circular base. You then crochet straight sides, add an eyelet round, and finish the upper edge. The ears are made separately and sewn below the closure. Embroider the face before threading the drawstrings so you can easily reach inside the pouch.
Pattern status: This is an original, untested written pattern. Stitch-count arithmetic has been checked, but finished measurements, yarn usage, and the final appearance need confirmation through a physical sample. The generated project photos are illustrative design references.
Project Overview
| Detail | Information |
|---|---|
| Skill level | Confident beginner |
| Terminology | US crochet terms |
| Construction | Circular base, straight sides, separate ears |
| Main stitches | Single crochet, double crochet, chain, slip stitch |
| Closure | Two drawstrings threaded in opposite directions |
| Estimated dimensions | 10–11 cm wide when flattened, 12–14 cm tall excluding ears |
These dimensions are planning estimates. They assume approximately 22 single crochet stitches and 24 rounds per 10 cm, measured in your actual working tension. Yarn thickness, hook size, and stitch height will change the result. Measure your own finished sample before choosing its contents.
This pouch is designed for small, lightweight contents. Its drawstrings close the opening but do not create a sealed compartment.
Materials and Tools
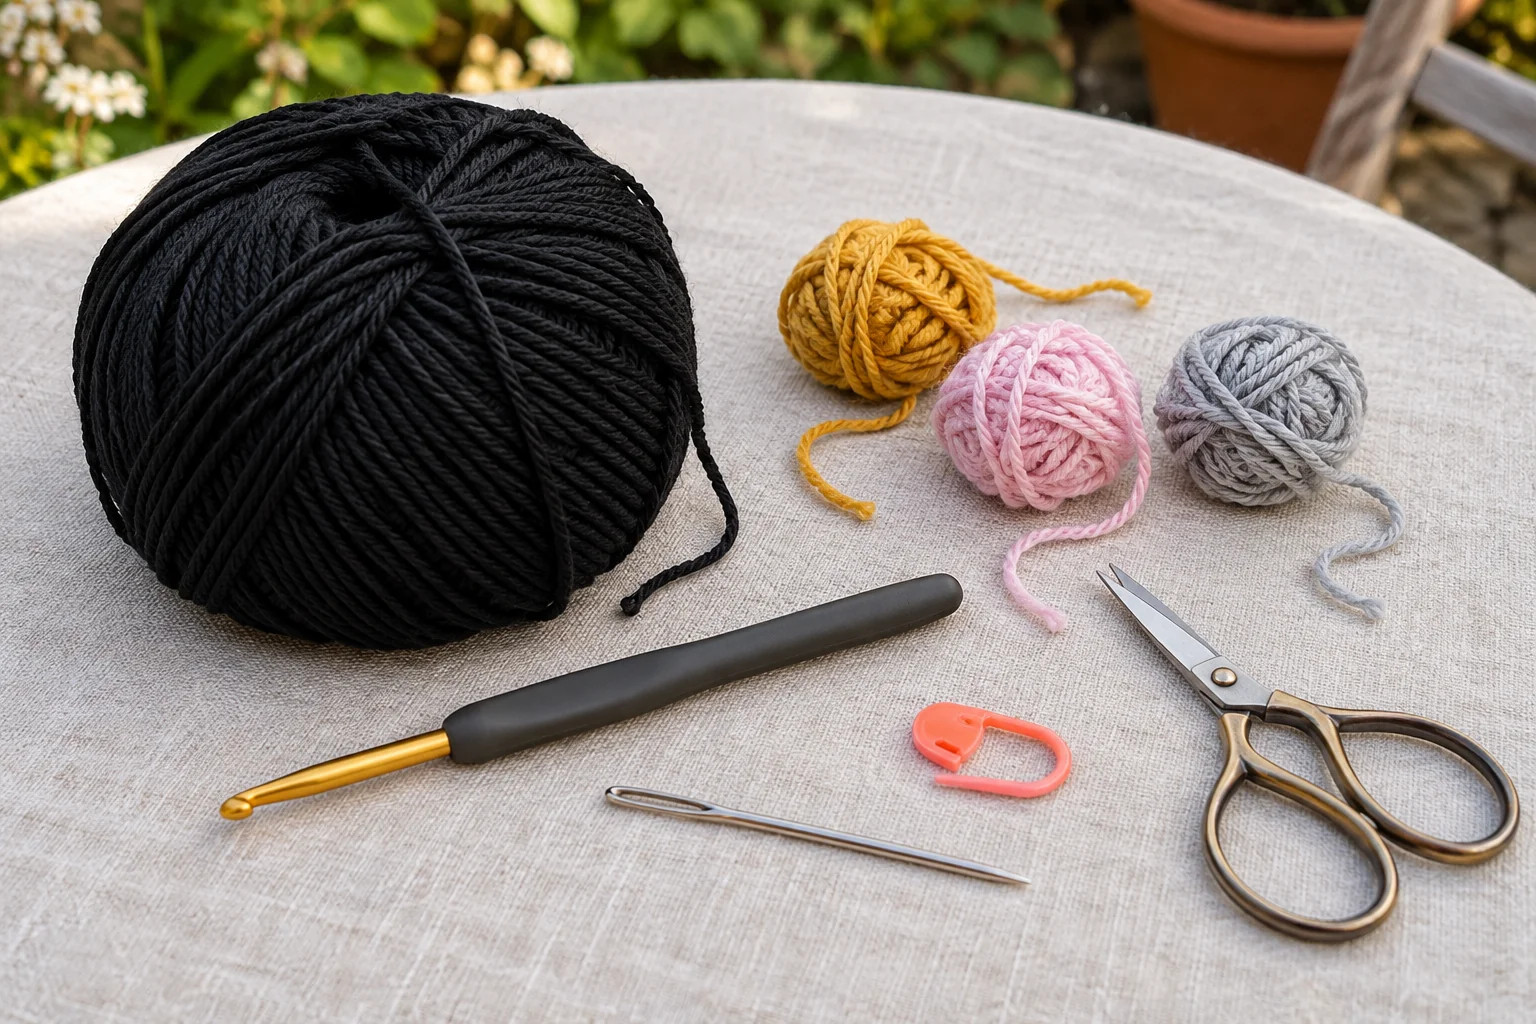
- Black smooth cotton or cotton-blend yarn, approximately DK weight.
- Small amounts of golden yellow, pale pink, and light gray yarn for embroidery.
- A 3 mm crochet hook, or a size that produces firm but flexible fabric.
- A removable stitch marker and a tapestry needle.
- Small scissors and a measuring tape.
- Optional contrasting scrap yarn for marking facial placement.
Have a 50 g ball of black yarn available as a starting supply, but check its yardage. This is a preparation allowance rather than a tested consumption figure.
Smooth yarn makes it easier to see individual stitches and gives the face a clear background. Work under bright lighting, especially when counting black stitches. A pale cloth beneath your project can also make the edges easier to distinguish.
Use thinner yarn for the whiskers if your main yarn creates bulky embroidery. You can also separate a plied yarn carefully and use fewer strands.
Abbreviations and Pattern Notes
| Abbreviation | Meaning |
|---|---|
| MR | Magic ring |
| ch | Chain |
| sc | Single crochet |
| dc | Double crochet |
| sl st | Slip stitch |
| inc | 2 single crochet stitches in one stitch |
| st / sts | Stitch / stitches |
| BLO | Back loop only |
These are US crochet terms. See the Craft Yarn Council abbreviation reference for terminology guidance.
Numbers in parentheses show the stitch count at the end of a round or row. Work Rounds 1–28 in a continuous spiral without joining. Move the marker to the first stitch of each new round.
The eyelet round and upper edging use joined rounds. Their starting chains do not count as stitches. Unless instructed otherwise, work through both loops. Turning chains on the ears do not count as stitches.
Step 1: Crochet the Circular Base
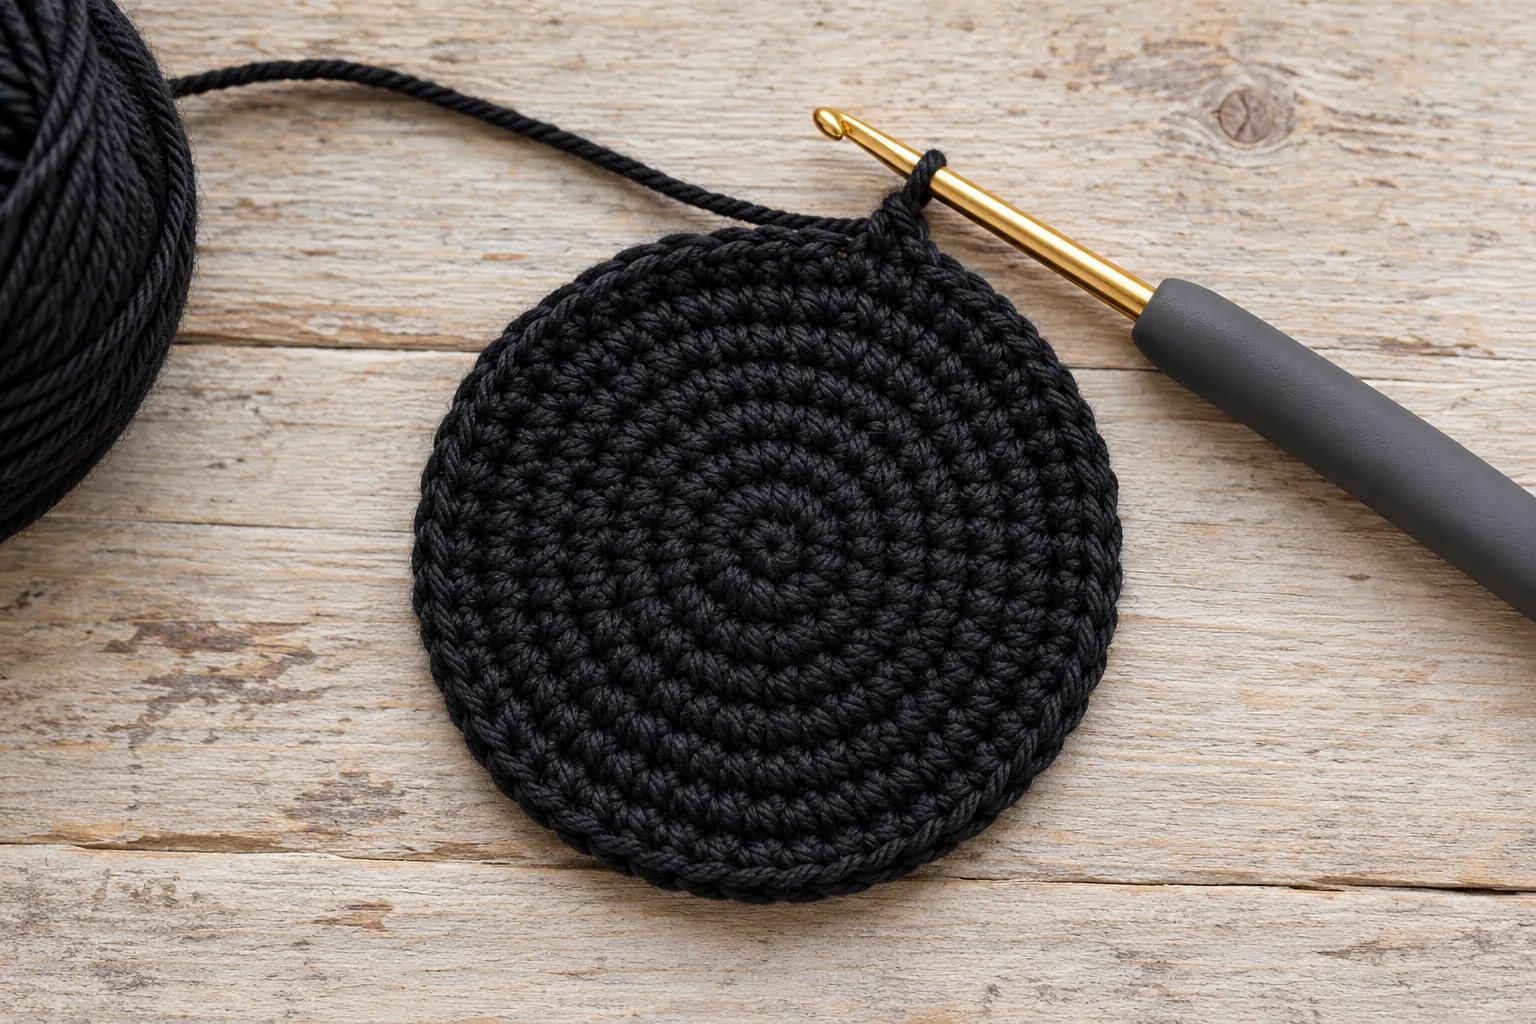
Using black yarn, make a magic ring.
| Round | Instructions | Count |
|---|---|---|
| 1 | 6 sc into MR | 6 |
| 2 | Inc in each stitch around | 12 |
| 3 | (1 sc, inc) × 6 | 18 |
| 4 | (2 sc, inc) × 6 | 24 |
| 5 | (3 sc, inc) × 6 | 30 |
| 6 | (4 sc, inc) × 6 | 36 |
| 7 | (5 sc, inc) × 6 | 42 |
| 8 | (6 sc, inc) × 6 | 48 |
Pull the magic-ring tail firmly closed. Weave it securely through the underside of the base.
Lay the circle on a flat surface and inspect its shape. Slight corners at the increase points are normal. Strong rippling or pronounced cupping may indicate a tension problem or a counting mistake. Count all 48 stitches before continuing; the rest of the body depends on maintaining this number.
Step 2: Build the Pouch Body
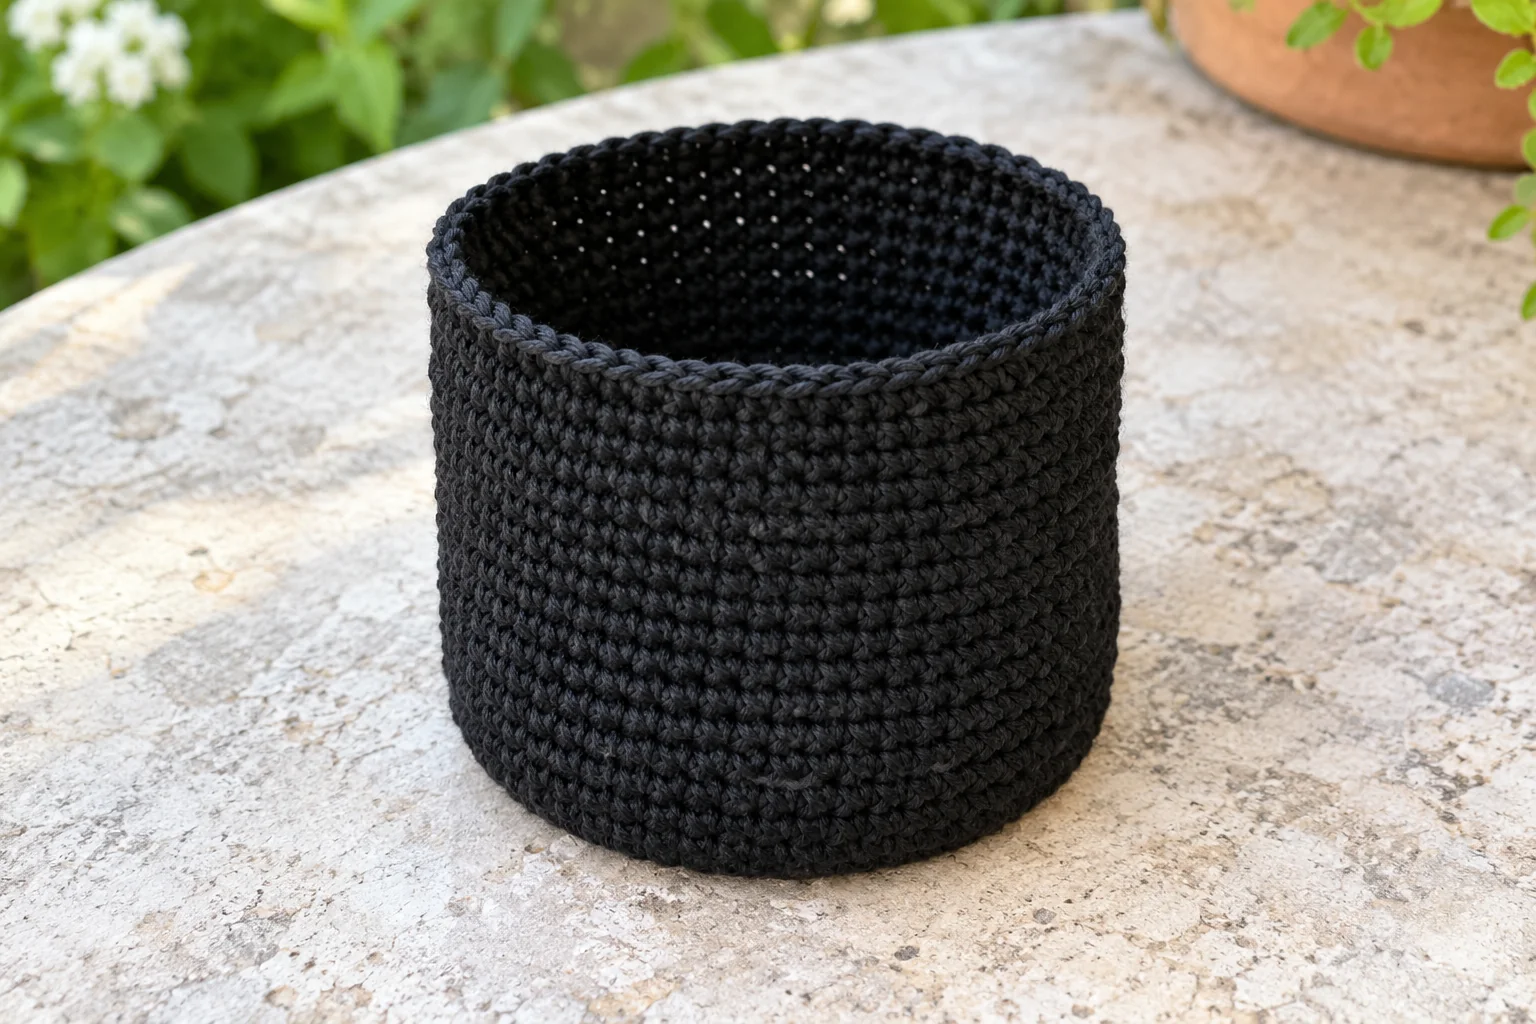
Round 9: Work 1 sc in the BLO of each stitch around. (48) This round creates a subtle transition between the base and sides.
Rounds 10–28: Work 1 sc in each stitch around, through both loops. (48 stitches per round)
Let the sides rise naturally as you work. Keep the marker in place; black yarn can make the beginning of a round difficult to find.
For a taller pouch, add complete 48-stitch rounds before the eyelet section. Extra height changes the yarn requirement and facial placement. At the end of Round 28, work a sl st into the next stitch to finish the spiral. This joining slip stitch does not count as an additional stitch.
Step 3: Make the Drawstring Eyelets and Upper Edge
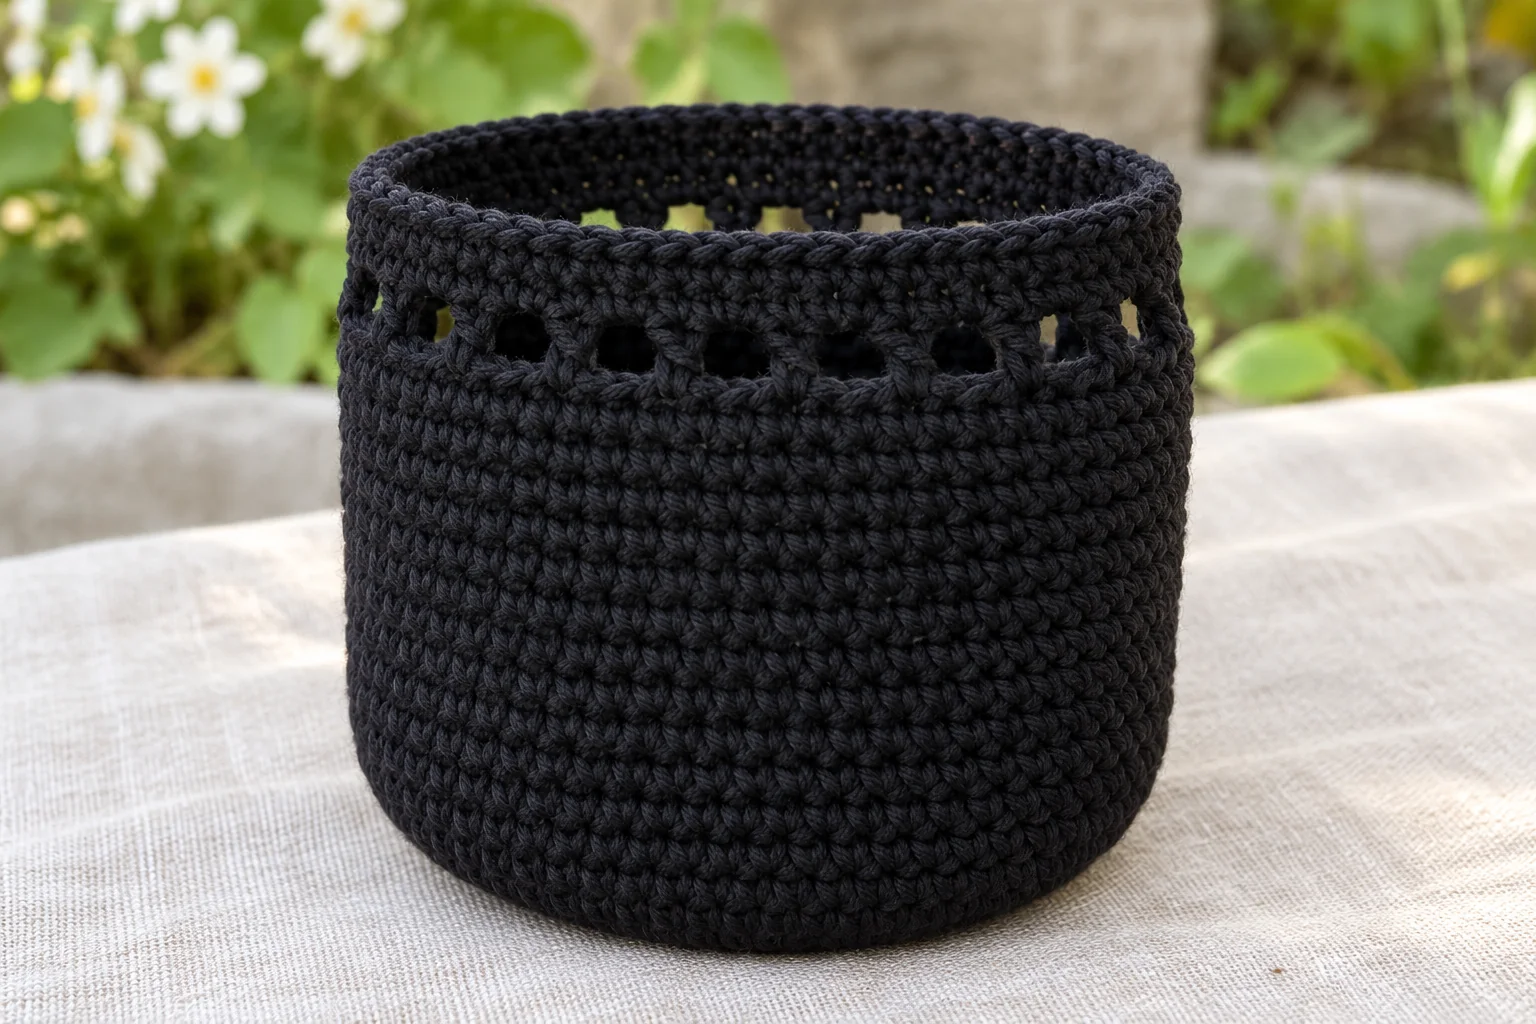
Round 29: Ch 2. Starting in the same stitch that received the joining slip stitch, repeat (1 dc, ch 1, skip the next stitch) 24 times around. Join with a sl st to the first dc.
You should have 24 dc and 24 chain-1 spaces. Together, these use all 48 stitches from the previous round.
Round 30: Ch 1. Work 1 sc into each dc and 1 sc into each chain-1 space around. Join to the first sc. (48)
Rounds 31–32: Ch 1, work 1 sc into each stitch around, and join to the first sc. (48 per round)
Fasten off and weave in the end. The two rounds above the eyelets form a small gathered rim. Keep them relaxed enough for the drawstrings to move through the openings.
Step 4: Crochet Two Cat Ears
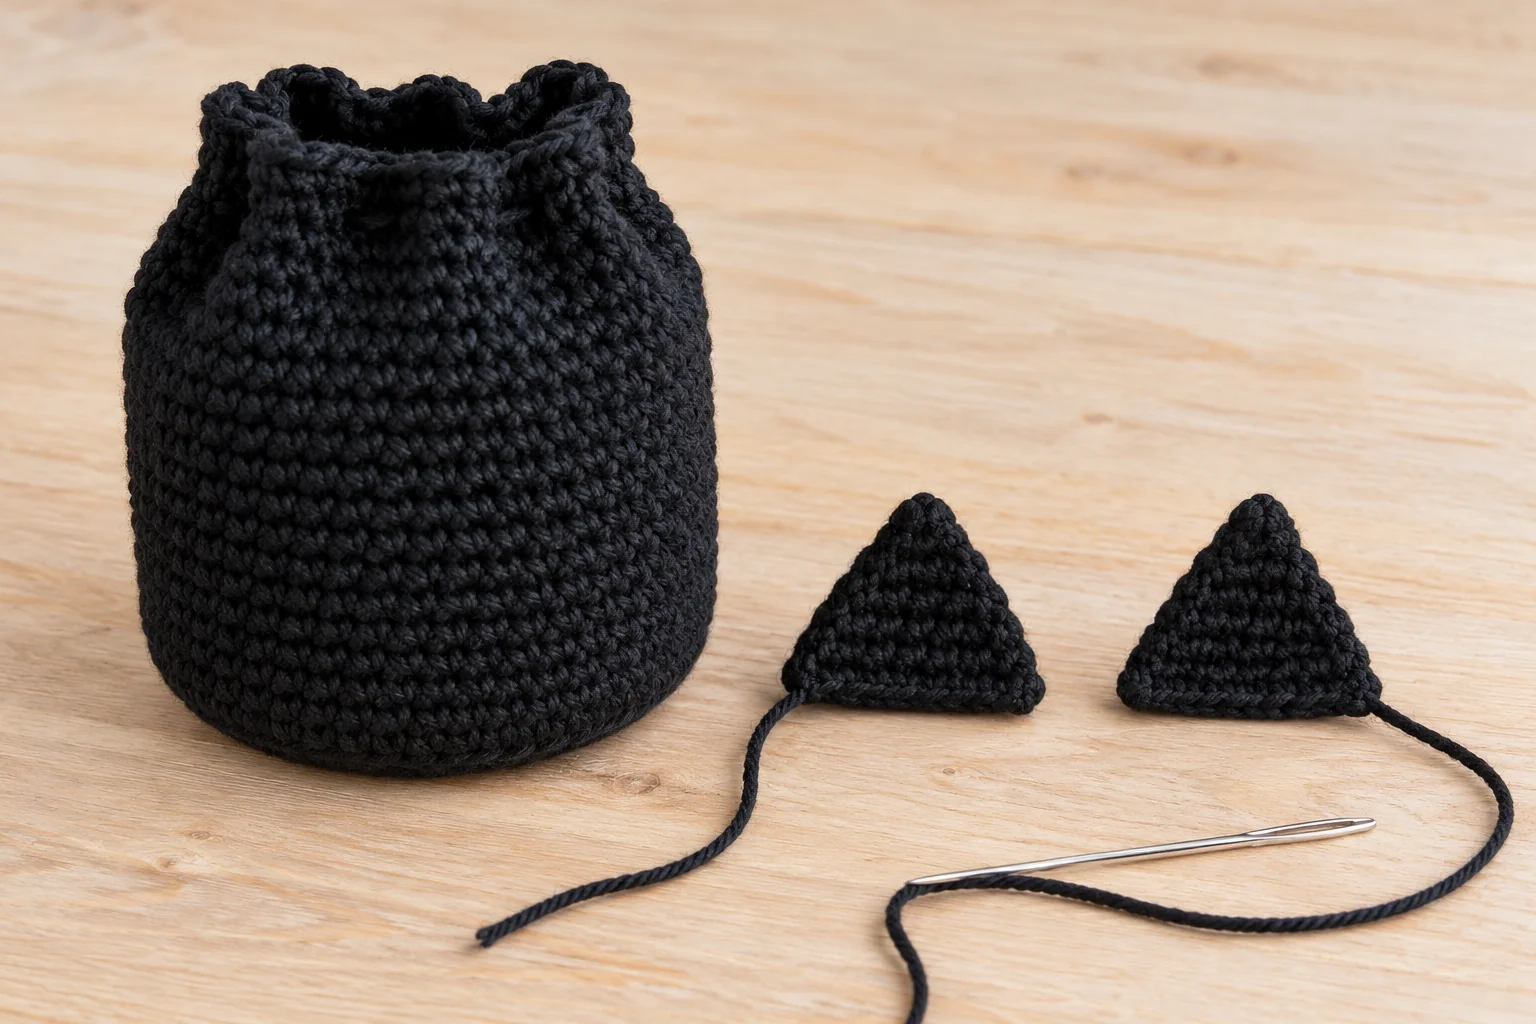
Make two matching flat triangles using black yarn. Foundation: ch 2.
| Row | Instructions | Count |
|---|---|---|
| 1 | 1 sc into second chain from hook | 1 |
| 2 | Ch 1, turn; 3 sc into the stitch | 3 |
| 3 | Ch 1, turn; inc, 1 sc, inc | 5 |
| 4 | Ch 1, turn; inc, 3 sc, inc | 7 |
| 5 | Ch 1, turn; inc, 5 sc, inc | 9 |
| 6 | Ch 1, turn; 1 sc in each stitch | 9 |
Fasten off, leaving a long sewing tail. Weave in the short starting tail. The narrow starting end is the ear tip; the final nine-stitch row is the attachment edge.
Flatten the pouch and choose its front. Pin the ears symmetrically near the upper left and right of the face area. Position their bases around Rounds 25–27, below the eyelets.
Sew each nine-stitch base securely to the front wall only. Keep the needle from catching the back of the pouch. Add a small securing stitch at each lower corner if an ear twists.
Step 5: Embroider the Cat’s Face
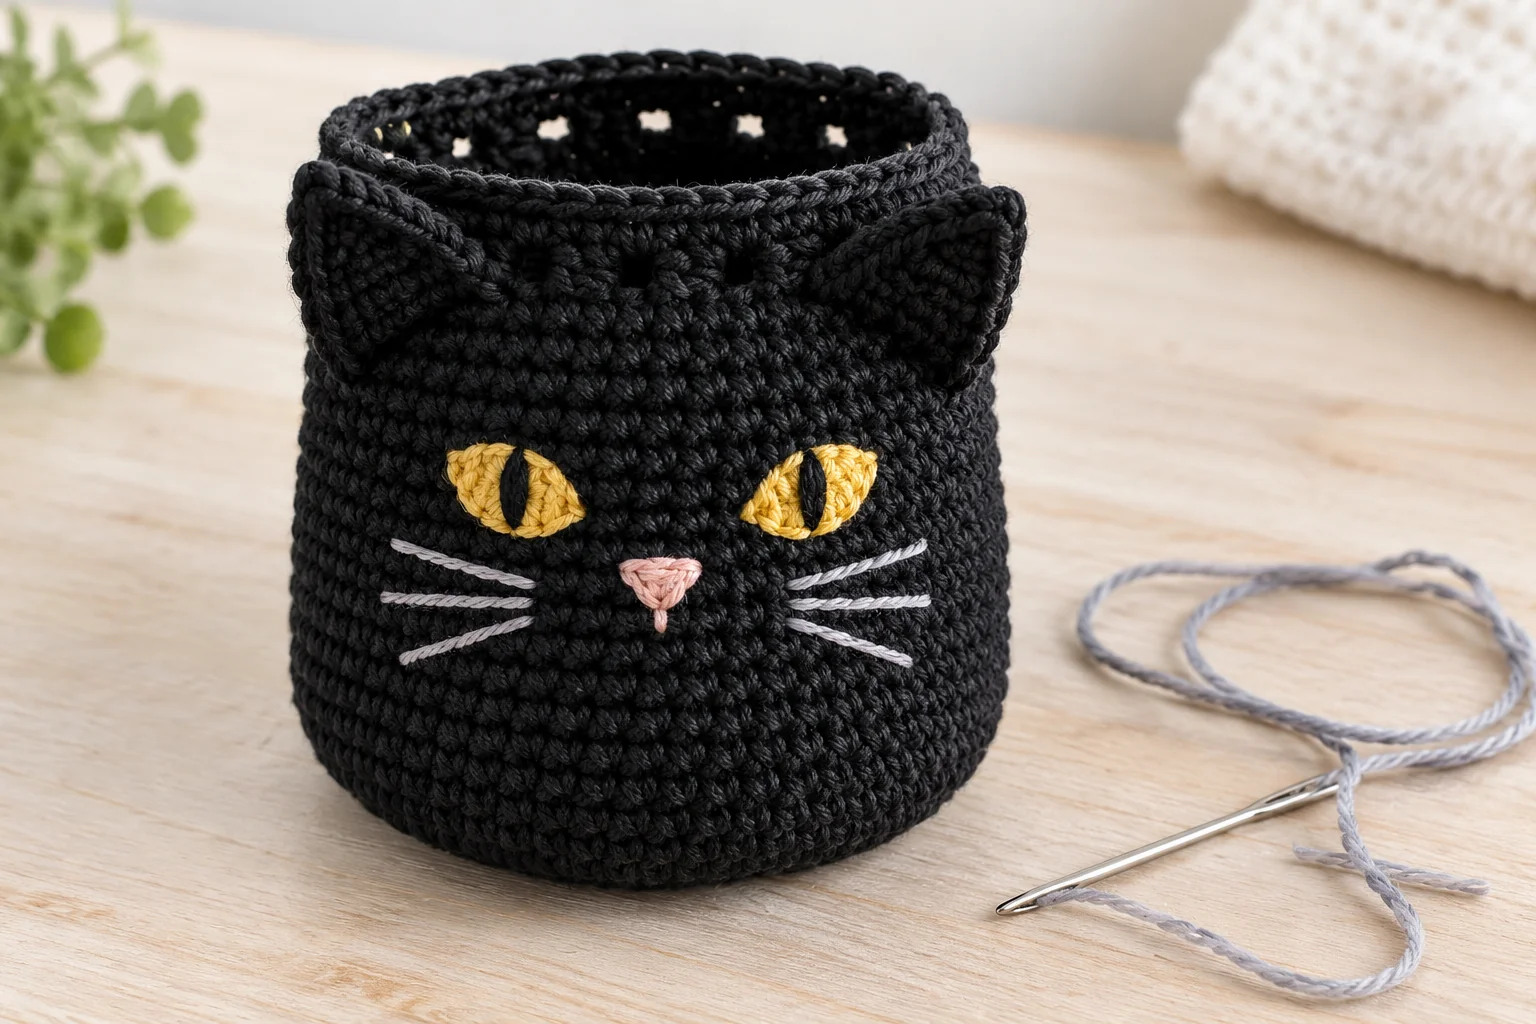
Mark the face before sewing. Keep the pouch flattened gently without stretching the fabric. Suggested placement: eyes across Rounds 18–21, nose centered around Round 17, and whiskers extending outward on either side. Adjust these positions to suit your stitch height and ear placement.
For each eye, use golden yellow yarn to outline a small almond shape approximately four stitches wide and two or three rounds high. Fill the shape with short, closely spaced embroidery stitches. Add a narrow vertical black pupil through the center of each yellow eye. Keep the pupils aligned.
Using pale pink yarn, stitch a small downward-pointing triangular nose. Add one short vertical stitch beneath it.
With light gray yarn, embroider three whiskers on each side. Make the upper whisker slope slightly upward, the middle one nearly horizontal, and the lower one slightly downward.
Avoid pulling the yarn tight enough to pucker the pouch. Secure the ends inside and weave them into nearby stitches without joining the front and back walls.
Step 6: Make and Thread the Drawstrings
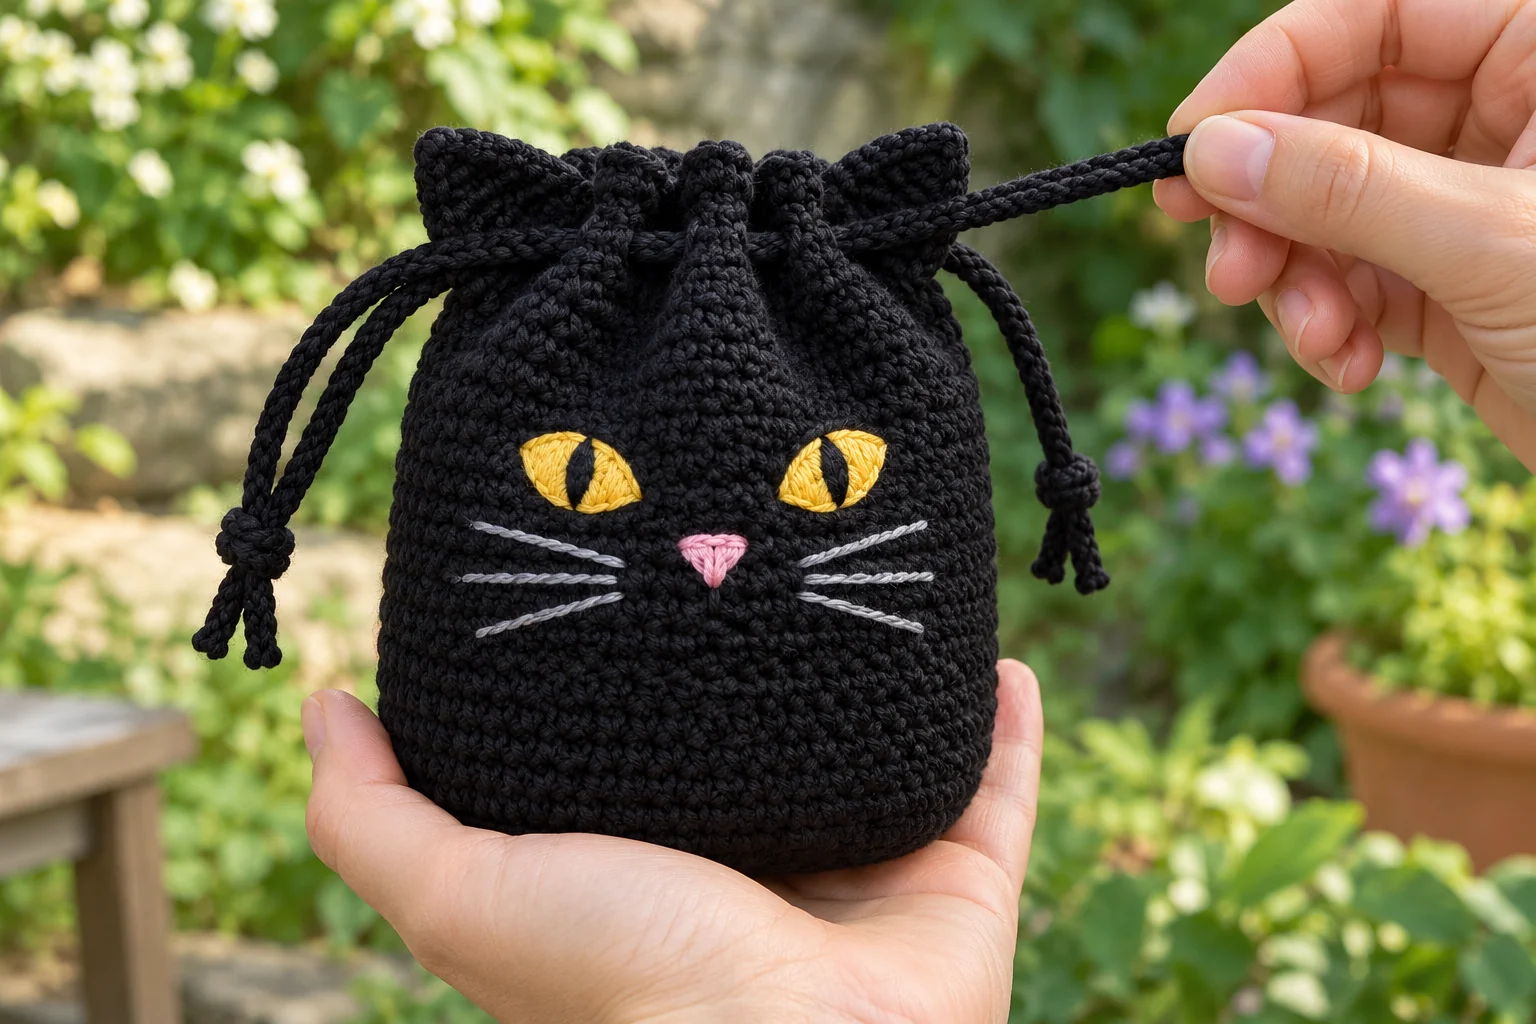
Make two black cords, each approximately 65–70 cm long as a starting length. Check the fit before securing their ends.
- Chain until the foundation reaches the desired length.
- Slip stitch into the back bump of the second chain from the hook.
- Continue slip stitching into each remaining back bump.
- Fasten off and weave in the tails.
Check that the cord passes comfortably through an eyelet. Keep your slip stitches loose enough to prevent excessive curling.
Thread the first cord through all 24 eyelets, alternating outside and inside the pouch. Start and finish at the same side. Thread the second cord through all the eyelets in the same way, starting and finishing at the opposite side.
Tie the two ends of each individual cord together with a secure knot. You will have one tied pair on each side. Pull both sides gently to gather the opening. To reopen it, ease the rim apart.
Step 7: Finish and Check the Pouch
Inspect the inside for loose ends. Confirm that the ears and embroidery are secure and that the drawstrings slide freely. Place a small, lightweight item inside. Close and reopen the pouch several times.
- Both cords should gather the opening evenly.
- The ears should remain clear of the eyelets.
- The face should stay reasonably flat.
- No sewing stitches should catch both walls together.
- The drawstring knots should not easily slip through the eyelets.
Record your finished measurements and yarn usage if you plan to make another pouch.
Troubleshooting
The base ripples: Recount each increase round. Extra stitches or loose tension can create waves.
The body becomes wider: Each straight round must contain 48 stitches. Check for accidental increases near the marker.
The opening will not gather: Confirm that both cords pass through every eyelet and begin on opposite sides. A cord that is too thick may also resist sliding.
The ears lean unevenly: Reposition their attachment edges before adding securing stitches. Check symmetry with the pouch both open and gathered.
The face puckers: Loosen the embroidery. Several short stitches usually allow better control than one long, tightly pulled strand.
Styling and Gift Ideas
Fill the pouch with wrapped Halloween treats, a small handwritten note, or lightweight accessories. Use wrapped food because this crochet fabric is not a food-storage lining.
For another seasonal bag project, try the crochet Halloween trick-or-treat bag pattern. A separate crochet witch hat keychain can make a coordinated gift.
Photograph the finished pouch against pale wood or another light background so its black stitch texture remains visible.
Frequently Asked Questions
Is this crochet black cat pouch suitable for beginners?
It suits beginners who already know single crochet, basic increases, and working in the round. The eyelets use double crochet, while the ears require turning rows and simple sewing.
Can I use a different yarn weight?
Yes, but size, fabric thickness, cord fit, and yarn usage will change. Make the base first and assess its dimensions before continuing.
Does the pouch need stuffing?
No. It is a functional bag with an open interior. Its shape comes from the circular base, crocheted sides, and contents.
Can I make the pouch larger?
You can add another increase round to make a 54-stitch base, then maintain 54 stitches through the body. The eyelet round would need 27 repeats. Recheck proportions, cord length, and facial placement.
Can I embroider simpler eyes?
Yes. Two small yellow stitched shapes with black centers can replace the filled almond eyes. Keep their placement symmetrical and avoid tight stitches.
Can I wash the finished pouch?
Follow the care instructions for every yarn used. Check that the embroidery is colorfast, reshape gently after washing, and let the pouch dry fully.
Why does my pouch look different from the photo?
The reference photos are generated rather than photographs of a tested sample. Yarn, tension, embroidery, and assembly also affect the result. Follow the written counts and use the images as guides to the overall design.
A Small Handmade Halloween Gift
This crochet black cat pouch brings together a practical drawstring closure and a playful embroidered face. Finish with careful stitching, check the closure, and adjust the facial details to give your cat its own expression.