Free Crochet Granny Square Tote Bag Pattern with Assembly Guide
Crochet a stylish granny square tote bag with 12 colorful squares, sturdy side panels, a matching base, handles, and an optional fabric lining.
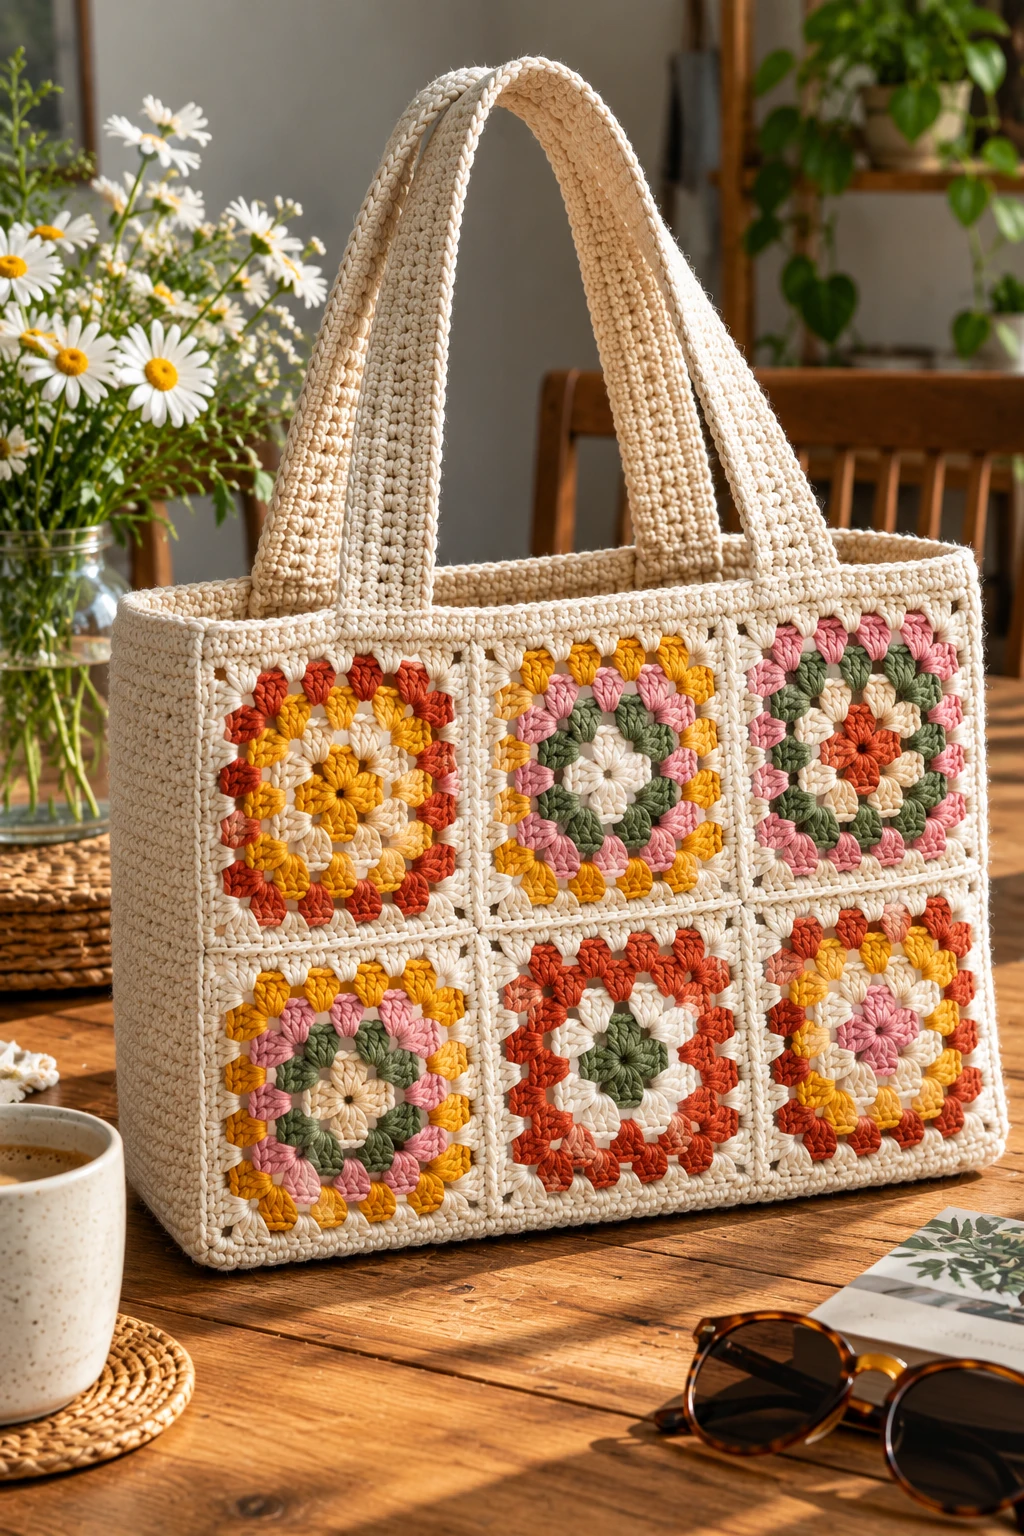
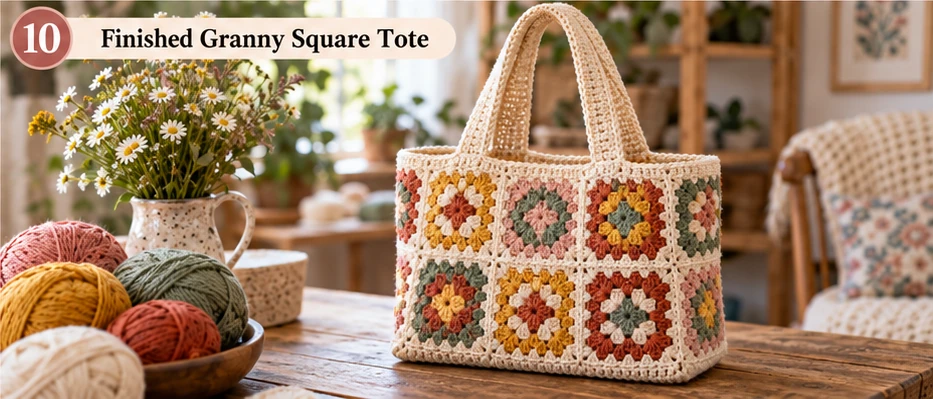
This free crochet granny square tote bag pattern shows you how to turn twelve colorful granny squares into a practical everyday bag with sturdy cream side panels, a matching base, and comfortable crochet handles. The construction is beginner-friendly, but the finished tote looks polished enough to use as a market bag, project bag, or handmade gift.
The front and back each use six squares arranged three across and two high. Mustard, sage, dusty pink, and terracotta create a warm modern palette, while cream joins, edging, and handles keep the design cohesive. You can follow the same layout with your own favorite colors.
Crochet Granny Square Tote Bag Pattern at a Glance
| Detail | Specification |
|---|---|
| Skill level | Confident beginner; basic sewing needed for lining |
| Terminology | US crochet terms |
| Granny squares | 12 five-round squares |
| Panel layout | Six squares per face, three across and two high |
| Target blocked square size | 11–12 cm / approximately 4⅜–4¾ inches |
| Front and back dimensions | Approximately 33–36 cm wide × 22–24 cm high, before allowing for joins and edging |
| Target depth | 8–10 cm / approximately 3–4 inches |
| Other pieces | Two side panels, one base, and two handles |
Before you begin: The measurements in this tutorial are practical target dimensions and can vary with yarn, hook size, and tension. Crochet and block one square first, then measure your joined panels before making the side gussets and base. This gives you a better fit and helps prevent pulling or excess fabric during assembly.
Materials and Tools
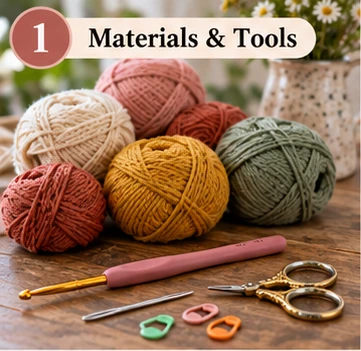
- DK cotton yarn in cream and four accent colors; use the same yarn range and weight throughout.
- A 3.5 mm hook as a starting point, adjusted to suit your yarn and tension.
- Yarn needle, scissors, measuring tape, and stitch markers.
- Blocking mat and rust-resistant pins.
- Optional woven fabric, sewing thread, sewing needle, and clips for the lining.
- Optional cotton webbing to back the handles.
Cream is used for every final square round, the joins, side panels, base, edging, and handles, so reserve more of it than any individual accent color. Yarn consumption has not been measured for this design. Weigh a completed square to estimate the motif requirement, then allow additional cream yarn for the solid pieces and finishing.
If you substitute yarn, check both the size and feel of your sample. The squares should lie flat, and the single-crochet fabric should feel firm without being difficult to work. A matching square size alone does not guarantee that a loose fabric will hold its shape as a bag.
Crochet Abbreviations
| Abbreviation | Meaning |
|---|---|
| ch | Chain |
| ch-sp | Chain space |
| dc | Double crochet |
| sc | Single crochet |
| sl st | Slip stitch |
| st / sts | Stitch / stitches |
| RS / WS | Right side / wrong side |
A granny group means three separate dc worked into one space. Do not work these stitches together as a decrease. A corner is (3 dc, ch 2, 3 dc) in one corner space.
The beginning ch 3 counts as one dc. A ch 1 at the beginning of a single-crochet row or round does not count as a stitch. Join each granny-square round with a sl st into the top of its beginning ch 3.
Step 1: Crochet Twelve Granny Squares
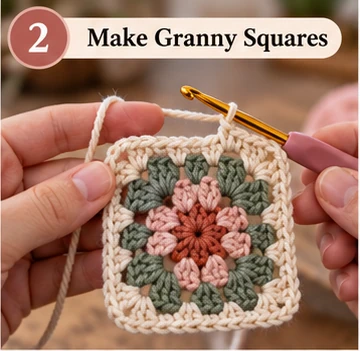
Use an accent color for each of Rounds 1–4 and cream for Round 5. You may repeat an accent color; the four inner rounds do not need four different shades.
Round 1
Make a magic ring. Ch 3, work 2 dc into the ring, ch 2. Work (3 dc into the ring, ch 2) three times. Tighten the ring and join to the top of the beginning ch 3. Fasten off.
Count: Four granny groups, 12 dc, and four ch-2 corner spaces.
Round 2
Join the next color in any ch-2 corner space. In that space, work ch 3, 2 dc, ch 2, 3 dc, ch 1.
In each of the remaining three corner spaces, work (3 dc, ch 2, 3 dc), ch 1. Join and fasten off.
Count: Eight granny groups, 24 dc, four ch-2 corners, and four ch-1 side spaces.
Rounds 3–5
Work the following instructions for each round, using cream for Round 5:
- Join yarn in any corner space. Work ch 3, 2 dc, ch 2, 3 dc, ch 1 in that corner.
- Work
3 dc, ch 1in each ch-1 space along the side. - In the next corner, work
(3 dc, ch 2, 3 dc), ch 1. - Continue around, working each side space and the remaining corners once. After the last side space, join to the beginning ch 3 and fasten off.
Do not work a second corner into the starting space when you reach it again. Round 3 works into one side space per side, Round 4 into two, and Round 5 into three.
| Round | Granny groups | Total dc | Ch-1 side spaces |
|---|---|---|---|
| 1 | 4 | 12 | 0 |
| 2 | 8 | 24 | 4 |
| 3 | 12 | 36 | 8 |
| 4 | 16 | 48 | 12 |
| 5 | 20 | 60 | 16 |
Every round has four ch-2 corner spaces. Weave in the ends on the wrong side, including the magic-ring tail, passing through several stitches and changing direction to secure them.
Step 2: Block and Arrange the Squares
Block the sample according to the yarn label and let it dry. Aim for a square measuring 11–12 cm on each side. If you change hook size, make another sample before completing the remaining squares.
Block all twelve squares to matching dimensions. Pin the corners and edges without stretching the stitches out of shape. If one square is noticeably smaller, check its stitch count and tension before trying to stretch it to size.
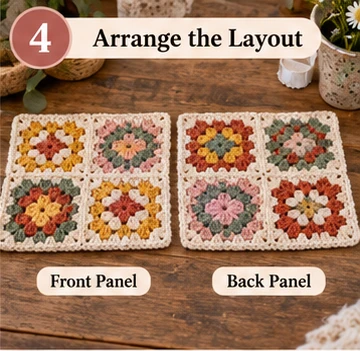
Arrange two panels with their right sides up:
| Position | Front | Back |
|---|---|---|
| Top row, left to right | A, B, C | G, H, I |
| Bottom row, left to right | D, E, F | J, K, L |
Move the squares until you like the color balance. Photograph the arrangement or label the pieces with markers before joining. The top edges of A–B–C and G–H–I will form the front and back of the opening.
Step 3: Join the Front and Back Panels
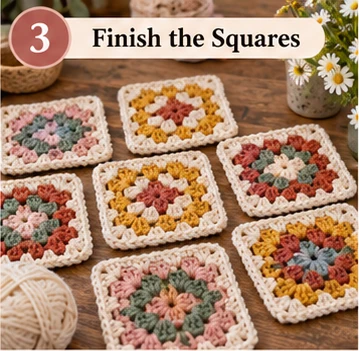
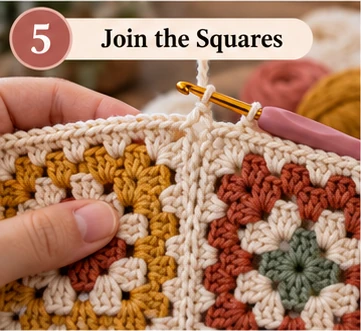
Use cream yarn for a raised single-crochet seam. Hold the two squares being joined with wrong sides together, so their right sides face outward. Align their corners and corresponding edge stitches.
Join yarn at one end. Ch 1, then work through both top loops of a stitch on each square to make one sc joining the pair. Continue through matching stitches along the edge. At matching ch-1 spaces, work one sc through both spaces; at matching ch-2 corner spaces, work two sc through both spaces. Do not count the starting ch 1 as a stitch.
Keep the seam relaxed. Lay the joined pieces flat to check that the edge does not pull inward.
Join A to B, then B to C. Join D to E, then E to F. Align the two completed rows and join their shared horizontal edge. At the intersections, match the existing seams and close any small gap with a yarn needle rather than adding a bulky group of crochet stitches.
Repeat for the back panel. Weave in the seam tails and measure both faces. They should match in width and height.
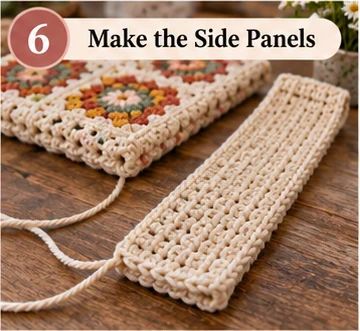
Step 4: Make the Side Panels and Base
Use cream yarn and single crochet. Make the solid pieces to fit your actual joined faces rather than relying on an estimated chain or row count.
Side Panels — Make Two
Choose a depth of 8–10 cm. Make a foundation chain slightly wider than this target, then sc in the second chain from the hook and each chain across. The stitch count is one fewer than the foundation-chain count.
Work several rows to check the width of the fabric. If needed, restart with more or fewer chains. Measure the crocheted strip, not only the loose chain.
For each following row, ch 1, turn, and sc in every stitch. Keep the same stitch count throughout. Continue until the side panel matches the height of the joined front panel, then fasten off.
Make the second side with the same stitch count and number of rows. Compare the pieces without stretching them.
Base — Make One
Use the same foundation-chain count and hook as the sides. Work the same single-crochet rows until the strip's length matches the width of the joined front panel.
The base's short edges must match the width of the side pieces. Its long edges must match the lower edges of the front and back. Pin the pieces together to check the fit before fastening off the base.
Step 5: Assemble the Bag and Edge the Opening
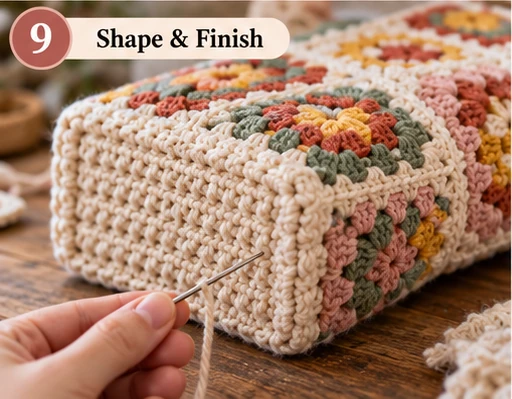
Keep the joining ridges on the outside, consistent with the seams between the squares. Fold the pieces so their wrong sides meet at each seam and their right sides face outward.
Pin the middle and quarter points of each seam before joining. Granny-square edges contain stitch tops and chain spaces; the long edges of the solid panels contain row ends. Their counts may differ, so distribute the joining stitches evenly between the markers. Do not force a one-to-one match between every row end and every granny-square stitch.
Attach the Base
Join one long edge of the base to the bottom of the front panel with sc worked through both pieces. Join the other long edge to the bottom of the back. Check that neither seam stretches or gathers the fabric.
Attach the Sides
Pin one side panel between the front and back. Join its three lower edges in a U-shaped seam: down the front edge, across its short bottom edge to the base, then up the back edge. Leave its top open.
Repeat on the other side. At the lower corners, use a yarn needle to close any gap where the seams meet. Weave in the tails.
Add the Top Border
Join cream yarn at a side seam. Ch 1. Work sc around the entire opening, through the front, one side, the back, and the other side.
Along the granny-square edges, work one sc in each dc top and each ch-1 space. Work two sc in each exposed ch-2 corner space, treating adjacent squares' corner spaces separately. Along each side-panel top, work one sc in each sc stitch. At the seam ridges, use only enough stitches to bridge the join without leaving a gap or adding a bulge.
Mark the first sc. Join to it with a sl st and record your stitch count. There is no fixed total because the side-panel width and joins are adjusted to your measurements.
For Round 2, ch 1 and sc in each stitch around. Join and fasten off. Check the opening after the first round: correct excess or missing stitches there if it flares or pulls inward, rather than hiding the problem with random decreases later.
Step 6: Crochet and Attach the Handles
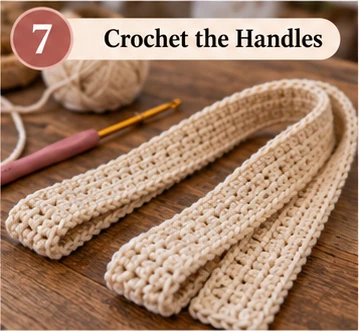
Make two cream handles. These are worked in short rows so their width and length can be checked separately.
Ch 8. Sc in the second chain from the hook and each remaining chain: seven sc. For each following row, ch 1, turn, and sc in all seven stitches.
After several rows, check the width. Aim for approximately 3–4 cm; adjust the foundation-chain count if needed. Continue until the handle measures approximately 60–65 cm without stretching. Fasten off with a long sewing tail. Make the second handle with the same stitch and row counts.
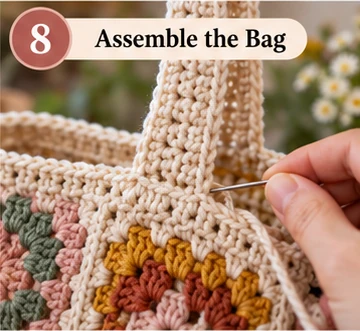
Pin one handle to each face. Place the ends approximately 7–9 cm inward from the side edges and overlap about 4 cm of each end onto the inside of the panel. Check the placement with the bag upright. Adjust the handle length or spacing before sewing if you want a different drop; the drop depends on both measurements.
Sew around each overlapping rectangle and add diagonal stitches across it. Catch solid stitches in several rows of the panel, not only the narrow top border or the open spaces between granny groups. Keep both handles centered and untwisted.
For additional support, sew cotton webbing along the inside of each handle, including its attached ends. Wider straps alone do not make an open crochet bag suitable for heavy loads. Try a few light belongings first and inspect the attachment points for pulling.
Step 7: Add an Optional Lining and Finish
A lining keeps small items from slipping through the granny-square openings. For this bag, use a lining with front, back, side, and base pieces so it follows the gusseted shape.
Measure the interior after assembly. Let W be the inside width, H the height to the lining attachment line just below the border, and D the depth. Use a 1 cm seam allowance and allow 2 cm at the top for a double-fold hem.
| Fabric piece | Quantity | Cutting dimensions |
|---|---|---|
| Front and back | 2 | W + 2 cm wide × H + 3 cm high |
| Sides | 2 | D + 2 cm wide × H + 3 cm high |
| Base | 1 | W + 2 cm long × D + 2 cm wide |
Join the front, sides, and back with right sides together, using the 1 cm seam allowance. Sew the base into the lower opening, matching the corners. Fold the top twice toward the wrong side, 1 cm each time, and hem it.
Leave the lining wrong side out and insert it into the tote: its right side should face the bag's interior, with the seam allowances against the crochet fabric. Check the fit before attaching. The lining should reach the base without hanging below it and should not pull on the opening.
Hand stitch the folded top just below the crochet border. Keep both layers relaxed as you sew. Check all crochet seams and weave in any remaining tails. Follow the yarn and fabric care labels when washing, and avoid hanging the wet bag by its handles.
Troubleshooting
The squares are different sizes
Check that every square has five rounds, 60 dc in the final round, and four corners. Small tension differences may settle with blocking; a large difference usually needs a new square or a change of hook size.
The joined panel is wavy
Lay the squares flat before and after joining. Tight seams can pull the edges inward, while too many joining stitches can create a ridge that ruffles. Undo the affected seam and rejoin with even tension.
The side or base does not fit
Compare it with the joined face before assembly. Adjust its row count for length, or restart with a different stitch count for width. Do not stretch a short gusset to force it into place.
The handles are uneven
Compare their stitch counts, row counts, and unstretched lengths. Check that the attachment overlaps are equal and that both handles are placed at matching distances from the side edges.
The base sags
Reduce the load. If you remake the base with firmer tension, recheck its dimensions before attaching it. A removable insert inside a lined bag can help maintain its shape, but it does not strengthen the crochet seams.
Frequently Asked Questions
How many granny squares does this bag need?
Twelve: six on the front and six on the back. The sides and base are solid single crochet.
Can a beginner make this tote?
The crochet uses basic stitches, but assembly requires matching different edge types and measuring the gussets. Practice one square and the joining method before starting all twelve.
Can I make it larger or smaller?
Yes. Add or remove the same number of rounds from every square, or change the panel layout. Measure the new faces and resize the gussets, handles, and lining accordingly. The five-round stitch counts in this pattern apply only to the original squares.
Can I use leftover yarn?
Yes, provided the yarns have similar weight and behave similarly after blocking. Keep enough matching cream yarn for the final rounds and solid pieces.
Can I use another square motif?
You can adapt the construction, but match both the blocked dimensions and the edges being joined. The granny-square stitch counts and top-border instructions will need adjustment for a different motif.
Is the lining required?
No. Add it if you want to carry small items that could pass through the open fabric. It also covers the inside seams and handle attachment stitches.