No-Sew Crochet Pumpkin Pattern: Easy 7-Step Guide
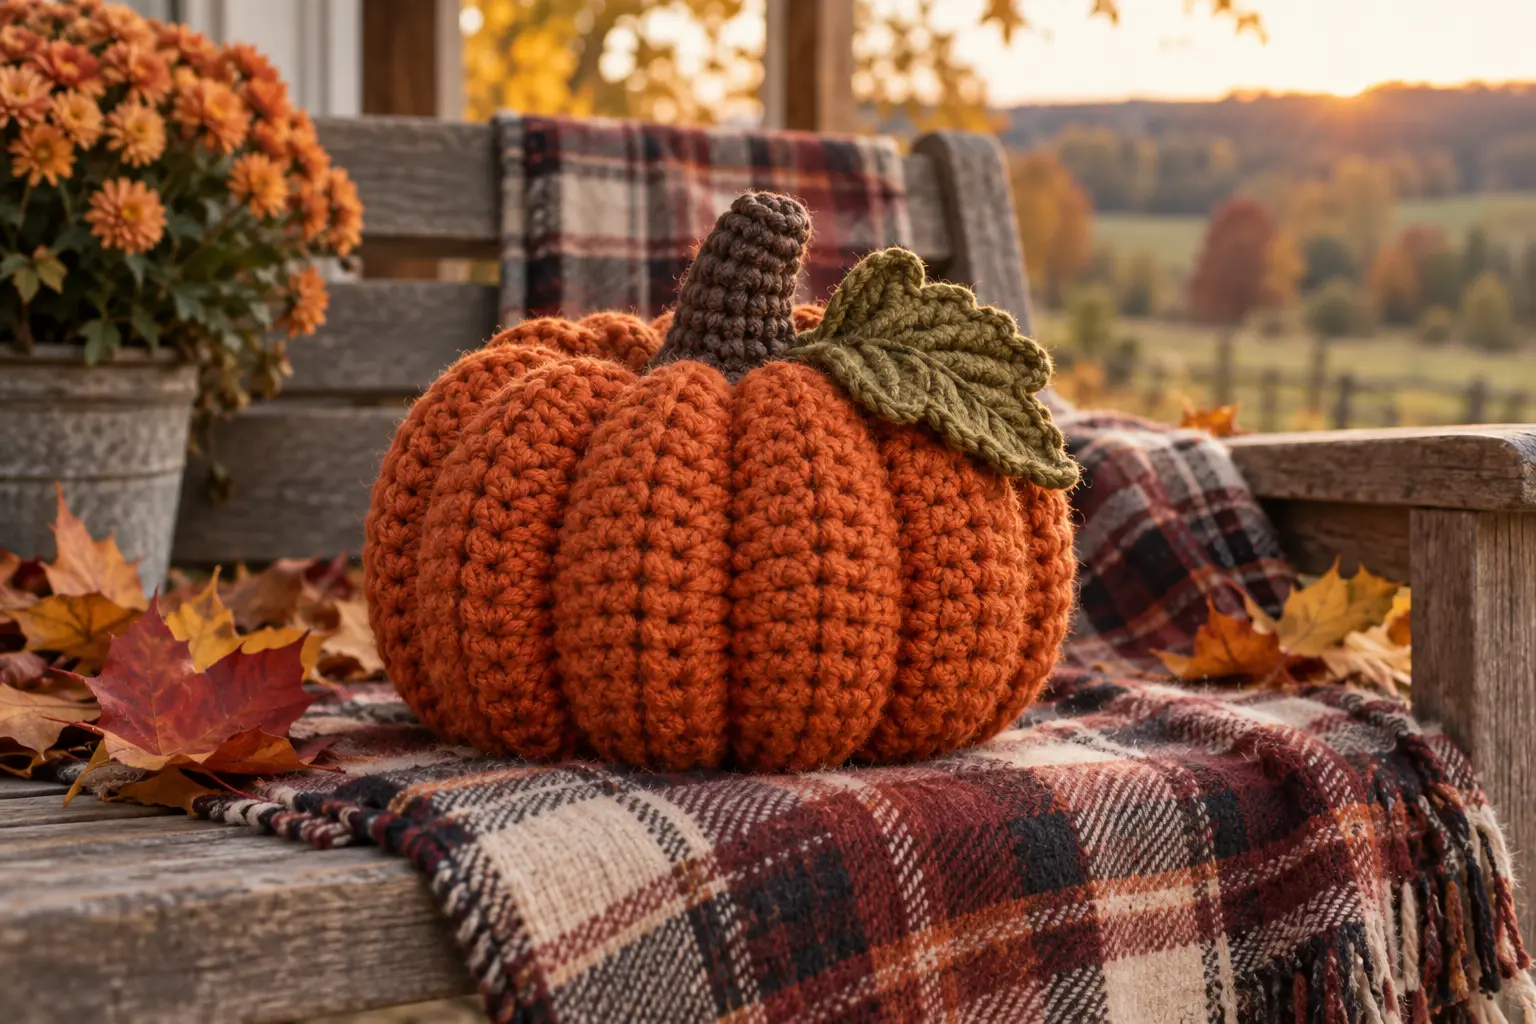
This no-sew crochet pumpkin pattern turns one ribbed rectangle into a plump autumn pumpkin. The short edges are joined with crochet, the top and bottom are gathered, and the ribs are shaped with yarn—no separate body pieces required.
Project Details
- Beginner level
- 7 in (18 cm) wide
- 2–3 hours
- US crochet terms
Materials
- 100 g worsted-weight orange yarn
- Brown and olive yarn scraps
- 4.5 mm hook
- Fiberfill, yarn needle and scissors
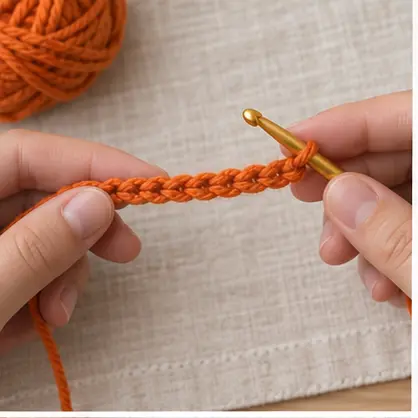
Ribbed Rectangle
Row 1: Starting in second chain, work 25 hdc. Ch 1 and turn. Row 2: Work 25 hdc in the back loops only. Repeat Row 2 until the rectangle measures approximately 16 in (41 cm) long.
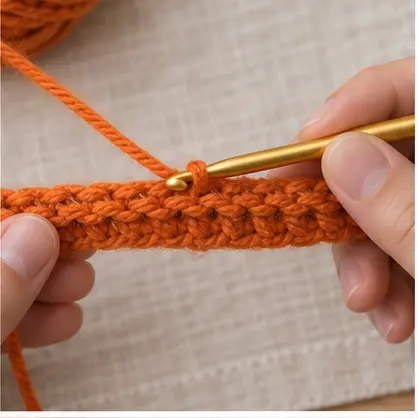
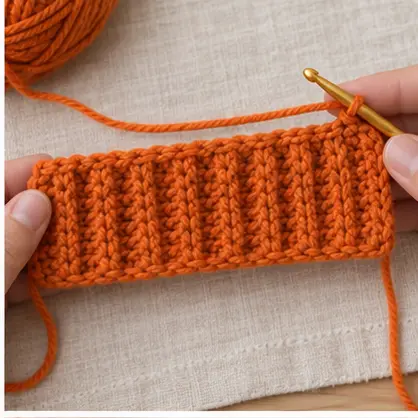
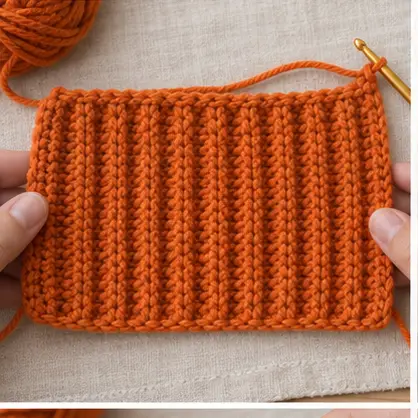
Join and Gather
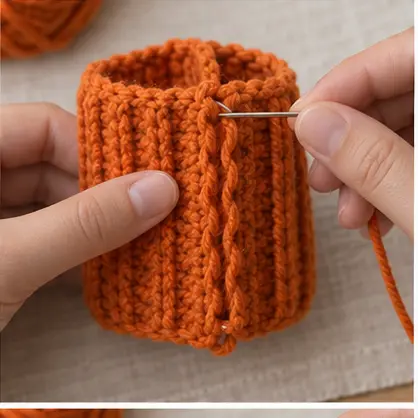
Bring the short edges together and slip stitch through both layers. Fasten off with a 30-inch tail. Thread the tail through every ridge along one open edge, pull tightly and secure. Turn the cylinder so the seam is inside.
Stuff and Shape
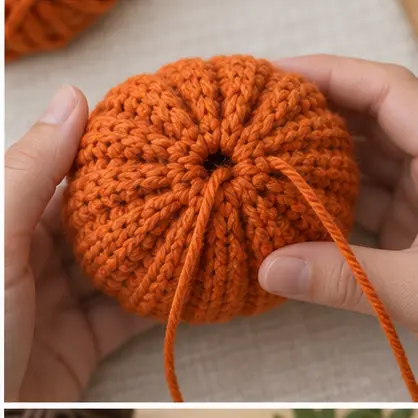
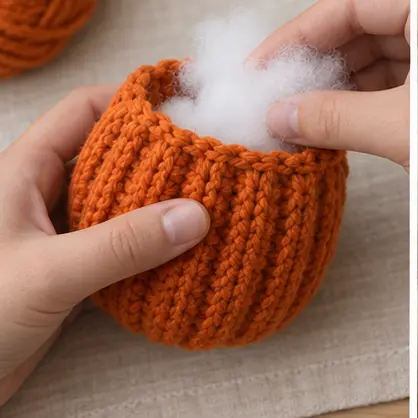
Fill firmly but keep the ribs visible. Gather the top. Pass a long yarn strand from top to bottom around the outside six times, pulling each strand into a different groove to define the pumpkin segments.
Stem and Leaf
For the stem, work 6 sc in MR, then sc around for six rounds. For the leaf, ch 8; starting in second chain work sl st, sc, hdc, 2 dc, hdc, sc. Sew both over the gathered center.
Tips and FAQ
A wobbly pumpkin needs firmer stuffing at the base. If the top opening will not close, remove a small amount of fiberfill. Use chenille yarn for a larger pumpkin without changing the row count.
Find more seasonal makes in Occasions and secure the final tails with our weaving-in guide.
Control the Pumpkin Proportions
A no-sew crochet pumpkin pattern gains its shape from the rectangle’s proportions and the final wrapping passes. A wider rectangle creates a flatter pumpkin; a taller one creates a rounder form. Before joining, wrap the rectangle around the stuffing without fastening it. This quick test shows whether another two ribbed rows are needed and prevents a stretched seam.
Create Even Ridges
After gathering the top and bottom, pass a long strand through the center and around the outside six times. Pull each pass only until a groove appears, then rotate the pumpkin by the same distance. Tightening one groove completely before adding the others can distort the center. Once all six sections look balanced, secure the yarn inside the lower opening and hide the tail through the stuffing.
Decorating and Storing the Pumpkin
Change the stem length, add one crocheted leaf or tie a removable ribbon for a seasonal variation. Keep decorations embroidered or firmly sewn if children will handle the piece. Display the pumpkin away from open flames and damp surfaces. At the end of the season, place it in a breathable cotton bag rather than compressed plastic so the stuffing retains its shape. Match alternative yarn with the Craft Yarn Council weight chart and adjust the hook to preserve firm stitches.
No-sew crochet pumpkin pattern: Final Checklist
Before finishing this no-sew crochet pumpkin pattern, confirm the stitch count, shape, seam strength and care instructions. Photograph the completed no-sew crochet pumpkin pattern in natural light and record the yarn and hook used so the result can be repeated accurately.