Crochet Elephant Amigurumi Pattern with a Curved Trunk
Make a small seated crochet elephant with a curved trunk, floppy ears and embroidered eyes. Includes component tables, assembly checks and troubleshooting.
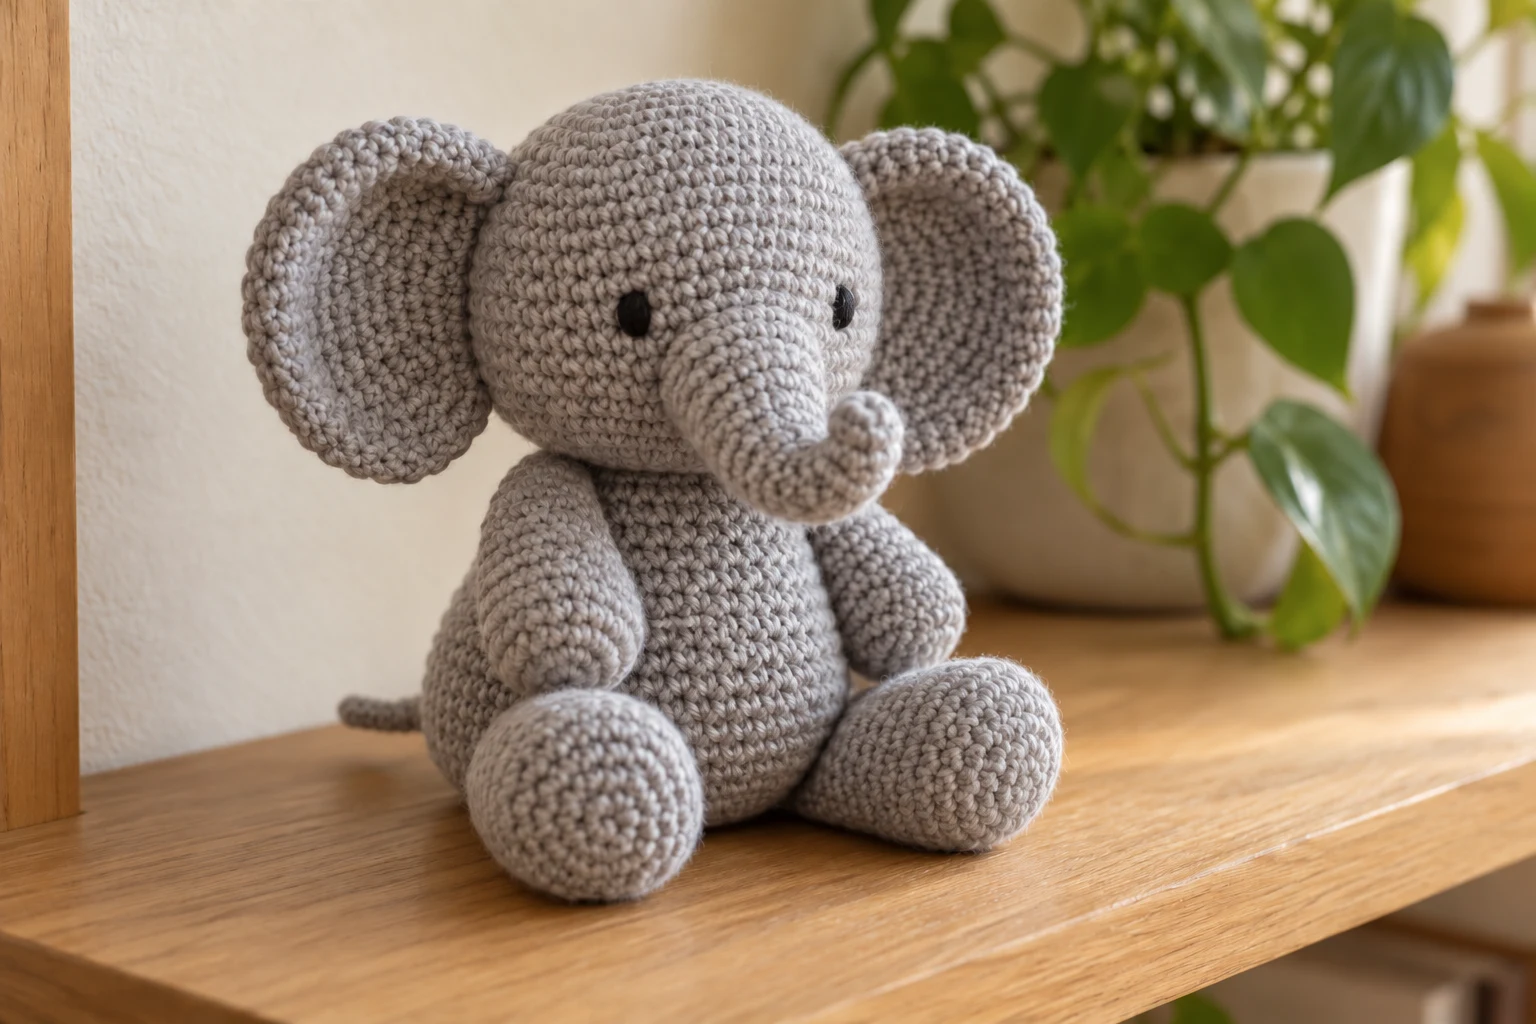
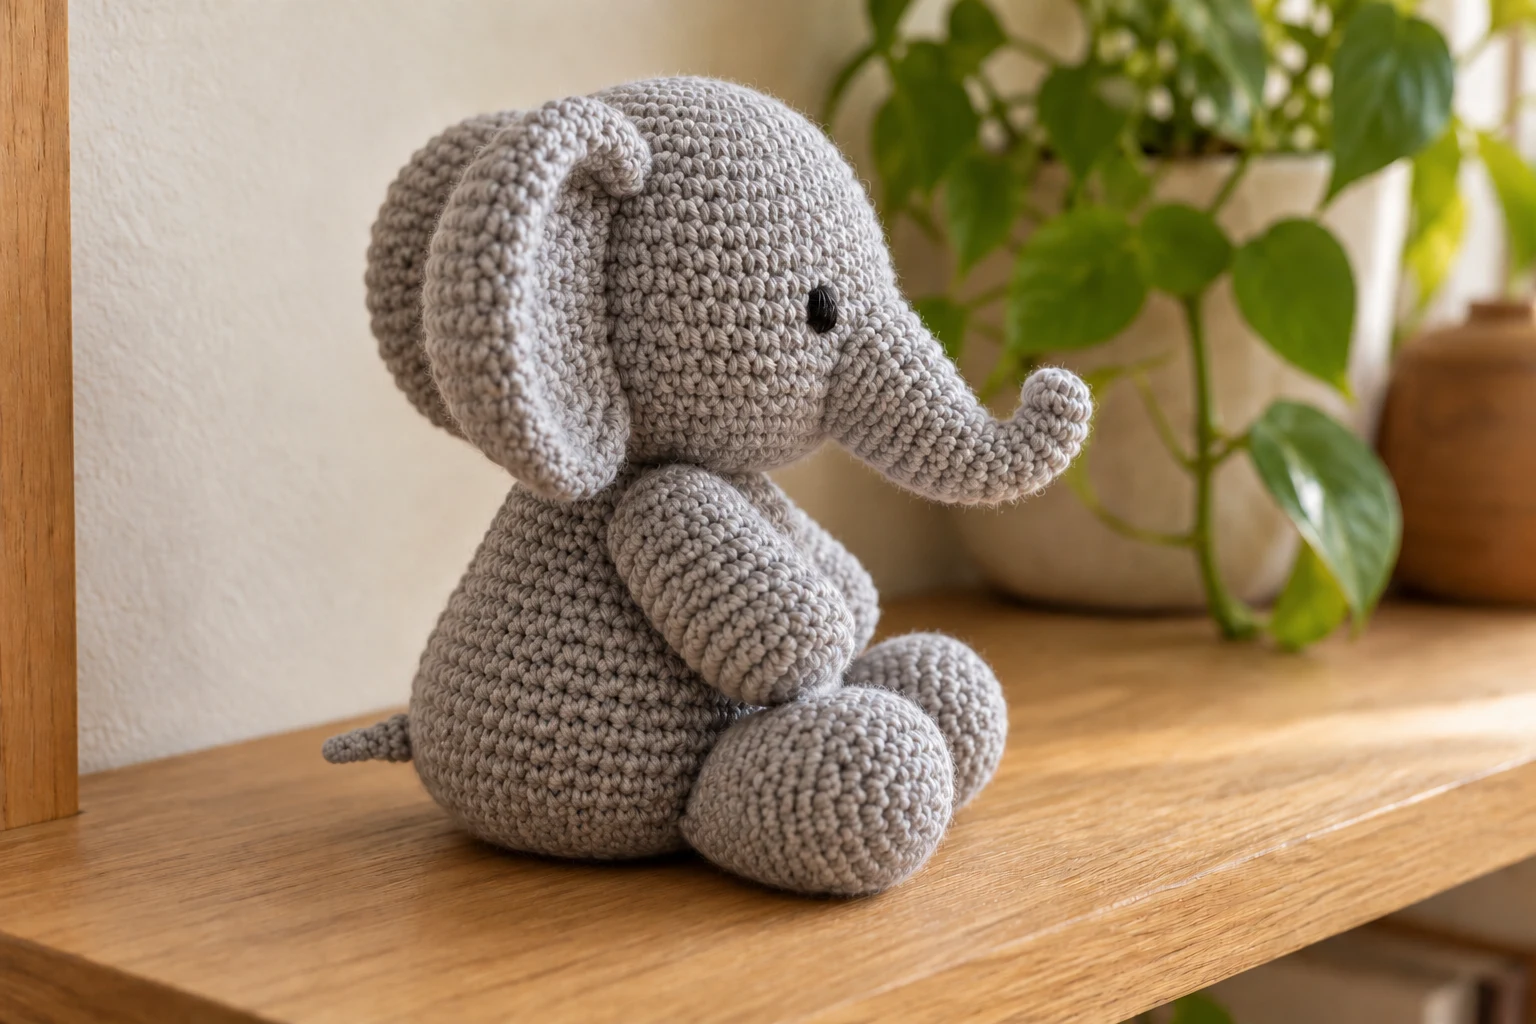
This small gray elephant has a round head, a pear-shaped seated body and broad floppy ears. The separate trunk narrows toward its tip and curves gently forward. Embroidered eyes keep the face simple, while four short limbs help define the sitting pose.
This crochet elephant pattern is written in US terms. It is a sewn amigurumi construction: crochet the components first, check their relative sizes, and pin the full arrangement before making permanent joins. There are no hidden wires, plastic eyes, tusks or clothing.
What pieces make up the elephant? Make one head, one body, one trunk, two round ears, two arms, two feet and a short yarn tail. The head and body both finish with 18-stitch openings so their edges can be matched during assembly.
Project Overview
| Detail | Pattern information |
|---|---|
| Skill | Confident beginner; small-part assembly required |
| Terms | US crochet |
| Construction | Separate components in continuous rounds |
| Hook | 2.75 mm, adjusted to hide stuffing |
| Planning height | Approximately 12–15 cm seated; not measured |
| Estimated time | Around 4–6 hours; experience dependent |
| Testing | Arithmetic reviewed; not physically test-crocheted |
Illustrations and testing: The six project images are generated illustrations of the intended design, not photographs of a test-crocheted sample. The written instructions and stitch arithmetic have been reviewed; size, yarn use, handling and construction still need a physical sample check.
Materials
| Material | Suggested specification |
|---|---|
| Gray cotton | Approximately 60–75 g DK cotton, around 100–125 m per 50 g; estimate |
| Black thread | Small amount for embroidered eyes |
| Hook | 2.75 mm or appropriate size for dense fabric |
| Filling | Polyester toy filling; small amounts added gradually |
| Notions | Yarn needle, marker, pins and scissors |
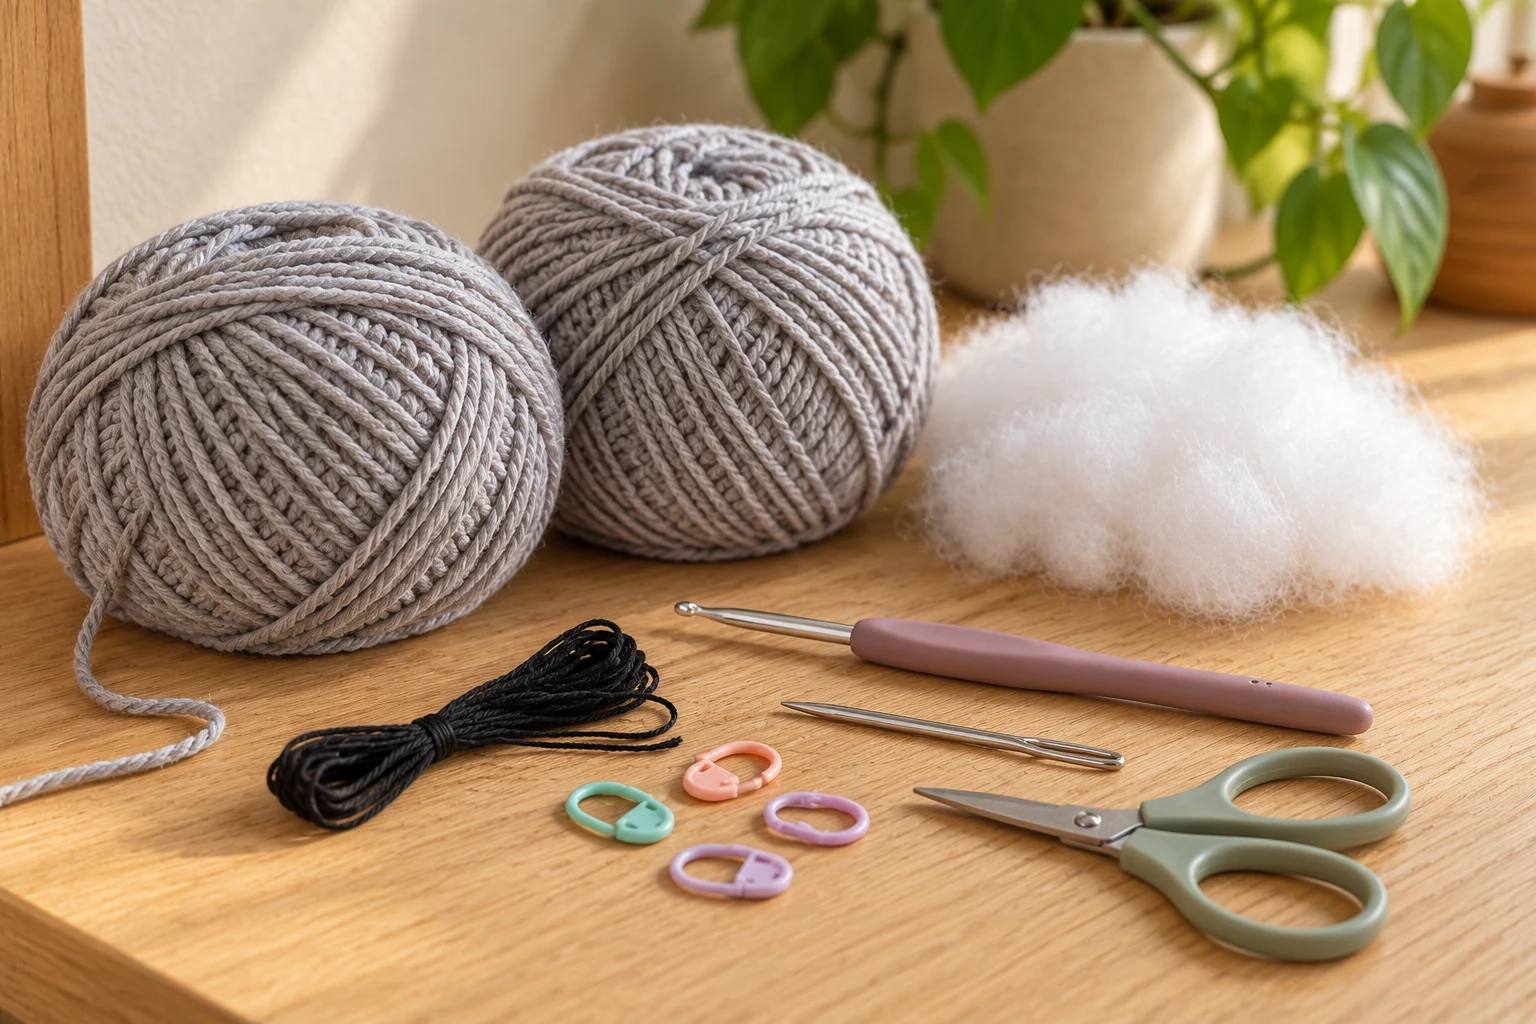
Size, Gauge, and Yarn Choices
Use one gray yarn throughout so the head, ears and limbs stay in proportion. There is no measured gauge for this draft. Before starting all the pieces, check a small single-crochet sample for gaps when gently stretched. The seated height and yarn amounts are estimates, not sample measurements. An embroidered face does not by itself establish child-toy suitability; attachment durability still needs practical testing.
Abbreviations and Working Notes
| Abbreviation | Meaning |
|---|---|
| ch | Chain |
| sc | Single crochet |
| inc | 2 sc in the same stitch |
| dec | Invisible single crochet decrease; consumes 2 stitches and makes 1 |
| sl st | Slip stitch |
| st / sts | Stitch / stitches |
| MR | Magic ring |
Use continuous spiral rounds unless a section says otherwise. Mark the first stitch. Do not add joining slips or starting chains to the round counts.
The invisible decrease uses front loops of the next two stitches and makes one sc. Count at the end of each shaping round.
Stuff the lower body more firmly than the neck, and keep the upper arms soft. This helps the intended seated posture without adding a weight or rigid insert.
Crochet the Body
| Round | Instructions | Stitches |
|---|---|---|
| 1 | 6 sc in MR | 6 |
| 2 | Inc around | 12 |
| 3 | (Sc, inc) × 6 | 18 |
| 4 | (2 sc, inc) × 6 | 24 |
| 5 | (3 sc, inc) × 6 | 30 |
| 6 | (4 sc, inc) × 6 | 36 |
| 7–12 | Sc around for 6 rounds | 36 each |
| 13 | (4 sc, dec) × 6 | 30 |
| 14–16 | Sc around for 3 rounds | 30 each |
| 17 | (3 sc, dec) × 6 | 24 |
| 18–19 | Sc around for 2 rounds | 24 each |
| 20 | (2 sc, dec) × 6 | 18 |
Fasten off with a long sewing tail, leaving the 18-stitch neck open. Stuff the base and lower sides gradually. Keep the neck rim flexible so it can match the head opening later. Set the body down: it should sit on a broad lower section rather than leaning on a hard ball of filling.
Crochet the Round Head
| Round | Instructions | Stitches |
|---|---|---|
| 1–7 | Start with 6 sc in MR; add 6 evenly per round: 12, 18, 24, 30, 36, then 42 | 6 → 42 |
| 8–14 | Sc around for 7 rounds | 42 each |
| 15 | (5 sc, dec) × 6 | 36 |
| 16 | (4 sc, dec) × 6 | 30 |
| 17 | (3 sc, dec) × 6 | 24 |
| 18 | (2 sc, dec) × 6 | 18 |
For Rounds 3–7, the increase repeats are (1 sc, inc), (2 sc, inc), (3 sc, inc), (4 sc, inc) and (5 sc, inc), each repeated six times. Fasten off with the opening unclosed. Add filling gently, especially around the lower cheeks. The 18-stitch head opening will meet the 18-stitch body opening.
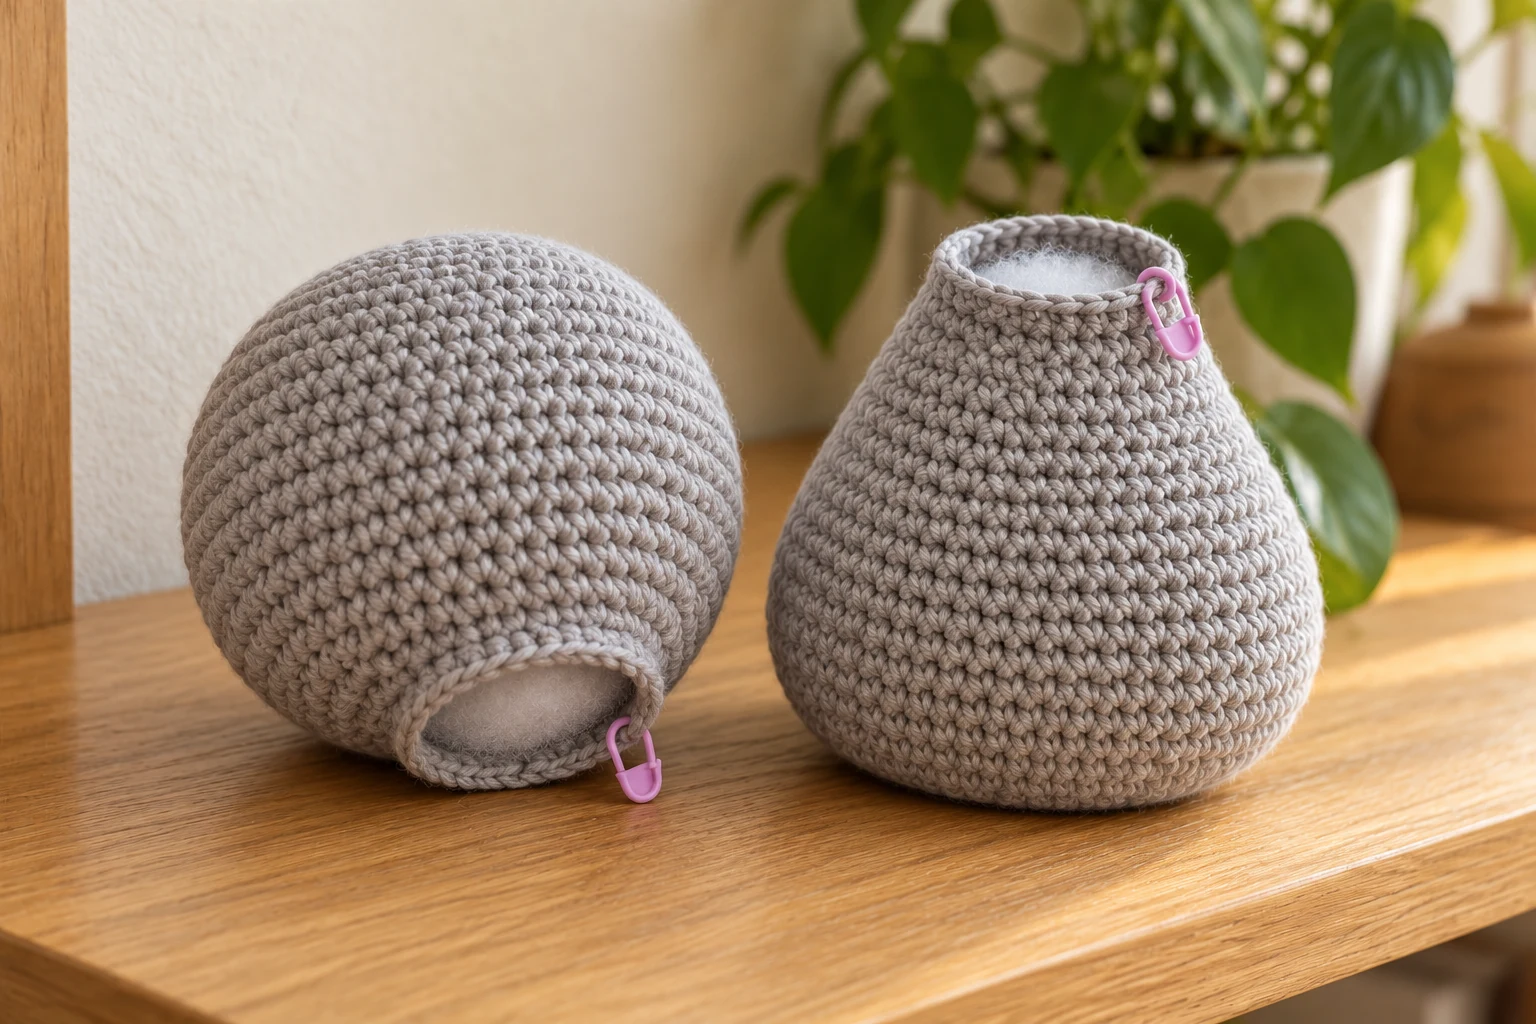
Make the Trunk
| Round | Instructions | Stitches |
|---|---|---|
| 1 | 6 sc in MR | 6 |
| 2–4 | Sc around for 3 rounds | 6 each |
| 5 | (2 sc, inc) × 2 | 8 |
| 6–7 | Sc around for 2 rounds | 8 each |
| 8 | (3 sc, inc) × 2 | 10 |
| 9–10 | Sc around for 2 rounds | 10 each |
| 11 | (4 sc, inc) × 2 | 12 |
| 12–14 | Sc around for 3 rounds | 12 each |
Leave a long sewing tail at the wide opening. Put only a little filling near that wide end; leave the narrow tip soft. To encourage a gentle curve, run a separate gray strand through several inside-facing surface stitches along Rounds 2–9 and draw it in slightly. Secure it inside the trunk. Do not cinch it into a sharp fold or expose a long loop. The exact curve needs to be checked on a physical sample.
Make Two Ears
| Round | Instructions | Stitches |
|---|---|---|
| 1 | 6 sc in MR | 6 |
| 2 | Inc around | 12 |
| 3 | (Sc, inc) × 6 | 18 |
| 4 | (2 sc, inc) × 6 | 24 |
| 5 | (3 sc, inc) × 6 | 30 |
| 6 | (4 sc, inc) × 6 | 36 |
Finish each ear with a sl st, which is not counted in the 36 stitches, and leave a long sewing tail. Do not stuff the ears. Finger-shape the circles without stretching their edges. A small fold at the upper attachment edge can help them hang beside the head; keep their lower edges free.
Crochet the Arms and Feet
| Part / round | Instructions | Stitches |
|---|---|---|
| Arm 1–2 | 6 sc in MR; inc around on Round 2 | 6, then 12 |
| Arm 3–6 | Sc around for 4 rounds | 12 each |
| Arm 7 | (4 sc, dec) × 2 | 10 |
| Arm 8–10 | Sc around for 3 rounds | 10 each |
| Arm closure | Flatten opening and sc through both layers | 5 closing sc |
| Foot 1–3 | 6 sc in MR; inc around; then (sc, inc) × 6 | 6, 12, 18 |
| Foot 4–6 | Sc around for 3 rounds | 18 each |
| Foot 7 | (Sc, dec) × 6 | 12 |
| Foot 8–11 | Sc around for 4 rounds | 12 each |
| Foot closure | Flatten opening and sc through both layers | 6 closing sc |
Make two arms and two feet. Put a little filling in each lower end before flattening the openings; leave the upper parts soft. The closing sc passes through one stitch from the front and one from the back at the same time, so ten opening stitches become five closing stitches, and twelve become six.
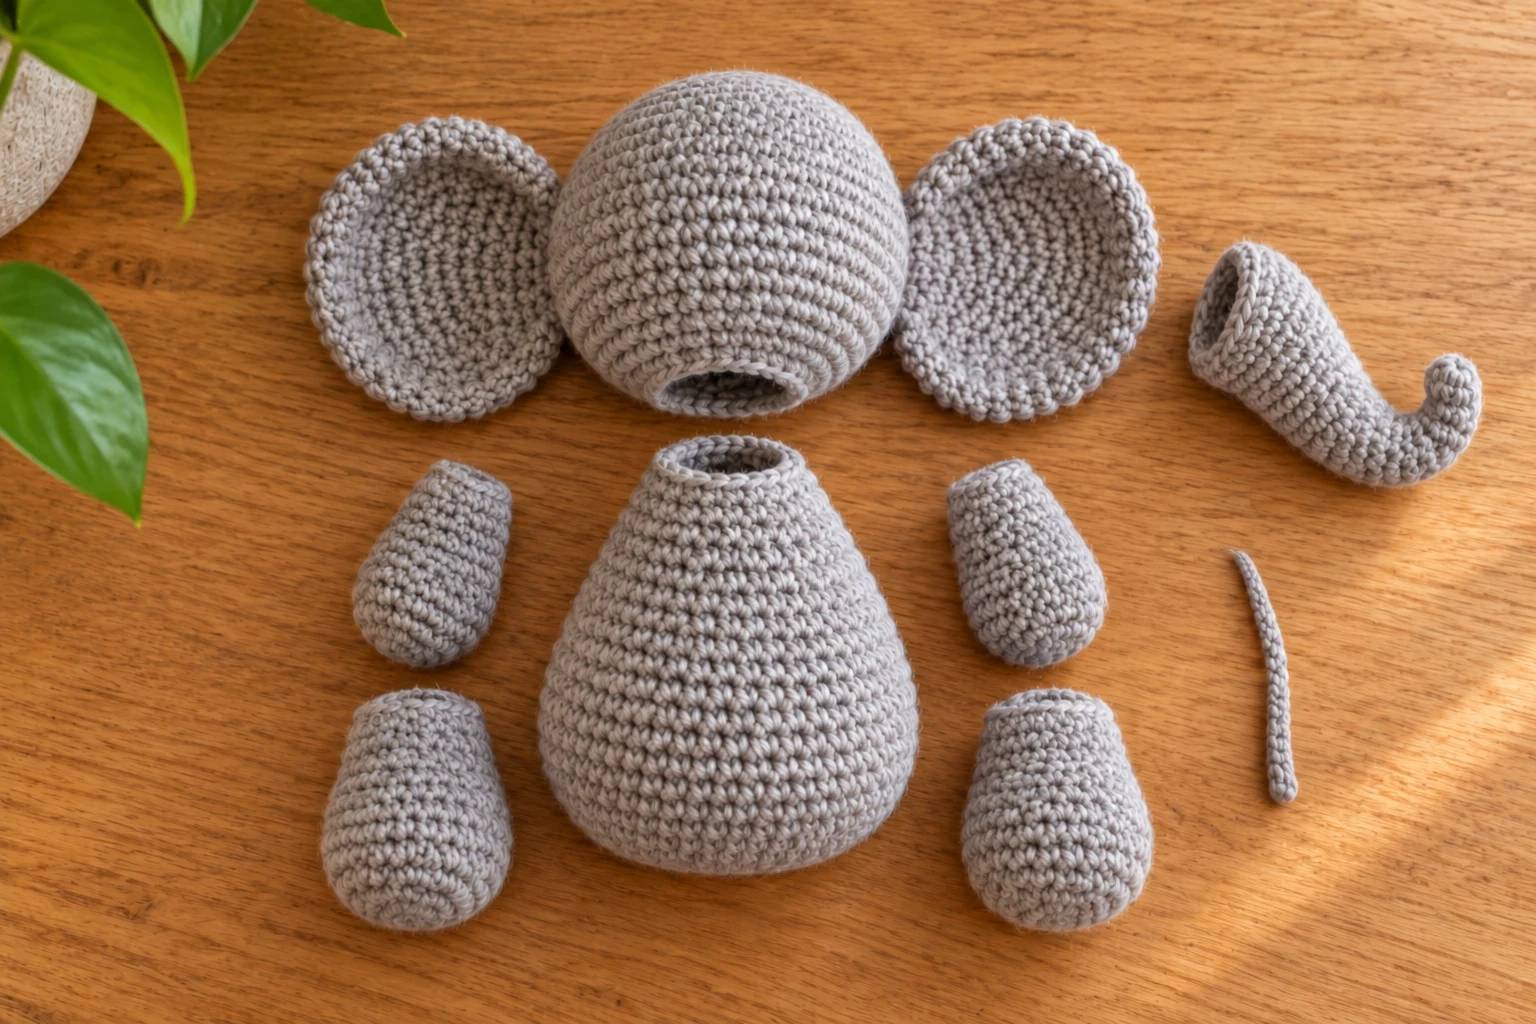
Pin and Assemble the Seated Elephant
Pin the feet to the lower front of the body, with their flattened ends following approximately Body Rounds 5–8. Let their rounded ends rest forward on the table. Pin the arms at the upper sides around Body Rounds 15–17, checking that they do not cover the feet. Adjust the positions together before sewing so the body can still sit upright.
Sew each flattened limb end firmly to the body, using small stitches along the full closed edge and an additional line through nearby body fabric. Match the 18 stitches of the head opening to the 18 stitches of the body opening. Sew most of the neck, add a little filling if needed, and close the remaining gap without making a tight ridge.
Pin the wide trunk base to the center front of the head around Head Rounds 11–15. The magic-ring top of the head is Round 1. Keep the narrower tip curling forward. Sew around the entire trunk opening, concealing its edge. Place the ears at the two sides around Head Rounds 7–12, securing roughly 8 outer-edge stitches of each ear to the head and leaving the rest free.
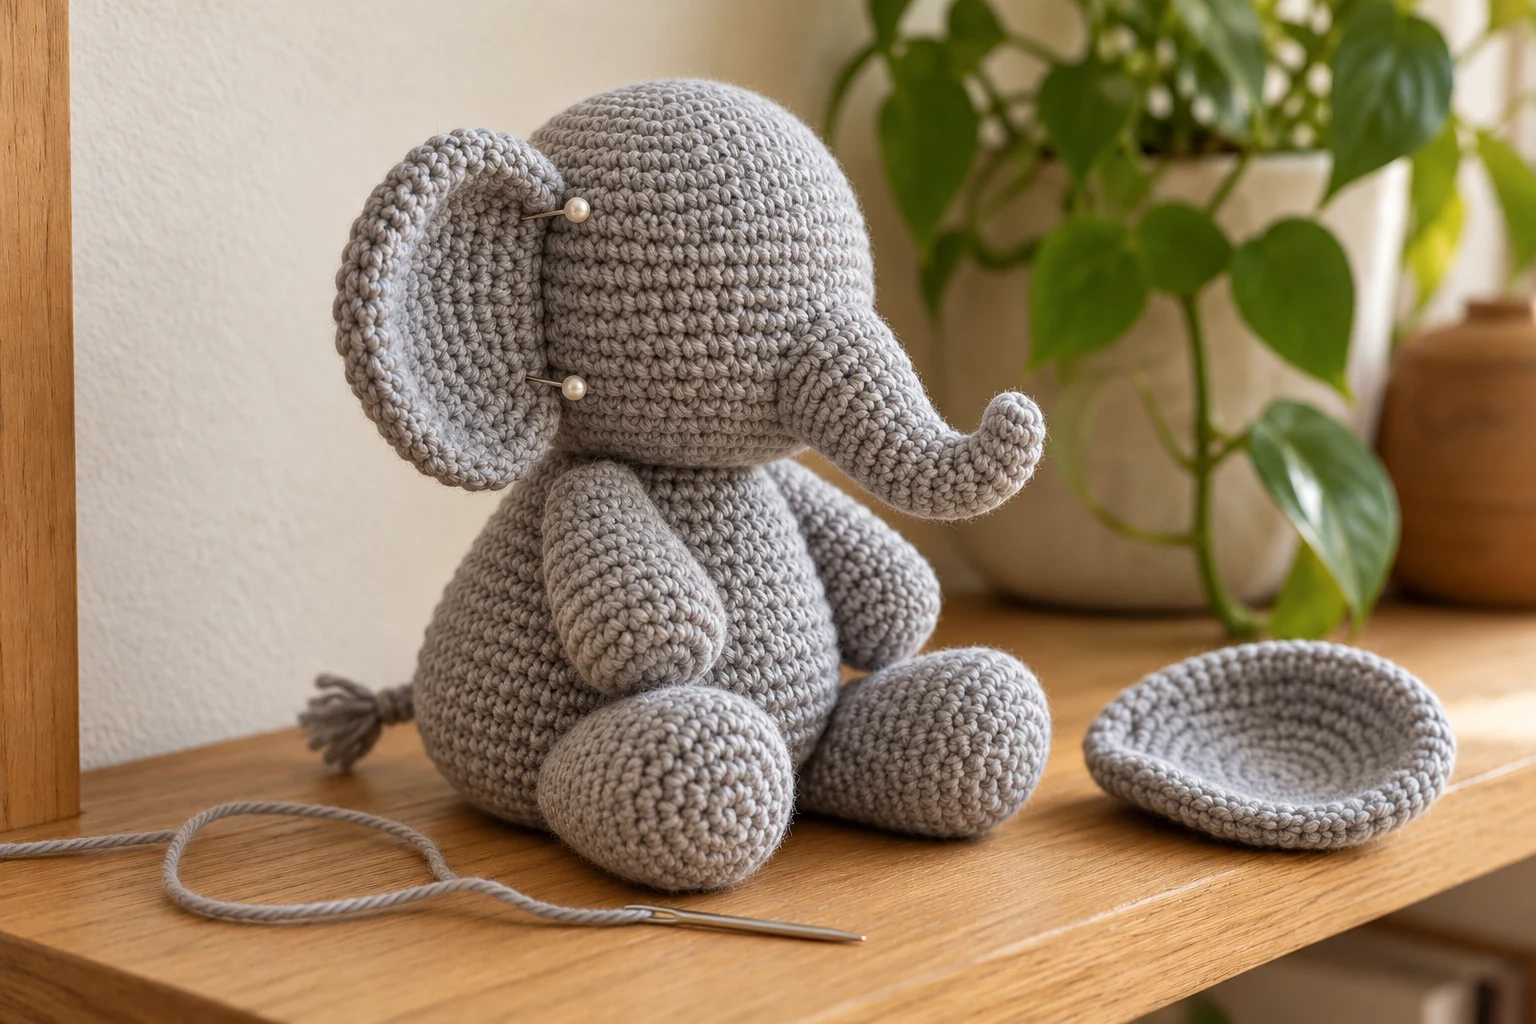
Embroider the Eyes and Add a Tail
Position two small black embroidered eyes above and slightly outside the trunk base, near Head Rounds 9–11. Choose their placement by pinning temporary markers first; the two eyes should be evenly spaced from the trunk, not merely separated by a fixed stitch count on a distorted head. Use several small stitches and bury the ends securely. Do not add plastic eyes to match an illustration.
For the tail, chain 8 in gray, sl st back along the 7 available chains, fasten off and sew the tail to the lower center back. The short plain tail avoids a long loose fringe. Remove every positioning pin and check the joins from the back and underside as well as the front.
Troubleshooting
| Problem | Check | Adjustment |
|---|---|---|
| Head tips forward | Neck filling or seam is uneven | Redistribute filling and resew matching neck stitches |
| Ears differ in size | Different tension or round counts | Make both 36-stitch circles consistently |
| Trunk forms a sharp kink | Curving strand drawn too tightly | Ease the strand and keep the narrow end soft |
| Elephant will not sit | Feet uneven or lower filling is a hard lump | Reposition both feet together and redistribute filling |
| Stuffing shows | Loose fabric or excess filling | Reduce stuffing or remake with a suitable smaller hook |
Care and Final Checks
Follow the yarn and filling care labels. Spot cleaning is a practical first step; if washing is permitted, reshape gently and dry completely. Before giving the piece away, check every limb, ear, tail and embroidered feature. This draft has not passed physical durability or toy-safety testing.
The amigurumi sewing guide can help with discreet joins. For a different animal silhouette, compare the Highland cow pattern; do not reuse its component placements for this elephant.
Frequently Asked Questions
Is the elephant no-sew?
No. The head, trunk, ears and limbs are made separately and sewn together. That allows you to check their positions before committing.
Why are the ears unstuffed?
A flat single-layer circle can hang beside the head. Stuffing would make this particular ear construction bulky and change its intended shape.
Can I omit the shaping strand in the trunk?
Yes. The trunk will be straighter. Keep that visual difference in mind when comparing your sample with the illustrations.
Can I use plush yarn?
A plush substitution will change size, visibility and small-piece handling. Make a fresh sample and recheck all attachments rather than relying on the cotton estimates.
Does the head need wire or a support?
No rigid internal support is specified. The matching neck rims, even filling and sewn joint create the intended structure, which still needs a physical check.
Can I make this for a baby?
Do not assume suitability from the embroidered eyes. The draft is untested, and small attached parts require appropriate physical safety assessment before making a toy for a child.
Compact Elephant Pattern Card
| Part | Essential instructions |
|---|---|
| Body | Increase to 36; shape to an 18-stitch neck over 20 rounds |
| Head | Increase to 42; decrease to an 18-stitch opening over 18 rounds |
| Trunk | 6-stitch tip; widen to 12; 14 rounds total |
| Ears | 2 flat circles, 6 increase rounds to 36 |
| Arms and feet | Make 2 of each; flatten and close before sewing |
| Finish | Pin seated pose, match neck rims, attach trunk and ears, embroider eyes |