Crochet Highland Cow Pattern: Easy 7-Step Amigurumi
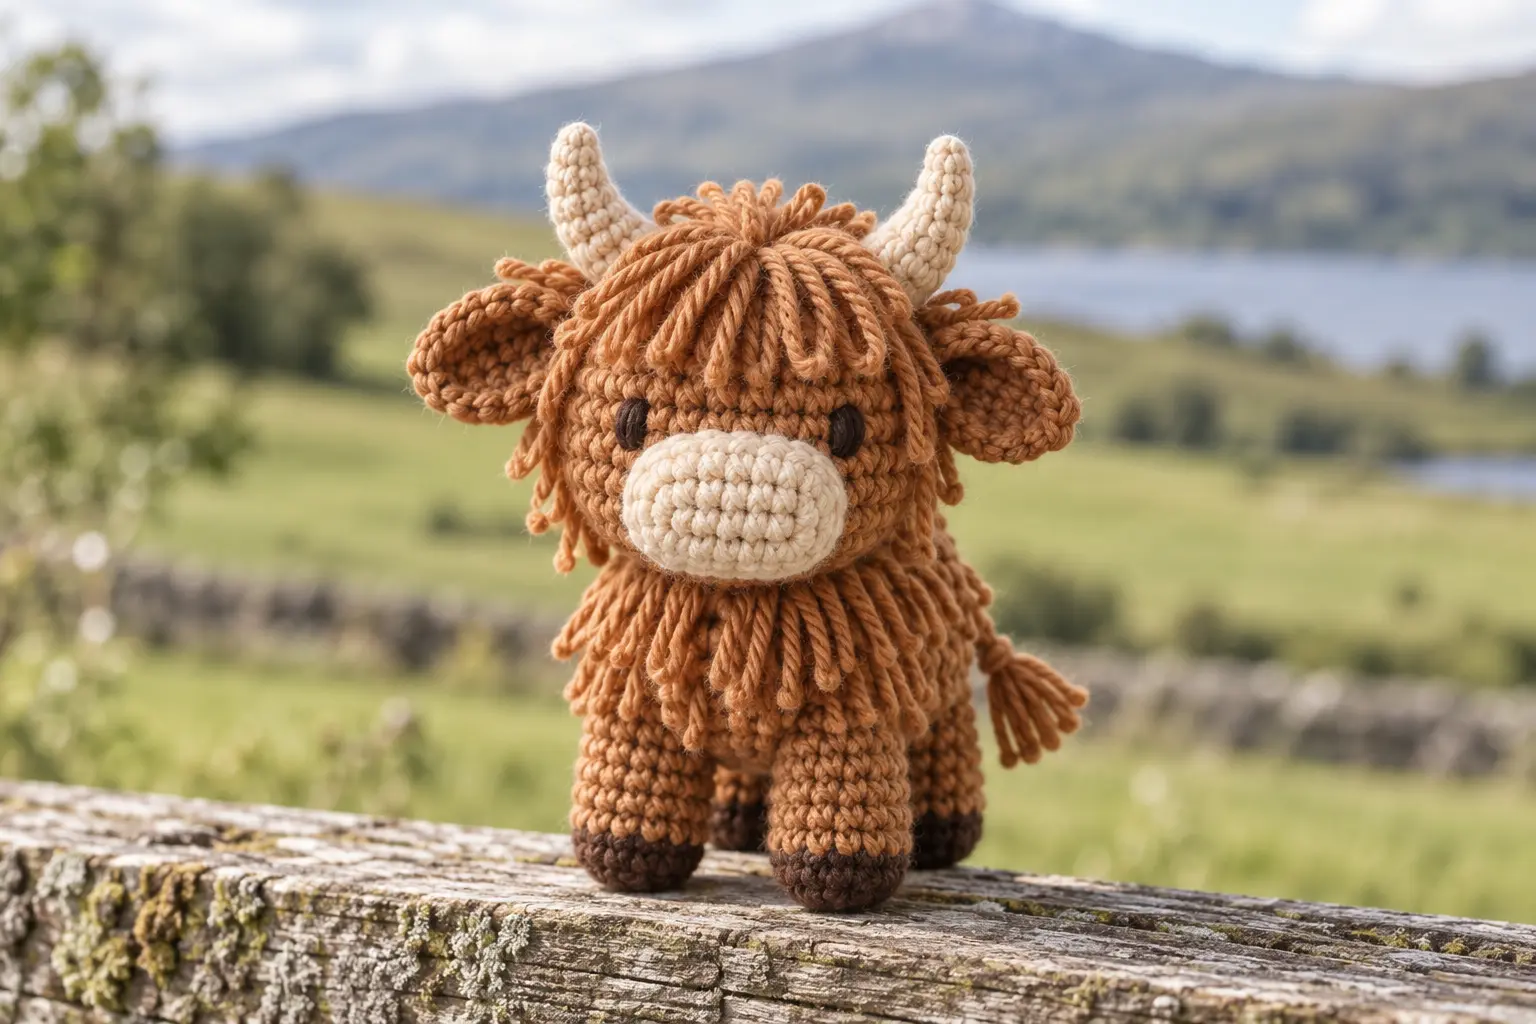
This crochet Highland cow pattern creates a small shaggy amigurumi with curved horns, a broad cream muzzle and a soft yarn fringe. It is an original dCrochet design made from beginner-friendly single-crochet shapes and sized to sit neatly on a shelf or gift table.
Crochet Highland Cow Pattern: Project Overview
- Skill level: Confident beginner
- Finished size: About 6.5 in (16.5 cm) tall
- Time: 4–6 hours
- Terms: US crochet terminology
- Construction: Head and body worked separately; limbs, ears, horns and tail attached during finishing
Materials
- Worsted-weight yarn: 80 g warm brown
- 15 g cream yarn for the muzzle and horns
- Small amount of dark brown yarn for hooves
- 3.0 mm crochet hook
- Polyester fiberfill, yarn needle, stitch marker, pins and scissors
- Black embroidery thread for the eyes and nostrils
Choose a hook that makes a dense fabric. Gauge is not critical, but the stuffing must not show between stitches.
Abbreviations
MR: magic ring; sc: single crochet; inc: 2 sc in one stitch; dec: invisible decrease; sl st: slip stitch; FO: fasten off. Work in continuous rounds unless noted.
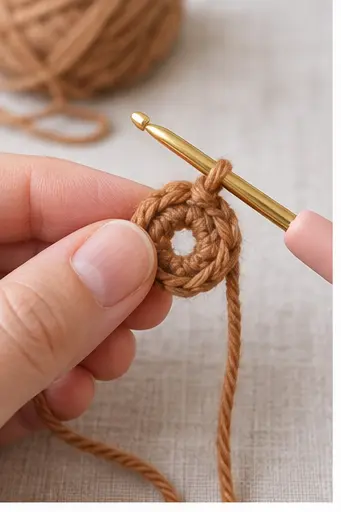
Head
- R1: 6 sc in MR. (6)
- R2: Inc around. (12)
- R3: [Sc, inc] × 6. (18)
- R4: [2 sc, inc] × 6. (24)
- R5: [3 sc, inc] × 6. (30)
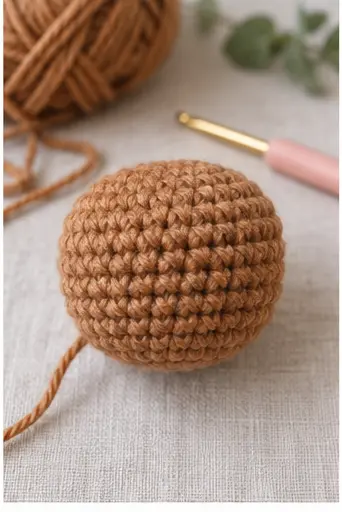
- R6–R10: Sc around. (30)
- R11: [3 sc, dec] × 6. (24)
- R12: [2 sc, dec] × 6. (18)
- Stuff evenly.
- R13: [Sc, dec] × 6. (12)
- R14: Dec × 6. (6). FO and close.
Muzzle, Ears and Horns
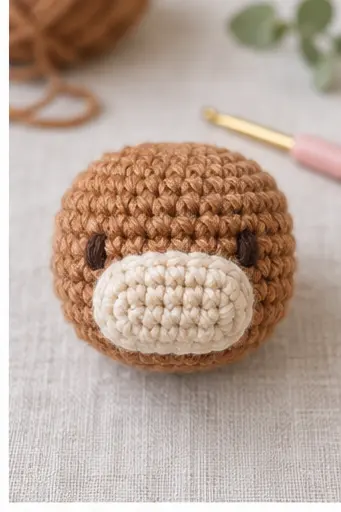
Muzzle
- With cream, ch 6.
- R1: Starting in second ch, 4 sc, 3 sc in last ch; work along the opposite side: 3 sc, inc. (12)
- R2: Inc, 3 sc, inc × 3, 3 sc, inc × 2. (18)
- R3: Sc around. (18). FO with a long tail.
Add a thin layer of stuffing and sew the muzzle across the lower front of the head. Embroider two short nostrils.
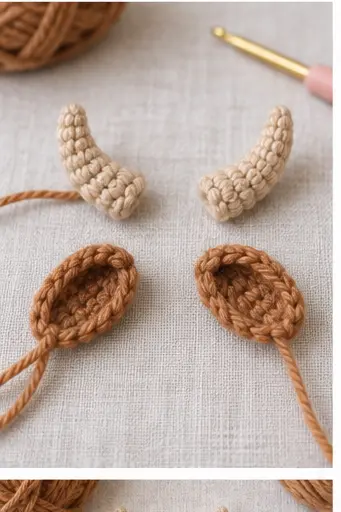
Ears—make two
- 6 sc in MR. (6)
- [Sc, inc] × 3. (9)
- Sc around. (9). Flatten and FO.
Horns—make two
- With cream, 5 sc in MR. (5)
- R2–R5: Sc around. (5)
- R6: Sc 2, inc, sc 2. (6). FO.
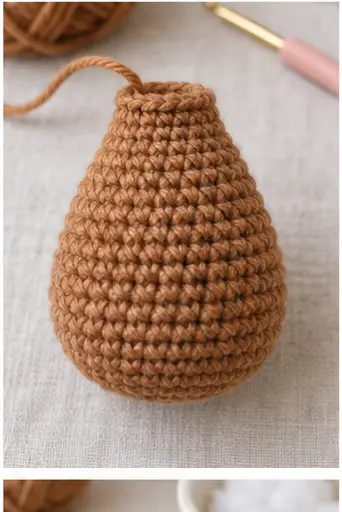
Body
- R1: 6 sc in MR. (6)
- R2: Inc around. (12)
- R3: [Sc, inc] × 6. (18)
- R4: [2 sc, inc] × 6. (24)
- R5: [3 sc, inc] × 6. (30)
- R6–R12: Sc around. (30)
- R13: [3 sc, dec] × 6. (24)
- R14: [2 sc, dec] × 6. (18)
- R15: Sc around. (18). Stuff and FO with a long sewing tail.
Legs and Tail
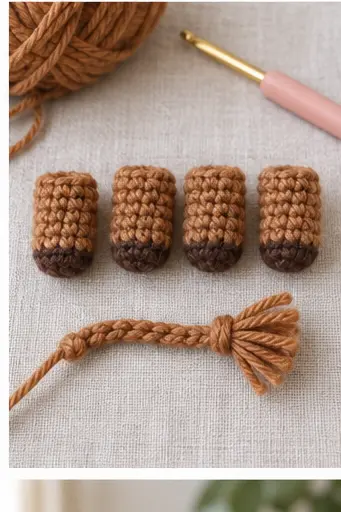
Legs—make four
- With dark brown, 6 sc in MR. (6)
- Inc around. (12)
- Sc around. (12). Change to brown.
- R4–R7: Sc around. (12)
- Stuff lightly, flatten and FO.
Tail
Ch 12, sl st back along the chain and FO. Attach four short strands at the tip and trim into a tassel.
Assembly and Shaggy Fringe
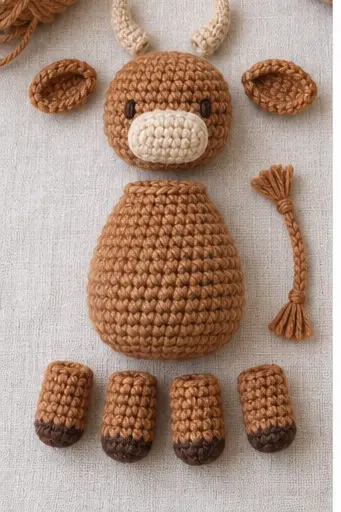
- Pin the head centrally to the body and sew around the neck twice.
- Attach the legs low and evenly so the cow stands without rocking.
- Sew ears at the sides of the head and horns slightly above them.
- Embroider eyes before adding the fringe.
- Cut brown yarn into 4 in (10 cm) strands. Latch-hook strands across the forehead, cheeks and chest.
- Trim slowly, keeping the muzzle and eyes visible.
Finishing Tips and Safety
- Steam-block acrylic fringe from a distance; never press it with an iron.
- For a child under three, use tightly embroidered eyes and secure every strand with a lark’s-head knot.
- If the head leans, add stuffing at the neck and reinforce the seam.
- Brush only the ends of the fringe to preserve the visible crochet texture.
Frequently Asked Questions
Can I use blanket yarn?
Yes, but increase the hook size and expect a much larger cow. Test the horns first because thick cream yarn can make them look oversized.
Can I make it less shaggy?
Yes. Add one short row of fringe across the forehead and skip the chest fringe for a cleaner beginner finish.
How should I wash it?
Spot-clean when possible. If the yarn label permits washing, place the cow in a mesh bag, use cold water and air-dry after reshaping the fringe.
Practise the core shaping in our beginner crochet animal guide, or choose another design from the Crochet Animals collection.
Crochet Highland cow pattern: Final Checklist
Before finishing this crochet Highland cow pattern, confirm the stitch count, shape, seam strength and care instructions. Photograph the completed crochet Highland cow pattern in natural light and record the yarn and hook used so the result can be repeated accurately.