Crochet Giraffe Amigurumi Pattern with a Long Neck
Crochet a seated giraffe with an elongated neck, brown spots and embroidered features. Includes component stitch tables and careful assembly checks.
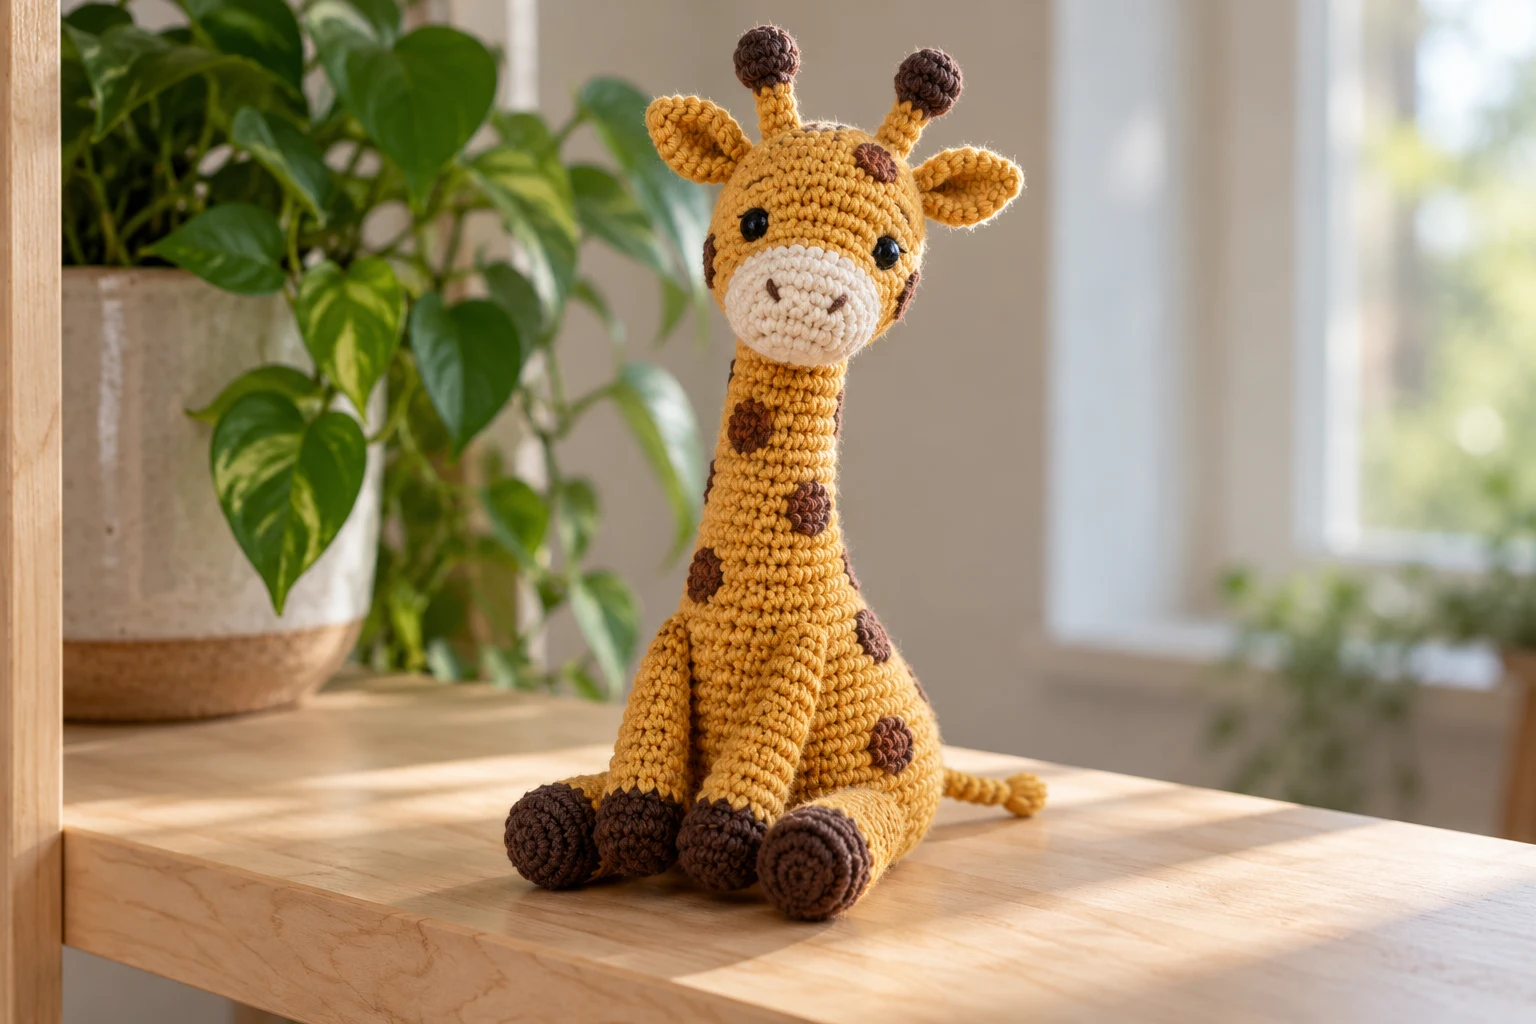
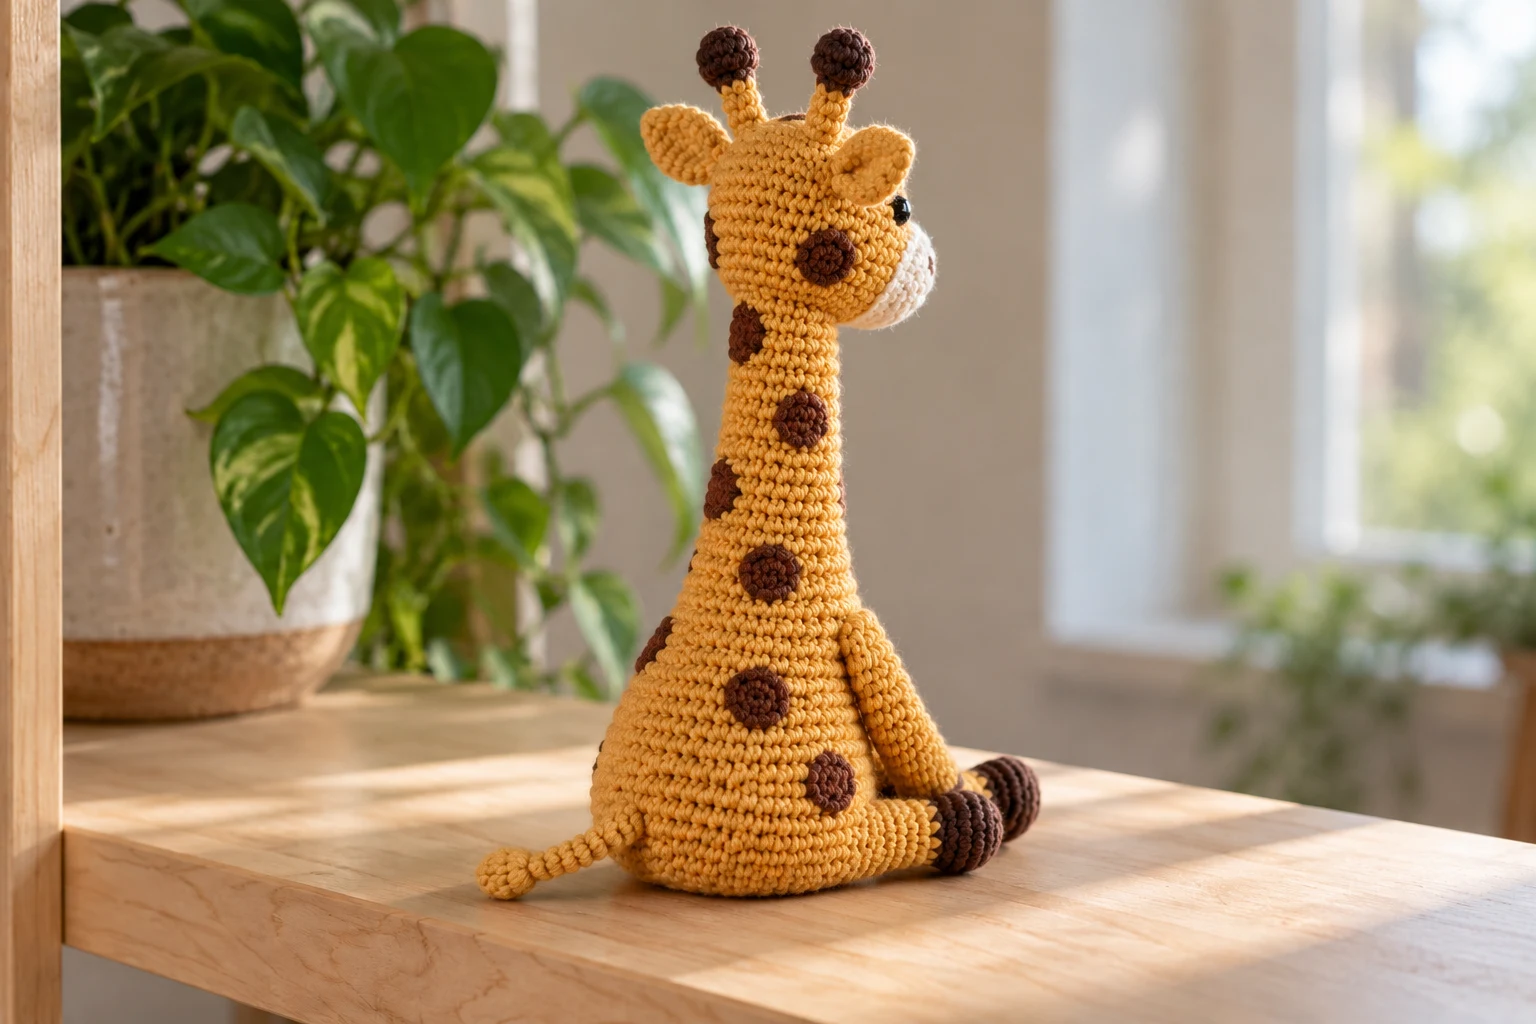
This small seated giraffe uses a narrow neck rising from a pear-shaped body, with a separate head and four soft limbs. Brown hoof tips and small flat spots create the familiar color pattern. The eyes and nostrils are embroidered rather than made from plastic parts.
This crochet giraffe pattern is a sewn draft. Its neck contains no hidden wire or rigid insert; the intended support comes from dense fabric, even filling and a broad head attachment. The word stable describes that design aim, not a tested balance or durability result.
How is this project made? Crochet the body and neck continuously, finishing with an 18-stitch neck opening. Make a separate closed head, a cream muzzle, four limbs, two ears and two short knobbed horns. Pin the seated pose and head angle before sewing all attachments.
Project Overview
| Detail | Pattern information |
|---|---|
| Skill | Confident beginner with small-part sewing |
| Terms | US crochet |
| Hook | 2.75 mm, adjusted to hide filling |
| Planning height | Approximately 14–17 cm seated, unverified |
| Construction | Integrated body/neck; separate head and details |
| Testing | Arithmetic reviewed; neck support physically untested |
Illustrations and testing: These six project images are generated illustrations, not photographs of a test-crocheted sample. Counts are reviewed; sizes, yarn consumption, attachments and physical performance remain unverified.
Materials
| Material | Suggested specification |
|---|---|
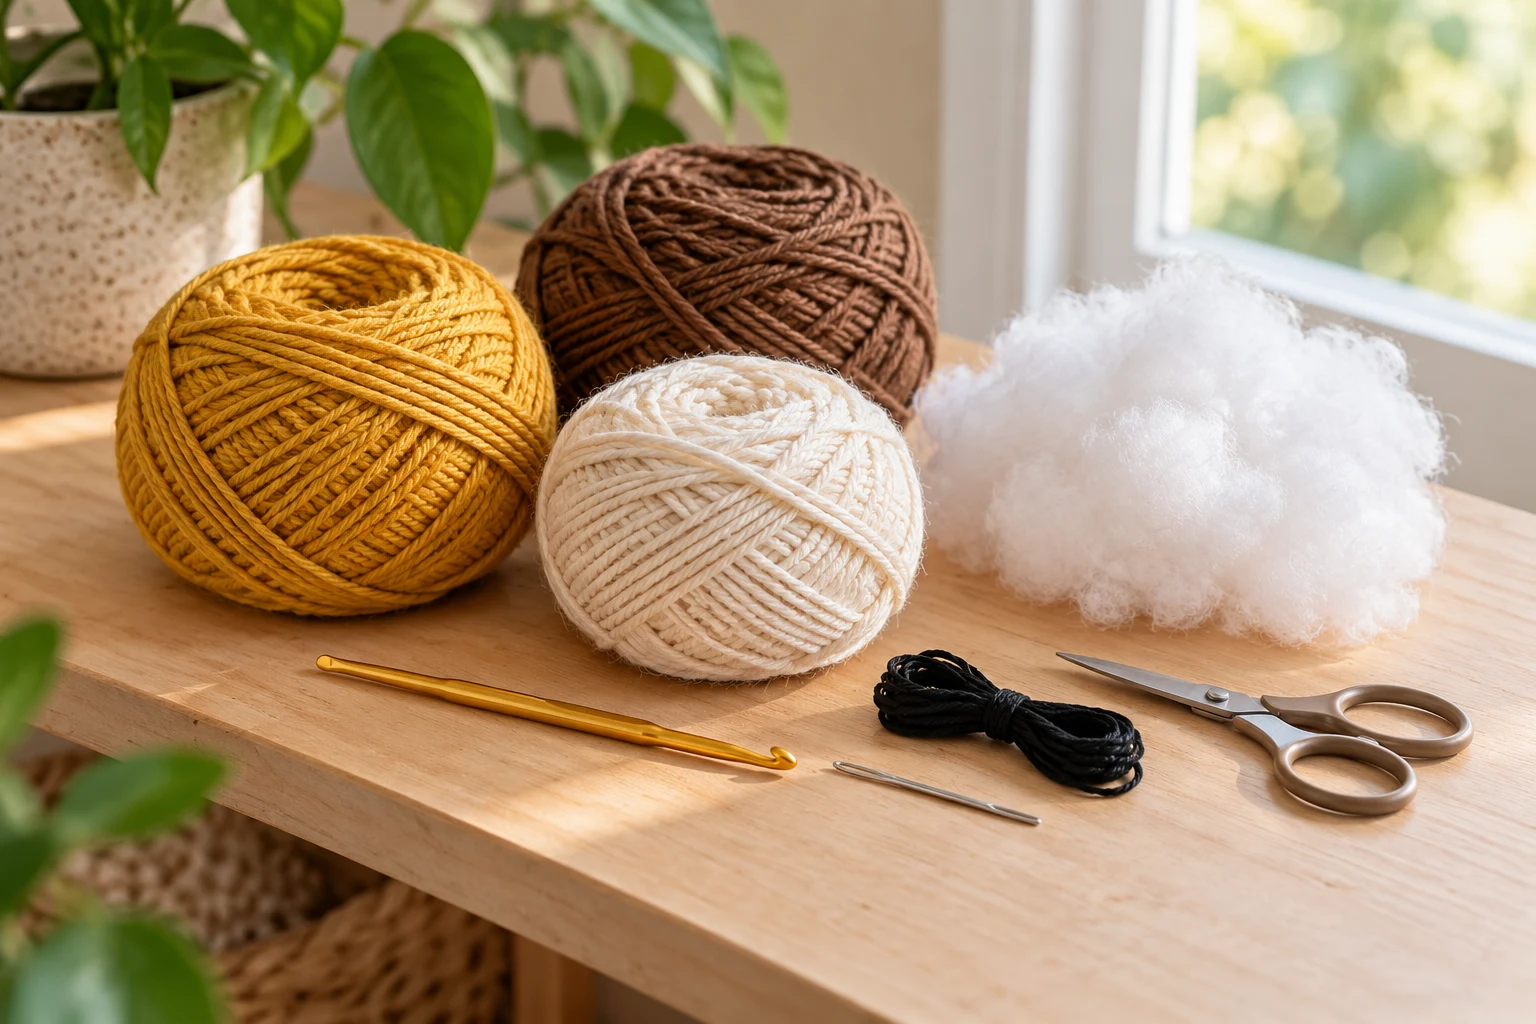
| Ochre cotton | Approximately 60–80 g DK cotton; estimate |
| Brown cotton | Approximately 10–15 g matching weight; estimate |
| Cream and black | About 5 g cream and short black embroidery length |
| Hook and filling | 2.75 mm hook and polyester filling |
| Notions | Blunt needle, marker, pins and scissors; no wire |
Size, Gauge, and Yarn Choices
Use the same yarn family and hook for every component. No measured gauge or height is available for this draft. Make a small single-crochet sample and check that filling stays hidden when the fabric is gently stretched. Yarn quantities and seated height remain estimates. The neck must be checked with the actual stuffed head before a finished item is given away.
Abbreviations and Working Notes
| Abbreviation | Meaning |
|---|---|
| ch | Chain |
| sc | Single crochet |
| sl st | Slip stitch |
| st / sts | Stitch / stitches |
| MR | Magic ring |
| inc | 2 sc in the same stitch |
| dec | Invisible sc decrease; uses 2 stitches and makes 1 |
Work the main pieces in continuous spiral rounds. Do not add joining slips or starting chains to the round counts. Move the first-stitch marker every round.
Stuff the lower body evenly and support the narrow neck gradually with small pieces of filling. A hard lump or an empty neck can both make the head lean.
Pin all limbs and the head first. Embroidered eyes do not by themselves establish toy safety; every attached part still requires practical assessment.
Crochet the Body and Long Neck
| Round / stage | Instructions | Count |
|---|---|---|
| 1 | 6 sc in MR | 6 |
| 2 | Inc around | 12 |
| 3 | (Sc,inc) ×6 | 18 |
| 4 | (2 sc,inc) ×6 | 24 |
| 5 | (3 sc,inc) ×6 | 30 |
| 6–10 | Sc around for 5 rounds | 30 each |
| 11 | (3 sc,dec) ×6 | 24 |
| 12–14 | Sc around for 3 rounds | 24 each |
| 15 | (2 sc,dec) ×6 | 18 |
| 16–26 | Sc around for 11 neck rounds | 18 each |
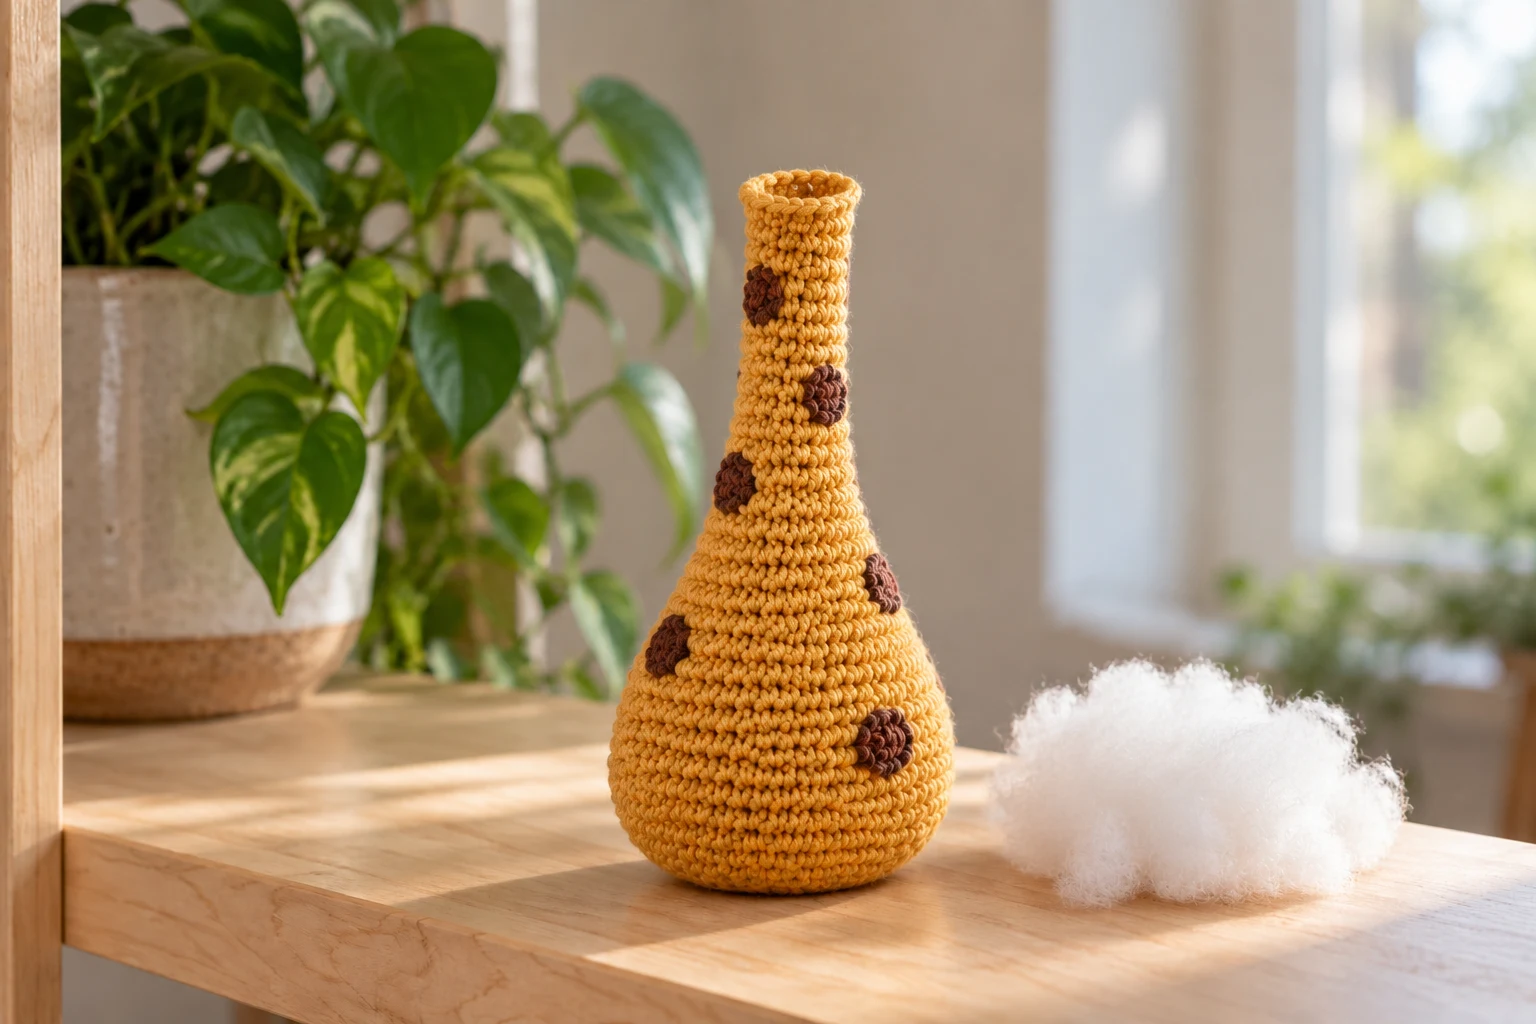
Leave the neck opening unclosed and keep a long sewing tail. Add filling to the lower body before the opening becomes narrow, then fill the neck in small amounts as it grows. Keep the fabric smooth rather than stretching its stitches apart.
The neck opening has 18 stitches. It will be sewn to a broad area of the closed head rather than to a matching open rim. Do not close it to a point before assembly.
Crochet the Separate Head
| Round / stage | Instructions | Count |
|---|---|---|
| 1 | 6 sc in MR | 6 |
| 2 | Inc around | 12 |
| 3 | (Sc,inc) ×6 | 18 |
| 4 | (2 sc,inc) ×6 | 24 |
| 5 | (3 sc,inc) ×6 | 30 |
| 6–9 | Sc around for 4 rounds | 30 each |
| 10 | (3 sc,dec) ×6 | 24 |
| 11 | (2 sc,dec) ×6 | 18 |
| 12 | (Sc,dec) ×6 | 12 |
| 13 | Dec 6 times | 6 |
Stuff gently before the final decreases. Thread the end through the last six front loops, close and secure it inside. Choose a smooth broad area for the lower head attachment and keep the closure at the rear where practical.
The muzzle is a separate cream piece. Its placement gives direction to the face, so do not sew the head permanently to the neck until the face orientation has been pinned.
Make the Muzzle, Ears, Horns and Spots
| Round / stage | Instructions | Count |
|---|---|---|
| Muzzle | Cream:6 sc in MR; inc around; (sc,inc) ×6; one round sc | 6,12,18,18 |
| Ears, make 2 | Ochre:6 sc in MR; inc around; finish and pinch base | 12-edge circles |
| Horns, make 2 | Brown:6 sc in MR;2 rounds at 6; dec 3 times; change to ochre and work 3 rounds at 3 | 6,6,6,3,3,3,3 |
| Spots, make 8 | Brown:6 sc in MR, finish with sl st | 6-edge flat spots |
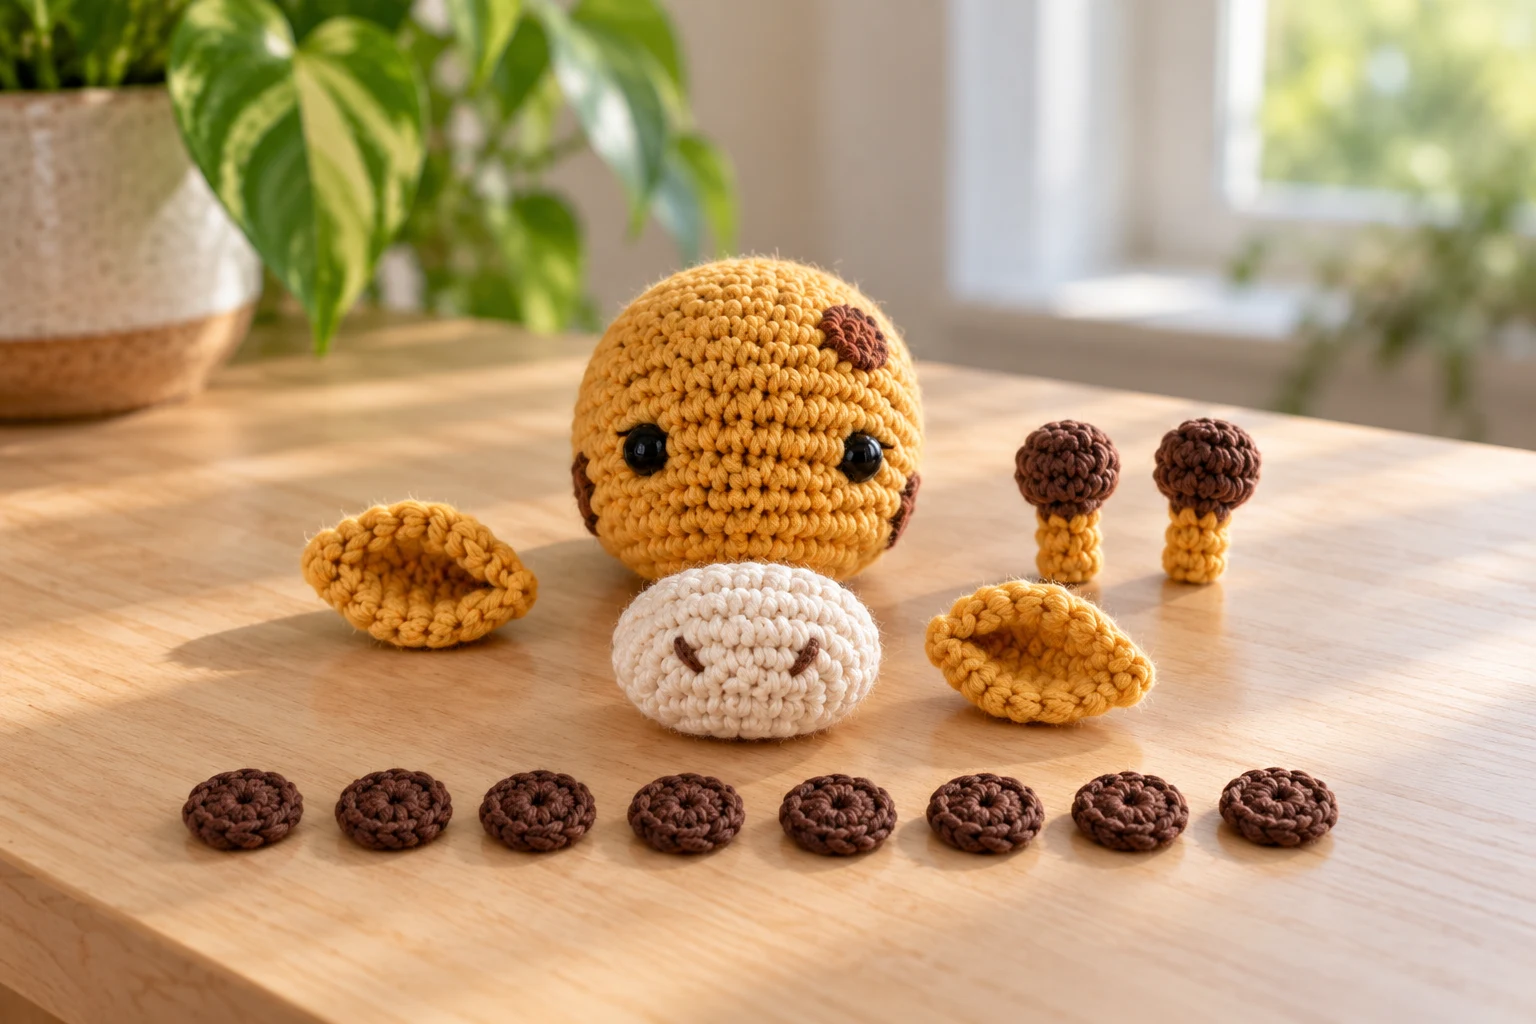
Leave the muzzle open with a long sewing tail. Use only a tiny amount of filling when attaching it to the lower front face. Pin the two 12-stitch ears beside the horn positions and pinch just their attachment bases so they hang outward.
Close the brown horn knobs firmly enough to hold a rounded shape, but do not insert wire or a stick into the narrow ochre stems. The three-stitch rounds are fiddly; use a marker and remake a horn if the stitches cannot be identified.
The spots are small sewn circles, not holes cut into the body. Lay out all eight before attaching: two on the neck, four around the body and two on the sides of the head. Some will naturally be hidden from a front view.
Make Two Arms and Two Lower Feet
| Round / stage | Instructions | Count |
|---|---|---|
| Each limb 1–2 | Brown:6 sc in MR; inc around | 6 then 12 |
| Each limb 3 | Sc around in brown | 12 |
| Each limb 4–7 | Change to ochre; sc around 4 rounds | 12 each |
| Each limb 8 | Dec 6 times | 6 |
| Arm 9–14 | Ochre:sc around 6 rounds; flatten and close through paired stitches | 6 per round;3 closing sc |
| Foot 9–11 | Ochre:sc around 3 rounds; flatten and close through paired stitches | 6 per round;3 closing sc |
Make two longer front arms and two shorter lower feet. Put a small amount of filling in the brown hoof ends and leave the upper narrow parts soft enough to position. Secure the color-change tails inside.
Flattening a six-stitch opening creates three front/back pairs. The three closing sc each pass through one stitch from both layers. Leave long sewing tails and compare each matching pair before assembly.
Assemble the Neck, Face and Seated Pose
| Round / stage | Instructions | Count |
|---|---|---|
| Feet | Pin lower feet to lower front body around Rounds 4–7 | 2 attachments |
| Arms | Pin longer arms near body shoulders around Rounds 11–14 | 2 attachments |
| Head | Sew open neck rim over a broad lower-head area | 18 neck-edge stitches spread evenly |
| Face | Attach cream muzzle and embroider eyes and nostrils | No plastic features |
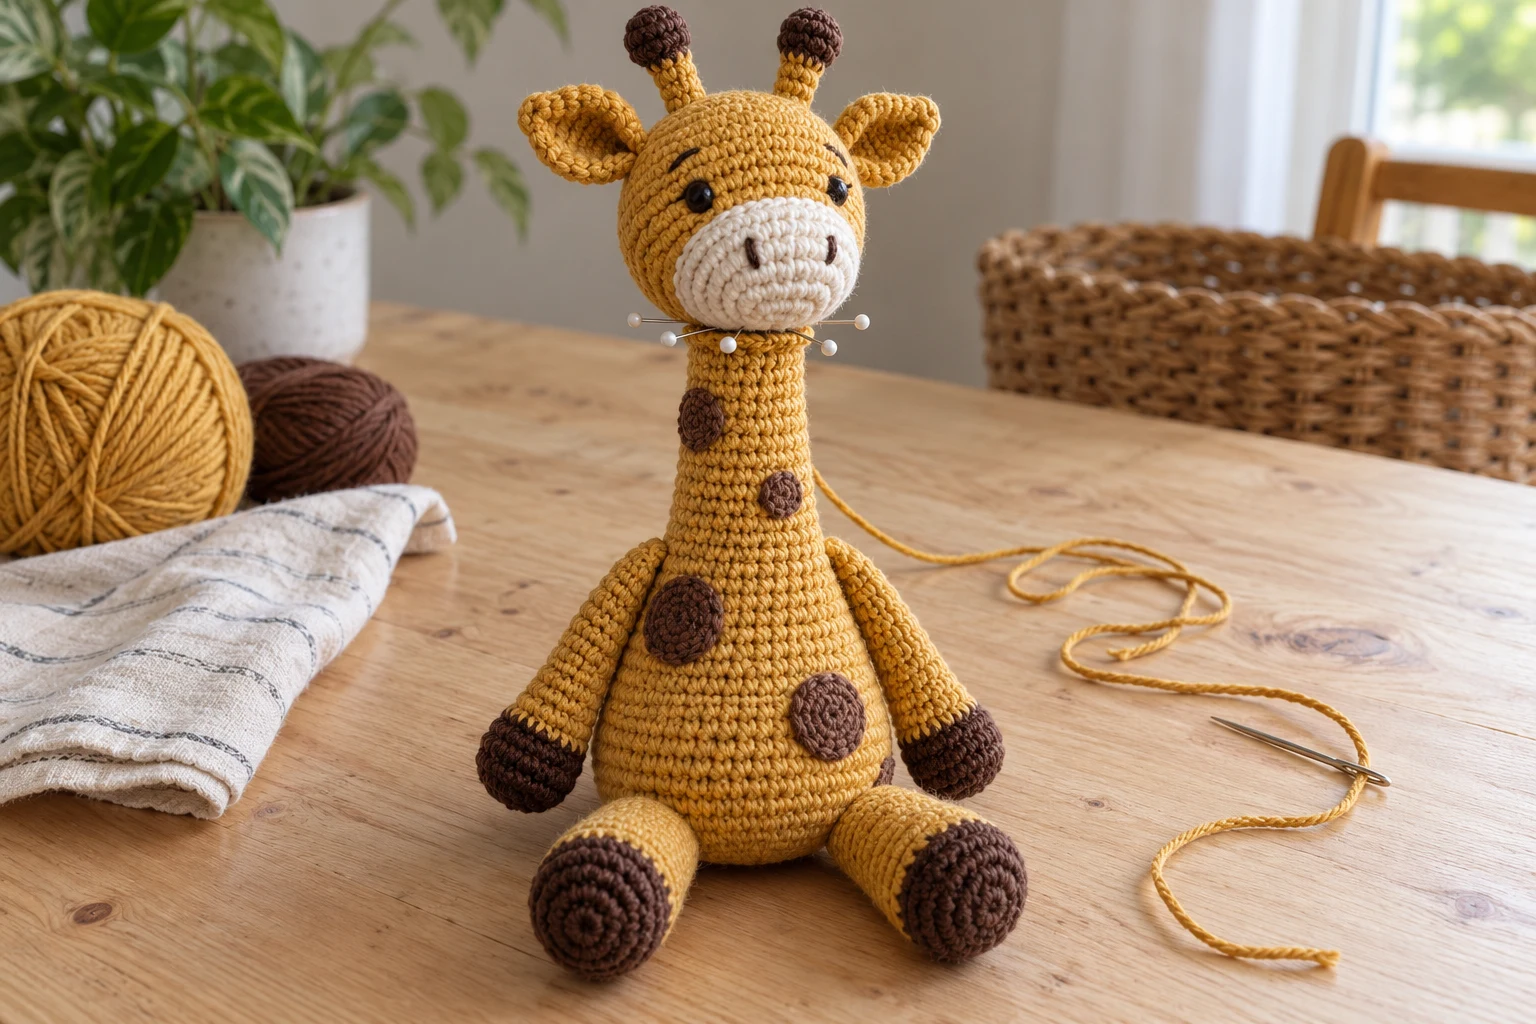
Set the body on a table and pin the limbs so it sits without being forced against a wall. Sew each flattened limb edge across its full width, adding a second line into neighboring body fabric. Do not make a single tiny stitch bear the whole attachment.
Pin the head with the muzzle pointing forward. Spread the neck rim around a suitable lower-head area, approximately over Head Rounds 8–11, adjusting by the actual shape rather than stretching 18 stitches into a small point. Sew most of the rim, check the angle and filling, then close the remaining gap. If it leans, reposition before tightening the seam.
Attach the lightly filled muzzle on the lower front, ears on the upper sides and horns along the top. Embroider two small black eyes above the muzzle and two short brown nostrils on it. Sew all eight spots flat, hiding tails inside. For a plain tail, ch 8 in ochre, sl st back 7 chains and sew to the lower center back. No fringe is specified.
Check the Neck and All Small Parts
| Round / stage | Instructions | Count |
|---|---|---|
| Posture | Set down and inspect from both sides | Head not forced forward |
| Neck | Move head gently and inspect seam | No exposed filling or pulling gaps |
| Details | Check horns, ears, spots, tail and embroidery | All tails secured |
The intended neck support has not been physically tested. Do not add a concealed rigid object to rescue a weak sample; instead check gauge, stuffing distribution and attachment area, then remake as needed.
Remove every pin. A display photograph cannot establish the durability of the small horns, spots or limb seams. Keep a concrete sample-check list with the yarn, hook and finished measurements.
Troubleshooting
| Problem | Check | Adjustment |
|---|---|---|
| Head leans | Neck underfilled or seam too narrow | Redistribute filling and spread attachment |
| Horns differ | Extra small round or inconsistent tension | Compare 7-round sequences |
| Hoof colors uneven | Different color-change rounds | Use brown through Round 3 on all limbs |
| Body rocks | Unequal foot placement | Pin and adjust both feet together |
Care and Related Projects
Follow the yarn and filling labels. Spot clean as a first approach, reshape gently if washing is permitted, and dry fully. This is an untested decorative amigurumi draft, not a toy-safety-certified design.
The amigurumi sewing guide explains discreet joins. For a different animal body plan, compare the Highland cow, without transferring its attachment positions to this long-neck design.
Frequently Asked Questions
Is there wire in the neck?
No. The written construction uses dense fabric and filling; support still needs a physical check.
Is the head sewn to an open head rim?
No. The head is closed, and the 18-stitch neck rim is spread over a broad lower-head area.
How many spots are made?
Eight: two for the neck, four around the body and two for the sides of the head.
Can the horns be omitted?
They can be left off for a simpler decorative version, but that changes the intended giraffe silhouette.
Can I use chenille?
It changes visibility, scale and small-part handling. Test the complete neck and head assembly rather than assuming it will behave like cotton.
Is it suitable for a young child?
No suitability is established. Small sewn parts and the neck need appropriate physical safety assessment before any toy use.
Compact Pattern Card
| Component | Essential instructions |
|---|---|
| Body/neck | Increase to 30; shape to 18;11 straight neck rounds |
| Head | Increase to 30; shape closed over 13 rounds |
| Details | Muzzle,2 ears,2 horns,8 spots |
| Limbs | 2 longer arms and 2 shorter feet, brown hoof tips |
| Finish | Pin seated pose, spread neck seam, sew details and embroider face |