Christmas Robin Crochet Pattern: Free Mini Amigurumi
Make a little Christmas robin with a round brown body, a red breast and embroidered details. Follow clear stitch tables and step-by-step assembly instructions.
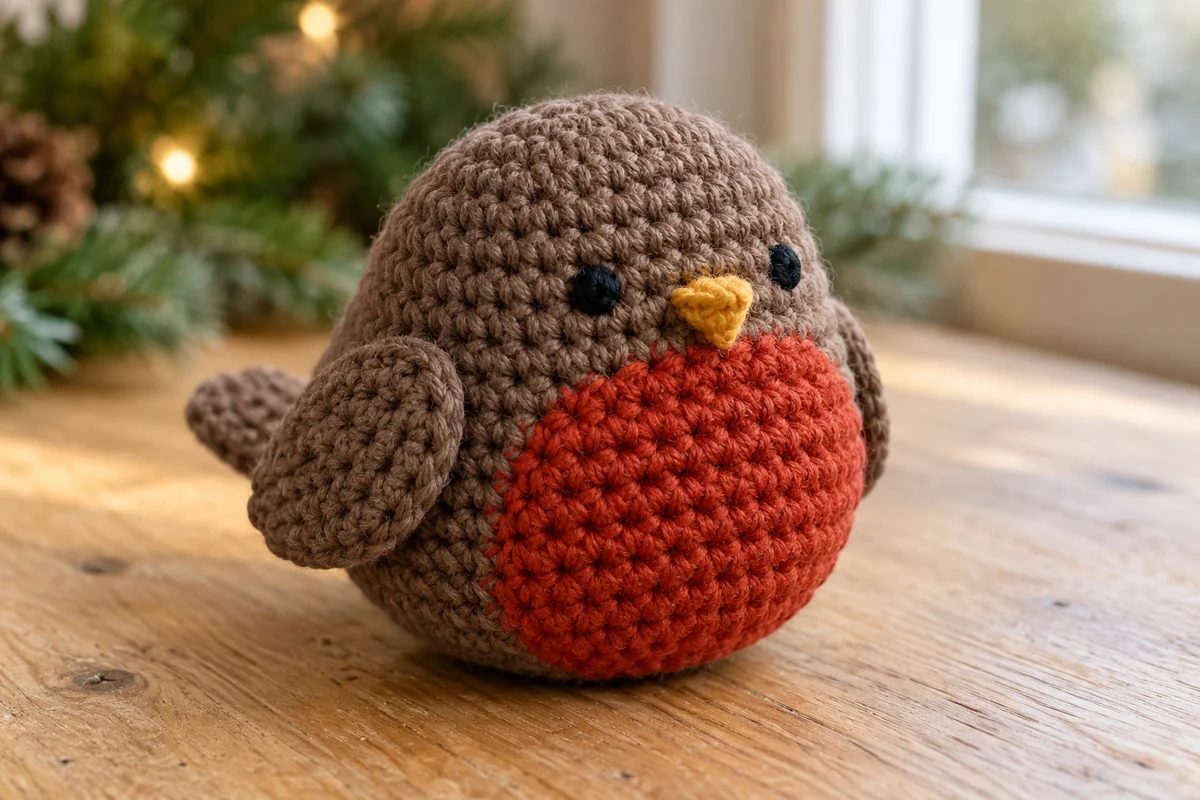
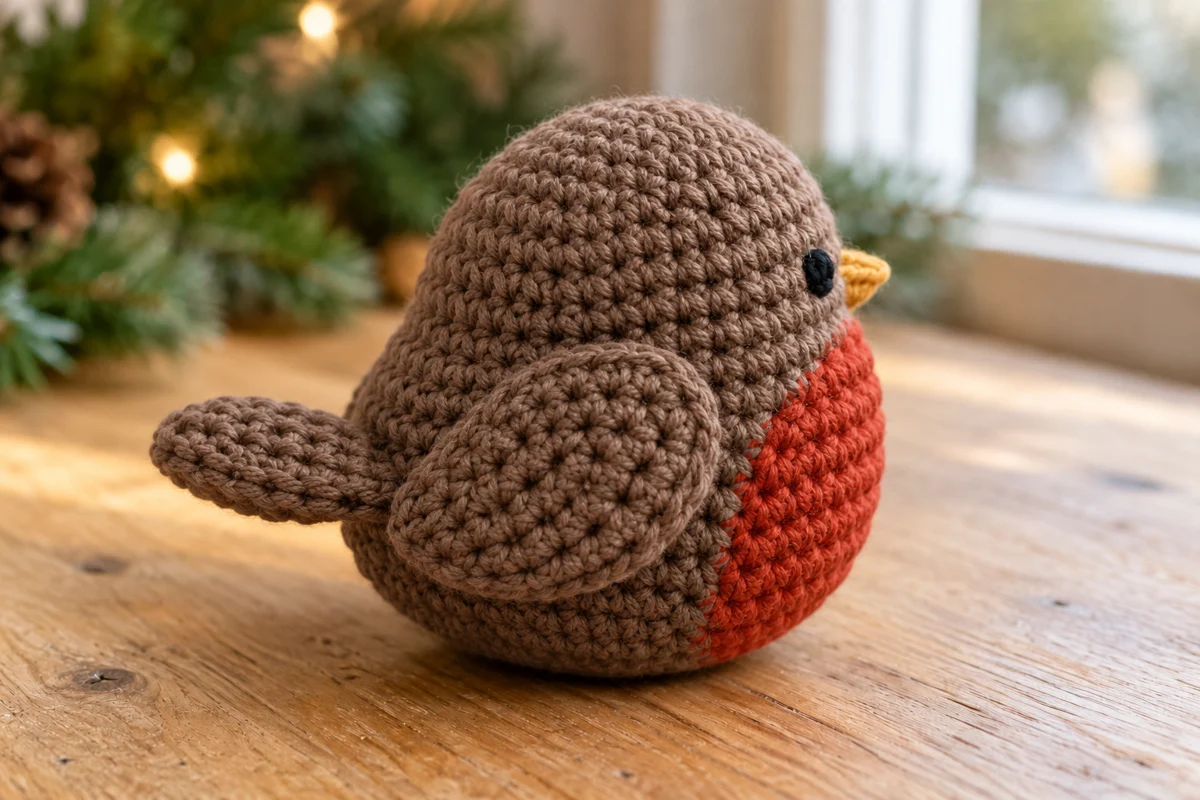
A little brown robin with a red breast brings a familiar woodland touch to Christmas decorating. This small crochet version keeps the shape simple: one round body, a separate breast patch, two wings, and a tiny tail.
Set your finished bird beside a miniature tree, tuck it into a seasonal display, or add a hanging loop for a handmade ornament. The embroidered face gives you room to adjust its expression without adding plastic eyes.
This Christmas robin crochet pattern uses US crochet terminology. You will work the body in continuous rounds, make the small flat pieces separately, and sew everything together.
How is this crochet robin made? Start with a brown amigurumi sphere and stuff it gently. Crochet a flat red circle for the breast, then make two small oval wings and a matching tail. Sew the pieces onto the body and embroider the eyes and beak. The bird has no separate head, legs, or feet, which keeps the construction manageable.
Project Overview
| Detail | Pattern information |
|---|---|
| Skill level | Confident beginner |
| Terminology | US crochet terms |
| Construction | Continuous-round body with sewn details |
| Suggested yarn | Fine cotton, approximately sport weight |
| Hook | 2.5 mm, adjusted to suit your tension |
| Estimated size | Approximately 6–8 cm tall; not physically verified |
| Estimated time | Around 2–3 hours, depending on experience |
| Testing status | Stitch arithmetic reviewed; not test-crocheted |
About the illustrations: The six project images are AI-generated illustrations, not photographs of a tested sample. They show the intended colors, parts, and assembly. Follow the written stitch tables for exact counts; the images may differ in visible stitch detail.
Materials for Your Christmas Robin
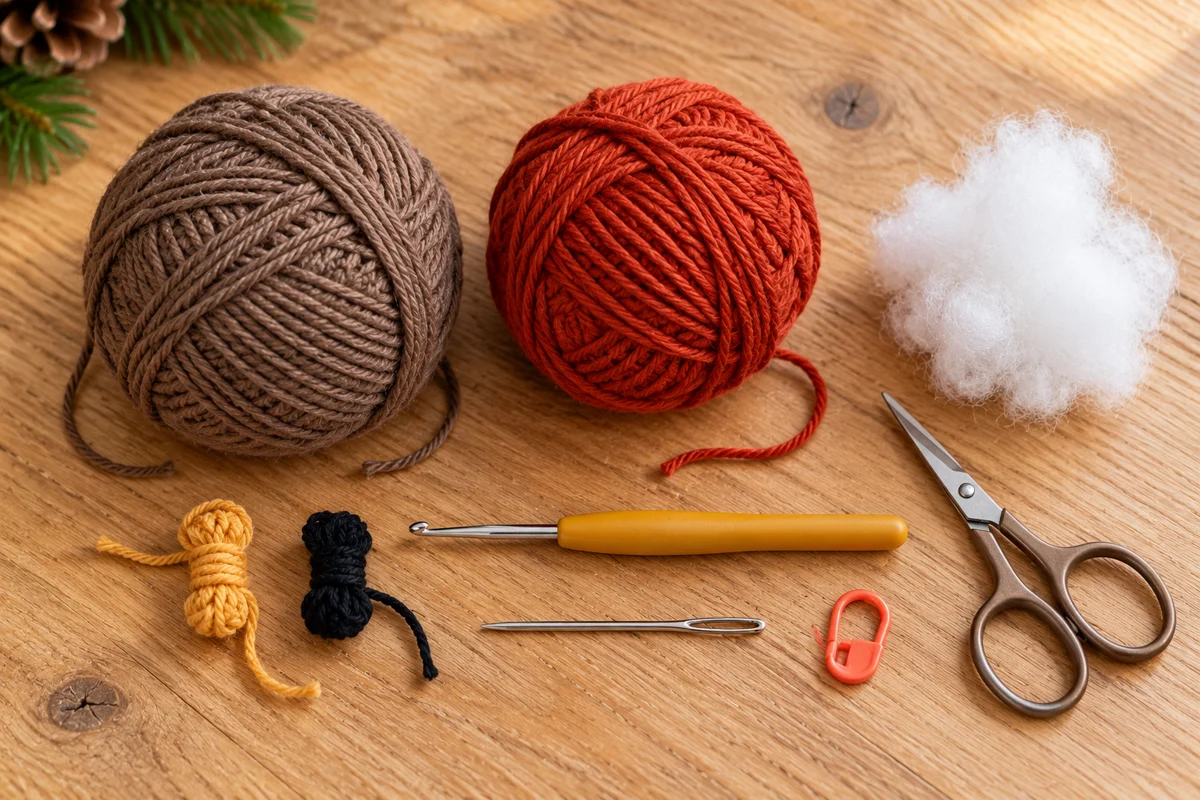
Use the same yarn range for the body, breast, wings, and tail so that the pieces remain in proportion. Fine cotton makes the small stitches easier to see, but your actual tension matters more than the label alone.
| Material | Suggested amount or specification |
|---|---|
| Brown cotton yarn | Approximately 15 g; sport weight |
| Rust-red cotton yarn | Approximately 5 g; same weight as brown |
| Golden ochre yarn | Short length for an embroidered beak |
| Black thread or fine yarn | Short length for two embroidered eyes |
| Crochet hook | 2.5 mm, or a size that produces dense fabric |
| Stuffing | Small amount of polyester toy filling |
| Notions | Yarn needle, stitch marker, scissors; finer embroidery needle if needed |
Yarn quantities are planning estimates rather than measured consumption. With a yarn labeled approximately 125 m per 50 g, these amounts represent roughly 38 m of brown and 13 m of red. Leave extra for sewing tails and any remade pieces.
Size, Tension, and Yarn Substitutions
For amigurumi, the most useful tension check is whether the stuffing stays hidden between the stitches. After completing the first few body rounds, gently stretch the fabric. If you can see large openings, try a smaller hook. If the hook is difficult to insert and your hands feel strained, move up slightly.
The body reaches 42 stitches around its widest section. As a calculation example, 22 single crochet stitches per 10 cm gives a circumference near 19 cm, or a diameter around 6 cm. This is not a measured result: row height, yarn, and stuffing also affect the finished shape.
Changing yarn weight changes the finished size. Use your substitute consistently for every crocheted component. A thicker yarn also needs more filling and may require a different hook; do not assume that the original yarn estimate will still apply.
Abbreviations and Working Notes
| Abbreviation | Meaning |
|---|---|
| MR | Magic ring |
| ch | Chain |
| sc | Single crochet |
| inc | Work 2 sc into the same stitch |
| dec | Invisible single crochet decrease |
| sl st | Slip stitch |
| st / sts | Stitch / stitches |
Numbers in parentheses show the stitch count at the end of the round. For the body and breast, work in a continuous spiral without joining. Move the stitch marker to the first stitch of every new round. Do not add a turning chain between rounds.
For an invisible decrease, insert the hook through the front loop of each of the next two stitches, yarn over and draw through both front loops, then complete one single crochet. Each decrease consumes two stitches and produces one.
The starting chain for the wings and tail does not count as a stitch. Finishing slip stitches are not included in the stated counts. Keep the sewing tails until you have checked the full arrangement.
Crochet the Brown Body
Using brown yarn, make a magic ring and follow the table below. Pull the starting ring snug after Round 1, then secure its tail on the inside before the opening becomes difficult to reach.
| Round | Instructions | Stitches |
|---|---|---|
| 1 | 6 sc in MR | 6 |
| 2 | Inc in every stitch | 12 |
| 3 | (Sc, inc) × 6 | 18 |
| 4 | (2 sc, inc) × 6 | 24 |
| 5 | (3 sc, inc) × 6 | 30 |
| 6 | (4 sc, inc) × 6 | 36 |
| 7 | (5 sc, inc) × 6 | 42 |
| 8–14 | Sc in every stitch for 7 rounds | 42 each |
| 15 | (5 sc, dec) × 6 | 36 |
| 16 | (4 sc, dec) × 6 | 30 |
| 17 | (3 sc, dec) × 6 | 24 |
| 18 | (2 sc, dec) × 6 | 18 |
| 19 | (Sc, dec) × 6 | 12 |
| 20 | Dec × 6 | 6 |
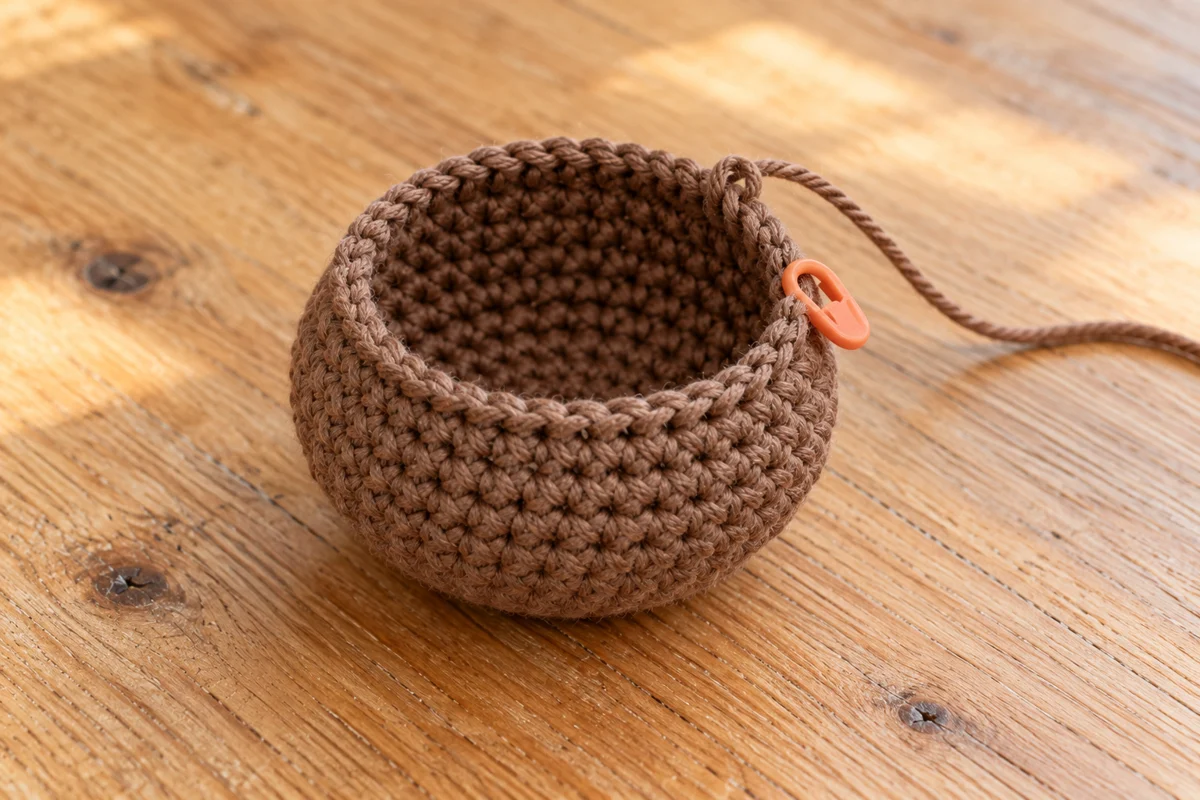
Begin stuffing after Round 17 while the opening is still easy to reach. Add small pieces of filling and distribute them around the inside rather than pushing one large lump into the center. The body should feel rounded and springy.
Before Round 20, add enough filling to support the lower section without spreading the stitches. Cut the yarn with a tail, thread it through the front loops of the remaining six stitches, pull closed, and secure the end inside.
The magic-ring end will be the top of the bird. The decrease closure belongs underneath. Gently shape the body with your fingers and choose the smoothest area as the front.
Make the Red Breast Patch
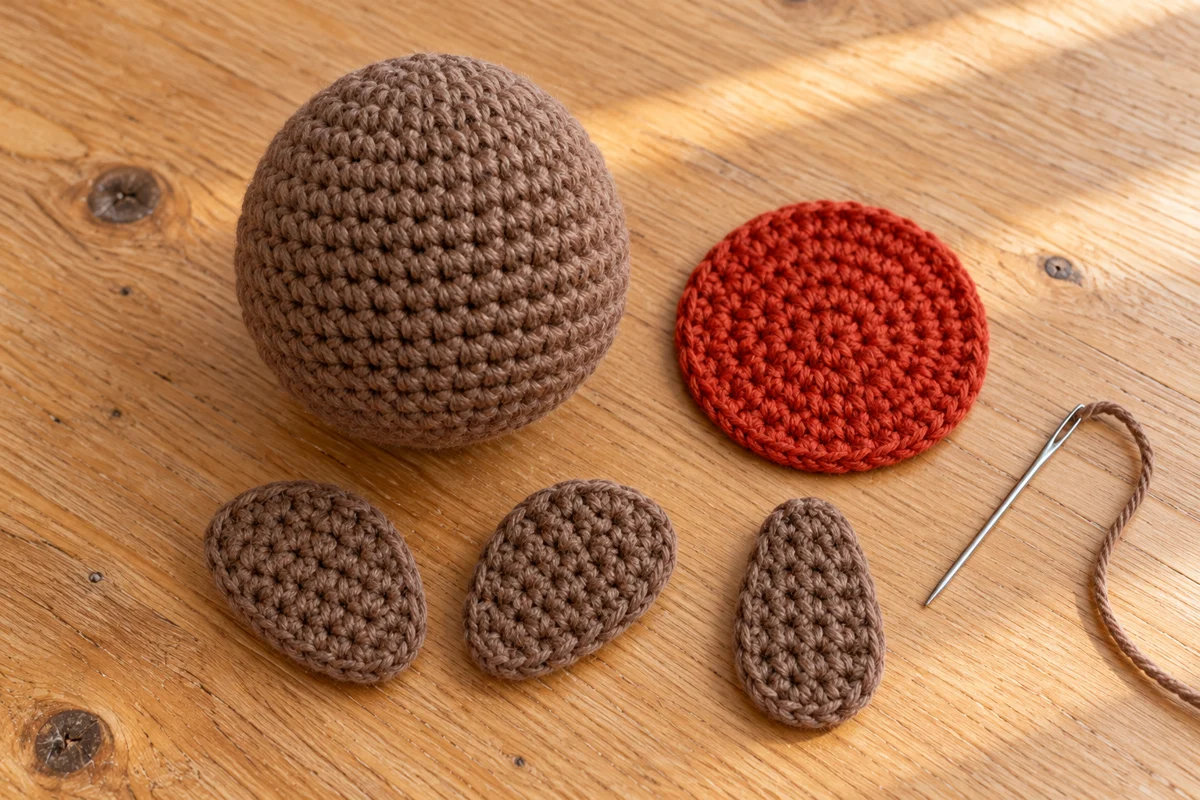
Using rust-red yarn, crochet a flat circle. This separate patch avoids carrying red yarn inside the brown body and lets you adjust the placement before sewing.
| Round | Instructions | Stitches |
|---|---|---|
| 1 | 6 sc in MR | 6 |
| 2 | Inc in every stitch | 12 |
| 3 | (Sc, inc) × 6 | 18 |
| 4 | (2 sc, inc) × 6 | 24 |
| 5 | (3 sc, inc) × 6 | 30 |
Slip stitch into the next stitch and fasten off with a long sewing tail. Smooth the patch with your fingers. Do not stuff it. A small amount of edge movement can settle during sewing, but strong rippling or cupping needs checking before attachment.
Crochet the Wings and Tail
Make three identical flat ovals in brown: two become the wings and the third becomes the tail. For each oval, chain 5 and work around both sides of that foundation chain.
| Round | Instructions | Stitches |
|---|---|---|
| 1 | Starting in second chain from hook: sc in next 3 chains, 3 sc in final chain; along unused side: sc in next 2 chains, 2 sc in chain holding first sc. | 10 |
| 2 | Inc, 2 sc, inc in each of next 3 stitches, 2 sc, inc in each of final 2 stitches. | 16 |
The two end chains each hold three stitches in Round 1. The two middle chains each hold one stitch on each side. This gives 3 + 3 + 2 + 2 = 10 stitches around the oval.
Slip stitch into the next stitch and fasten off with a sewing tail. Keep the pieces unstuffed and weave the starting tails into their backs. Compare the two wings before assembly; remake one if its tension differs noticeably.
Position and Sew the Pieces
Use loose temporary stitches or removable markers to position the parts. Look at the bird from the front, both sides, and above. The round numbers below are starting guides; your row height may differ.
| Piece | Position | Attachment |
|---|---|---|
| Red breast | Lower front; upper edge around Rounds 9–10, lower edge near Rounds 16–17 | Sew around entire edge with small, relaxed stitches |
| Two wings | One on each side; tops slightly above breast center | Sew upper third only; leave lower section free |
| Tail | Lower back, opposite lower half of breast | Sew one rounded end across several stitches |
Tack the breast at four evenly spaced points before sewing around its edge. Catch shallow stitches of the brown body and avoid pulling the seam tight enough to form a ridge. Check that the patch remains centered as you work.
Attach the first wing, then compare the second against it before securing the final stitches. Matching their height and angle matters more than making every sewing stitch identical. Let the tail project outward with a slight upward angle.
For more help with attachment stitches, read how to sew amigurumi pieces together neatly. Secure every part over several stitches rather than relying on one strand.
Embroider the Face and Finish
Mark two eye positions above the breast, roughly around body Rounds 7–8. Leave about 6–8 stitches between them, then adjust the expression by eye. Use two or three short black stitches over each small marked area.
Keep the embroidery tension gentle so that the eyes do not sink deeply into the filling. Between the eyes and slightly lower, embroider a tiny downward-pointing triangle with ochre yarn. A few neat stitches are enough for a small beak.
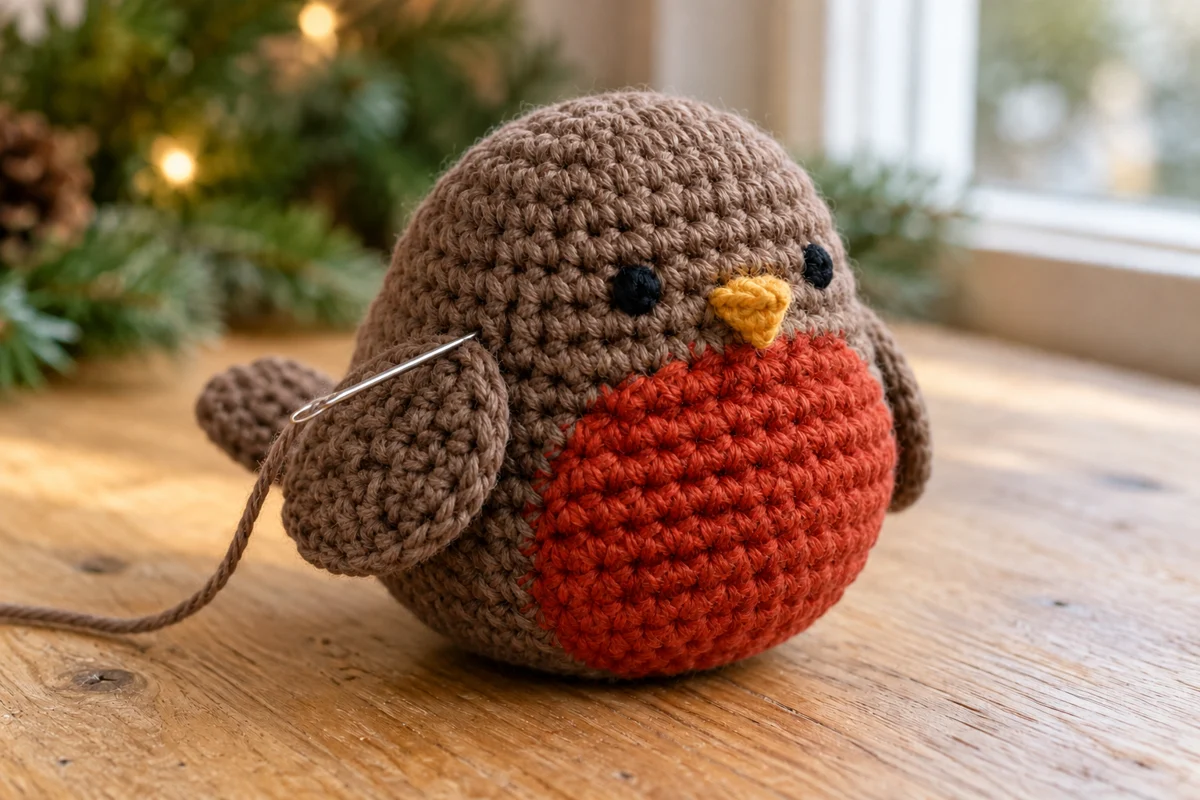
Secure and bury all thread ends, remove temporary markers, and check the attachments. If you prefer to embroider before attaching the wings, that is fine; the construction is unchanged.
Troubleshooting Your Crochet Robin
| Problem | Likely cause | Correction |
|---|---|---|
| Stuffing shows | Loose tension or too much filling | Use a smaller hook or reduce stuffing |
| Body looks lumpy | Large clumps of filling | Redistribute small amounts before closing |
| Breast puckers | Seam pulled too tightly | Loosen stitches and spread edge evenly |
| Breast sits off-center | Patch shifted during sewing | Tack four points before sewing around |
| Wings look uneven | Attachment heights differ | Compare both sides before fastening off |
| Bird rolls sideways | Rounded base or uneven filling | Redistribute filling; display in a shallow nest |
This design has a rounded underside and no feet. It is not intended to stand like a bird with a flat supporting base. A shallow decorative nest helps hold its angle in a display.
Display Ideas and Care
For a hanging ornament, sew a yarn loop securely through several stitches at the top. Test its balance before fastening permanently. Choose terracotta for a muted woodland breast or brighter red for a traditional Christmas palette.
Pair it with a mini crochet Christmas tree, a crochet snowman ornament, or a Christmas penguin. Compare their finished sizes before arranging them together.
Follow the yarn and stuffing care labels. Spot cleaning is a practical first option. If washing is permitted, reshape gently and allow the bird to dry fully. This is a decorative design, not a tested child’s toy; an embroidered face alone does not establish toy suitability.
Frequently Asked Questions
Can I start without a magic ring?
Yes. Chain 2 and work the first six single crochet stitches into the second chain from the hook. Tighten and secure the starting end to reduce the opening.
Can I use plush yarn?
You can adapt it, but the bird will be larger and small details may look different. Use matching yarn weights throughout and choose a hook that keeps the filling contained.
Is this a no-sew pattern?
No. The body is made in one piece, but the breast, wings, and tail are sewn on separately.
Can I turn it into a keychain?
A keychain needs reinforced attachments that withstand repeated pulling. This draft is designed as a display ornament, and attachment strength has not been tested for keychain use.
Do I need to block the pieces?
Finger-shaping is usually enough for small cotton pieces. If you block them, follow the yarn instructions and let them dry completely before sewing.
What if the breast covers the eye positions?
Move the patch lower before sewing. Keep a clear brown area above it for the eyes and beak; use the approximate round positions as guides rather than forcing an awkward arrangement.
Compact Christmas Robin Pattern Card
| Component | Essential instructions |
|---|---|
| Body | Increase 6 → 12 → 18 → 24 → 30 → 36 → 42 over Rounds 1–7 |
| Middle | Rounds 8–14: 42 sc each round |
| Closure | Decrease to 36, 30, 24, 18, 12, then 6; stuff and close |
| Breast | Increase from 6 to 30 over 5 rounds |
| Wings and tail | Make 3 ovals: ch 5; Round 1 = 10 sts, Round 2 = 16 sts |
| Assembly | Breast at front, wings at sides, tail at lower back |
| Face | Two black embroidered eyes and a small ochre beak |
Save this Christmas robin crochet pattern for a quiet crafting afternoon. Keep notes on your yarn, hook, and actual finished size so that you can make a matching bird later.