Free Crochet Christmas Moose Pattern for Beginners
Make a cozy woodland friend with this free crochet Christmas moose pattern. Includes the body, muzzle, ears, antlers, legs, Santa hat, scarf, and assembly.
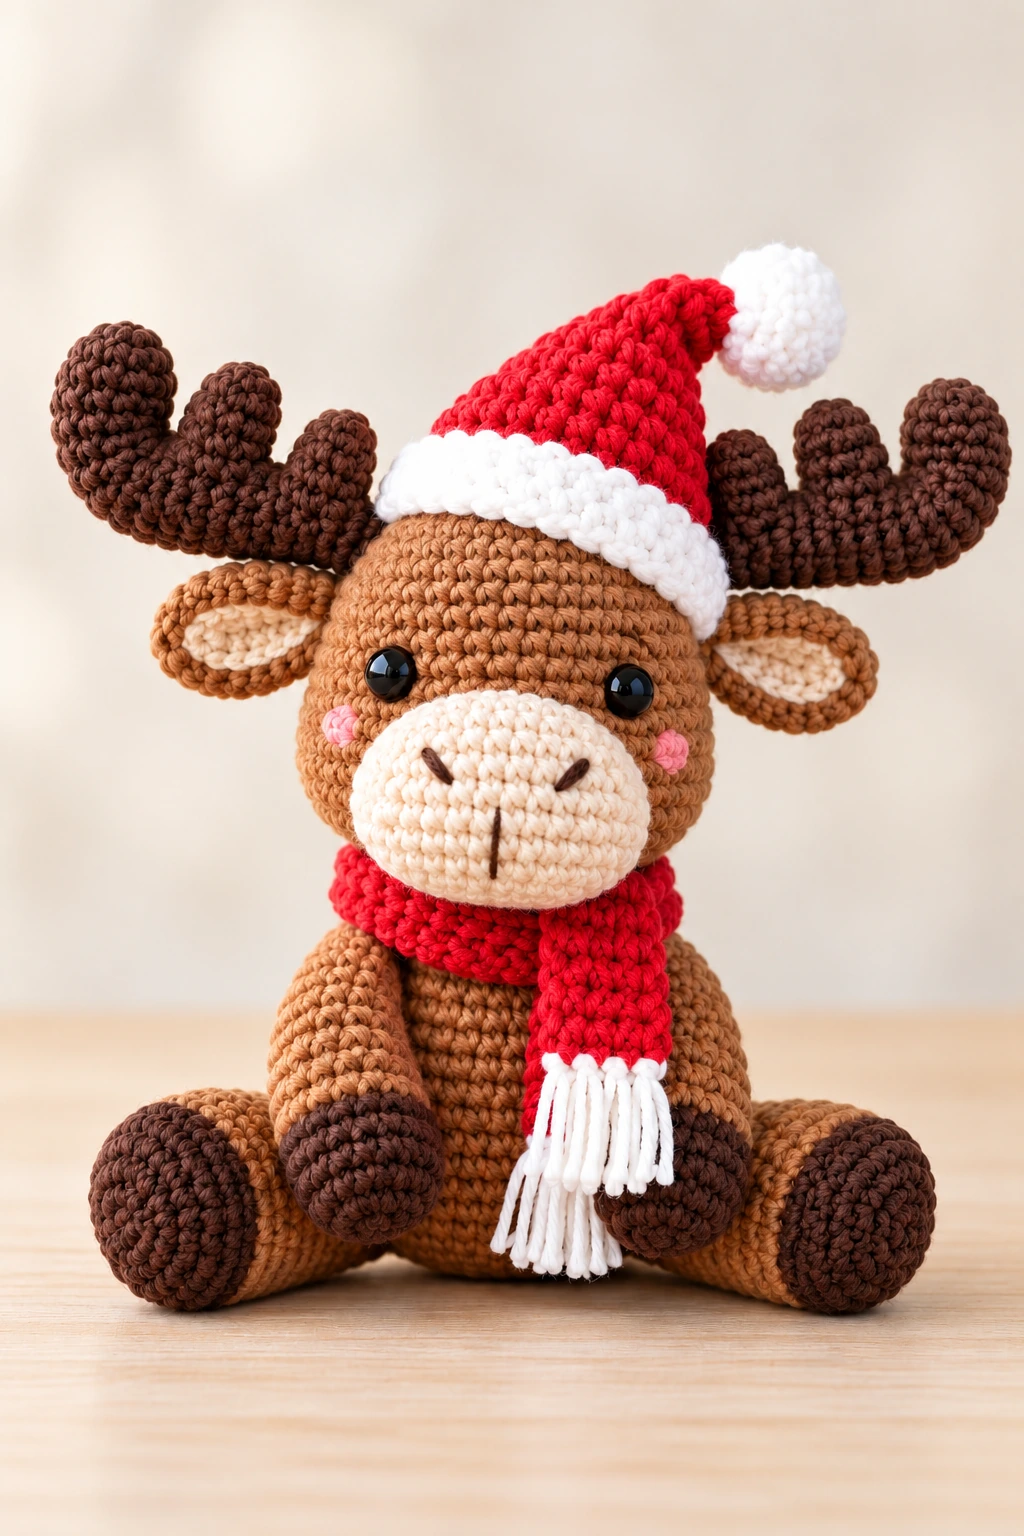
This free crochet Christmas moose pattern makes a cozy woodland amigurumi with a warm brown body, cream muzzle and inner ears, dark brown hooves, soft caramel antlers, glossy black eyes, rosy cheeks, a bright red scarf, and a classic Santa hat.
The finished moose has a seated, chubby amigurumi shape that works beautifully for Christmas shelf décor, handmade gifts, winter displays, and festive crochet collections.
Pattern at a Glance
- Skill level: Confident beginner to intermediate
- Terms: US crochet terminology
- Construction: Main body and head worked continuously, with separate muzzle, ears, antlers, four limbs, Santa hat, and scarf
- Recommended yarn: DK or light worsted cotton, acrylic, or cotton-acrylic blend
- Hook: 3 mm
- Finished height: Approximately 16–19 cm / 6.3–7.5 inches when seated, excluding the tallest part of the antlers and hat
- Working method: Continuous spirals unless otherwise noted
- Gauge: Not critical
Materials and Tools
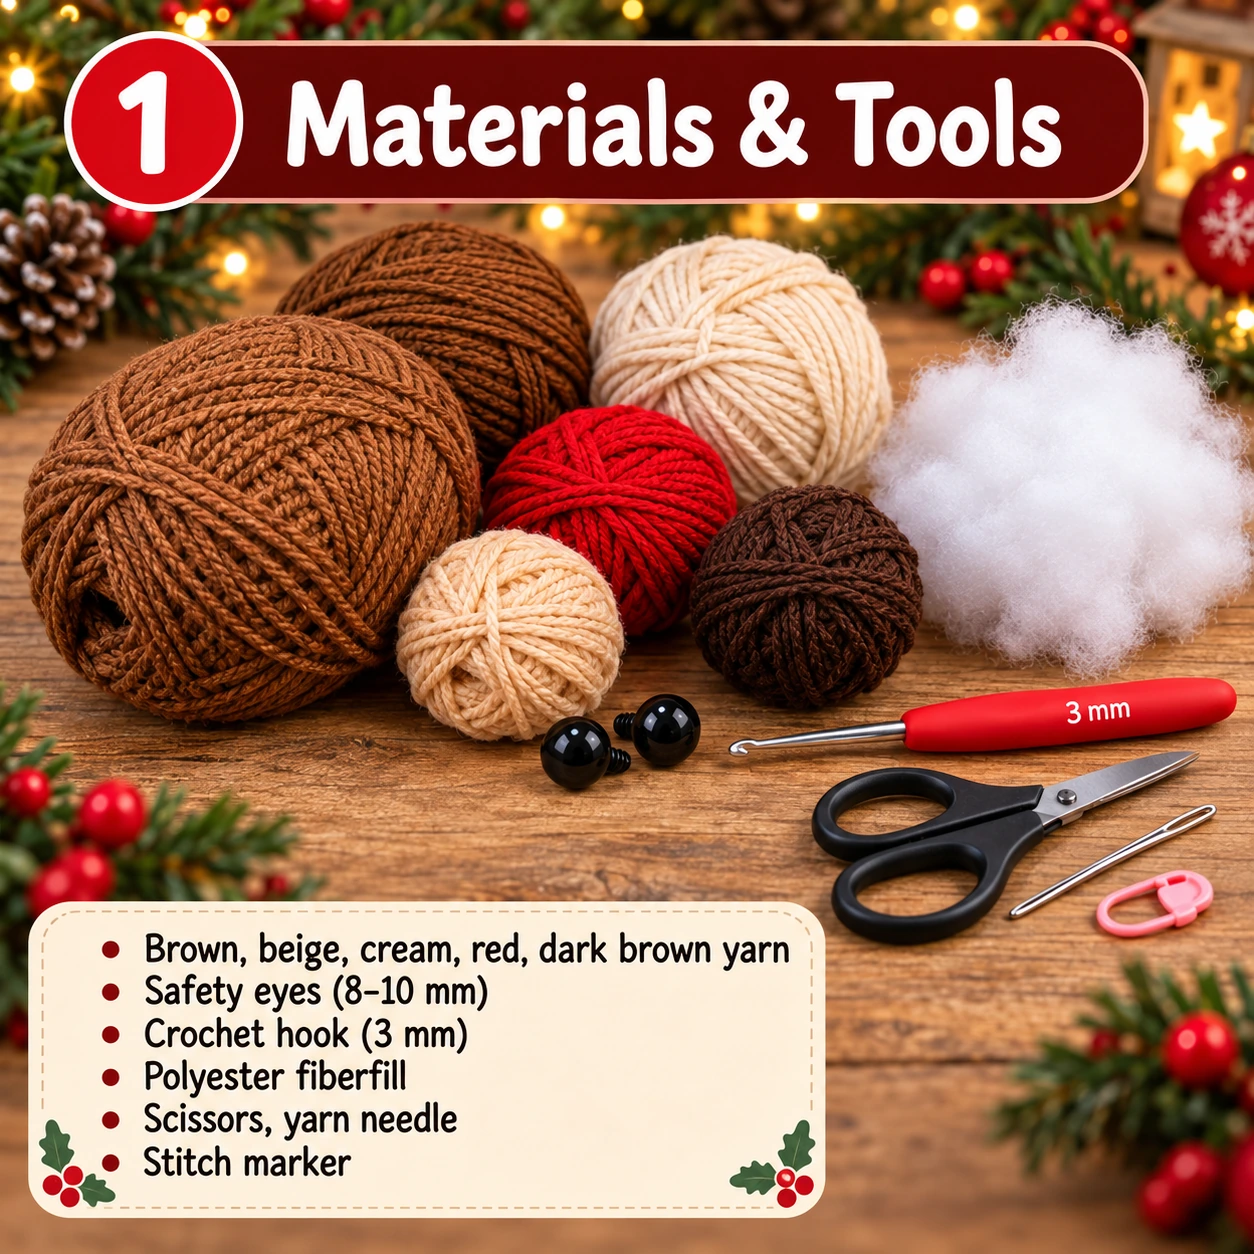
- 60–75 g medium brown yarn
- 15–20 g cream yarn
- 10–15 g dark brown yarn
- 15–20 g caramel or tan yarn for antlers
- 15–20 g red yarn
- Small amount of white yarn
- Small amount of pink yarn or embroidery thread
- Black embroidery yarn
- 3 mm crochet hook
- Two 8–10 mm safety eyes
- Polyester fiberfill
- Yarn needle
- Stitch marker
- Pins
- Scissors
Crochet Abbreviations
| Abbreviation | Meaning |
|---|---|
| MR | Magic ring |
| ch | Chain |
| sc | Single crochet |
| inc | Increase — 2 sc in one stitch |
| dec | Invisible decrease |
| hdc | Half double crochet |
| sl st | Slip stitch |
| st | Stitch |
| sts | Stitches |
| Rnd | Round |
| FO | Fasten off |
Important Pattern Notes
Work the main piece in a continuous spiral and mark the first stitch of each round. Count frequently, especially when narrowing the body into the neck and increasing again for the head.
Stuff gradually. The body should be firm enough to hold its seated shape without becoming hard or showing fiberfill through the stitches.
Important: The main brown piece contains both the body and head. Do not fasten off at the neck; continue directly into the head.
Crochet the Main Body and Head
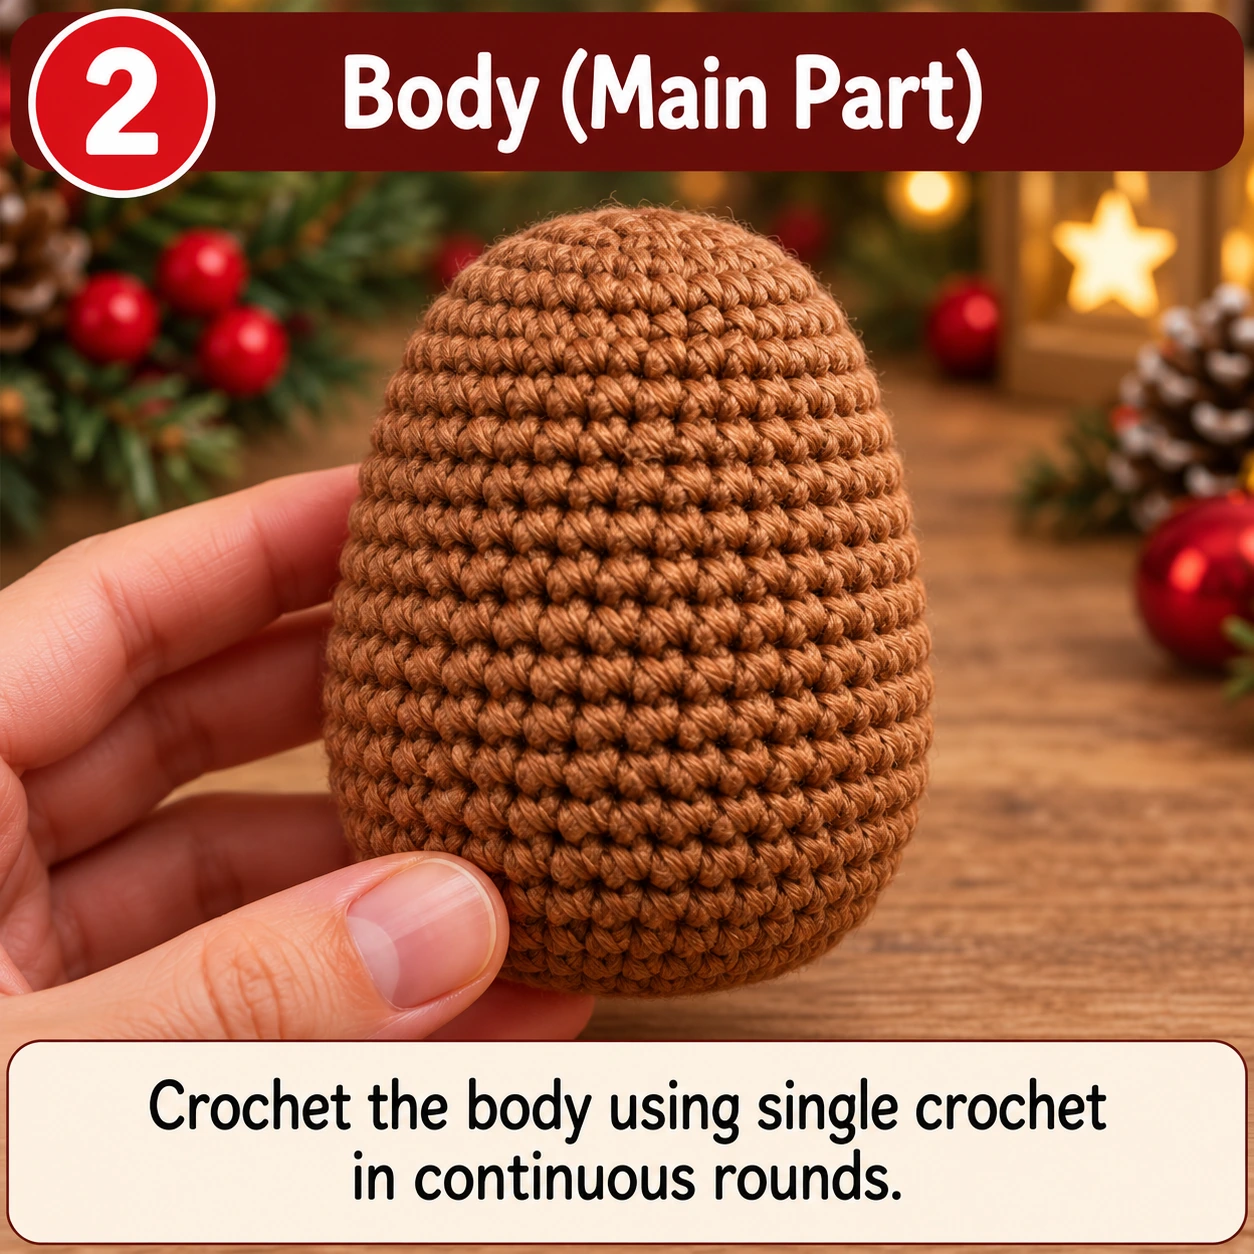
Body
Rnd 1: 6 sc into MR. (6)
Rnd 2: Inc around. (12)
Rnd 3: (1 sc, inc) × 6. (18)
Rnd 4: (2 sc, inc) × 6. (24)
Rnd 5: (3 sc, inc) × 6. (30)
Rnd 6: (4 sc, inc) × 6. (36)
Rnds 7–13: Sc around. (36)
Rnd 14: (4 sc, dec) × 6. (30)
Rnds 15–17: Sc around. (30)
Rnd 18: (3 sc, dec) × 6. (24)
Rnd 19: Sc around. (24)
Rnd 20: (2 sc, dec) × 6. (18)
Begin stuffing the lower body and add enough support at the neck. Do not fasten off.
Head
Rnd 21: (2 sc, inc) × 6. (24)
Rnd 22: (3 sc, inc) × 6. (30)
Rnd 23: (4 sc, inc) × 6. (36)
Rnd 24: (5 sc, inc) × 6. (42)
Rnds 25–30: Sc around. (42)
Place the safety eyes approximately between Rounds 27 and 28, starting with about 8 stitches between them.
Rnd 31: (5 sc, dec) × 6. (36)
Rnd 32: (4 sc, dec) × 6. (30)
Rnd 33: (3 sc, dec) × 6. (24)
Rnd 34: (2 sc, dec) × 6. (18)
Rnd 35: (1 sc, dec) × 6. (12)
Rnd 36: Dec × 6. (6)
Finish stuffing, fasten off, pull the opening closed, and hide the tail.
Crochet the Moose Muzzle
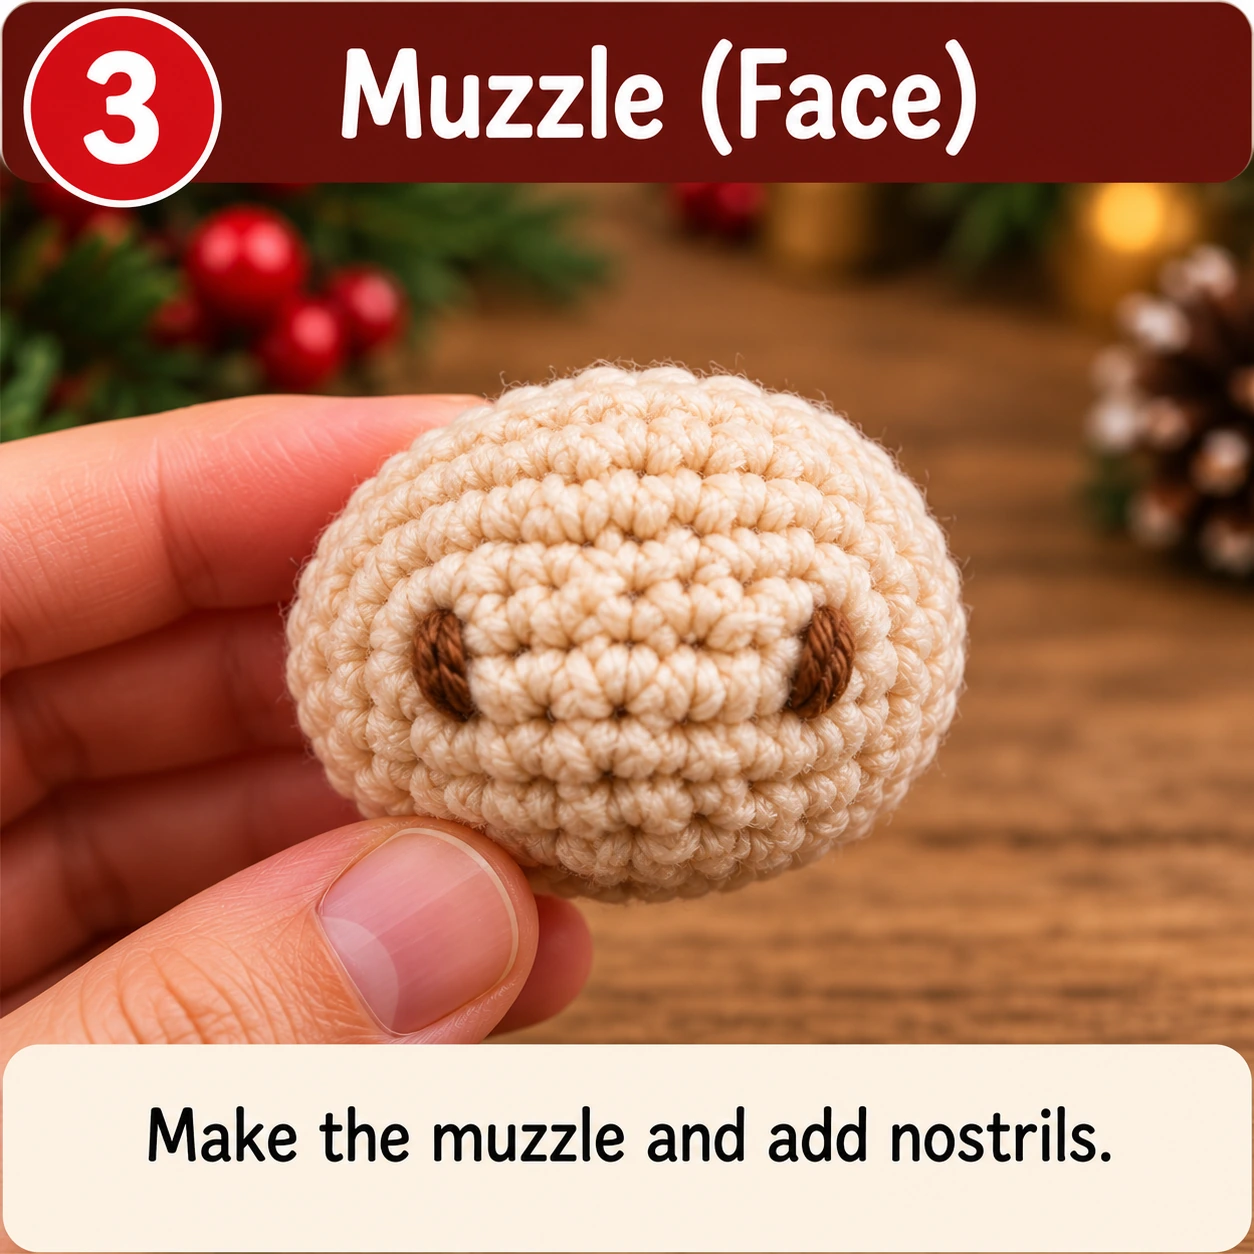
Use cream yarn. Ch 8.
Rnd 1: Starting in the second chain from the hook, 6 sc, 3 sc in the final chain, 5 sc along the opposite side, 2 sc in the final chain. (16)
Rnd 2: Inc, 5 sc, inc in each of the next 3 sts, 5 sc, inc in each of the final 2 sts. (22)
Rnds 3–4: Sc around. (22)
Fasten off with a long sewing tail. Add only a very small amount of stuffing so the muzzle stays shallow. Embroider two short nostrils and a small curved smile if desired.
Make the Ears
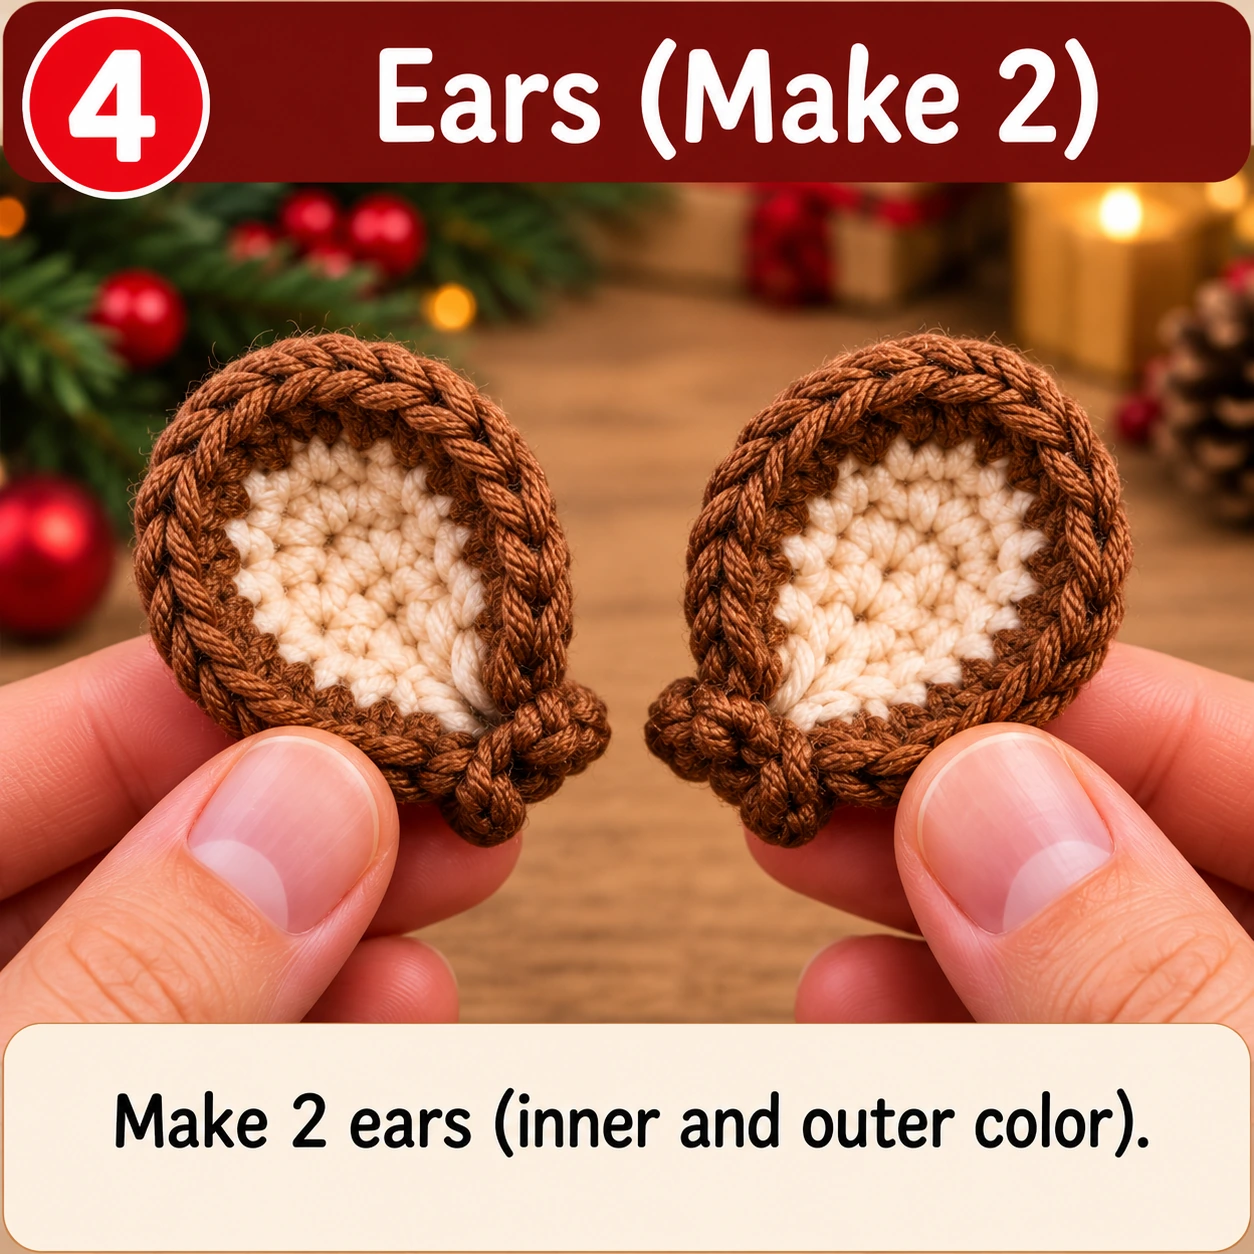
Make 2 outer ears in brown and 2 inner pieces in cream.
Outer Ear
Ch 5. Starting in the second chain: 3 sc, 3 sc in the final chain, 2 sc along the opposite side, 2 sc in the final chain. (10)
Rnd 2: Inc, 2 sc, 3 inc, 2 sc, 2 inc. (16)
Inner Ear
Ch 4. Starting in the second chain: 2 sc, 3 sc in the final chain, 1 sc down the opposite side, 2 sc in the final chain. (8)
Sew the cream inner piece to the brown outer ear. Fold the lower corners slightly inward and secure with one stitch to create a cupped moose-ear shape.
Crochet the Antlers
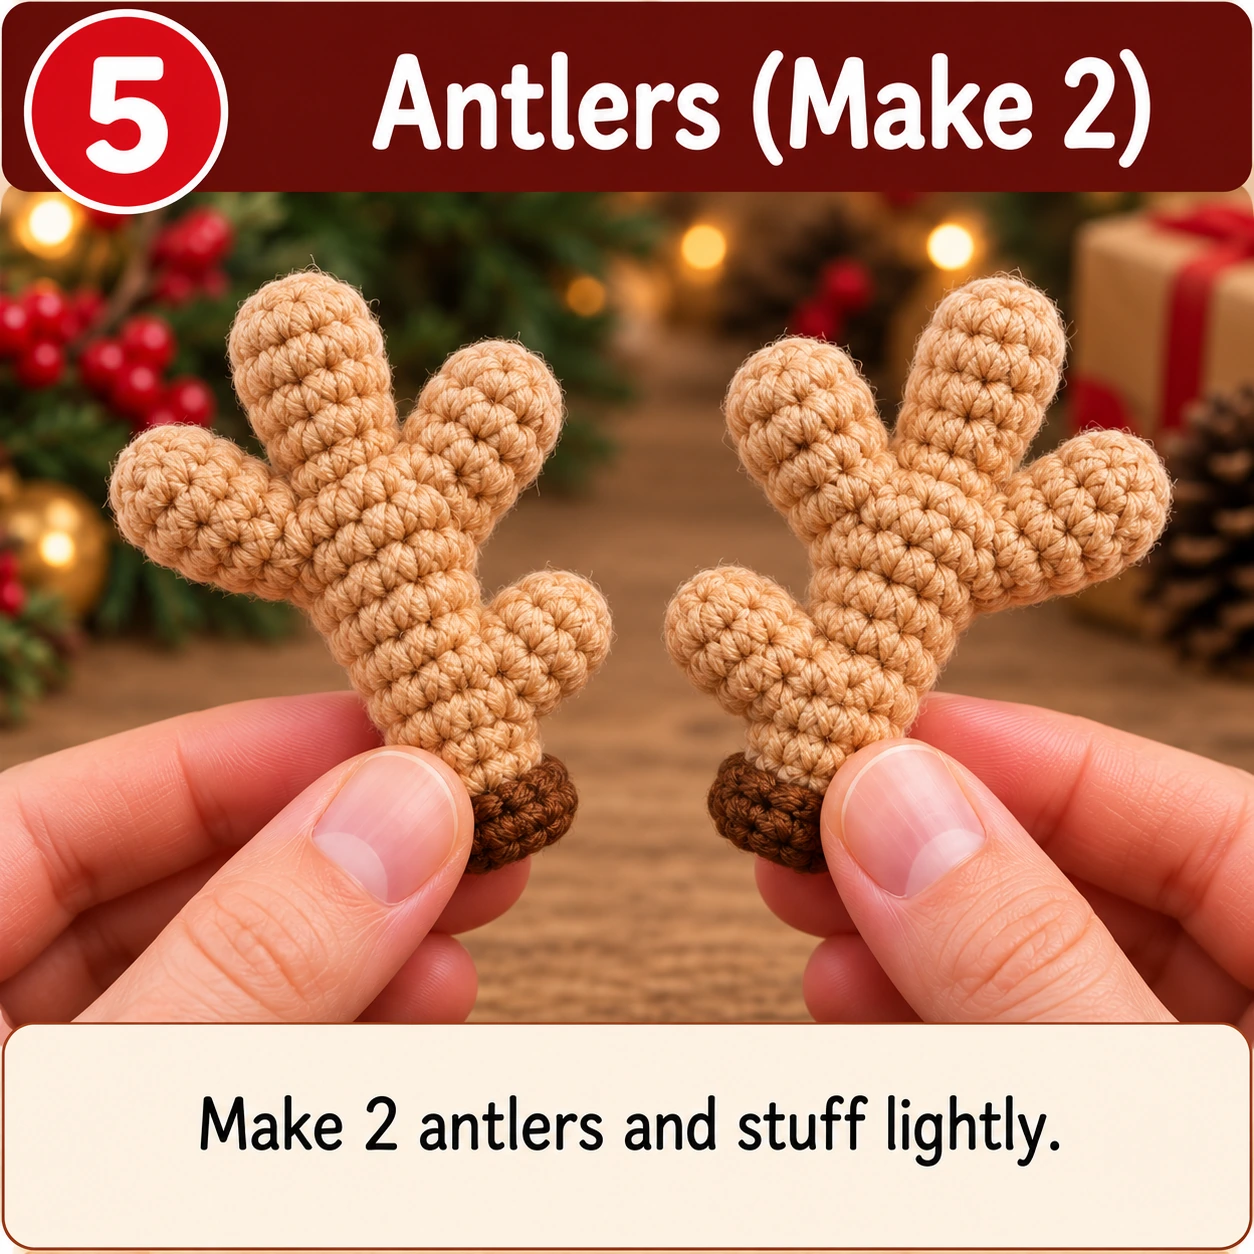
Make 2 using caramel or tan yarn. Each antler uses one stem and two small branches.
Main Stem — Make 2
Rnd 1: 6 sc in MR. (6)
Rnds 2–7: Sc around. (6)
Upper Branch — Make 2
Rnd 1: 5 sc in MR. (5)
Rnds 2–4: Sc around. (5)
Side Branch — Make 2
Rnd 1: 5 sc in MR. (5)
Rnds 2–3: Sc around. (5)
Attach the longer branch near the upper part of the stem and the shorter branch slightly lower, angled outward. Repeat as a mirror image for the second antler.
Make the Four Limbs
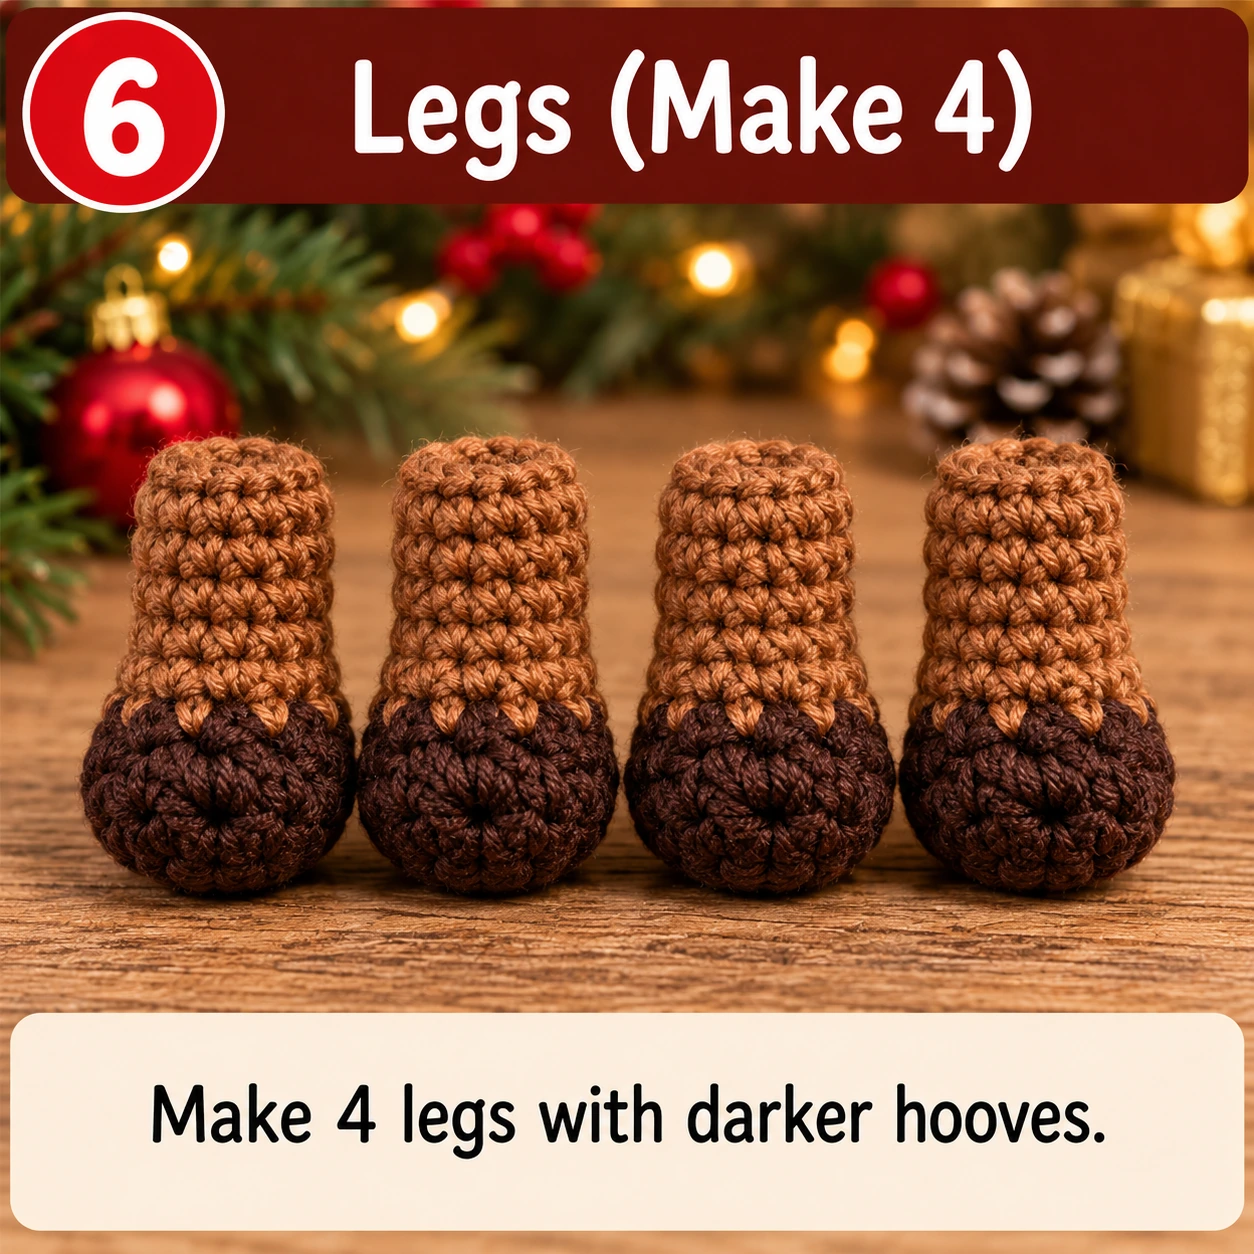
Make 4. Begin with dark brown yarn for the hoof.
Rnd 1: 6 sc in MR. (6)
Rnd 2: Inc around. (12)
Rnd 3: BLO sc around. (12)
Change to medium brown.
Rnds 4–8: Sc around. (12)
Lightly stuff the lower half, flatten the top, and work 6 sc through both layers to close. Leave a long sewing tail.
Assemble the Moose Face
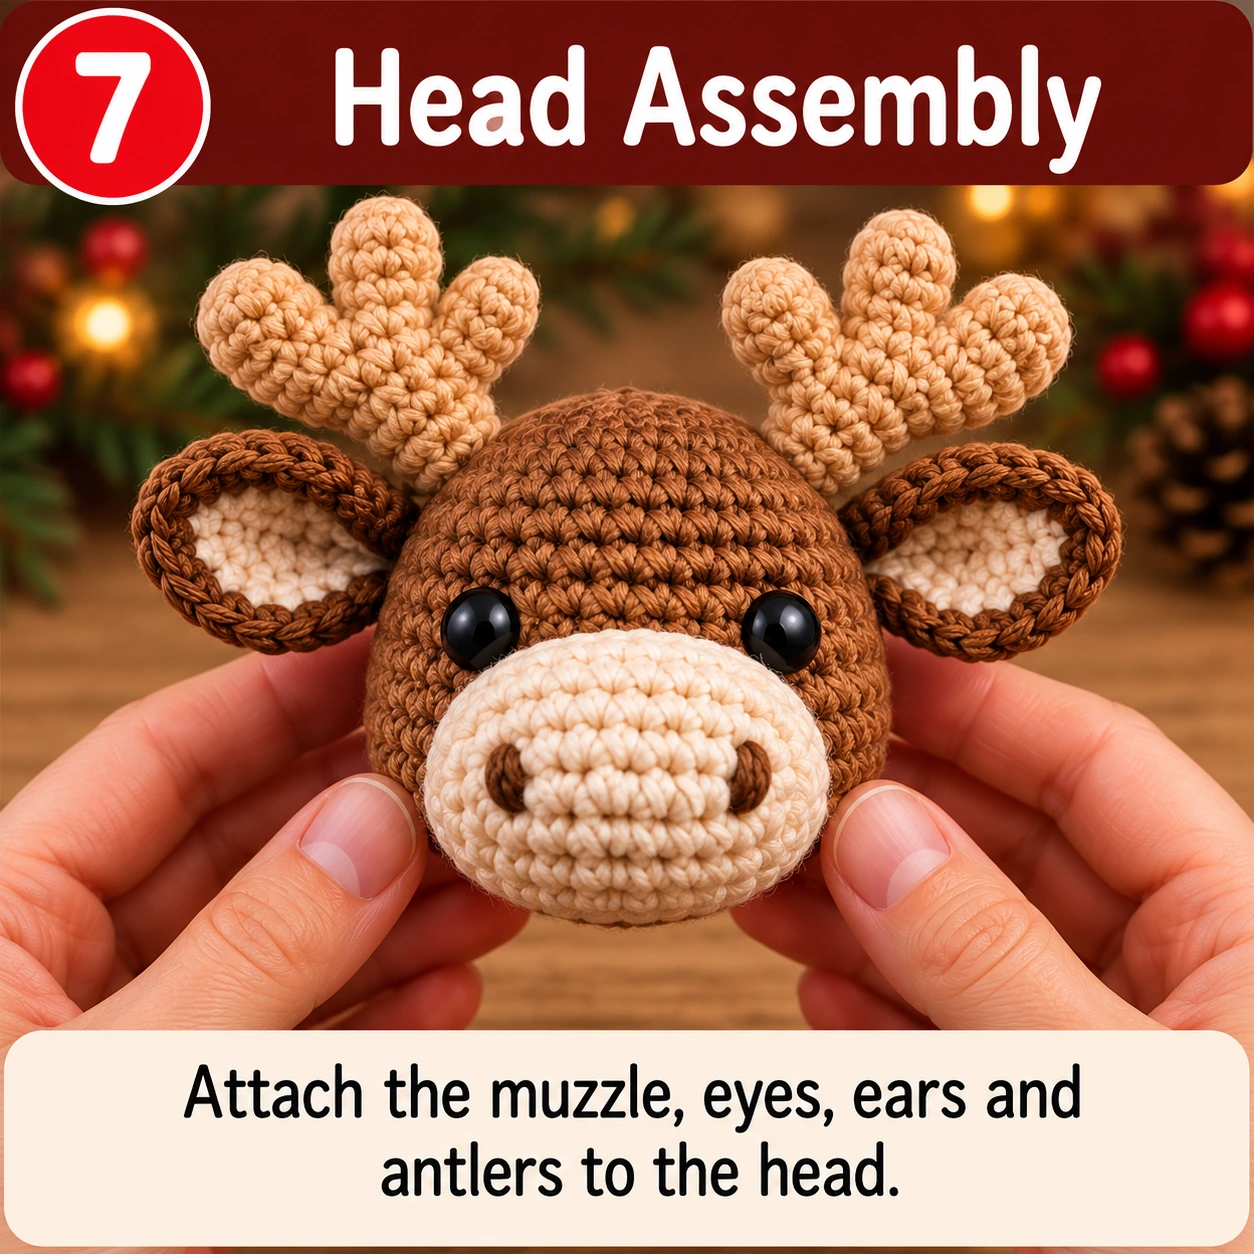
Before sewing permanently, pin the muzzle, both ears, and both antlers. Center the muzzle under the eyes, place the ears slightly lower than the antler bases, and angle the ears outward. Place the antlers above or just behind the ears and secure them with several strong sewing passes.
Add pink cheeks beneath the eyes with embroidery or two tiny 6-sc circles.
Crochet the Santa Hat
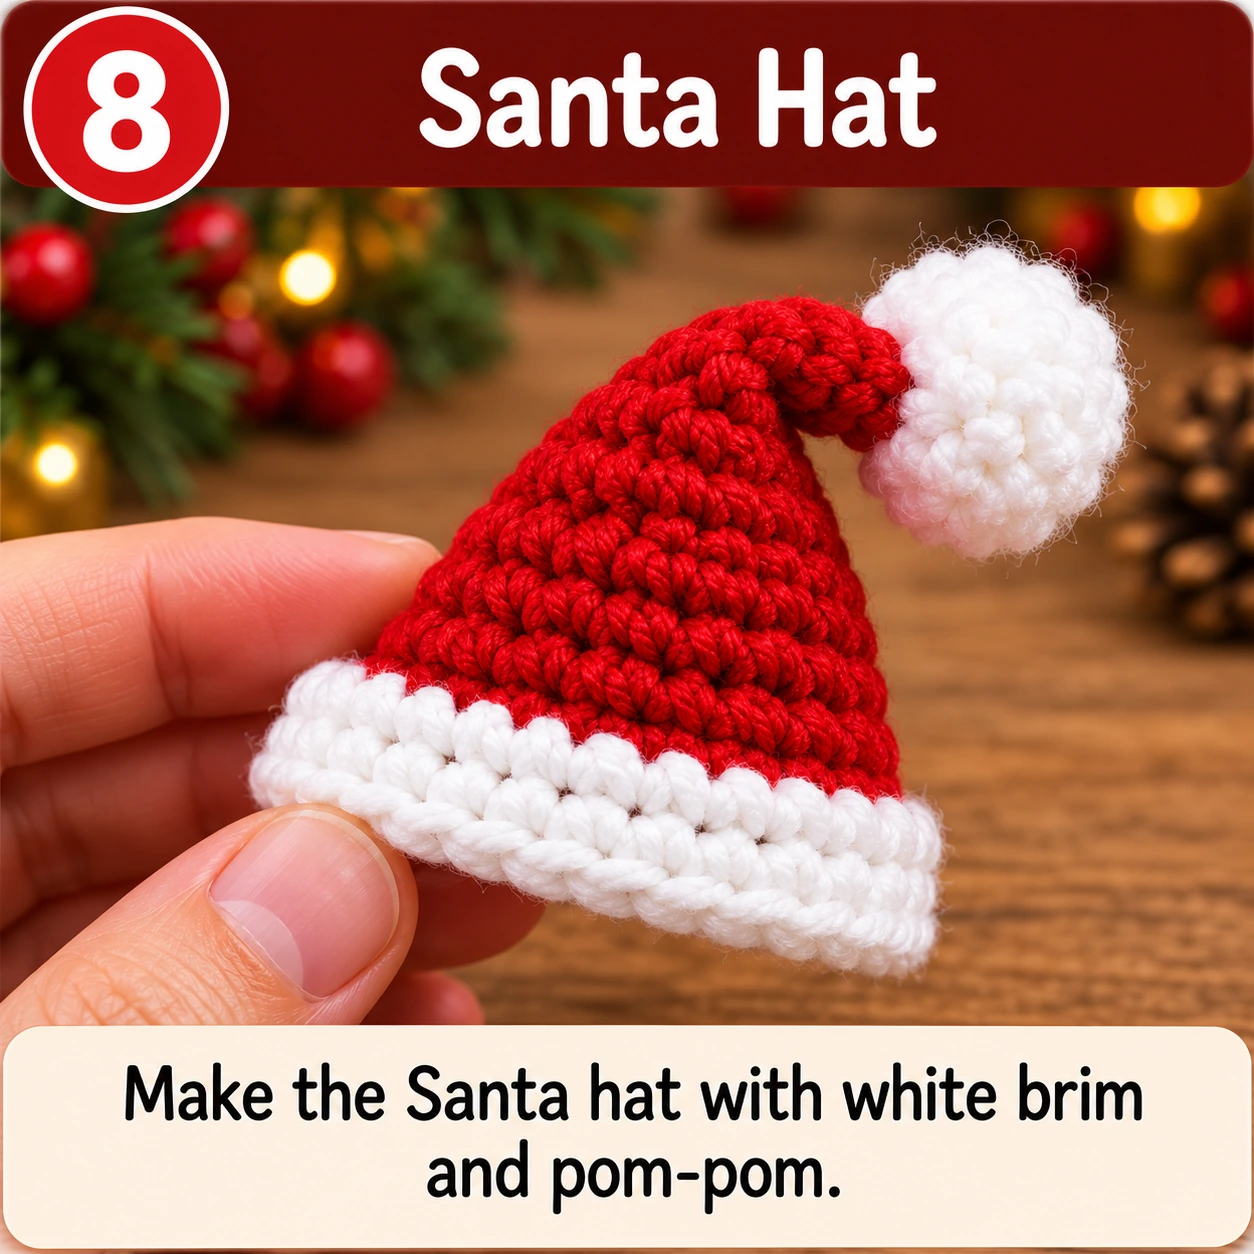
Use red yarn and work from the tip downward.
Rnd 1: 4 sc in MR. (4)
Rnd 2: Sc around. (4)
Rnd 3: (1 sc, inc) × 2. (6)
Rnd 4: Sc around. (6)
Rnd 5: (2 sc, inc) × 2. (8)
Rnd 6: Sc around. (8)
Rnd 7: (3 sc, inc) × 2. (10)
Rnd 8: Sc around. (10)
Rnd 9: (4 sc, inc) × 2. (12)
Rnd 10: Sc around. (12)
Rnd 11: (1 sc, inc) × 6. (18)
Rnd 12: Sc around. (18)
Rnd 13: (2 sc, inc) × 6. (24)
Rnd 14: (3 sc, inc) × 6. (30)
Rnd 15: (4 sc, inc) × 6. (36)
Rnds 16–17: Sc around. (36)
Change to white yarn.
Rnds 18–19: Sc around. (36)
Fasten off and add a small white pom-pom or crocheted ball to the tip.
Crochet the Christmas Scarf
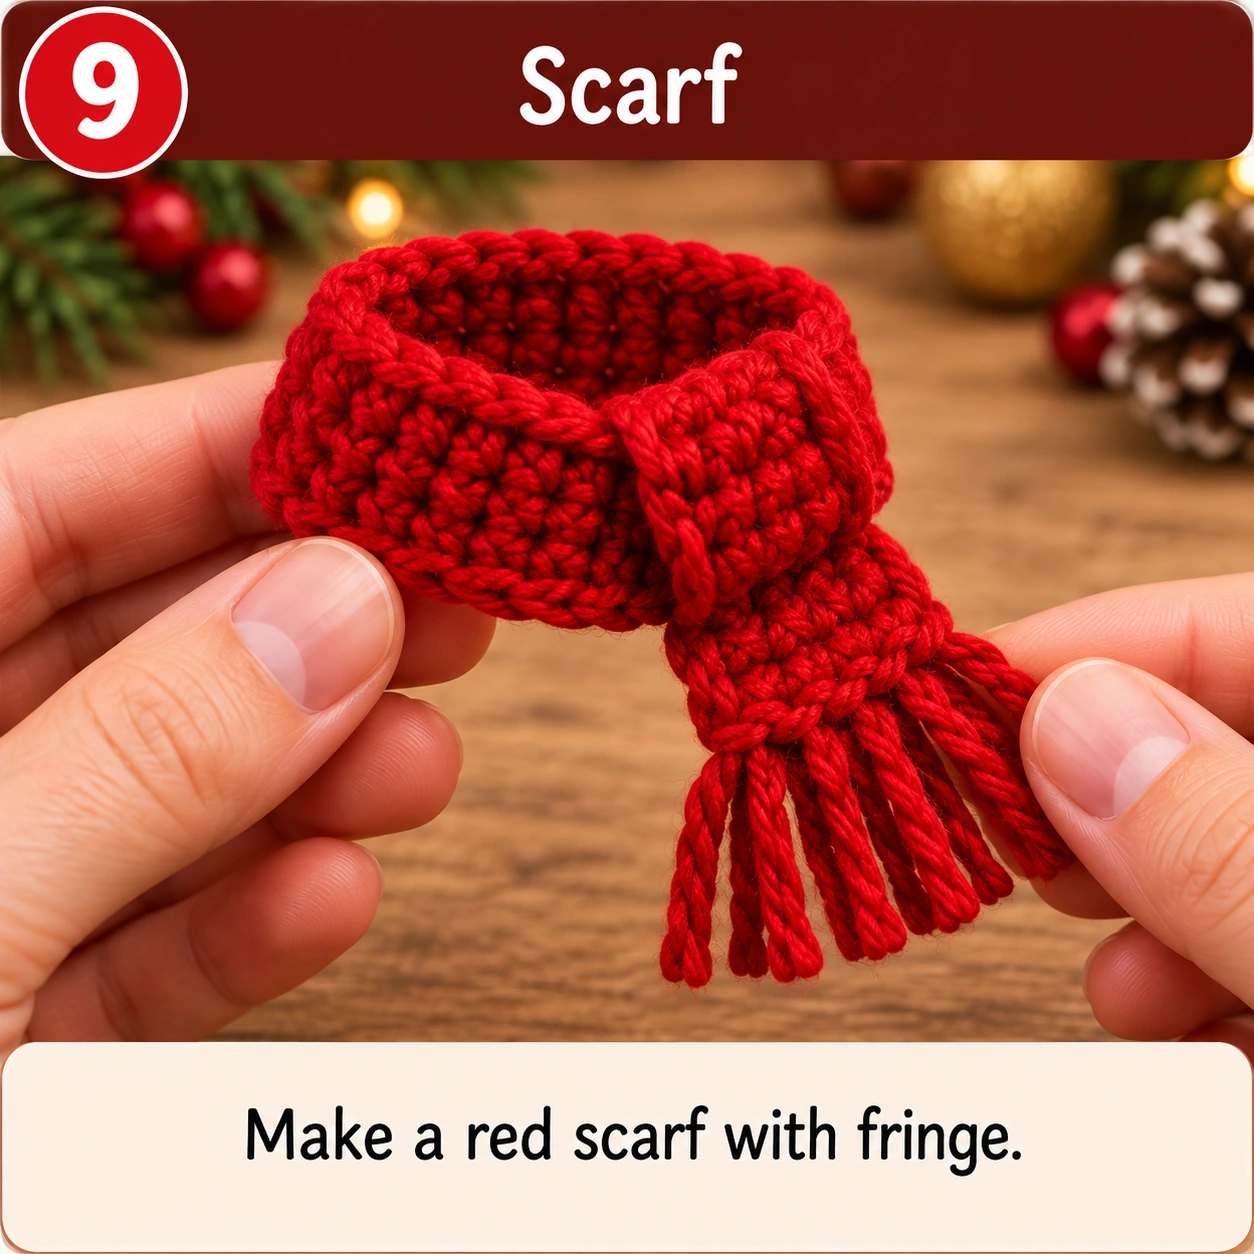
Use red yarn. Ch 66. Starting in the second chain, work 65 hdc across. Ch 1 and turn. Work another row of 65 hdc. Repeat until the scarf has 3–4 rows.
Add fringe to both ends, trim evenly, and wrap the scarf loosely around the neck.
Final Assembly
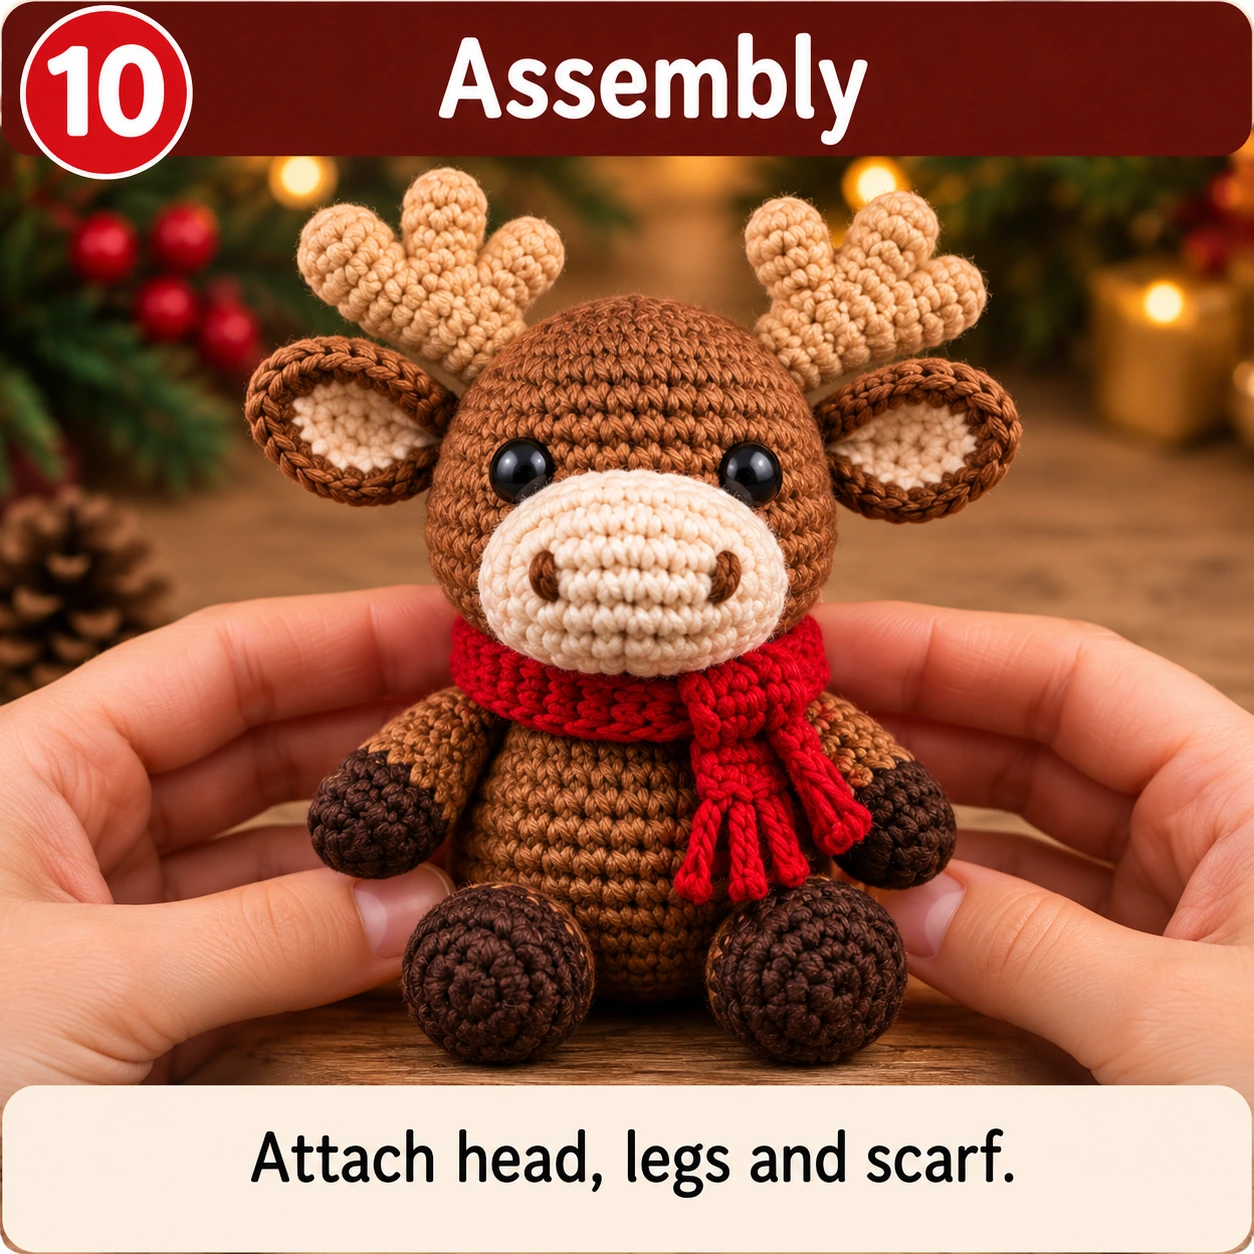
Attach two limbs to the upper sides of the body beneath the neck. Place the remaining two limbs near the lower front so the dark hooves remain visible in the seated pose.
Add the scarf, then position the Santa hat between and slightly in front of the antlers so the antlers stay visible. Secure the hat with small hidden stitches if needed.
Massage the stuffing and adjust the ears, antlers, muzzle, limbs, scarf, and hat until the moose sits evenly.
Christmas Moose Color Ideas
| Style | Body | Muzzle | Antlers | Accessories |
|---|---|---|---|---|
| Classic Christmas | Warm brown | Cream | Caramel | Red/White |
| Woodland | Chestnut | Beige | Tan | Forest green |
| Nordic | Taupe | Ivory | Oatmeal | Burgundy |
| Pastel Christmas | Light beige | Cream | Pale tan | Dusty pink |
| Rustic | Dark brown | Oatmeal | Medium brown | Brick red |
| Snowy Winter | Gray-brown | White | Cream | Ice blue |
Troubleshooting
Why does my moose look more like a reindeer?
Make the antler branches clearly visible and angle them outward. Broad ears and a large cream muzzle also strengthen the moose silhouette.
Why is the head leaning?
The neck may need more stuffing. Add support to the upper body before the head is completely closed.
Why are the antlers falling backward?
Use several tight sewing passes through the antler base and head instead of relying on one stitch.
Why is the muzzle crooked?
Pin it first and use the line between the eyes as your center reference.
Why do the ears point upward?
Pin them more horizontally and fold the lower edge slightly before sewing.
Why does the moose fall forward?
Move the rear legs slightly toward the front and flatten the bottom of the body gently.
Why is the Santa hat hiding the antlers?
Move the brim forward or slightly to one side so the hat sits between the antlers.
Video Help
For visual help with basic moose amigurumi construction, Acacia Copley’s Moose Amigurumi Crochet Tutorial demonstrates separate head, body, nose, ears, limbs, antler pieces, and sewing techniques. Use it as a general technique reference only; follow the written dCrochet stitch counts above for this exact Christmas moose.
Frequently Asked Questions
Is this crochet Christmas moose pattern suitable for beginners?
It is best for a confident beginner to intermediate crocheter who is comfortable with a magic ring, increases, decreases, basic sewing, and attaching small amigurumi parts.
Is the head crocheted separately?
No. The body and head are worked continuously as one main brown piece.
How large is the finished moose?
With DK or light worsted yarn and a 3 mm hook, expect approximately 16–19 cm / 6.3–7.5 inches tall when seated, excluding the tallest part of the antlers and hat.
Can I use plush yarn?
Yes. Plush or bulky yarn will create a much larger moose, so use a larger hook and adjust the safety-eye size to keep the proportions balanced.
Can I embroider the eyes?
Yes. Embroidered eyes are a good alternative when making the toy for a very young child.
Can I make the hat removable?
Yes. Leave the hat unsecured for interchangeable accessories, or attach it with a few hidden stitches for display.
Is this a no-sew pattern?
No. The body and head are one continuous piece, but the muzzle, ears, antlers, limbs, hat, and decorative details require sewing.
This crochet Christmas moose pattern combines a simple seated amigurumi body with the woodland details that make a moose instantly recognizable: a large cream muzzle, wide ears, branched antlers, dark hooves, and cozy Christmas accessories.