Crochet Blobfish Amigurumi Pattern: Easy 7-Step Guide
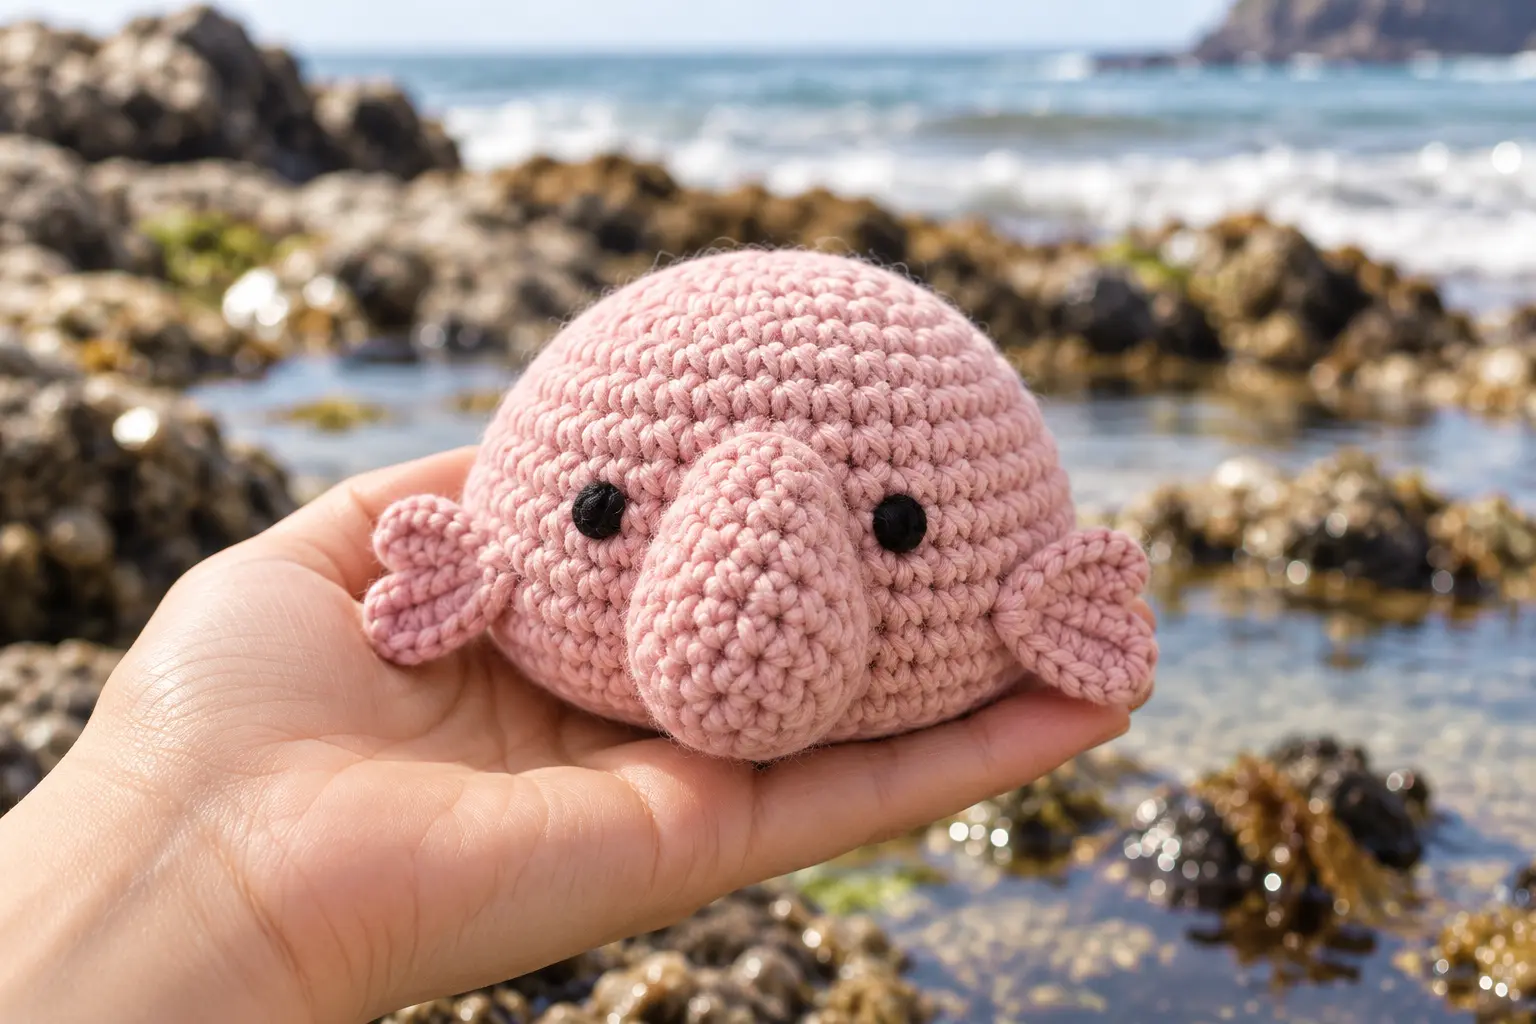
This crochet blobfish amigurumi pattern makes a wonderfully odd, palm-sized sea creature in dusty pink cotton. A low oval body, drooping crochet nose and two tiny fins create the recognizable shape. It is quick enough for a one-evening gift or market-table project.
Crochet Blobfish Amigurumi: Project at a Glance
- Skill: Beginner
- Size: 5 in wide (13 cm)
- Time: 90 minutes
- Yarn: 35 g dusty-pink DK cotton
- Hook: 2.5 mm
Materials and Abbreviations
You also need dark brown embroidery yarn, polyester filling, a marker, needle, pins and scissors. MR means magic ring, sc single crochet, inc increase, dec invisible decrease, ch chain, sl st slip stitch and FO fasten off.
Compare substitute yarns with the Craft Yarn Council Standard Yarn Weight System. The crochet blobfish amigurumi should be worked firmly enough to hide the filling while remaining easy to shape by hand.
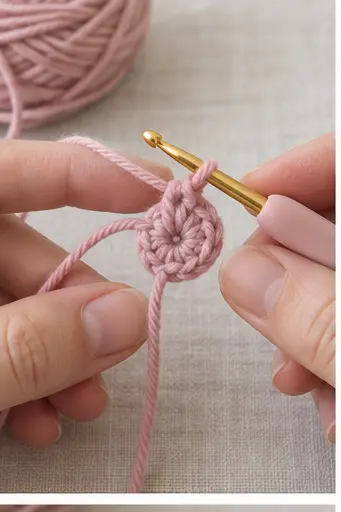
Low Oval Body
- R1: 6 sc in MR. (6)
- R2: Inc around. (12)
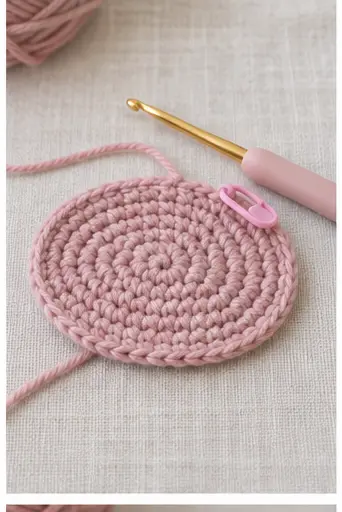
- R3: [Sc, inc] × 6. (18)
- R4: [2 sc, inc] × 6. (24)
- R5: [3 sc, inc] × 6. (30)
- R6: [4 sc, inc] × 6. (36)
- R7–R11: Sc around. (36)
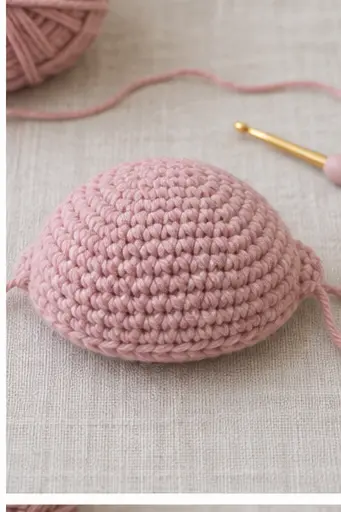
- R12: [4 sc, dec] × 6. (30)
- R13: [3 sc, dec] × 6. (24)
- R14: [2 sc, dec] × 6. (18). Stuff softly and press into a low oval.
- R15: [Sc, dec] × 6. (12)
- R16: Dec × 6. (6). FO and close.
Drooping Nose
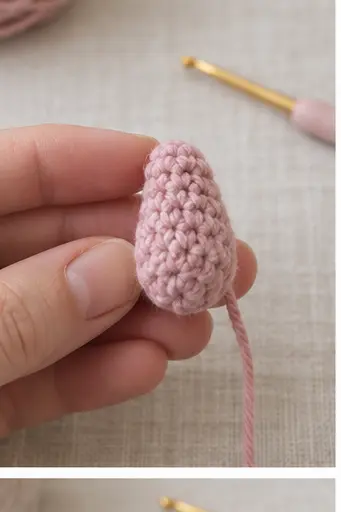
- R1: 5 sc in MR. (5)
- R2: Inc around. (10)
- R3–R5: Sc around. (10)
- R6: [Sc, dec] × 3, sc. (7)
- R7: Sc around. (7). Add a tiny amount of filling, flatten the open edge and FO.
Side Fins — Make Two
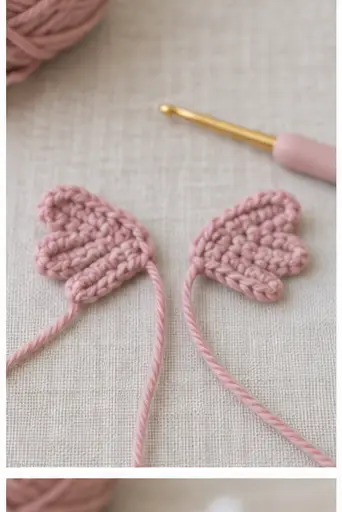
Ch 6. Starting in the second chain, work sc, hdc, 2 dc and 5 dc in the final chain. Continue on the opposite side with 2 dc, hdc and sc. Sl st to finish. FO with a sewing tail.
Face and Assembly
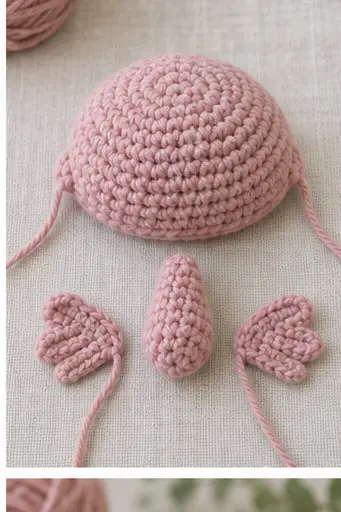
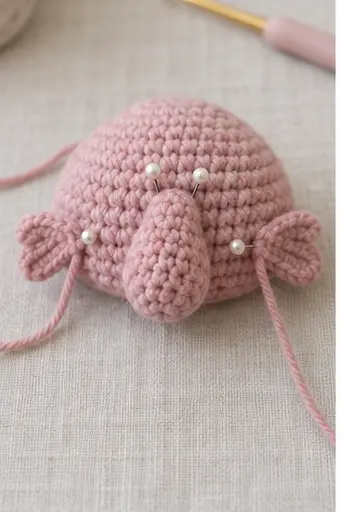
Pin the nose vertically over the center front, with its rounded end hanging slightly below the body midpoint. Sew the upper two-thirds only so the lower section remains free. Attach a fin to each side. Embroider two round eyes one stitch above the widest point of the nose and about ten stitches apart.
Tips and Common Mistakes
- Do not overstuff: the silhouette should be wider than it is tall.
- If the nose points straight out, remove some filling and sew only its upper edge.
- Keep both fins on the same body round.
- Use embroidered eyes for a child-safe finish.
FAQ
Can I make a plush blobfish?
Yes. Use medium chenille yarn and a 4 mm hook, but place a marker in every round because the stitches are difficult to see.
How can I turn it into a keychain?
Use crochet thread or sport-weight cotton and reduce the hook size. Sew a reinforced loop through several body stitches.
Is the pattern worked in joined rounds?
No. Work continuously and move the marker after the first stitch of every round.
How do I keep the body low and wide?
Add filling around the sides instead of packing the center. After closing, press the crochet blobfish amigurumi gently against a flat surface and redistribute the filling with your fingers.
Practise the magic ring first, or explore more quick projects in Crochet Animals.