Little Crochet Tiger Cub Pattern: Easy 7-Step Guide
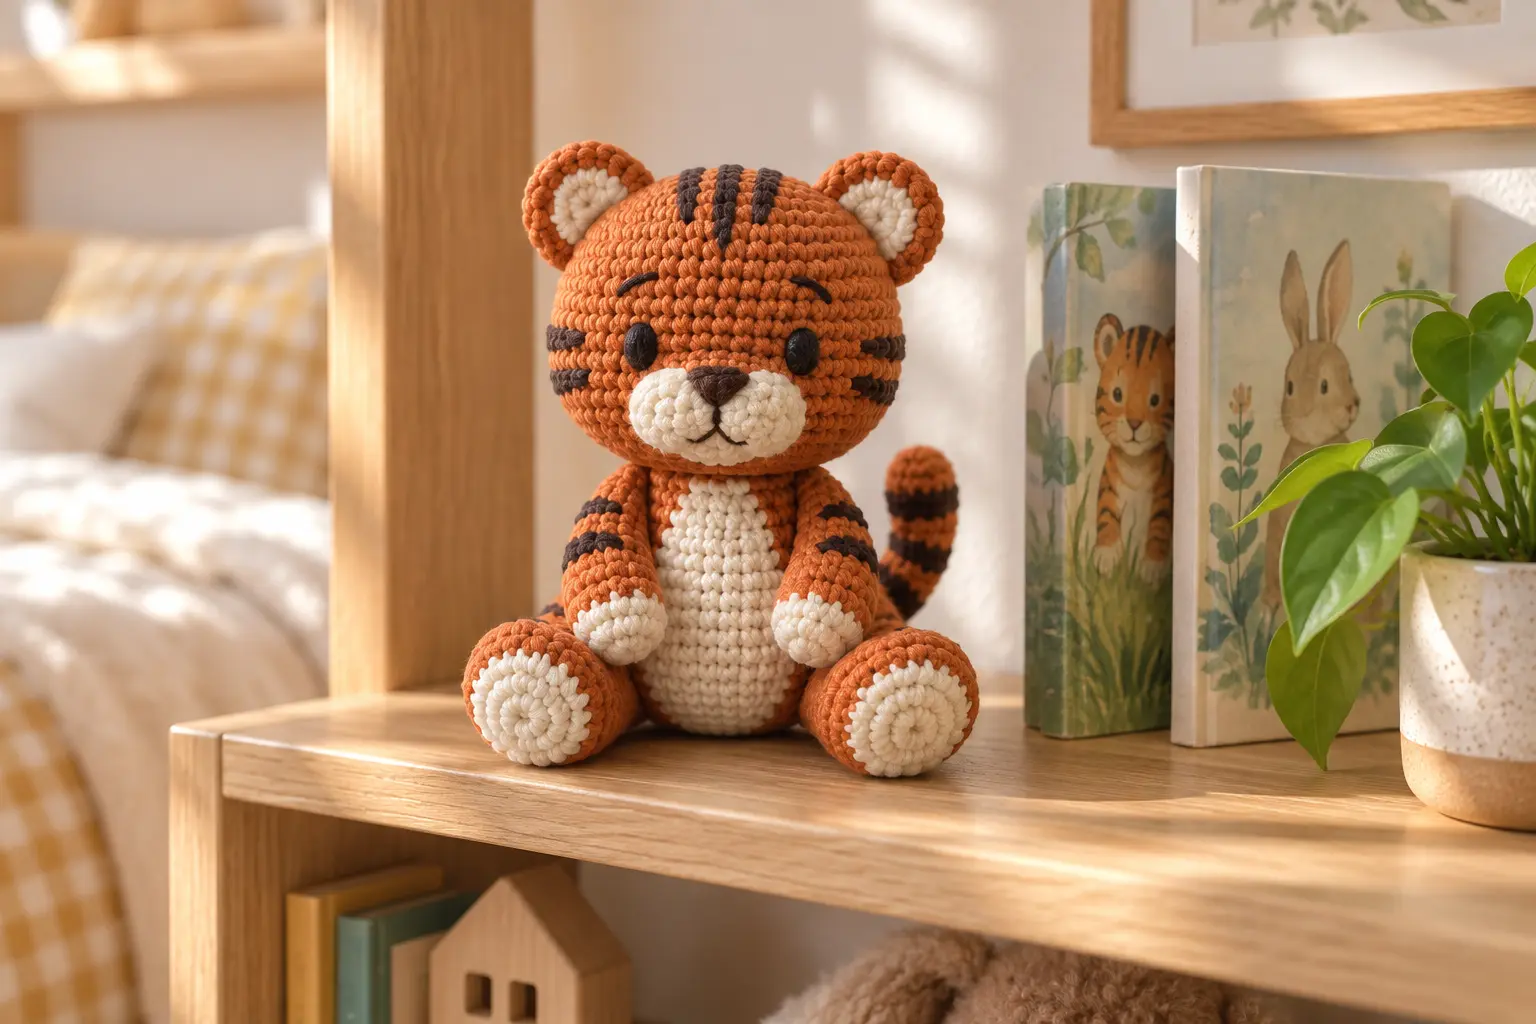
This little crochet tiger cub pattern makes a soft, seated amigurumi about 7–8 inches tall. The construction uses simple single-crochet shapes, embroidered eyes and surface-stitched stripes, so the finished toy is friendly, washable and suitable for confident beginners. The pattern below is an original dCrochet design with stitch totals included at every shaping round.
Little Crochet Tiger Cub Pattern: Project at a Glance
- Skill level: Confident beginner
- Finished size: Approximately 7–8 in (18–20 cm) seated
- Time: 5–7 hours
- Construction: Head, body, arms, legs, ears, muzzle and tail made separately
- Terminology: US crochet terms
Materials
- DK or light-worsted cotton yarn: 70 g burnt orange
- 20 g cream yarn for muzzle, belly, ears and paws
- Small amount of dark brown yarn for stripes and facial embroidery
- 2.5 mm crochet hook
- Polyester fiberfill
- Blunt yarn needle, stitch marker, pins and scissors
Use a hook that produces a firm fabric with no visible gaps. Gauge is not critical, but all pieces must be worked at the same tension.
When substituting yarn, compare the label with the Craft Yarn Council Standard Yarn Weight System. The little crochet tiger cub pattern works best when the hook is slightly smaller than the size normally suggested for that yarn.
Abbreviations
MR magic ring; sc single crochet; inc two single crochets in one stitch; dec invisible decrease; sl st slip stitch; FO fasten off. Work in continuous rounds unless stated otherwise.
Before You Start
Place a marker in the first stitch of each round and move it upward as you work. The number in parentheses is the stitch count after completing that round. Read our magic ring tutorial and crochet animal assembly guide if this is your first amigurumi.
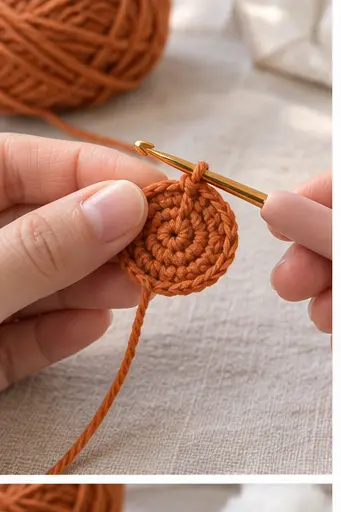
Head
- R1: Work 6 sc in an MR. (6)
- R2: Inc in every stitch. (12)
- R3: [Sc, inc] × 6. (18)
- R4: [2 sc, inc] × 6. (24)
- R5: [3 sc, inc] × 6. (30)
- R6: [4 sc, inc] × 6. (36)
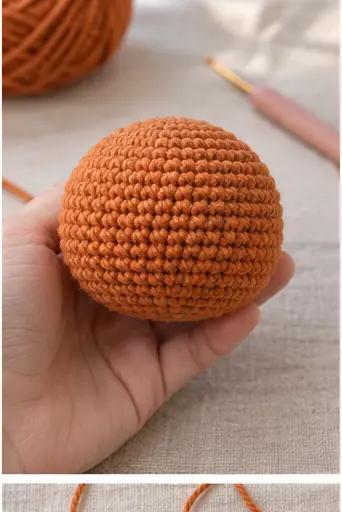
- R7–R12: Sc around. (36)
- R13: [4 sc, dec] × 6. (30)
- R14: [3 sc, dec] × 6. (24)
- R15: [2 sc, dec] × 6. (18)
- Stuff firmly, shaping a smooth sphere.
- R16: [Sc, dec] × 6. (12)
- R17: Dec × 6. (6). FO and close the opening.
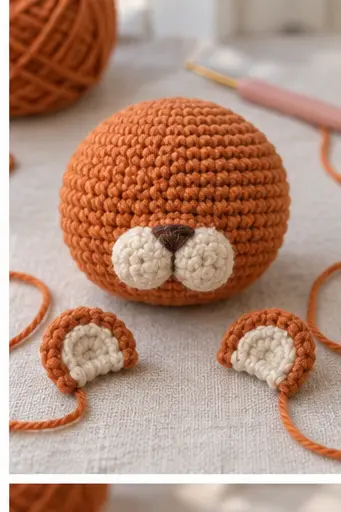
Muzzle and Ears
Muzzle — make two in cream
- R1: 6 sc in an MR. (6)
- R2: Inc around. (12)
- R3: Sc around. (12). FO, leaving a sewing tail.
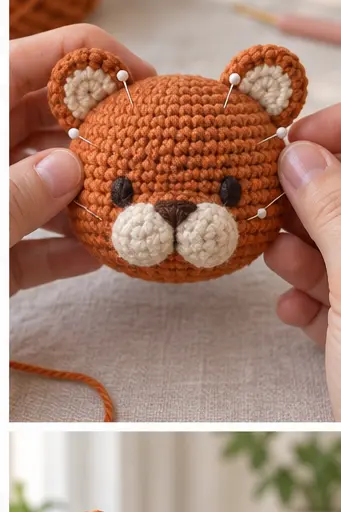
Pin the two muzzle circles side by side between head rounds 10 and 14. Add a pinch of stuffing beneath each half. Sew around the edges, then embroider a small triangular nose and a short curved mouth with dark brown yarn.
Ears — make two
- With cream, work 6 sc in an MR. (6)
- Inc around. (12). Change to orange.
- Sc around. (12). FO with a long tail.
Flatten each circle into a shallow cup. Sew the ears symmetrically between head rounds 4 and 8.
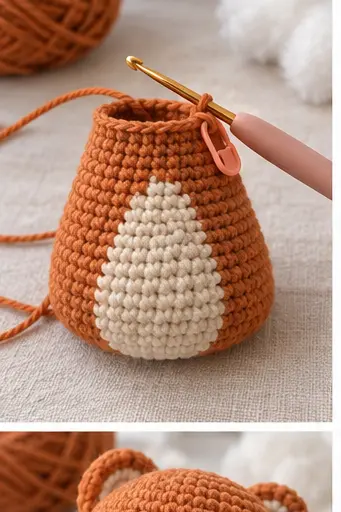
Body
With orange:
- R1: 6 sc in an MR. (6)
- R2: Inc around. (12)
- R3: [Sc, inc] × 6. (18)
- R4: [2 sc, inc] × 6. (24)
- R5: [3 sc, inc] × 6. (30)
- R6–R11: Sc around. (30)
- R12: [3 sc, dec] × 6. (24)
- R13: [2 sc, dec] × 6. (18)
- R14: Sc around. (18). FO, leaving a long tail.
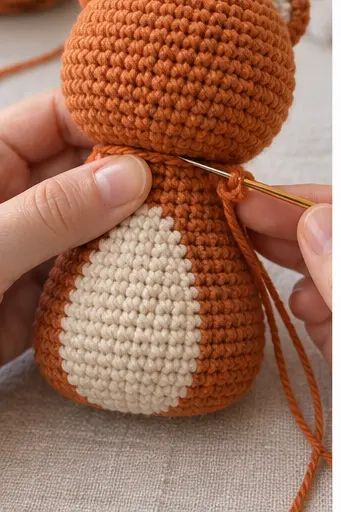
Stuff the body firmly at the base and slightly more softly at the neck. For the cream belly, surface-crochet or embroider a neat oval over the front; this keeps the piece flatter than a separate patch.
Arms, Legs and Tail
Arms — make two
- Start in cream: R1 6 sc in an MR. (6)
- R2: Inc around. (12)
- R3–R4: Sc around. (12). Change to orange.
- R5: Sc around. (12)
- R6: Dec around. (6)
- R7–R10: Sc around. (6). Stuff only the paw; flatten and FO.
Legs — make two
- Start in cream: R1 6 sc in an MR. (6)
- R2: Inc around. (12)
- R3: [Sc, inc] × 6. (18)
- R4–R5: Sc around. (18). Change to orange.
- R6: [Sc, dec] × 6. (12)
- R7–R10: Sc around. (12). Stuff firmly and FO.
Tail
- R1: 6 sc in an MR. (6)
- R2–R17: Sc around. (6)
Alternate orange and dark brown every three rounds if you prefer crocheted stripes. Leave the tail almost unstuffed so it curves naturally.
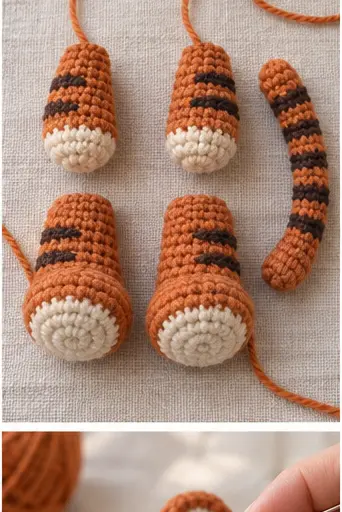
Assembly
- Pin the head centrally over the body opening. Sew through both loops around the neck twice.
- Attach the arms at the upper sides of the body, angled slightly forward.
- Sew the legs low on the body so the tiger sits without tipping.
- Attach the tail at the center back between body rounds 7 and 9.
- Embroider eyes between head rounds 9 and 10, seven stitches apart.
- Add three short forehead stripes and two cheek stripes on each side. Keep every stripe shallow so it does not pull the head out of shape.
Finishing Tips
- Roll the stuffed pieces between your palms to smooth small bumps.
- Use pins to compare the left and right sides from the front, back and top.
- Hide each yarn tail inside the body, then tug gently and trim close.
- For a toy intended for a child under three, use embroidered eyes as shown and avoid detachable buttons or plastic eyes.
Common Mistakes
Visible stuffing: Change to a smaller hook or tighten the working loop. Uneven stripes: Count rounds from the top and mirror each line. Head tipping forward: add a little more stuffing at the neck and repeat the neck seam. Unstable sitting position: move the legs slightly lower and farther apart before securing them.
Frequently Asked Questions
The little crochet tiger cub pattern is easy to personalize, but keep the same increase and decrease totals if you want the parts to remain proportional.
Can I use worsted-weight yarn?
Yes. Use the hook size that creates a dense fabric. The finished tiger will be larger, so you will also need more stuffing.
Can I make the tiger without sewing?
This version uses separate pieces because that gives beginners better control over shape and symmetry. If you want less sewing, embroider the belly and crochet the stripes as color changes.
How do I wash the finished amigurumi?
Spot-clean when possible. If the yarn label permits washing, place the tiger in a mesh bag, use cold water and reshape it while air-drying.
When your tiger is finished, try another small animal from our Crochet Animals collection or return to the complete beginner crochet guide to practise the core stitches.