No-Sew Crochet Bunny Pattern: Easy 7-Step Guide
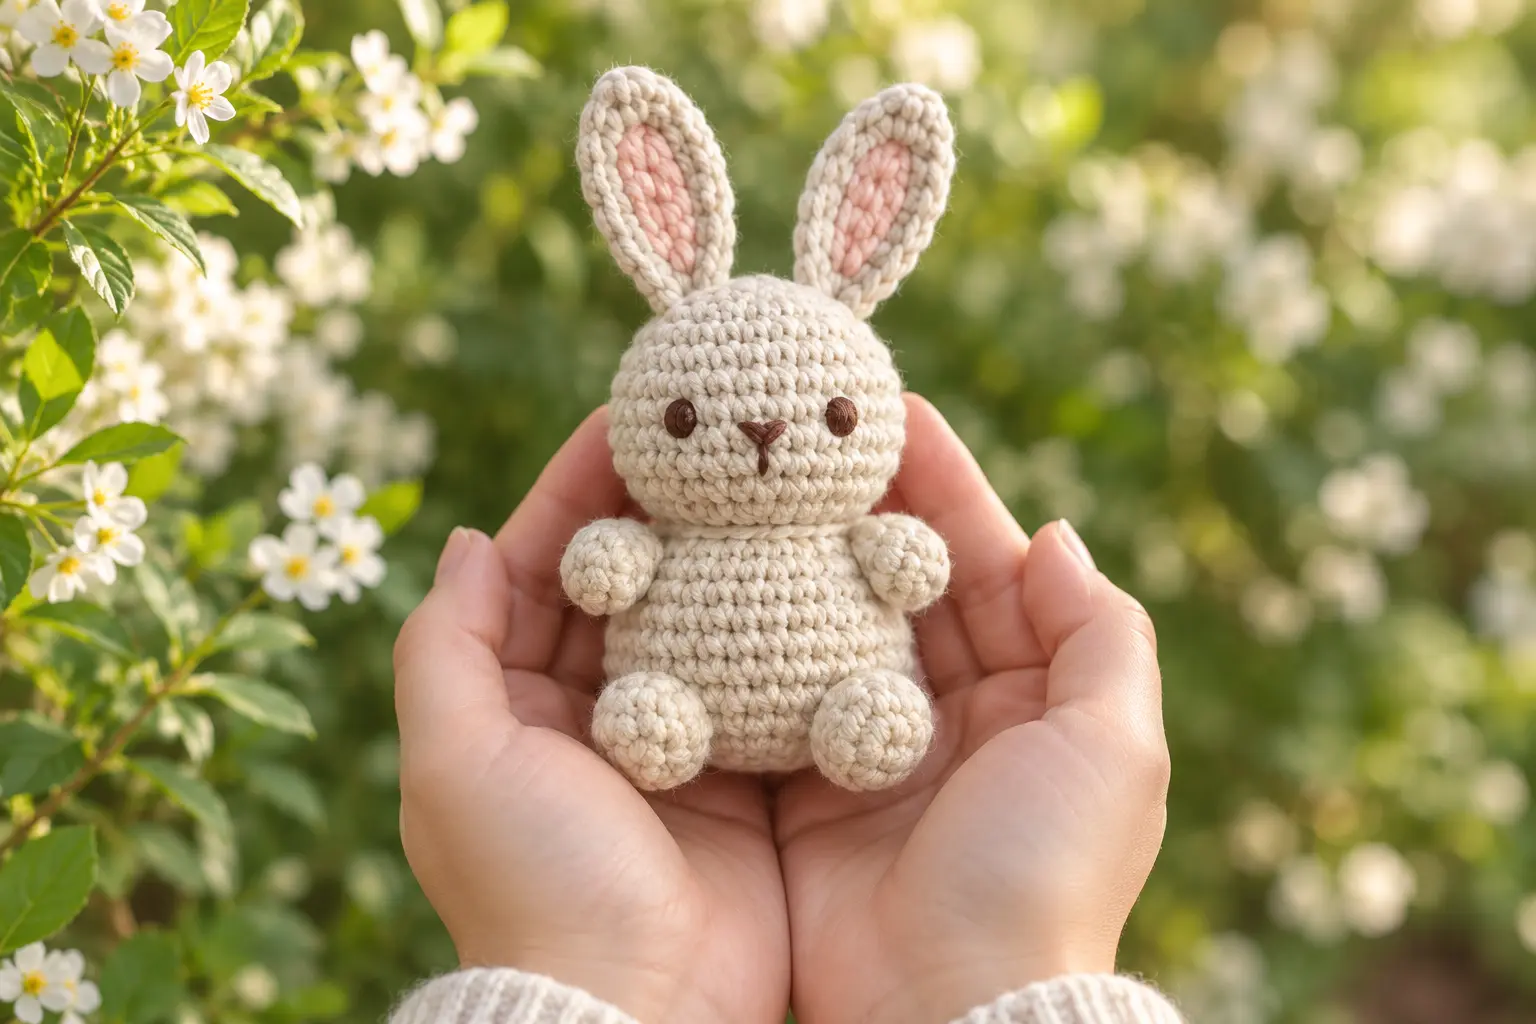
This no-sew crochet bunny pattern turns one small ball of cotton yarn into a palm-sized spring rabbit. The head and body continue as one piece; the ears and bobble limbs are formed while crocheting, and the eyes and nose are embroidered. That means there are no separate pieces to sew on.
No-Sew Crochet Bunny Pattern: Project at a Glance
- Skill: Advanced beginner
- Size: About 4 in (10 cm)
- Time: 90 minutes
- Yarn: DK cotton
- Hook: 2.5 mm
- Terms: US terminology
Materials
- 25 g oatmeal DK cotton yarn
- Small amounts of blush pink and dark brown embroidery yarn
- 2.5 mm hook, stitch marker and scissors
- Polyester fiberfill and a blunt yarn needle
Check yarn substitutions against the Craft Yarn Council yarn-weight standards. The no-sew crochet bunny pattern needs a dense fabric, so choose a hook about 0.5–1 mm smaller than the yarn label suggests.
Abbreviations
MR: magic ring; sc: single crochet; inc: two sc in one stitch; dec: invisible decrease; ch: chain; hdc: half double crochet; dc: double crochet; bobble: five unfinished dc closed together; FO: fasten off.
Head and Body
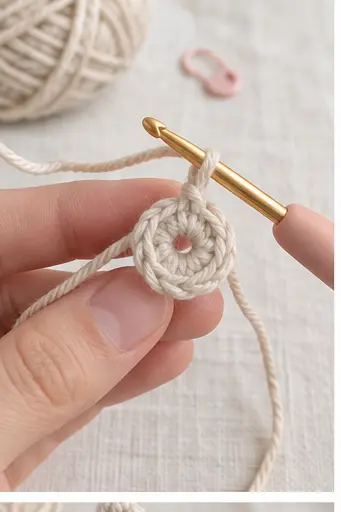
- R1: 6 sc in MR. (6)
- R2: Inc around. (12)
- R3: [Sc, inc] × 6. (18)
- R4: [2 sc, inc] × 6. (24)
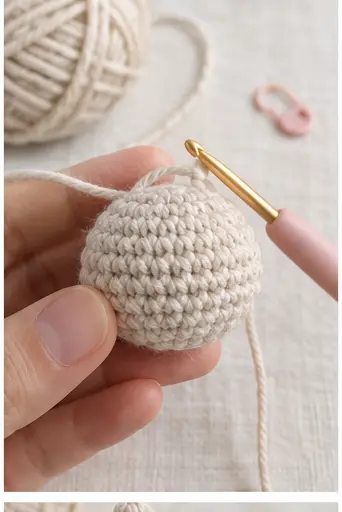
- R5–R9: Sc around. (24)
- R10: [2 sc, dec] × 6. (18)
- R11: [Sc, dec] × 6. (12). Stuff the head firmly.
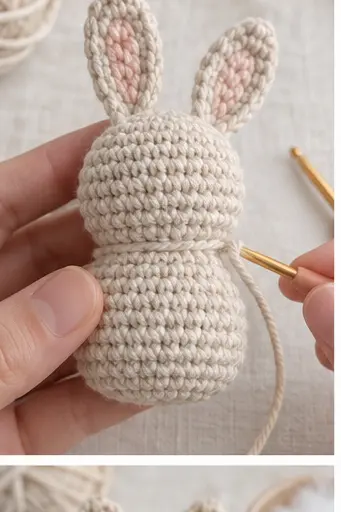
- R12: In the front loops only, inc around. (24). This begins the body beneath the head.
- R13–R17: Sc around. (24)
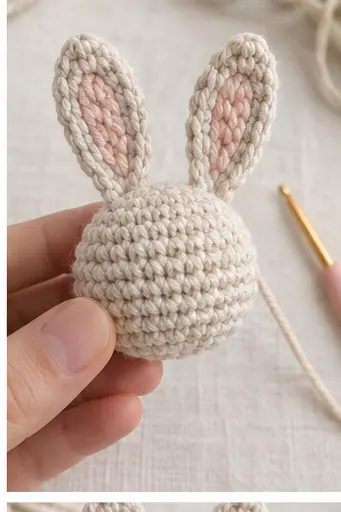
Ears Made Directly on the Head
Hold the bunny with the magic-ring center facing upward. Join yarn at head round 3. For each ear, ch 9; starting in the second chain, work 2 sc, 3 hdc, 2 dc and 1 hdc. Slip stitch into the next head stitch. Repeat three stitches away for the second ear. Surface-stitch blush yarn through the center of each ear.
Bobble Arms and Legs
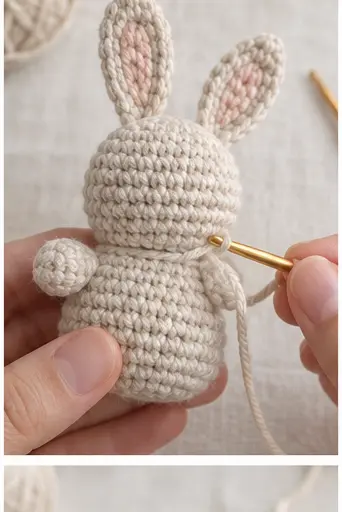
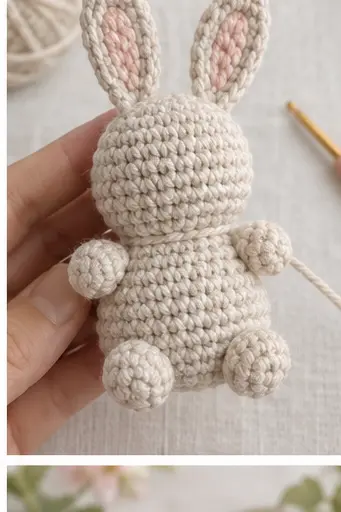
On body R14, work 6 sc, one five-dc bobble, 10 sc, one bobble and 6 sc. Push both bobbles outward. On R18, place the two leg bobbles directly below the arms: 4 sc, bobble, 12 sc, bobble, 6 sc.
Stuff and Close
- R19: Sc around. (24)
- R20: [2 sc, dec] × 6. (18)
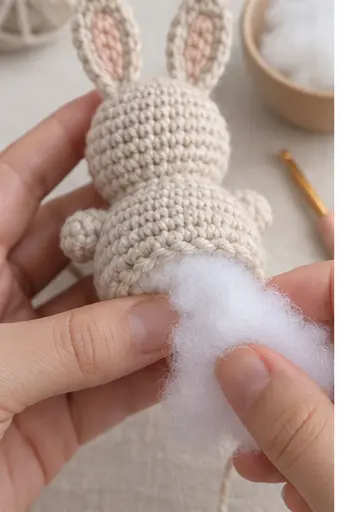
- Add stuffing in small pieces, keeping the base flat.
- R21: [Sc, dec] × 6. (12)
- R22: Dec × 6. (6). FO and close.
For the tail, join yarn at the center back, work one six-dc bobble and slip stitch into the same space.
Embroider the Face
Place the eyes between head rounds 7 and 8, five stitches apart. Make each eye from three short vertical stitches. Add a small V-shaped nose one round lower and a single short mouth line. Hide all tails inside the head.
Tips and Common Mistakes
- If the neck stretches, pass a strand through the unused back loops of R12 and pull gently.
- If one ear twists, steam it lightly without touching the iron to the yarn.
- Count stitches after every bobble; its closing chain does not count as a stitch.
- Use embroidered facial features for children under three.
FAQ
This no-sew crochet bunny pattern is designed as a fast, low-risk first amigurumi. Read the complete round before starting it and confirm the stitch count before moving the marker.
Is this bunny completely no-sew?
Yes. The main piece, ears, limbs and tail are crocheted in place. Only facial embroidery and weaving in ends require a yarn needle.
Can I use plush yarn?
You can, but the stitch locations become harder to see. Try cotton first, then use a 4–5 mm hook with medium plush yarn.
How can I make it larger?
Use thicker yarn and a matching smaller-than-label hook. Do not add random increase rounds unless you also recalculate the decreases.
Why does my bunny lean?
Check that the two leg bobbles sit on the same round and place slightly more filling at the back of the base. Roll the body gently between your hands before closing the last six stitches.
Review the magic ring tutorial, then browse more beginner crochet animal patterns.