Crochet Ice Cream Cone Keychain Pattern
Crochet a mint ice cream keychain with one scoop and a tan cone. Includes shaping, light filling, seam counts and an independent hanging loop.
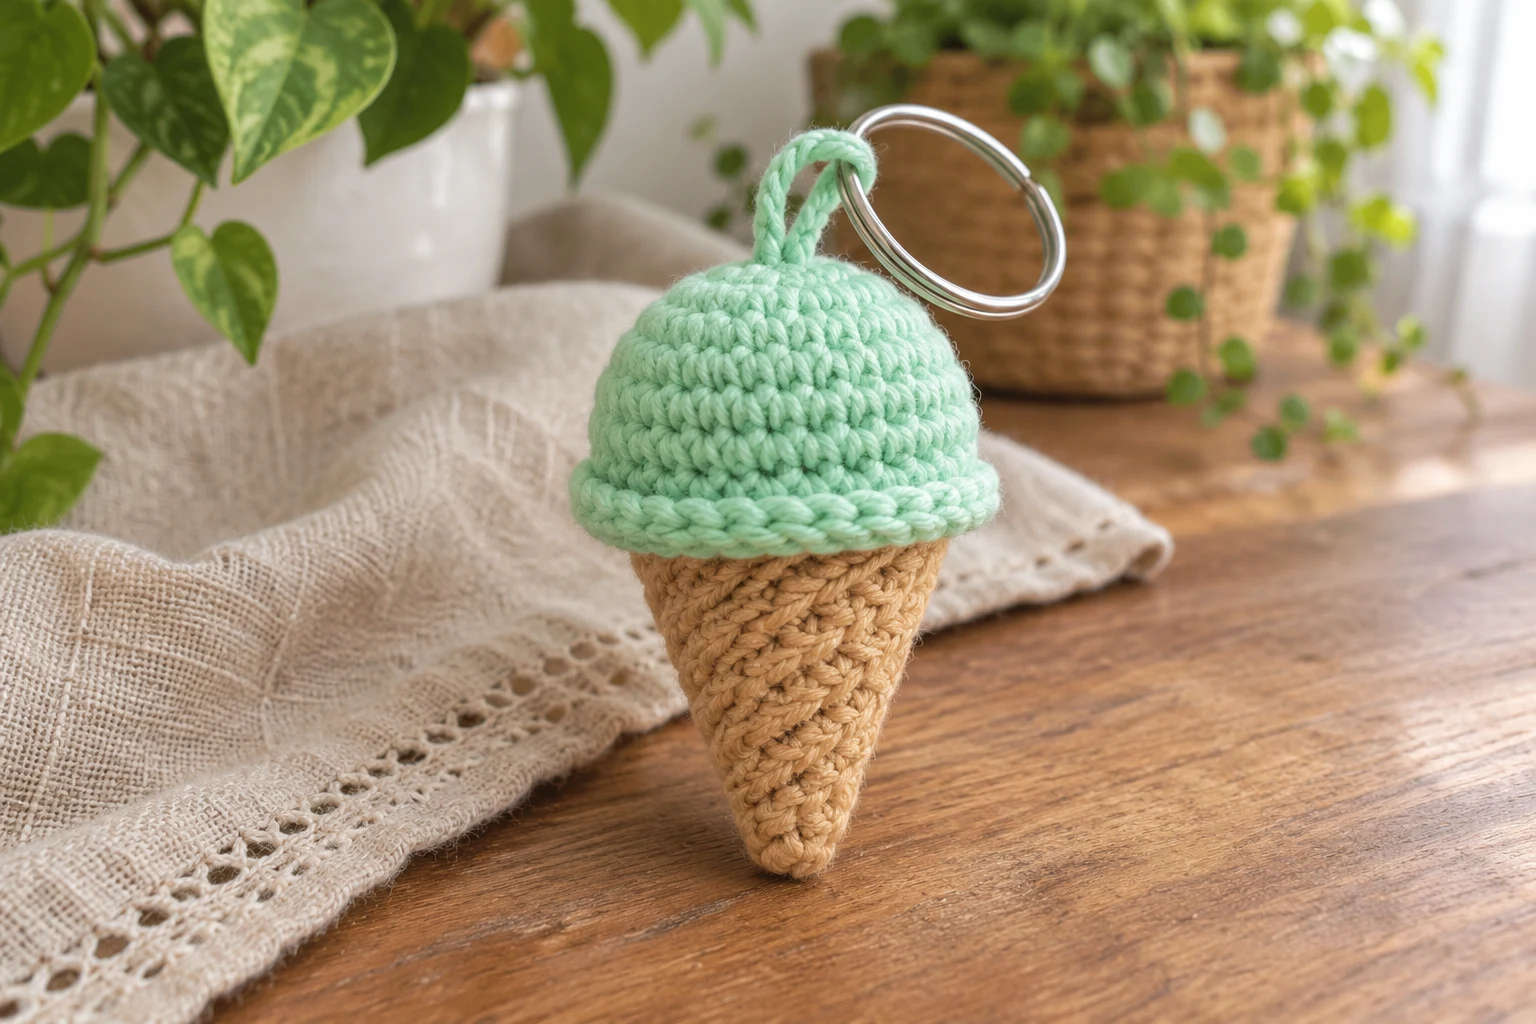
This crochet ice cream keychain joins a mint dome to a tapered tan cone. The scoop has a smooth rim and the cone carries short light-tan diagonal embroidery. No cherry, face or extra scoop is part of the construction.
Crochet the tan cone from four tip stitches to an 18-stitch mouth, then make a mint scoop that expands to 24 and narrows to 18. Sew the two open rims together after light filling and attach a short ring loop directly through the scoop fabric.
Project Overview
| Detail | Information |
|---|---|
| Terms | US crochet |
| Skill | Confident beginner with sewing |
| Construction | Crochet the tan cone from four tip stitches to an 18-stitch mouth, then make a mint scoop that expands to 24 and narrows to 18. Sew the two open rims together after light filling and attach a short ring loop directly through the scoop fabric. |
| Testing | Arithmetic reviewed; physical sample not tested |
Project views are generated illustrations of the intended construction. Sizes, yarn use and attachment performance remain unverified on a physical sample.
Materials
| Material | Suggested specification |
|---|---|
| Cotton | About 10–15 g tan and mint with a scrap light tan; estimates |
| Hook | 2.5 mm or suitable size to hide filling |
| Filling | Small amount added gradually |
| Hardware | One plain silver split ring |
| Tools | Needle, scissors and stitch marker |

Size and Gauge
The intended total height is about 5–6 cm, unmeasured. Both open rims have eighteen stitches, but matched counts do not establish equal physical widths if yarns differ. Use one cotton family and hook, and compare the two relaxed mouths before sewing.
Abbreviations and Working Notes
| Term | Meaning |
|---|---|
| ch | Chain |
| sc | Single crochet |
| sl st | Slip stitch |
| inc | 2 sc in one stitch |
| dec | Invisible sc decrease over 2 stitches |
| MR | Magic ring |
| dc | Double crochet |
US terms. Work cone and scoop in continuous spiral rounds with a moving first-stitch marker. Neither piece uses joining chains.
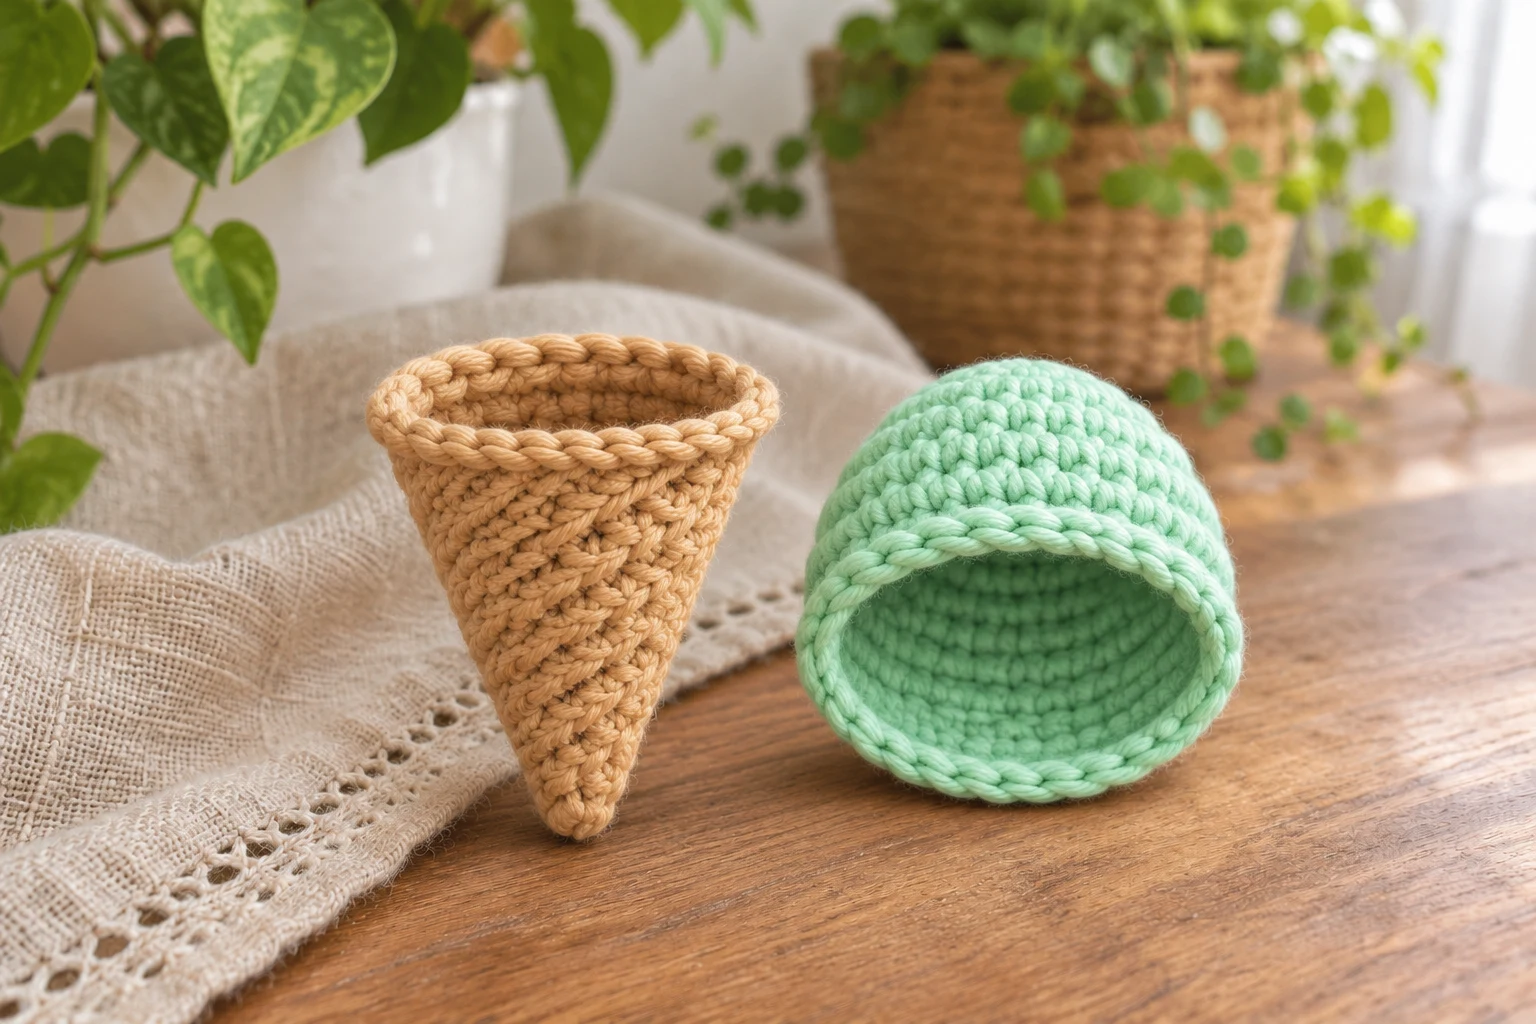
The cone starts at its blunt lower tip. The scoop starts at its upper dome; both leave their last eighteen-stitch rims open for the seam.
The ring hanger anchors into mint body stitches, independently of the rim seam. No beads, hard tip or plastic features are included.
Start the Tan Cone Tip
| Round / stage | Instructions | Count / check |
|---|---|---|
| 1 | 4 sc in MR | 4 |
| 2 | Sc around | 4 |
| 3 | (Sc, inc) × 2 | 6 |
| 4 | Sc around | 6 |
| 5 | (Sc, inc) × 3 | 9 |
| 6 | Sc around | 9 |
Close the starting ring and secure its tail inside. The four-stitch beginning makes a small blunt tip, not a sharp reinforced point. Avoid packing this end tightly with filling.

Widen the Cone to Eighteen Stitches
| Round / stage | Instructions | Count / check |
|---|---|---|
| 7 | (2 sc, inc) × 3 | 12 |
| 8 | Sc around | 12 |
| 9 | (3 sc, inc) × 3 | 15 |
| 10 | Sc around | 15 |
| 11 | (4 sc, inc) × 3 | 18 |
| 12 | Sc around; leave open | 18 |
Add small tufts of filling as the cone widens, leaving the mouth accessible for joining. The three increases per shaping round stay evenly spaced. Fasten off with a long tan sewing tail but do not close the mouth.
Make the Smooth Mint Scoop
| Round / stage | Instructions | Count / check |
|---|---|---|
| 1 | Mint: 6 sc in MR | 6 |
| 2 | Inc around | 12 |
| 3 | (Sc, inc) × 6 | 18 |
| 4 | (2 sc, inc) × 6 | 24 |
| 5–9 | Sc around five rounds | 24 each |
| 10 | (2 sc, dec) × 6 | 18 |
| 11 | Sc around; leave open | 18 |
Fill the upper dome evenly before the opening narrows. Keep a smooth rim without shell edging, drips or an added collar. Set the open scoop over the cone and compare the two eighteen-stitch mouths before sewing.
Embroider Cone Texture and Join Rims
| Round / stage | Instructions | Count / check |
|---|---|---|
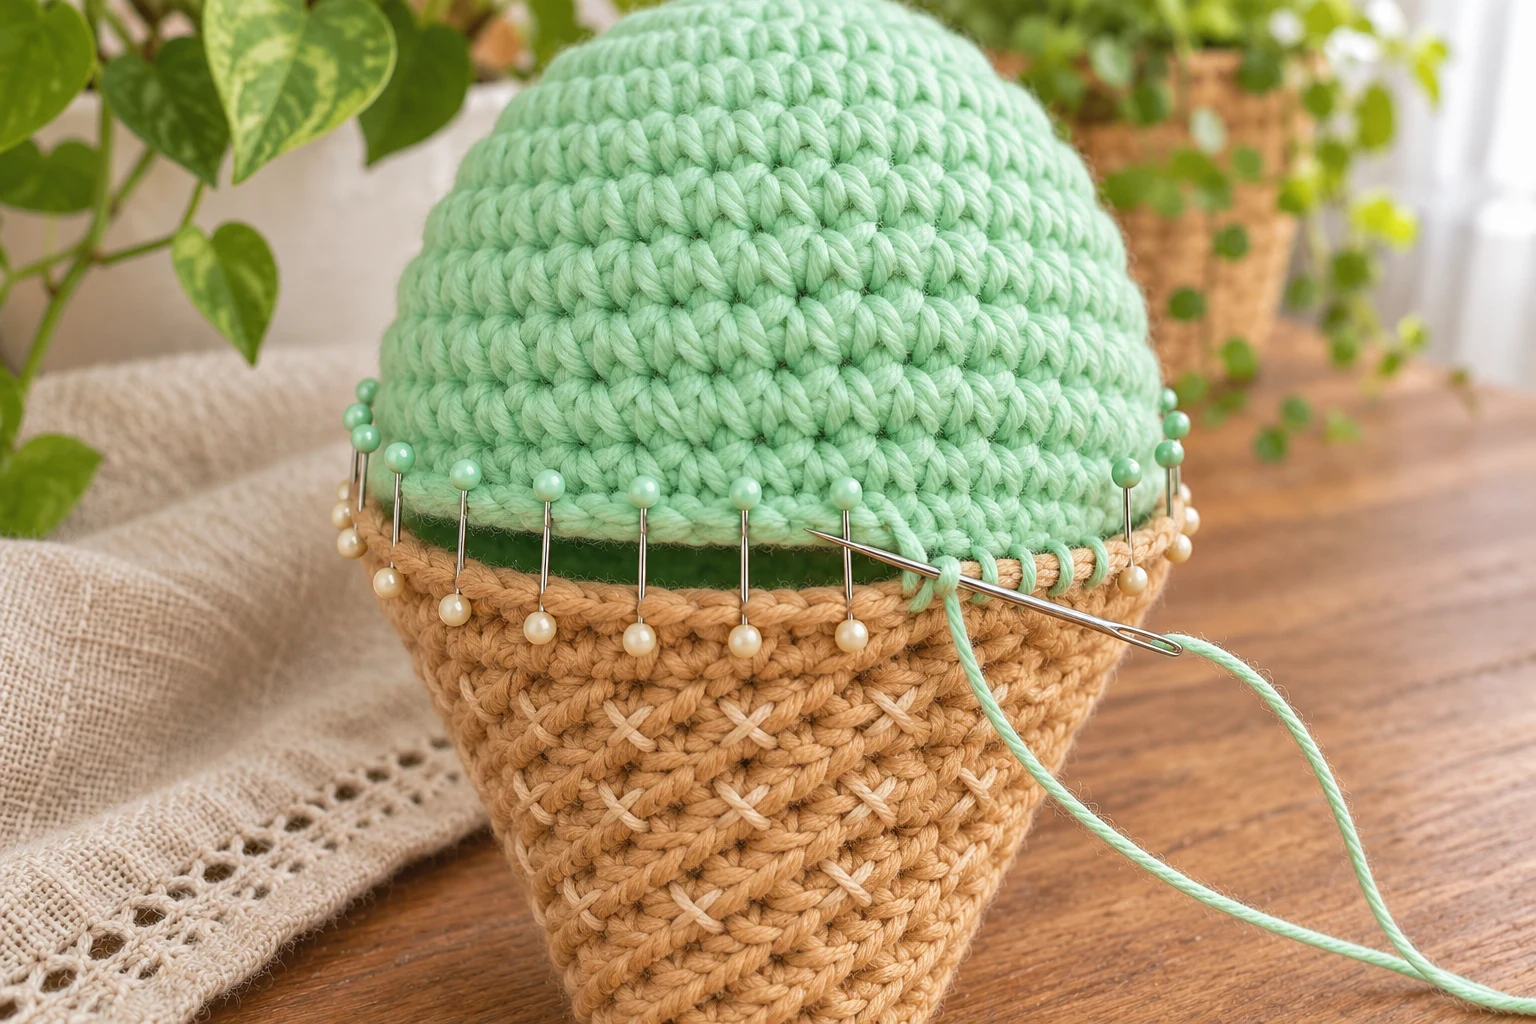
| Cone texture | Use short light-tan diagonal stitches across neighboring tan fabric | Short evenly spaced diagonals crossing in both directions |
| Rim seam | Match scoop and cone open edges | 18 paired positions |
| Filling | Sew most of seam, adjust filling through last gap, then close | Smooth neck join |
The texture is surface embroidery, not a crochet waffle stitch. Each diagonal spans only two or three neighboring sc stitches; bury ends inside the cone and avoid long exposed loops. Sew all eighteen rim pairs with small neat passes. Do not cinch the cone mouth inward or leave filling visible below the scoop.
Anchor the Ring into the Mint Dome
| Round / stage | Instructions | Count / check |
|---|---|---|
| Loop | Pass doubled mint yarn through split ring | Short hanger |
| Anchors | Sew ends through separate scoop fabric paths near Rounds 2–3 | Spread into several stitches |
| Inspection | Check ring gap, dome anchors and rim seam | No loose yarn |
The hanger should not depend on the scoop-to-cone seam. Use several short securing passes and bury the ends within the filled dome. Keep yarn out of the split-ring gap. Inspect gently over a table; decorative construction does not establish a load rating or child suitability.
Troubleshooting
| Problem | Likely cause | Adjustment |
|---|---|---|
| Cone mouth too narrow | Missed three-increase round | Check 6, 9, 12, 15, 18 shaping |
| Scoop rim frills | Extra shell edging added | Keep plain eighteen-stitch last round |
| Join puckers | Different gauges or tight seam | Compare relaxed mouths first |
| Tip feels hard | Cone overfilled | Use less filling in lower tip |
Care and Related Projects
Remove keys before spot cleaning. Follow cotton and filling labels, dry completely and inspect hanger and joining seam after use.
For another useful construction reference, see this related crochet project. Its stitch counts and attachment positions belong to that project; keep the instructions for this design separate.

Frequently Asked Questions
Does it have a face or cherry?
Neither is included.
Is the cone texture a waffle stitch?
No. Short light-tan embroidery creates the crossed texture.
How many stitches meet at the seam?
Eighteen open rim positions on each piece.
Can the ring attach to the cone?
This version anchors a mint loop into the scoop; another location needs its own attachment design.
Compact Pattern Card
| Stage | Key instruction |
|---|---|
| Start the Tan Cone Tip | Sc around |
| Widen the Cone to Eighteen Stitches | Sc around; leave open |
| Make the Smooth Mint Scoop | Sc around; leave open |
| Embroider Cone Texture and Join Rims | Sew most of seam, adjust filling through last gap, then close |
| Anchor the Ring into the Mint Dome | Check ring gap, dome anchors and rim seam |